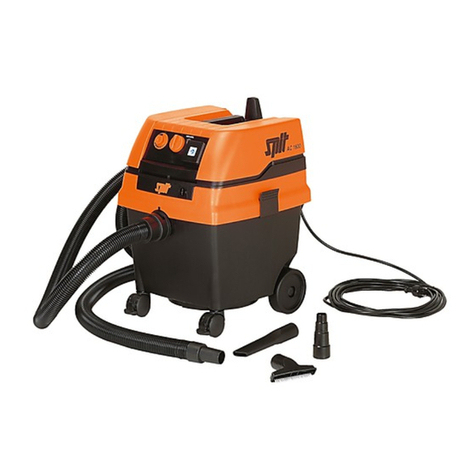
SPIT AC 1630P User manual

Bedienungs- und Wartungsanleitungen
(Original) 29 Instrukcja obslugi 131
Operating Instructions 7 Käyttöohje 111
Notice d’utilisation 18 KezelésiUtasítás 121
Istruzioni d’uso 40 Návod k obsluze 141
Gebruiksaanwijzing 50 Návod na obsluhu 151
Instrucciones para el manejo 60
Instruções de utilização 70
Uputstvo za upotrebu 161
Bruksanvisning 81
Uputa za uporabu 171
Betjeningsveiledning 91
Navadila za uporabo 181
Bruksanvisning 101
Pуководствопозксплуатации 191
δηγίες ειρισµύ 202
FIN
H
PL
CZ
SK
SRB
HR
SL
RUS
EL
Wichtig
Vor Gebrauch
sorgfältig lesen
Zum Nachschlagen
aufbewahren
780399_V00_2019-05_GA_ISP.indb 1 02.10.2019 16:52:09

2
Ⓖ
Ⓗ
Ⓒ
Ⓒ
Ⓒ
Ⓓ
Ⓓ
🅉
①
②
③
④
⑤
⑥
⑦ ⑧
⑨
⑩
⑩
⑪
⑫
⑬
⑭ ⑮
⑯
⑰
⑱
⑲
780399_V00_2019-05_GA_ISP.indb 2 02.10.2019 16:52:11

3
EL
F
D
E
GB
I
①Griff Deckel
②Griff
③Schalterplatte
④Drehschalter
⑤Füllanzeige
⑥Steckdose
⑦/⑧ Drehzahlregulierung/
Einstellung Saugschlauch-Ø
⑩Riegel
⑪Ansaugstutzen
⑫Drehschieber
⑬Lenkrolle
⑭Behälter
⑮Rad
⑯Verschluss
⑰Motorgehäuse
⑱Trägerplatte
⑲Deckel
CFaltenlterkassetten GPapierlterbeutel
DMotorschutzlter HPE-Entleer- und
Entsorgungsbeutel
①
Handgreep deksel
②
Handgreep
③
Bedieningspaneel
④
Draaischakelaar
⑤
Niveau-indicatie
⑥
Stopcontact
⑦/⑧ Toerentalregeling/
Instelling zuigslangdiameter
⑩
Vergrendeling
⑪
Aanzuigopening
⑫
Draaischuif
⑬
Zwenkwieltje
⑭
Container
⑮
Wiel
⑯
Slot
⑰
Motorbehuizing
⑱
Dragerplaat
⑲
Deksel
C
Vouwltercassette
G
Papieren lterzak
D
Motorlter
H
PE-zak voor legen
en afvoer
①
Asa de la tapa
②
Asa
③
Placa de conmutadores
④
Conmutador giratorio
⑤
Indicador de recipiente lleno
⑥
Caja de enchufe
⑦/⑧ Regulación de velocidad / Ajuste del diá-
metro de la manguera de aspiración
⑩
Enclavamiento
⑪
Toma de aspiración
⑫
Corredera giratoria
⑬
Ruedas giratorias
⑭
Recipiente
⑮
Rueda
⑯
Cierre
⑰
Carcasa del motor
⑱
Placa de soporte
⑲
Tapa
C
Cartuchos de ltro en fuelle
G
Bolsa ltro de papel
D
Filtro protector del motor
H
Bolsa de vaciado y
eliminación de PE
①
Impugnatura coperchio
②
Impugnatura
③
Interruttore ON/OFF
④
Manopola
⑤
Indicatore serbatoio
⑥
Presa di corrente
⑦/⑧ Regolazione numero giri /Impostazione
diametro tubo essibile di aspirazione
⑩
Blocco
⑪
Bocchettone di aspirazione
⑫
Valvola a maschio
⑬
Ruota di guida
⑭
Serbatoio
⑮
Ruota
⑯
Chiusura
⑰
Carter motore
⑱
Piastra di supporto
⑲
Coperchio
C
Cartucce ltro pieghettato
G
Sacchetto ltro di carta
D
Filtro di protezione motore
H
Sacchetto PE per svuo-
tamento e smaltimento
①
Cover handle
②
Handle
③
Switch plate
④
Rotary switch
⑤
Fill level indicator
⑥
Plug socket
⑦/⑧ Speed control/
Adjustment of the vacuum hose diameter
⑩
Latch
⑪
Vacuum spigot
⑫
Rotary slider
⑬
Steering roller
⑭
Container
⑮
Wheel
⑯
Lock
⑰
Motor housing
⑱
Support plate
⑲
Cover
C
Folding lter cartridges
G
Paper lter bag
D
Motor protection lter
H
PE emptying and
disposal bag
①
Poignée couvercle
②
Poignée
③
Panneau des interrupteurs
④
Interrupteur rotatif
⑤
Indicateur de niveau de remplissage
⑥
Prise
⑦/⑧ Régulation du nombre de tours/
Réglage du diamètre du exible d'aspi-
ration
⑩
Verrou
⑪
Tubulure d’aspiration
⑫
Régulateur rotatif
⑬
Roue directrice
⑭
Cuve
⑮
Roue
⑯
Fermeture
⑰
Carter de moteur
⑱
Plaque support
⑲
Couvercle
C
Cassettes à ltre plissé
G
Sac ltrant en papier
D
Filtre de protection-mo-
teur
H
Sac PE de vidange
et d’élimination
780399_V00_2019-05_GA_ISP.indb 3 02.10.2019 16:52:12

4
①
Greb, dæksel
②
Greb
③
Kontaktplade
④
Drejekontakt
⑤
Fyldningsindikator
⑥
Stikdåse
⑦/⑧ Regulering af omdrejningstal /
Indstilling af sugeslanges diameter
⑩
Spærre
⑪
Indsugningsstuds
⑫
Drejeventil
⑬
Styrehjul
⑭
Beholder
⑮
Hjul
⑯
Lukkemekanisme
⑰
Motorhus
⑱
Bæreplade
⑲
Dæksel
C
Filterkassetter til
foldelter
G
Papirlterpose
D
Motorlter
H
PE-tømnings- og
bortskaffelsespose
①
Håndtak deksel
②
Håndtak
③
Bryterplate
④
Dreiebryter
⑤
Fyllingsindikator
⑥
Stikkontakt
⑦/⑧ Turtallsregulator /
Innstilling sugeslangediameter
⑩
Sperre
⑪
Sugestuss
⑫
Dreieskiver
⑬
Styretrinse
⑭
Beholder
⑮
Hjul
⑯
Lås
⑰
Motorhus
⑱
Bærerplate
⑲
Deksel
C
Foldelterkassetter
G
Papirlterpose
D
Motorbeskyttelseslter
H
PE-tømme- og
avfallspose
①
Pega da tampa
②
Pega
③
Placa de interruptores
④
Interruptor rotativo
⑤
Indicador do enchimento
⑥
Tomada
⑦/⑧ Regulação da rotação/Ajuste do diâmetro
da mangueira de aspiração
⑩
Trinco
⑪
Bocal de aspiração
⑫
Interruptor rotativo
⑬
Roda direccional
⑭
Recipiente
⑮
Roda
⑯
Fecho
⑰
Caixa do motor
⑱
Placa de suporte
⑲
Tampa
C
Cassete de ltros
plissados
G
Saco de papel para
ltragem
D
Filtro de protecção do
motor
H
Saco em PE para esva-
ziamento e eliminação
①
Handtag till lock
②
Grepp
③
Kopplingsplatta
④
Vridbrytare
⑤
Fyllnadsindikering
⑥
Stickkontakt
⑦/⑧ Varvtalsreglering/
Inställning sugslangens diameter
⑩
Regel
⑪
Uppsugningstappar
⑫
Vridslid
⑬
Styrhjul
⑭
Behållare
⑮
Hjul
⑯
Lås
⑰
Motorhölje
⑱
Bärplatta
⑲
Lock
C
Vecklterkassetter
G
Filterpåse av
papper
D
Motorskyddslter
H
PE-tömnings- och
bortskaffningspåse
N
S
P
①
Kahvan suojus
②
Kahva
③
Kytkinlevy *
④
Kiertokytkin *
⑤
Täyttötason osoitin *
⑥
Pistorasia*
⑦/⑧
Kierrosluvunsäädin* / Letkun läpimitan säädin *
⑩
Lukitsin
⑪
Imuistukka
⑫
Suljin*
⑬
Ohjauspyörä
⑭
Säiliö
⑮
Pyörä
⑯
Kiinnitin
⑰
Moottorin kotelo
⑱
Tukilevy
⑲
Kansi
C
Suodatinkasetteja
G
Paperinen suoda-
tinpussi
D
Moottorin suojasuo-
datin
H
PE-tyhjennys- ja
hävityspussi
①
Fogantyú fedél
②
Fogantyú
③
Kapcsoló lap *
④
Forgókapcsoló *
⑤
Töltés kijelző *
⑥
Dugaszoló aljzat *
⑦/⑧
Fordulatszám szabályozó * / Szívócső átmérő
beállítás *
⑩
Retesz
⑪
Szívócsonkok
⑫
Forgó tolattyú *
⑬
Vezető görgő
⑭
Tartály
⑮
Kerék
⑯
Zár
⑰
Motorház
⑱
Tartólap
⑲
Fedél
C
Redőzött szűrő kazetta
G
Papír szűrőtasak
D
Motorvédő szűrő
H
PE ürítő és
hulladékkezelő tasak
H
FIN
780399_V00_2019-05_GA_ISP.indb 4 02.10.2019 16:52:12

5
①
Poklopac rukohvata
②
Rukohvat
③
Komandna tabla *
④
Obrtni prekidač *
⑤
Indikator punjenja *
⑥
Utičnica *
⑦/⑧
Regulacija broja obrtaja * / Podešavanje prečnika
usisnog crijeva *
⑩
Zasovnica
⑪
Usisni priključak
⑫
Obrtni klizač *
⑬
Upravljački točkić
⑭
Posuda
⑮
Točak
⑯
Zatvarač
⑰
Kućište motora
⑱
Noseća ploča
⑲
Poklopac
C
Naborani lter (umeci)
G
Papirna vreća ltera
D
Zaštitni lter motora
H
PE-vreća za pražnjenje
i uklanjanje
①
Ručka poklopca
②
Ručka
③
Ploča sklopke *
④
Okretna sklopka *
⑤
Prikaz punjenja *
⑥
Utičnica *
⑦/⑧
Regulacija broja okretaja * / Postavke usisnog
crijeva-promjer *
⑩
Zapor
⑪
Usisni oslonci
⑫
Okretni kliznik *
⑬
Upravljački valjak
⑭
Posuda
⑮
Kotač
⑯
Brava
⑰
Kućište motora
⑱
Nosiva ploča
⑲
Poklopac
C
Kasete za nabrani lter
G
Papirnate lter vrečice
D
Filter za zaštitu motora
H
PE vrečica za
pražnjenje i uklanjanje
HR
SRB
①
Držadlo krytu
②
Držadlo
③
Spínací panel *
④
Otočný spínač *
⑤
Indikátor stavu naplnenia *
⑥
Zásuvka *
⑦/⑧
Regulácia otáčok * / Nastavenie priemeru sacej
trubice *
⑩
Západka
⑪
Sacie hrdlo
⑫
Otočný posúvač *
⑬
Otočné koliesko
⑭
Nádoba
⑮
Koleso
⑯
Uzáver
⑰
Puzdro motora
⑱
Nosná doska
⑲
Kryt
C
Kazety so skladaným ltrom
G
Papierové ltračné
vrecko
D
Ochranný lter motora
H
PS vyprázdňovacie a
likvidačné vrecko
①
Uchwyt pokrywa
②
Uchwyt
③
Płyta łącznika *
④
Przełącznik obrotowy *
⑤
Wskaźnik wypełnienia *
⑥
Gniazdo wtykowe *
⑦/⑧
Regulacja prędkości obrotowej * / Ustawienie
średnicy węża ssącego *
⑩
Zasuwa
⑪
Końcówka ssąca
⑫
Zasuwka obrotowa *
⑬
Rolka kierownicy
⑭
Pojemnik
⑮
Koło
⑯
Zamek
⑰
Obudowa silnika
⑱
Płyta nośna
⑲
Pokrywa
C
Kasety ltra
składanego
G
Papierowy worek
ltra
D
Filtr ochronny silnika
H
Worki
①
Rukojeť víka
②
Rukojeť
③
Ovládací panel *
④
Otočný spínač *
⑤
Indikace stavu naplnění *
⑥
Zásuvka *
⑦/⑧
Regulace otáček * / Nastavení průměru sací
hadice *
⑩
Západka
⑪
Sací hrdlo
⑫
Otočné šoupátko *
⑬
Řídicí kolečko
⑭
Zásobník
⑮
Kolo
⑯
Uzávěr
⑰
Kryt motoru
⑱
Nosná deska
⑲
Víko
C
Kazety se skládaným ltrem
G
Papírový sáček
D
Mot Ochranný ltr motoru
orskyddslter
H
Polyetylenový sáček
pro vyprazdňování a
likvidaci prachu
CZ
SK
PL
①
Ročaj pokrova
②
Ročaj
③
Stikalna plošča *
④
Vrtljivo stikalo *
⑤
Prikaz polne posode *
⑥
Vtičnica *
⑦/⑧
Regulacija vrtljajev * / Nastavitev premera sesalne
cevi *
⑩
Zapah
⑪
Sesalni nastavek
⑫
Vrtljivi drsnik *
⑬
Vrtljivo kolesce
⑭
Posoda
⑮
Kolo
⑯
Zapiralo
⑰
Ohišje motorja
⑱
Nosilna plošča
⑲
Pokrov
C
Kasete z nagubanim ltrom
G
Papirnata ltrska vrečka
D
Zaščitni ltri za motor
H
PE-vrečka za
praznjenje in
odstranjevanje
SL
780399_V00_2019-05_GA_ISP.indb 5 02.10.2019 16:52:12

6
①
Λαβή στο καπάκι
②
Λαβή
③
Πλάκα διακοπτών *
④
Περιστρεφόμενος διακόπτης *
⑤
Ένδειξη πληρότητας *
⑥
Υποδοχή ρεύματος *
⑦/⑧
Ρύθμιση αριθμού στροφών * / Ρύθμιση της διαμέτρου του
εύκαμπτου σωλήνα αναρρόφησης *
⑩
Μηχανισμός ασφάλισης
⑪
Στόμιο αναρρόφησης
⑫
Περιστρεφόμενος σύρτης *
⑬
Τροχός οδήγησης
⑭
Κάδος
⑮
Τροχός
⑯
Ασφάλεια
⑰
Περίβλημα μοτέρ
⑱
Πλάκα φορέα
⑲
Καπάκι
C
Κασέτες πτυχωτών φίλτρων
G
Χάρτινος φιλτρόσακος
D
Φίλτρο προστασίας μοτέρ
H
Σάκος απόρριψης
πολυεστέρα
EL
RUS ①
Рукоятка на крышке
②
Рукоятка
③
Выключатель*
④
Поворотный выключатель*
⑤
Индикатор заполнения
⑥
Розетка*
⑦/⑧ Регулятор количества оборотов* /
Регулировка диаметра всасывающего
шланга*
⑩
Замок сервисного отсека.
⑪
Воздухозаборник
⑫
Поворотная заслонка*
⑬
Рулевое колесо
⑭
Контейнер
⑮
Колесо
⑯
Замок
⑰
Моторный отсек
⑱
Подставка
⑲
Крышка
C
Складчатый кассетный
фильтр
G
Бумажный фильтр-
мешок
D
Защитный фильтр мотора
H
Полиэтиленовый
фильтр-мешок
780399_V00_2019-05_GA_ISP.indb 6 02.10.2019 16:52:13

7
English
1 Explanation of symbols and signs used
Symbol / Signal word Description
lThisisthewarningsymbol.Itwarnsagainstpossibleriskofinjury.Followallinstructionswhich
aremarkedwiththissigntoavoidinjuryordeath.Thewarningsymbolalwaysappearsin
associationwiththesignalwordsDANGER,WARNING and CAUTION.
DANGER! Identies a hazard with a high degree of risk which will cause death or serious injury if not
avoided.
WARNING!Identies a hazard with a medium degree of risk which could cause death or serious injury if
notavoided.
CAUTION!Identies a hazard with a low degree of risk which could cause minor or moderate injury if not
avoided.
NOTE Identies advice or instructions to simplify work and to ensure safe operation.
r
Identies a requirement which needs to be met before an action is taken.
▶Identies steps to be taken one after the other by the user.
↳Identies the results of an action.
2 Important safety information
lWARNING!
Dangerofsuffocation!Donotallowchildrentoplaywithpackagingmaterial,e.g.plasticbags.
Donotclimbontoorsitonthevacuumcleaner.
Riskoffallingwhenworkingonstairs.Payattentiontostandingsafely.
Donotpullthemainsconnectioncableandsuctionhoseoversharpedges,donotbenditorclampit.
Themainsconnectioncableandsuctionhosealwaysmustberoutedinsuchawaythatnoonecantripoverit.
If any foam or liquid is discharged, immediately switch off the vacuum cleaner.
Alwayskeeptheinsideoftheliddry.
Donotusethevacuumcleanerincludingaccessoriesinthefollowingcases:
• Mainsconnectioncableorextensioncableisdefectiveorshowingcracks
• Thereisvisibledamagetothevacuumcleaner, e.g. cracks in the housing
• Ifyoususpectaninvisibledefect,e.g.afterafall
lDANGER!
Risk of explosion and re! Do not run the vacuum cleaner in a potentially explosive environment.
Keep away the vacuum cleaner from ammable gases and substances.
lDANGER!
Risk of explosion and re! Do not use the vacuum cleaner to vacuum up the following:
• ammable or explosive solvents
• materialssoakedinsolvents
• potentiallyexplosivedusts
• liquids such as petrol, oil, alcohol, diluents
• materialshotterthen60°C
780399_V00_2019-05_GA_ISP.indb 7 02.10.2019 16:52:13

8
lWARNING!
Improperly repaired devices pose a hazard for the user. Only have repairs carried out by experts, e.g. the customer
service. Only use original accessories and spare parts.
lWARNING!
Only use the socket on the vacuum cleaner for the purposes specied in the operating instructions.
Incaseofanyinappropriateusage,improperoperationorrepair, the producer shall be exempt from liability.
Donotusedamagedextensioncables.
Ifthemainsconnectioncableofthevacuumcleanerisdamaged,itmustbereplacedbyaspecialmainsconnectioncable,
whichisavailablefromthemanufactureroritscustomerservice.
Neverallowelectricalbrushestocomeintocontactwiththemainsconnectioncable.
Thevoltageontheratingplatemustmatchthemainsvoltage.
Switchoffthevacuumcleaneranddisconnectthemainsplugafteruseandbeforemaintenance.
Whenunplugging,onlypullonthemainsplugandnotonthemainsconnectioncable.
Nevertouchthemainsplugwithwethands.
Only connect the vacuum cleaner to a sufciently protected electric socket.
Donotopenthevacuumcleaneroutdoorsintherainorduringathunderstorm.
Storethevacuumcleanerdryandindoors,protectedfromfrost.
lWARNING!
Dust-removingmachinesaretestedaccordingtoDINEN60335-2-69anddividedintodustclasses.
VacuumcleanersfordustclassL are suitable for vacuuming/sucking up dry, non ammable dusts that are hazardous to
health with workplace exposure limits (OEL) > 1 mg/m³.
VacuumcleanersfordustclassM are suitable for vacuuming/sucking up dry, non-ammable dusts, non-ammable liquids,
wood dusts and hazardous dusts with workplace exposure limits ≥ 0.1 mg/m³.
VacuumcleanersfordustclassH are suitable for vacuuming/sucking up dry, non-ammable dusts, carcinogenic and path-
ogenic particles as well as non-ammable liquids, wood dusts and toxic dusts with workplace exposure limits < 0.1 mg/m³.
lWARNING!
VacuumcleanersfordustclassH-asbestos are suitable for vacuuming and extracting dust containing asbestos. Observe
nationalregulationsforoperationandmaintenanceofasbestosremovaltools.
lWARNING!
The machine may not be used by persons (including children) who have reduced physical, sensory or metal capabilities or
whoareinexperiencedorlacktheknowledgeofhowtousethemachine.
Childrenmustbesupervisedtoensurethattheydonotplaywiththedevice.
Do not point nozzle, tube or hose at people or animals.
lWARNING!
Only use the brushes supplied with the vacuum cleaner or those specied in the operating instructions.
Usingotherbrushescancompromisesafety.
Whenbeingusedinfoodprocessingbusinesses:Immediatelycleanthevacuumcleanerafteruseanddisinfectittoavoid
microbialcontamination.
Donotuseanysteamjetsorhigh-pressurecleanersforcleaning.
Only operate the vacuum cleaner under supervision.
Disconnectthevacuumcleanerfromthemainsintheeventofalongerworkinterruption.
Do not clean lter cartridges using compressed air.
780399_V00_2019-05_GA_ISP.indb 8 02.10.2019 16:52:13

9
Readtheoperatingmanual carefullybefore startingto usethe vac-
uumcleaner.Theoperating manualprovides importantinstructions
for safety, commissioning,operation, maintenanceand care.Keep
theoperating manualin asafe placeand, incase yousell theunit,
handit onto thenext owner.
The manufacturer reserves the right to carry out modications to
the design and equipment.
Donot performany otherwork thandescribed inthis manual.
Thismachine isintended forcommercial use,for example,in
hotels, schools, hospitals, factories, shops, ofces and in the rental
business.
Whenunpacking, checkfor completenessand transportdamage.
Beforeuse, theoperators shouldbe providedwith information,
instructionsand trainingfor theuse ofthe vacuumcleaner andthe
substancesthat itis tobe usedfor,includingthesafeprocedurefor
theremoval ofthe gatheredmaterial.
780399_V00_2019-05_GA_ISP.indb 9 02.10.2019 16:52:13

10
3 Display and control elements
Switch position Function Description
0Vacuum cleaneris switchedoff -Plugsocket current-conducting
IVacuum cleaneris running -Plugsocket current-conducting
-Automaticshaker functionoff
AReadyfor operation -Plugsocket current-conducting
-Automaticshaker functionoff
AC Readyfor operation
Automaticshaker function
-Plugsocket current-conducting
-Automaticshaker functionon
-Thevacuum cleaneris switchedon andoff viathe connectedelectri-
cal/compressedair tool*at theplug socket.
Automatic lter cleaning function -Automaticshaker functionon; 2min
Filllevel indicator* -Whenthe containeris fulland/or thereis ablockage inthe suction
hose, the full indicator lights up. On the M and H vacuum cleaners, an
acousticsignal isalso emitted.
Speedregulation* -The suctionperformance canbe regulatedusing thespeed regulato
Settingthe suctionhose diameter* -On M-/H-/H-asbestos vacuum cleaners for volume ow monitoring, to
triggeran audiblewarning signalif theair speedfalls below20 m/s
(*depending on the equipment variant of your vacuum cleaner)
780399_V00_2019-05_GA_ISP.indb 10 02.10.2019 16:52:13

11
4 Commissioning
4.1 Before every use
Makesure thatthe followingconditions aremet:
rVacuum cleaner, mainscable, suctionhose andaccessories
arenot damaged.
rAll lters have been inserted and are not damaged.
4.2 Switching on and off
Theplug socketon thevacuum cleanerremains alwaysunder
voltage,regardless ofthe mainswitch position.
lWARNING!
Dangerof injuryby automaticallystarting powertool!
▶Switchoff powertool orpneumatic toolbefore connectingto
thevacuum cleaner.
NOTE
With switch in position >0<, the plug socket on the vacuum
cleanercan beused asan extensioncable.
l Power consumption: vacuumcleaner +connected power
tool (max. 2000 W) max. 16 A.
4.2.2 Switching on the vacuum cleaner
Functionssee „3Display andcontrol elements“
▶Insertplug intoplug socket.
▶Set switch to position >I<.
↳Vacuum cleanerstarts immediately.
or:
▶Set switch to position >A< or >AC<.
↳Vacuum cleaneris instandby modefor powertools.
4.2.3 Setting the suction hose diameter*
▶Setsuction hosediameter atthe switch.
lCAUTION!
Selector switch for minimum air volume ow signal (horn and
light) on vacuum cleaners with dust classes „M“ and „H“
In the modes >A< and >AC< the following setting is made,
dependingon thediameter ofthe hose:
Selector switch for
suction hose inner diameter Volume air ow
∅35mm 70 l/s
∅27mm 41 l/s
∅ 21 mm 25l/s
No speed regulation is carried out. The vacuum cleaner
always runs at max. speed
4.2.4 Adjusting the suction power*
▶Adjustmotor speedon theswitch.
or
▶Setauxiliary airslide onthe handletube.
4.2.5 Switching off the vacuum cleaner
▶Set switch to position >0<.
↳Vacuum cleaneris switchedoff.
▶Afterswitching off,pull themains plugout.
▶Rollup mainsconnection cable.
▶Storethe mainsconnection cableon thecable hook.
▶Storethe suctiontube byinserting itinto theaccessories holder*
onthe containerrear wall.
▶Putthe suctionhose endstogether sothat nodirt particlesleak
out.
▶RemovePower tool.
5 Operating modes
5.1 Sucking up dry materials
▶Only use a dry lter, vacuum cleaner and accessories, so that
thedust doesnot stickand orcake.
▶Whenvacuuming soot,cement, plasteror similardusts: Inserta
PEdisposal bagin thedirt container.
▶Always use disposal bags in combination with folded lter
cartridges. NOTE
M, H and H-asbestos class vacuum cleaners should be
preferablyused asvacuum cleanersfor drydusts.
5.2 Sucking up liquids
lWARNING!
Electrical shock hazard!
▶If any foam or liquid is discharged, immediately switch off the
vacuumcleaner.
▶Empty dirt container and folded lter cartridge.
NOTE
1
1
Regularly clean the water level sensors (1)
andinspect forsigns ofdamage.
▶Vacuum cleaning without eece lter bags.
The folded lter cartridge designed for wet vacuum cleaning.
Thebuilt-in sensorswitches themotor offwhen thecontainer is
full.The handlingof thevacuum cleanercan becompromised
bya fullcontainer.
780399_V00_2019-05_GA_ISP.indb 11 02.10.2019 16:52:13

12
▶Empty container (see „7 Emptying the container“ ).
NOTE
Ifthe vacuumcleaner isnot switchedoff, there-start protection
remainseffective.The vacuumcleaner isready foroperation only
afterthe unithas beenswitched offand switchedon again.
▶Remove the suction hose from the liquid before emptying.
▶After switching off, a small quantity of water can ow back out of
thehose, asa resultof thehigh suctionlevel andthe favourable
ow condition in the container.
▶After wet vacuum cleaning insert dry lters for picking up dry
dust. NOTE
When changing frequently between dry and wet vacuum
cleaning, use a second set of lters, preferably polyester folded
lter cartridges.
5.3 Sucking up asbestos-containing substances
Only vacuum cleaners of dust class H-asbestos may be used for
vacuumingasbestos-containing substances.
▶ Only work with a dry lter, vacuum cleaner and accessories to
preventdust fromsticking andbecoming incrusted.
▶Forsucking upasbestos-containing substances:Insert thePE
emptying bag or eece lter bag into the dirt container.
▶Always use lter bags in conjunction with folded lter cartridges.
NOTE
H-asbestos class vacuum cleaners should be preferably used as
vacuumcleaners fordry dusts.
lWARNING!
Health hazard !
Asbestos bres in the air.
▶Supply the work area with sufcient outside air (fresh air).
▶Guideor cleanextracted airin sucha waythat asbestos
bres do not get into the breathing air of other persons.
▶When ltering the extracted air, transport any dust in dust-
tightcontainers.
▶Donot decantdust.
If there is a possibility of asbestos bres becoming free:
▶Absorb asbestos bres at the outlet or point of origin.
▶Then dispose of asbestos bres in accordance with the state of
theart withoutany dangerto personsor theenvironment.
If complete absorption of asbestos bres is not possible:
▶Takeadditional ventilationmeasures inaccordance withthe
stateof theart.
Aftercompletion ofthe work:
▶Carefullyclean tools,including suctiontubes andwork
equipment.
▶Carefullyclean theworking area.
▶Moistenand properlyremove objectscontaminated withasbes-
tos bres that cannot be cleaned.
Aftercleaning:
▶ Ventilate the working area sufciently.
6 Permanent lter cleaning
The vacuum cleaner is tted with an electromagnetic lter cleaning
system,which canbe usedto cleanany attacheddust fromthe
lter cartridges.
The folded lter cartridges are cleaned alternately one after the
otherso thatcontinuous workis guaranteed.
7 Emptying the container
NOTE
Only permitted for dust with workplace exposure limits > 1 mg/m³.
▶Switchoff thevacuum cleaner, pullout themains plug.
▶Open the latches.
▶Removethe coverand suctionhose fromthe container.
▶Emptythe containerby pouringout.
7.1 Dispose of the eece lter bag
▶Switchoff vacuumcleaner.
▶Disconnectmains plug.
▶Wearappropriate breathingmask.
▶Removesuction hose.
▶Closeoff intakesocket withcap.
▶Open side latches.
▶Removetop section.
▶Carefully pull the ange off the intake socket and close off the
ange.
▶Dispose of gathered material in accordance with legal require-
ments.
7.2 Dispose of the PE emptying and disposal
bag
▶Set switch to position >AC<.
↳Folded lter cartridges are cleaned automatically.
↳Residual dust in the lters falls into the bag.
▶Switchoff vacuumcleaner.
▶Disconnectmains plug.
▶Wearappropriate breathingmask.
▶Removesuction hose.
▶Closeoff intakesocket withcap.
▶Open side latches.
▶Carefullyclose thePE emptyingand disposalbag withthe
enclosedsealing tape.
▶Carefully pull the ange off the intake socket and close off the
ange.
780399_V00_2019-05_GA_ISP.indb 12 02.10.2019 16:52:13

13
▶Carefullyremove thePE emptyingand disposalbag fromthe
container.
▶Dispose of gathered material in accordance with legal require-
ments.
7.3 Insert eece lter bag
NOTE
Only use eece lter bags for dry vacuum cleaning.
▶Slide the ange completely over the intake socket
NOTE
Operating the rotary slide
▶Turn the red rotary slide inside to position CLOSE to the stop
on the marker ▲.
7.4 Insert PE emptying and disposal bag*
NOTE
Only vacuum cleaners with dust class M and H with special
containersand rotaryslide inthe intakesocket oftypes iPulseM,
iPulse H and iPulse H-asbestos are suitable for the use of PE
emptyingand disposalbags.
NOTE
Operating the rotary slide
▶Turn the red rotary slide inside to position OPEN to the stop
on the marker ▲.
▶Slide the ange completely over the intake socket.
▶Placethe upperbag openingover thecontainer rim.
8 Changing the lter
8.1 Changing the folded lter cartridges
▶Clean the lter cartridges before changing them.
▶Turnthelock onthe latchthrough 90°in acounter-clockwise
directionwith acoin orsimilar objectand pushthe latchto the
rear.
▶Foldup thecover.
▶Immediately isolate the folded lter cartridges that you have
removedin adust-tight plasticbag anddispose ofproperly in
accordance with the requirements.
▶Insert new folded lter cartridges.
▶Lift the locking bracket up, fold down the cover and click in place
withlight pressure.
9 Changing the motor protection lter
NOTE
If motor protection lter is contaminated, this indicates defective
lter cartridges.
▶Replace folded lter cartridges.
▶Replace motor protection lter or wash the motor protection
lter under owing water, dry and re-insert.
780399_V00_2019-05_GA_ISP.indb 13 02.10.2019 16:52:13

14
10 Transport
▶Removesuction hose.
▶Closeoff intakesocket withcap.
▶Securely x the motor head to the container.
▶Closethe sidelatches.
▶Placethe accessoriesin asuitable plasticbag andseal theplas-
ticbag orplace itin thetool storagecompartment.
▶Putthe suctionhose endstogether sothat nodirt particlesleak
out.
▶Placethe hosearound thevacuum cleanerand clamponto the
handle.
11 Maintenance
NOTE
Switchoff thevacuum cleanerand pullout themains plugbefore
carryingout anymaintenance work.
Formaintenance bythe user, thevacuum cleanermust be
-dismantled,
-cleanedand
-maintained,
asfar aspossible withoutcreating anydanger tothe maintenance
personnelor other.
Precautionary measures
Suitableprecautionary measuresinclude:
-Cleaningbefore dismantling
-Provision of local ltered positive ventilation where the vacuum
cleaneris tobe dismantled
-Cleaningof themaintenance area
-Suitable personal protection equipment
Precautionary measures with vacuum cleaners class H and M
Theoutside ofthe vacuumcleaner shouldbe cleanedby dust
extractionprocedures andwiped down,or shouldbe treatedwith a
sealing agent before being removed from the hazardous area. All
partsof thevacuum cleanermust beconsidered tobe contaminat-
ed when they are removed from the hazardous area, and suitable
handlingmust beused toprevent dustdistribution.
Contaminated items
Whencarrying outmaintenance orrepair work,all contaminated
items which have not been adequately cleaned, must be disposed
of.Such itemsmust bedisposed ofin impermeablebags in
accordancewith theapplicable regulationsconcerning thedisposal
ofsuch waste.
11.1 Testing the effectiveness of the vacuum
cleaner
Atleast oncea year, themanufacturer oran instructedperson must
perform a technical inspection including lters, air tightness of the
vacuumcleaner,andcontrolmechanisms.
Inaddition, theeffectiveness ofthe vacuumcleaners withdust
class H and H-asbestos must be checked at least once a year or
more frequently. The test method, which can be used for demon-
strating the effectiveness of the device, is dened in EN 60335-2-69
AA.22.201.2. If the test is not passed, it must be repeated with a
new main lter.
There must be an adequate air exchange rate L in the room if the
exhaust air returns to the room. Observe national regulations.
Ifthe suctionpower ofthe vacuumcleaner isreduced andthe
cleaning of the lter cartridges is no longer sufcient (assuming that
tank is emptied and eece lter bag is replaced), it is necessary to
replace the folded lter cartridges (see „8.1 Changing the folded
lter cartridges“ ).
12 Cleaning
NOTE
Acids,acetone andsolvents candamage partsof thevacuum
cleaner.
▶Cleancontainer andaccessories withwater.
▶Wipethe topsection witha dampcloth.
▶Allowthe containerand accessoriesto dry.
780399_V00_2019-05_GA_ISP.indb 14 02.10.2019 16:52:14

15
13 Repair
lWARNING!
Improperly repaired vacuum cleaners pose a hazard for
theuser!
▶Have repairs carried out by qualied personnel only, e.g. the
customerservice.
14 Troubleshooting and repair
NOTE
Malfunctionscannot alwaysbe tracedback todefects inthe vacuumcleaner.
Fault Cause Remedy
Suctionpower drops Filterdirty Clean
Filterbag full Change
Containerfull Empty
Motor protection lter blocked Clean
Nozzle, tube or hose blocked Clean
Vacuum cleanerdoes notstart Mains plugnot insocket Plugmains pluginto socket
Nomains voltage Checkfuse
Mainsconnection cabledefective Replace
Covernot properlyclosed Close
Watersensorswitched off Emptycontainer
Vacuum cleaner in standby mode >A<
or >AC<
Set switch to >I< (see „3Display andcontrol
elements“ )
Thevacuum cleanerdoes notstart
when the tool is switched on in the >A<
or >AC< mode
Electricaltool notplugged intosocket
onthe vacuumcleaner Plug mainsplug intosocket onthe vacuumcleaner
Solenoidvalve ofpneumatic on-offunit*
contaminated Rinsewith alcohol
PEemptying anddisposal bagis sucked
against the lter Incorrectposition ofrotary slide Set rotary slide to position OPEN ▲(see „7.4Insert
PE emptying and disposal bag*“ )
Vacuum cleanerwith dustclasses M
orH: with inserted lter bag, dust is
accumulatingin thecontainer
Incorrectposition ofrotary slide Set rotary slide to position CLOSE ▲(see„7.3
Insert eece lter bag“ )
Donot tryanything else,contact customerservices.
780399_V00_2019-05_GA_ISP.indb 15 02.10.2019 16:52:14

16
15 Technical Data
Type: ISP AC 1630 P
Voltage V 220-240
Frequency Hz 50/60
Ratedpower W1400
Max.power W1600
Air ow* l/s (m³/h) 75 (270)
Negativepressure* hPa/MG 280
Air ow** l/s (m³/h) 45 (162)
Negativepressure** hPa/SE 245
Noiselevel dB(A) 69
Weight kg 15,5
Dimensions (l x w x h) cm 53x 40x 56
*at thefan
**at thehose
Max.power onvacuum cleanerswith plugsocket: 2000W
Mains connection cable on vacuum cleaners for dust class M, H and H Asbestos with plug socket: H07RN-F 3G1,5
16 Tests and approvals
Electro-technical tests must be carried out in accordance with the accident prevention regulations (DGUV V3) and in accordance with
DIN VDE 0701 Part 1 and Part 3. These tests are required in accordance with DIN VDE 0702 at regular intervals and after repair or
modication.
Thevacuum cleanersare successfullytested inaccordance withIEC/EN 60335–2–69.
NOTE
Old equipment contains valuable materials which are designed
forre-processing. Thevacuum cleanersmust not be thrown
away in the normal household waste,but shouldbe disposed
ofat asuitable propercollection system,e. g.via yourcommunal
disposallocation.
780399_V00_2019-05_GA_ISP.indb 16 02.10.2019 16:52:14

17
17 Declaration of conformity
We hereby declare that the machine described below complies with the relevant basic safety and health requirements of the EC Directives, both in its
basic design and construction as well as in the version put into circulation by us.
This declaration shall cease to be valid if the machine is modied without our prior approval.
Product: Vacuum cleaner for wet and dry operation
Type: ISP model AC 1630 P
The design of the appliance corresponds to the following
pertinent regulations: EC Machinery Directive 2006/42/EU
EC Directive EMC 2014/30/EC
ROHS 2011/65/EU
EC Machinery Directive 2006/42/EU including
amendments: DIN EN 60335-1 (VDE 0700-1):2012-10; EN 60335-1:2012
DIN EN 60335-1 Ber.1 (VDE 700-1 Ber.1):2014-04;
EN 60335-1:2012/AC:2014; EN 60335-1:2012/A11:2014
EN 60335-2-69:2012; DIN EN 62233 (VDE 0700-366 Ber.1):2009-04;
EN 62233 Ber.1:2008; DIN EN ISO 12100:2011-03;
EN ISO 12100:2010
EC Directive EMC 2014/30/EC: DIN EN 55014-1 (VDE 0875-14-1):2012-05;
EN 55014-1:2006 + A1:2009 + A2:2011
DIN EN 61000-3-2 (VDE 0838-2):2015-03; EN 61000-3-2:2014;
DIN EN 61000-3-3 (VDE 0838-3):2014-03; EN 61000-3-3:2013;
DIN EN 55014-2 (VDE 0875-14-2):2009;
EN 55014-2:1997 + A1:2001 + A2:2008
Category II requirements
The following institute has tested and certied the product:
VDE Prüf- und Zertizierungsinstitut GmbH (EU-Kenn-Nr. 03666), Merianstr. 28,
63069 Offenbach
Authorized documentation representative:
30.07.2019
SPIT S.A.S., 150 Avenue de Lyon, B.P,104, 26501 BOURG LES VALENCE CEDEX,
FRANCE
780399_V00_2019-05_GA_ISP.indb 17 02.10.2019 16:52:14

18
Français
1 Explication des symboles et des signes utilisés
Symbole / Mention Description
lSymboled’avertissement. Ilprévient d’unrisque deblessure potentiel.Toutesles instructionsaccompa-
gnéespar cesymbole ontpour butde prévenirles blessures,voire lamort. Lesymbole d’avertissement
apparaîttoujours avecles mentionsDANGER,AVERTISSEMENT etPRUDENCE.
DANGER ! Signaleundangeravecunrisqueélevépouvantentraînerdesblessuresgraves,voirelamort,
s’iln’estpasévité.
AVERTISSEMENT ! Signaleundangeravecunrisquemoyenpouvantentraînerdesblessuresgraves,voirelamort,
s’iln’estpasévité.
PRUDENCE ! Signaleundangeravecunrisquefaiblepouvantentraînerdesblessureslégèresoumodérées
s’iln’estpasévité.
REMARQUE Signalelesconseilsoudesindicationsquifacilitentletravailetpourvoientàlasécuritéde
fonctionnement gurent ici.
r
Signale une condition préalable indispensable avant d‘entreprendre une manipulation.
▶Signalelesétapessuccessivesquel’utilisateurdoitsuivre.
↳Signalelerésultatd’unemanipulation.
2 Informations importantes concernant la sécurité
lAVERTISSEMENT !
Risqued’étouffement!Nelaissezpaslesenfantsjoueraveclematérield’emballage,parexemplelessacsenplastique.
Nepasgrimperous’asseoirsurl'aspirateur.
Risquedechuteencasdetravaildansdesescaliers.Veillez à adopter des postures stables et sûres.
Ne pas poser le câble d’alimentation ni le exible d’aspiration au-dessus de bords tranchants, ne pas les plier ni les
coincer.
Toujours poser le câble d’alimentation et le exible d’aspiration de manière à éviter des points de trébuchement.
Immédiatementmettrel’aspirateurhorsmarchesidelamousseouduliquides’échappentdel’appareil.
Veiller à ce que l’intérieur du couvercle soit toujours sec. Ne pas utiliser l’aspirateur y compris les accessoires dans les cas
suivants:
• Lecâbled'alimentationausecteuroulecâblederallongeestdéfectueuxouprésentedesfentes
• Présencededommagesvisiblessurl'aspirateur, par exemple des fentes sur le boîtier
• Sivoussoupçonnezundéfautimperceptible,parexempleaprèsunechute
lDANGER !
Risqued’explosionetd’incendie!Nefaitespasfonctionnerl’aspirateurdansunlieuprésentantunrisqued’explosion.
Tenez l’aspirateur à l’écart de gaz et de substances inammables.
780399_V00_2019-05_GA_ISP.indb 18 02.10.2019 16:52:14

19
lDANGER !
Risqued’explosionetd’incendie!Nepasutiliserl’aspirateurpouraspirerleschosessuivantes:
• Solvants inammables ou explosifs
• Matériauxtrempésdansdessolvants
• Poussièrespotentiellementexplosives
• Liquidestelsquedel’essence,del'huile,del'alcool,desdiluants
• matériauxàtempératuresupérieureà60°C
lAVERTISSEMENT !
Desappareilsréparésdemanièreincompétenteprésententdesdangerspourl’utilisateur. Ne faire exécuter des travaux
deréparationquepardupersonnelspécialisé,telqueparexempleleserviceaprès-vente.N’utiliserquedespiècesde
rechanged’origine.
lAVERTISSEMENT !
Utiliser la prise gurant sur l’aspirateur uniquement aux ns déterminées dans les instructions de service.
Lefabricantdéclinetouteresponsabilitépourd’éventuelsdégâtsrésultantdechangementd’affectation,demaniement
incorrectouderéparationincompétente.
Nejamaisutiliserdesrallongesendommagées.
Silecâbled’alimentationdel’aspirateurestendommagé,ildoitêtreremplacéparuncâbled’alimentationparticulier
disponiblechezlefabricantousonserviceaprès-ventes.
Danslecasdebrossesélectriques,garantirquelesbrossesrotativesn’entrentpasencontactaveclecâbled’alimenta-
tion.
Latensionsurlaplaquesignalétiquedoitconcorderaveclatensionduréseau.
Mettre l’aspirateur hors marche et débrancher la che secteur après chaque utilisation et avant chaque maintenance.
Toujours tirer sur la che secteur et jamais sur le câble d’alimentation.
Ne jamais brancher ni débrancher la che secteur avec des mains humides.
L’alimentation en courant doit être protégée au moyen d’un fusible à intensité de courant appropriée.
Nejamaisouvrirl’aspirateuràl’airlibreencasdepluieoud’orage.
L’aspirateur doit être entreposé sec et protégé contre le gel en intérieur.
lAVERTISSEMENT !
LesdépoussiéreusessonttestéesselonlanormeDINEN60335-2-69etsontrépartiesendifférentescatégoriesde
poussière.
LesaspirateursdecatégorieLsontappropriéspouraspirerdespoussièressèches,incombustiblesetdangereusespour
lasantéprésentantdesvaleurslimitespourpostedetravail>1mg/m³.
LesaspirateursdelacatégorieMsontappropriéspourl’aspirationdepoussièressèches,noncombustibles,deliquides,
poussières de bois non combustibles et de poussières dangereuses avec des valeurs limites ≥ 0,1 mg/m³.
LesaspirateursdelacatégorieHsontappropriéspourl’aspirationdepoussièressèches,noncombustibles,departicules
cancérigènesetpathogènes,ainsiquedeliquides,depoussièresdeboisnoncombustiblesetdepoussièresdange-
reusesavecdesvaleurslimites<0,1mg/m³.
lAVERTISSEMENT !
LesaspirateursdelacatégoriedepoussièreH-amiante conviennentpourl’aspirationetl’extractiondepoussièresconte-
nantdel’amiante.Respecterlesprescriptionsnationalespourlefonctionnementetl’entretiendesoutilsanti-amiante.
780399_V00_2019-05_GA_ISP.indb 19 02.10.2019 16:52:14

20
lAVERTISSEMENT !
Cetappareilnedoitpasêtreutilisépardespersonnes(ycomprisdesenfants)avecdescapacitésphysiques,sensorielles
ou mentales décientes ou un manque d’expérience ou de connaissances.
Les enfants doivent être surveillés an de s’assurer qu’ils ne jouent pas avec l’appareil.
Ne jamais diriger la buse, le exible ou le tube sur des personnes ou des animaux.
lAVERTISSEMENT !
N’utilisez que les brosses fournies avec l’aspirateur ou celles spéciées dans les instructions d’utilisation.
L’utilisation d’autres brosses peut compromettre la sécurité.
Lorsdel'utilisationdansdesentreprisesdetransformationdesaliments:Nettoyezimmédiatementl'aspirateuraprès
utilisationetdésinfectez-lepourévitertoutecontaminationmicrobienne.
Nepasutiliserdejetsdevapeurnidenettoyeurhautepressionpourlenettoyage.
Utilisezl’aspirateuruniquementsoussurveillance.
Déconnectezl’aspirateurdel'alimentationdusecteurencasd’interruptionassezlonguedutravail.
Ne pas nettoyer les cassettes ltrantes avec de l’air comprimé.
780399_V00_2019-05_GA_ISP.indb 20 02.10.2019 16:52:14
Other manuals for AC 1630P
1
Table of contents
Languages:
Other SPIT Vacuum Cleaner manuals
Popular Vacuum Cleaner manuals by other brands
Sandia Plastics
Sandia Plastics Raven Safety, operation and maintenance manual with parts list

Hitachi
Hitachi CV-300 How to use
Powr-Flite
Powr-Flite Comfort Pro series Operator's manual and parts list
Powr-Flite
Powr-Flite PF99 Operator's manual and parts list

Electrolux
Electrolux Oxy3system manual
Daewoo
Daewoo RCC-260 instruction manual
