manuals.online logo
Brands
  1. Home
  2. •
  3. Brands
  4. •
  5. Hitachi
  6. •
  7. Vacuum Cleaner
  8. •
  9. Hitachi CV-300 Operating instructions

Hitachi CV-300 Operating instructions

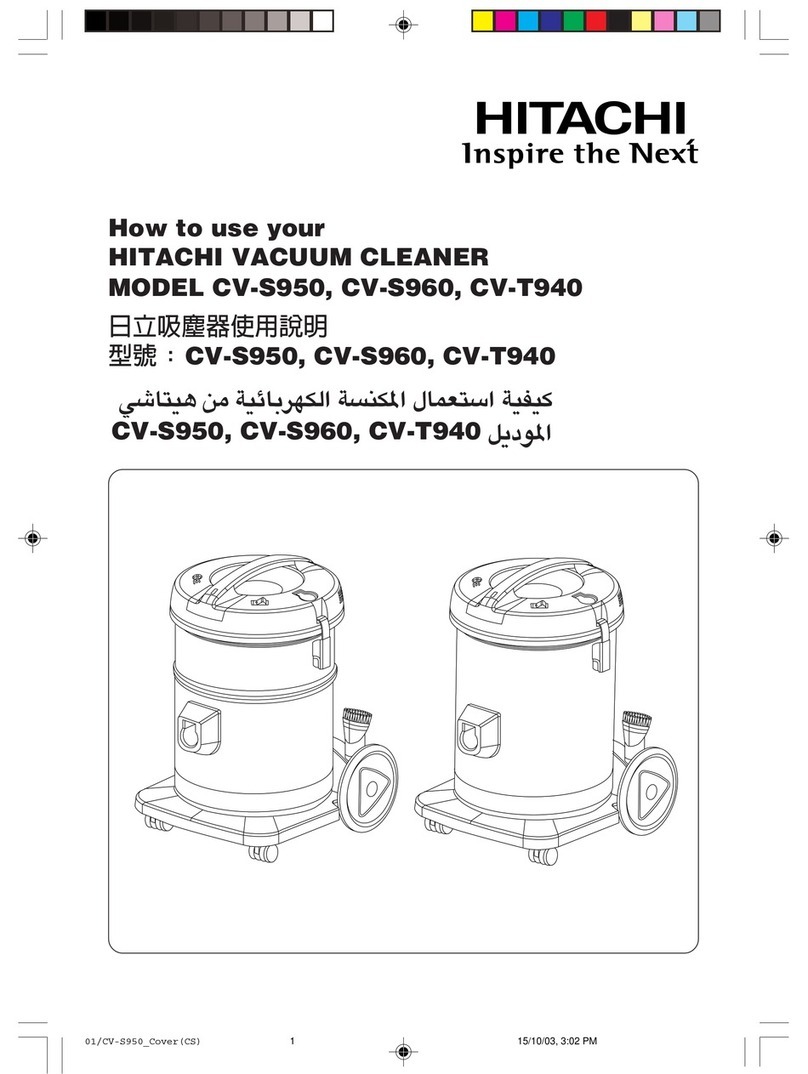
How to use your
HITACHI VACUUM CLEANER
MODEL CV-300/CV-300P
Bedienungsanleitung
HITACHI STAUBSAUGER
MODEL CV-300/CV-300P
Fig. 1 Hitachi Vacuum Cleaner and its accessories
Abb. 1 Der Hitachi-Staubsauger mit seinen Zubehörteilen
ACCESSORIES (FIG. 1) ZUBEHÖR (ABB. 1)
1Flexible crush proof hose
2Extension pipes
3Rug and floor tool
4Crevice nozzle
5Dusting brush
6Joint pipe
7Curved joint pipe
8Cloth Filter (CV-300)
9Paper Bag (CV-300P)
0Cage Cloth Filter assembly (CV-300)
1Flexibler, druckfester Schlauch
2Verlängerungsrohre
3Teppich- und Fußbodendüse
4Fugendüse
5Möbelbürste
6Verbindungsrohr
7Gekrümmtes Verbindungsrohr
8Tuchfilter (CV-300)
9Papierbeute (CV-300P)
0Tuchfiltergehäuse (CV-300)
HOW TO OPERATE
GEBRAUCH DES STAUBSAUGERS
TO ASSEMBLE HOSE (FIG. 2)
The hose and joint pipes are packaged separately. To put them
together, insert the curved pipe 1and joint pipe 2into each end of
the hose 3until the claws 4of the stopper ring 5click into the holes
6of the curved joint pipe and joint pipe.
SCHLAUCH ZUSAMMENSTECKEN (ABB. 2)
Der Schlauch und die Verbindungsrohre sind separat verpackt. Um sie
aneinander anzuschließen, das gebogene Rohr 1und das Verbindungsrohr 2
jeweils in ein Ende des Schlauches 3schieben, bis die Klauen 4des
Verschlussringes 5in die Löcher 6des gebogenen Rohres und des
Verbindungsrohres einrasten.
Fig. 2 To assemble hose
Abb. 2 Zusammenstecken des
Schlauchs
12
3
4
5
3
6
– 2 –
HITACHI
CV-300P
10
896
5
4
2
3
7
TO ATTACH HOSE (FIG. 3)
Insert the joint pipe 2into the air inlet 7of the cleaner. When you want
to remove the hose 3, press the button 8and pull out the hose 3.
ANBRINGUNG DES SCHLAUCHES (ABB. 3)
Das Verbindungsrohr 2in den Lufteinlass 7des Staubsaugers schieben. Um den
Schlauch 3zu entfernen, den Knopf 8drücken und den Schlauch 3herausziehen.
TO ATTACH EXTENSION PIPES (FIG. 4)
Attach the extension pipes 9together by joining the two ends and twist slightly to
secure it tightly.
VERLÄNGERUNGSROHRE ZUSAMMENSTECKEN (ABB. 4)
Die Erweiterungsrohre 9durch lneinanderstecken der beiden Endstücke und
leichtes Drehen zur festen Sicherung anbringen.
ON/OFF SWITCH (FIG. 5)
The set is operated by the ON/OFF power switch 0.
EIN/-AUS-SCHALTER (ABB. 5)
Das Gerät wird mittels ON/OFF-Netzschalter 0ein- und ausgeschaltet.
DUST INDICATOR (FIG. 7)
When the orange sign Cappears in the large window continuously,
the cleaner requires emptying.
Check the dust indicator by lifting the suction tool from the floor and
removing the crevice nozzle when it is used.
STAUBFÜLLANZEIGE (ABB. 7)
Wenn die orangefarbige Markierung Csich dauernd im großen Fenster befindet,
muss der Staubsauger entleert werden.
Zur Prüfung der Staubanzeige das Saugteil vom Boden heben und die Spaltdüse
entfernen, wenn diese benutzt wird.
NOTE: If the cleaner is used when the orange sign appears in the large
window, air to the motor will be reduced and the motor will eventually
burn out.
HINWEIS: Wenn der Staubsauger bei angezeigter oranger Markierung im
großen Fenster verwendet wird, wird die Luftzufuhr zum Motor reduziert.
Dadurch kann der Motor überhitzt und beschädigt werden.
–3 –
RUG AND FLOOR TOOL (FIG. 6)
The nozzle is fitted with a brush at the back, which can either be in the “with-
drawn”or “projected”position. These positions are operated by the pedal on the
tool marked “”(Carpet) Aand “”(Floor) B.
For cleaning rugs or carpets keep the brush in its “withdrawn”position, i.e., with
the pedal marked “”pressed down.
If you feel the tool is too heavy to slide on the carpet, please reduce the suction
power by adjusting the suction control.
TEPPICH- UND FUSSBODENDÜSE (ABB. 6)
An der Düse ist hinten eine Brüste angebracht, die in der Position „Zurückgezogen“
oder „Geschützt“eingestellt sein kann.
Die Einstellung können Sie mit dem Pedal auf der Düse vornehmen, das als „“
(Teppich) Aund „“(Fußboden) Bgekennzeichnet ist.
Beim Reinigen von Läufern und Teppichen die Bürste in der „eingezogenen“Position,
d.h. den Fußhebel mit der Markierung „“heruntergedrückt halten.
Wenn Sie denken, dass die Düse zu schwer ist, um über den Teppich zu gleiten,
reduzieren Sie die Saugleistung, indem Sie den Saugkraftregler einstellen.
2
7
8
3
9
0
AB
C
Fig. 3 To attach hose
Abb. 3 Anbringung des Schlaches
Fig. 4 To attach extension pipes
Abb. 4 Verlängerungsrohre
zusammenstecken
Fig. 5 ON/OFF switch
Abb. 5 EIN/-AUS-Schalter
Fig. 6 Rug and floor tool
Abb. 6 Teppich- und Fußbodendüse
Fig. 7 Dust indicator
Abb. 7 Stabfüllanzeige
–4 –
SUCTION CONTROL (FIG. 8)
Suction pressure can be reduced by moving the adjustment ring Don the curved
joint pipe 1to expose a hole.
The more hole area exposed, the lower the suction. Low suction pressure is
recommended for cleaning curtains, blinds, delicate fabrics, etc.
SAUGKRAFTREGULIERUNG (ABB. 8)
Die Saugkraft kann durch Drehen des Einstellrings Dan dem gekrümmten
Verbindungsrohr 1verändert werden.
Je größer die dabei erscheinende Öffnung ist, desto geringer wird die Saugkraft.
Für das Reinigen von Vorhängen, Rollos, empfindlichen Stoffen u.ä. empfiehlt sich eine
niedrige Einstellung der Saugkraft.
TO USE ATTACHMENTS (FIG. 9, 10)
SAUGZUBEHÖR BENUTZEN (ABB. 9, 10)
Brush head can be turned to adjust
the angle.
Der Büstenkopf kann zur Einstellung
des Winkels gedreht werden.
Fig. 9 To use attachments
Abb. 9 Saugzubehör benutzen
TO DISCONNECT JOINT PIPE (FIG. 11)
Blockages may be cleared by separating the curved joint pipe
1
from the hose.
To separate the joint pipe, pull the hose while pressing the two claws 4that are
clicked into the holes 6on both sides of the joint pipe.
If needed, the hose collar Ecan be removed from the hose end by turning it (left-
handed screw). To re-connect, push hose back into joint pipe and twist until the
two claws 4are aligned with the holes 6. Likewise, you can disconnect the joint
pipe on the other end of the hose.
ABTRENNEN DES VERBINDUNGSROHRES (ABB. 11)
Blockierungen können durch Abtrennen des gebogenen Verbindungsrohres 1vom
Schlauch beseitigt werden. Um das Verbindungsrohr abzutrennen, den Schlauch
ziehen und dabei die beiden Klauen 4, die in den Löchern 6auf beiden Seiten des
Verbindungsrohres eingerastet sind, drücken.
Bei Bedarf kann die Schlauchmuffe Evom Schlauch durch Drehen (entgegen den Uhrzeigersinn) entfernt werden. Um das
Verbindungsrohr wieder anzuschließen, den Schlauch in das Verbindungsrohr schieben und drehen, bis die beiden Klauen 4auf die
Löcher 6ausgerichtet sind. Auf die gleiche Weise lässt sich auch das Verbindungsrohr am anderen Ende des Schlauches abtrennen.
Roll the power cord and hang on the back of the Handle .
HOW TO KEEP POWER CORD (FIG. 11A)
Rollen Sie das Netzkabel und die Blockierung auf der Rückseite des Handgriffs .
WIE KANN MAN NETZKABEL BEHALTEN (ABB. 11A)
1
D
Fig. 8 Suction control
Abb. 8 Saugkraftregulierung
Fig. 10 To use attachments
Abb. 10 Saugzubehör benutzen
61E4
Fig. 11 To disconnect joint pipe
Abb. 11 Abtrennen des
Verbindungsrohres
Fig. 11A To keep power cord
Abb. 11A Das Netzkabel behalten
HOW TO CHANGE PAPER BAG
TO DETACH PAPER BAG FOR CV-300P (FIG. 12)
1. Switch off the power supply and disconnect the power cord.
2. Remove the upper case Fby pressing the clamp G.
3. Remove the filter cloth Hand lift up the clip of the adapter
Islightly to detach the paper bag Jfrom the adapter.
4. Dispose the paper bag in the proper manner.
SO WECHSELT MAN DEN PAPIERBEUTEL
HERAUSNEHMEN DES PAPIERBEUTELS FÜR CV-300P (ABB. 12)
1. Den Netzschalter ausschalten und das Stromkabel abziehen.
2. Das obere Gehäuse Fdurch Drücken der Klemme Gentfernen.
3. Das Filtertuch Hentfernen und die Klemme des
Passstückes Ileicht hochziehen, um den Papierbeutel J
aus dem Passstück herauszunehmen.
4. Den Papierbeutel auf die übliche Weise entsorgen.
15A
15A
15A
–5 –
F
GHJ
I
Fig. 12 To detach
paper bag
Abb. 12 Herausnehmen
des
Papierbeutels
TO ATTACH PAPER BAG FOR CV-300P (FIG. 13)
1. Insert the paper bag Jat an angle so that the
cardboard sits inside the bottom hook of the adapter I.
2. Flip up the paper bag until it is securely locked by the
clip of the adapter.
3. Place the filter cloth Honto the dust receptacle K.
4. The HITACHI PAPER BAG has been made especially
for your cleaner. Paper bags may be purchased from
your local dealer or from a HITACHI service center.
EINLEGEN DES PAPIERBEUTELS FÜR CV-300P (ABB. 13)
1. Den Papierbeutel Jso einlegen, dass die Pappe
innerhalb des unteren Hakens am Passstück Isitzt.
2. Den Papierbeutel nach oben drücken, bis er fest in der
Klemme des Passstückes einrastet.
3. Das Filtertuch Hauf dem Staubbehälter Kpositionieren.
4. Der HITACHI-PAPIERBEUTEL wurde eigens für dieses
Reinigungsgerät hergestellt. Papierbeutel sind beim Händler
vor Ort und in jedem HITACHI-Service-Center erhältlich.
J
IK
H
CLICK
Fig. 13 To attach
paper bag
Abb. 13 Einlegen des
Papierbeutels
TO REMOVE DUST FOR CV-300 (FIG. 14)
When the dust accumulation is excessive, remove the dust by the following procedure.
1. Having disconnected the power cord and removed the hose, take off the upper case Mby pressing the clamp L.
2. Take the filter guide Nand shake the filter about 20 times to remove the clogging dust from the filter cloth O.
The cleaner regains its strong suction power, even if some fluff still remains on the filter cloth.
When fluff remains excessively on the filter cloth, remove it by a brush.
3. Take off the filter and dispose of dust in the dust receptacle P.
4. Replace the cloth filter device N,Oin the appropriate position such that larger gap Qof circular flange Rfit to
the front.
Fig. 14 To Remove dust
Abb. 14 Staubentleerung
L
M
N
O
PQ
R
STAUBENTLEERUNG FÜR CV-300 (ABB. 14)
Wenn sich der Staubbehälter gefüllt hat, ist die Entleerung wie folgt vorzunehmen.
1. Das Netzkabel aus der Steckdose ziehen, den Schlauch abnehmen und das obere Gehäuseteil Mdurch
Drücken der Verriegelung Labnehmen.
2. Nehmen Sie dem Filterführer Nund schütteln Sie den Filter etwa 20-mal, um den blockiert werdenden
Staub aus dem Filtertuch Ozu entfernen.
Der Raumpfleger gewinnt seine starke Saugkraft zurück, selbst wenn Staubflocken immer noch auf dem Filtertuch bleiben.
Wenn Sie Staubflockenüberreste übertrieben auf dem Filtertuch sind, entfernen Sie sie durch Bürste.
3. Nehmen Sie den Filter ab und erledigen Sie Staub im Staubbehälter P.
4. Ersetzen Sie das Tuchfiltergerät N,Oin der entsprechenden Position, so dass größere
Lücke Qvon kreisförmigem Flansch Rzur Vorderseite passte.
–6 –
S
S
S
T
T
T
U
U
Fig. 15 Care of motor protection filter
Abb. 15 Pflege des Motorenschutzfilters
HOW TO MAINTAIN CLEANING EFFICIENCY AND AVOID ACCIDENTS
•Be sure to replace the cloth filter after disposing of the dust.
If the cleaner is used with replacing its filter, dust will be sucked directly into the mechanical parts and may damage the
motor.
•Do not press or hit the clamp when carrying the cleaner. It may cause the dust receptacle to fall and hurt you.
•Do not block airflow.
Any blockages or obstructions to the suction inlet, rug and floor tool, extension pipe, hose, etc., or the exhaust air outlet
can cause loss of power and motor overheating.
•Do not pick up matches, fireplace ashes, or smoking material with the cleaner, as a possible hazard may result.
•Do not use the cleaner to pick up wet dirt, and avoid using the cleaner in a wet and moist place as moisture may damage
the motor and other mechanical parts.
•To clean the cleaner body and attachments, wipe them with a soapsuds-soaked cloth, and avoid using spirits.
•Avoid cleaning the switch area with a wet cloth and splashing water on it as moisture may cause a short circuit.
•The carbon brushes of the motor are of special composition.
When replacing the defaced carbon brushes, it is necessary to use only Hitachi special carbon brushes for the Hitachi
Vacuum Cleaner.
•Your vacuum cleaner is not a toy. Do not allow children to play with the cleaner. Do not leave the cleaner connected to an
electrical outlet and leave it unattended.
•Always disconnect cord from electrical outlet before servicing the cleaner.
CARE OF MOTOR PROTECTION FILTER (FIG. 15)
PFLEGE DES MOTORENSCHUTZFILTERS (ABB. 15)
Once or twice a year, or when it becomes visibly soiled, the motor protection filter
located under the upper case may require cleaning.
1. Remove the set of HEPA FILTER which is composed of HEPA COVER Tand
HEPA FILTER Sfrom MOTOR BASE Uby pulling the lock as show in illustration.
2. Remove HEPA FILTER Sfrom HEPA COVER Tfor cleaning.
3. Clean HEPA FILTER by shaking it to remove dust. (Do not wash.)
4. Assembly the set of HEPA FILTER. Attach HEPA FILTER Sto HEPA COVER Tfirst,
then fix with MOTOR BASE Uby locking the latch of HEPA COVER Tinto the position of HEPA FILTER GUARD .
Einmal oder zweimal im Jahr oder wenn er sichtlich verschmutzt ist, wird es wahrscheinlich
erforderlich sein, den Motorenschutzfilter, der sich unter dem oberen Gehäuse befindet, zu
reinigen.
1. Entfernen Sie den Satz des HEPA Filters, der aus HEPA Abdeckung Tund
HEPA Filter Svon Motorbasis Uzusammengesetzt ist, durch Ziehen des
Schlosses als Vorstellung in Abbildung.
2. Entfernen Sie HEPA Filter Saus HEPA Abdeckung Tum Sauber zu machen.
3. Reinigen Sie HEPA Filter dadurch, daßSie ihn schütteln, um Staub zu entfernen.
(Bitte nicht waschen.)
4. Versammeln Sie der Satz des HEPA Filters. Schließen Sie ersten HEPA Filter San zu Abdeckung T,dann schließen Sie mit
Motorbasis Uan Durch Schließen des Riegels von HEPA Bedeckung Tin die Position der HEPA Filterwache .
WARNING :
Electrical shock could occur if used outdoors or on wet surfaces.
Before you plug in your Hitachi Vacuum Cleaner, make sure that the voltage indicated on the rating plate located on the
back of the vacuum cleaner is the same as your local power supply.
Your vacuum cleaner is marked with this symbol. This means that electrical and electronic
products shall not be mixed with general household waste. European Community
countries (*), Norway, Iceland and Liechtenstein should have a dedicated collection
system for these products.
Do not try to dismantle the system yourself as this could have harmful effects on your
health and on the environment. The dismantling and disposal of refrigerant, oil and other
parts must be done by a qualified installer in accordance with relevant local and national
regulations.
Vacuum Cleaners must be treated at a specialized treatment facility for re-use, recycling and recovery and
shall not be disposed of in the municipal waste stream. Please contact the installer or local authority for more
information.
*subject to the national law of each member state.
Ihr Staubsauger ist mit diesem Symbol merklich. Dies bedeutet, daßelektrische und
elektronische Produkte nicht mit allgemeinem Haushaltsabfall gemischt werden sollen.
Länder der Europäischen Gemeinschaft (*), Norwegen Iceland und Liechtenstein sollten
ein hingebungsvolles Sammlungssystemfür diese Produkte haben.
Versuchen Sie nicht, das System Sie selbst zu demontieren, weil dies schädlich
Wirkungen auf Ihre Gesundheit und auf die Umgebung haben konnte. Die Demontierung
die Entsorgung des kühlenden, Öls und andere Teile von einem qualifizierten
Systemverantwortlichen entsprechend relevanten lokalen und nationalen Bestimmungen
gemacht werden müssen.
Ihr Staubsauger mußan einer spezialisierten Behandlungsbegabung für die
Wiederverwendung, die Wiederverwertung und die Erholung behandelt
werden und soll nicht im kommunalen Abfallstrom losgeworden werden.
Bitte wenden Sie sich an den Systemverantwortlichen oder lokalen Autorität
wegen weiterer Informationen.
*abhängig vom nationalen Gesetz jedes Mitgliedsstaats.
CAUTION :
If the supply cord is damaged, it must be replaced by the manufacturer or its service agent or a similarly qualified person in
order to avoid a hazard.
This product conforms with the protection requirements of council directives 89/336/ECC relating to electromagnetic
compatibility, and 73/23/ECC relating to electrical equipment designed for use within certain voltage limits.
ERHALTUNG DER REINIGUNGSLEISTUNG UND VERMEIDUNG VON UNFÄLLEN
•Stets nach dem Entfernen von Staub den Stofffilter wieder anbringen.
Wenn der Staubsauger ohne seinen Filter benutzt wird, wird der Staub direkt in die mechanischen Teile hineingesaugt und kann
so zu Motorschäden führen.
•Während des Tragens des Staubsaugers nicht an die Klemme schlagen oder auf sie drücken. Dadurch kann der Staubbehälter
herausfallen und Verletzungen verursachen.
•Nicht den Luftstrom blockieren.
Blockierung oder Behinderung der Ansaugöffnung, der Teppich- und Fußbodendüse, des Verlängerungsrohres usw. oder
der Abluftöffnung kann zu einem Leistungsabfall und Überhitzung des Motors führen.
•Zur Vermeidung von Feuergefahr weder Streichhölzer, Kaminasche noch Rauchgegenstände mit dem Staubsauger aufsaugen.
•Keinen nassen Schmutz mit dem Staubsauger aufsaugen und den Staubsauger nur im Trockenen benutzen, da Feuchtigkeit
dem Motor und anderen mechanischen Teilen schaden kann.
•Das Staubsaugergehäuse und die Zubehörteile können mit einem mit Spülmittel angefeuchteten Tuch abgewischt werden.
Zur Reinigung keine Lösungsmittel verwenden.
•Den Netzschalterbereich möglichst mit einem trockenen Lappen reinigen und Wasserspritzer in dem Bereich vermeiden, da
Feuchtigkeit einen Kurzschluss verursachen kann.
•Die Kohlebürsten des Motors bestehen aus einer besonderen Zusammensetzung.
Beim Auswechseln der abgenutzten Kohlebürsten nur Hitachis spezielle Kohlebürsten für den Hitachi-Staubsauger verwenden.
•Der Staubsauger ist kein Spielzeug. Es sollte Kindern daher untersagt werden, mit dem Staubsauger zu spielen. Den
Staubsauger nicht unbeaufsichtigt ans Stromnetz angeschlossen lassen.
WARNUNG :
Bei Verwendung im Freien oder auf nassen Böden besteht die Gefahr eines electrischen Schlages.
Bevor Sie den Netzstecker des Hitachi-Staubsaugers einstecken, vergewissern Sie sich, dass die auf dem Leistungsschild an der
Rückseite des Staubsaugers angegebene Spannung mit der Spannung lhrer Netzversorgung übereinstimmt.
VORSICHT :
Falls das Netzkabel beschädigt ist, muss es entweder vom Hersteller oder einer Kundendienstfir ma oder einer qualifizierten
Person ausgewechselt werden, um mögliche Gefahren zu vermeiden.
Dieses Produkt stimmt mit den folgenden europäischen Richtlinien überein: (89/336/EWG) “Richtlinie des Rates zur Angleichung
der Rechtsvorschriften der Mitgliederstaaten über elektromagnetische Verträglichkeit”und (73/23/EWG) “Richtlinie des Rates über
Niederspannungsbetriebsmittel”.
–7 –
THE HITACHI ATAGO BLDG.
15-12, Nishi-Shinbashi 2-Chome,
Minato-ku, Tokyo, 105-8410 Japan.
Tel : Tokyo (03) 3502-2111
IBEUROPE
3-K8973-4
HITACHI SALES EUROPA GmbH.
Am Seesterns 18
40547 Dusseldorf
GERMANY
Tel : 02 11-5 29 15-0
Fax : 02 11-5 29 15-190
Email : [email protected]

This manual suits for next models

1

Other Hitachi Vacuum Cleaner manuals

Hitachi R 18DSAL Operator's manual

Hitachi

Hitachi R 18DSAL Operator's manual

Hitachi CV-BU16 User manual

Hitachi

Hitachi CV-BU16 User manual

Hitachi PV-X95N User manual

Hitachi

Hitachi PV-X95N User manual

Hitachi PV-X200K User manual

Hitachi

Hitachi PV-X200K User manual

Hitachi CV710 User manual

Hitachi

Hitachi CV710 User manual

Hitachi CV-975FC User manual

Hitachi

Hitachi CV-975FC User manual

Hitachi R 14DL User manual

Hitachi

Hitachi R 14DL User manual

Hitachi PV-XE90 User manual

Hitachi

Hitachi PV-XE90 User manual

Hitachi PV-XL300J User manual

Hitachi

Hitachi PV-XL300J User manual

Hitachi RV-X20M User manual

Hitachi

Hitachi RV-X20M User manual

Hitachi CV-995HC Instruction Manual

Hitachi

Hitachi CV-995HC Instruction Manual

Hitachi CV-T190A User manual

Hitachi

Hitachi CV-T190A User manual

Hitachi R 14DL User manual

Hitachi

Hitachi R 14DL User manual

Hitachi CV-SC22V Operating instructions

Hitachi

Hitachi CV-SC22V Operating instructions

Hitachi PV-XC500 User manual

Hitachi

Hitachi PV-XC500 User manual

Hitachi CV-SH18E User manual

Hitachi

Hitachi CV-SH18E User manual

Hitachi CV-SF16 User manual

Hitachi

Hitachi CV-SF16 User manual

Hitachi CV-950Y Operating instructions

Hitachi

Hitachi CV-950Y Operating instructions

Hitachi CV-975FC User manual

Hitachi

Hitachi CV-975FC User manual

Hitachi RP35YB User manual

Hitachi

Hitachi RP35YB User manual

Hitachi PV-XH850M User manual

Hitachi

Hitachi PV-XH850M User manual

Hitachi HCVDN20ME User manual

Hitachi

Hitachi HCVDN20ME User manual

Hitachi R 7D User manual

Hitachi

Hitachi R 7D User manual

Hitachi CV-BH18 User manual

Hitachi

Hitachi CV-BH18 User manual

Popular Vacuum Cleaner manuals by other brands

Bosch BSS8 Series instruction manual

Bosch

Bosch BSS8 Series instruction manual

Annovi Reverberi HOT 1515N Use and maintenance handbook

Annovi Reverberi

Annovi Reverberi HOT 1515N Use and maintenance handbook

Qlima ASE 1020 Directions for use

Qlima

Qlima ASE 1020 Directions for use

VARO PowerPlus POWDP6040 manual

VARO

VARO PowerPlus POWDP6040 manual

Panasonic MC-CL433 operating instructions

Panasonic

Panasonic MC-CL433 operating instructions

Home HM-RV-A350B user manual

Home

Home HM-RV-A350B user manual

Fakir ROCKY SB 5150 user manual

Fakir

Fakir ROCKY SB 5150 user manual

Nilfisk-Advance 3997 instruction manual

Nilfisk-Advance

Nilfisk-Advance 3997 instruction manual

Fantom FM743 instruction manual

Fantom

Fantom FM743 instruction manual

bObsweep Bob PetHair Plus owner's manual

bObsweep

bObsweep Bob PetHair Plus owner's manual

LG VK8928 Series owner's manual

LG

LG VK8928 Series owner's manual

EINHELL HOME TH-VC 1318 Original operating instructions

EINHELL HOME

EINHELL HOME TH-VC 1318 Original operating instructions

Piranha YLW-6201 Instctruction manual

Piranha

Piranha YLW-6201 Instctruction manual

Hyundai HYUHVC101 instruction manual

Hyundai

Hyundai HYUHVC101 instruction manual

Hoover Platinum Collection owner's manual

Hoover

Hoover Platinum Collection owner's manual

Roborock S7 Max Ultra user manual

Roborock

Roborock S7 Max Ultra user manual

Hyundai VC 006 instruction manual

Hyundai

Hyundai VC 006 instruction manual

Philips FC9179 manual

Philips

Philips FC9179 manual

manuals.online logo
manuals.online logoBrands
  • About & Mission
  • Contact us
  • Privacy Policy
  • Terms and Conditions

Copyright 2025 Manuals.Online. All Rights Reserved.