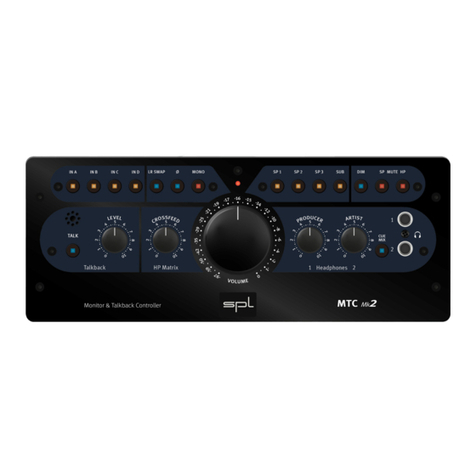
SPL 2381 User manual

Model 2381
Owner‘s Manual
Monitor & Talkback Controller
Stereo volume, source and monitor control with Cue Mix and Talkback functions

2
Version 1.0 – 7/2004
Design: Wolfgang Neumann
This user's guide contains a description of the product. It in no way repre-
sents a guarantee of particular characteristics or results of use. The informa-
tion in this document has been carefully compiled and verified and, unless
otherwise stated or agreed upon, correctly describes the product at the time
of packaging with this document.
Sound Performance Lab (SPL) continuously strives to improve its products
and reserves the right to modify the product described in this manual at any
time without prior notice. This document is the property of SPL and may not
be copied or reproduced in any manner, in part or fully, without prior autho-
rization by SPL.
SPL electronics GmbH
Sohlweg 55
41372 Niederkruechten
Germany
Tel. +49 (0)2163 983 40
Fax +49 (0)2163 983 420
Email: info@soundperformancelab.com
www.soundperformancelab.com
© 2004 SPL electronics GmbH. All rights reserved. Names of other companies and their products are trademarks of
their respective owners.
Owner‘s Manual MTC 2381 Modell 2381
MTC 2381

3
Introduction .............................................................................................. 4
Before You Begin ....................................................................................... 5
Power Supply ............................................................................................ 5
Rear Panel Graphic & Cabling Overview ................................................... 6
Connectors/General Advice ...................................................................... 7
Rear Panel/Inputs .................................................................................... 7
Musician, Mix, 2Tr A to 2Tr D, Footswitch ................................................... 7
Rear Panel/Outputs ................................................................................. 8
Slave Out, Talk Out, Cue Mix, Speaker 1-3 .................................................. 8
Rear Panel/Power Connection and Switches ............................................ 9
Mains Input, Power Switch, Power Supply Voltage Switch ........................ 9
Front Panel/Output ................................................................................... 9
Headphone Output .................................................................................... 9
Operation/Switch Functions ..................................................................... 10
Status-LEDs, Musician, Mix, 2Tr A to 2Tr D, Musician /Mix/2Tr A bis 2Tr D ..... 10
SP 1 to SP 3, Mono, Dim, HP On, Talk ......................................................... 11
Operation/Control Functions ..................................................................... 12
Cue Mix/Musician, Cue Mix/Mix, Cue Mix/Volume, Talkback/Level ........... 12
Control Room/Source Blend, Master Volume ............................................. 13
Specifications ........................................................................................... 14
Warranty ................................................................................................... 15
Contents
MTC 2381

4MTC 2381
The Monitor & Talkback Controller MTC 2381 combines volume level control,
source switching and loudspeaker management for stereo monitoring with
comfortable talkback and cue mixing functions. The organizational focus that
such essential services bring, coupled with an extraordinary tonal quality,
makes possible an unrivaled convenience in DAW-based monitor management
– in all areas of signal processing and playback
• stereo productions/recording studios
• movie and video post production
• video and computer game production
• audio-visual media and multimedia production
The latency-free Cue Mix signal for the musician can be composed of the
musician’s track and the track mix. The Talkback communications option via
built-in microphone provides a footswitch input for remote control and a sepa-
rate output with the dry talkback signal. These features mean that monitoring
in any DAW-based studio now can be expanded to include the kind of essen-
tial functionality that to now has only been available in large analog consoles.
The advantages of the MTC become especially apparent in combination with
modern audio and video production tools such as ProTools™, Nuendo™,
Cubase™, Logic™, Deck™ etc. Monitor levels and source management can
be handled independently of the software and with virtually no loss in quality.
You no longer need to set up additional aux sends for monitoring. In addition,
you won‘t have to worry about over- or underdriving the converters due to
monitor levels.
One of the MTC‘s biggest advantages is the possibility to manage up to six
input sources: comparing and monitoring is much easier than having to import
all of your audio files and set up monitor mixes – not to mention the inevitable
A/D-D/A conversions.
SPL‘s renowned electronic balancing circuitry forms the basis for the MTC‘s
I/O architecture. Its extended frequency range up to 100 kHz, exceptional
dynamic spectrum and excellent common mode rejection ensure specs that
exceed SACD standards, as only highest quality analog circuitry can provide.
Last but not least, the MTC‘s rugged and ergonomic desktop enclosure with
its slanted front panel harmonizes perfectly with the desktop production envi-
ronment.
Introduction

5
MTC 2381
IMPORTANT: Before you operate your MTC, first check carefully whether the
local voltage setting corresponds to the switch setting on the rear panel!
If not, and the voltage is in one way or another, incorrect, you will either experi-
ence an immediate fuse burn through (if the setting is lower than the supplied
power) or, if the power is 110-120 V at a 220-240V input switch setting, the
MTC will simply not function correctly.
Moreover, make sure you remove the plug from your MTC before changing this
switch setting!
Always turn volume down or mute your speakers when connecting or
repatching audio cables to avoid damage to your speakers and ears.
It makes good sense to think about where you place your MTC before connec-
ting it. It should be positioned so that you can easily reach it, but there are
other considerations. Try not to place it near heat sources or in direct sunlight,
and avoid exposure to excessive vibrations, dust, heat, cold or moisture. It
should also be kept away from transformers, motors, power amplifiers and
digital processors. In addition, please:
• Do not open the case. You may risk electric shock and damage to your equip-
ment.
• Leave repairs and maintenance to a qualified service technician. Should
foreign objects fall inside the case, contact your authorized dealer or support
person.
• To avoid electric shock or fire hazards, do not expose your unit to rain or
moisture.
• In case of lightning, unplug the unit. Always unplug the cable by pulling on
the plug only; never pull on the cable.
• Never force a switch or knob.
• Use a soft, lint-free cloth to clean the case, if necessary together with an
acid-free cleaning oil. Avoid cleaning agents as they may damage the unit.
The MTC‘s power supply was carefully engineered to provide clean and consis-
tent current – an important prerequisite for excellent audio. Built around a
toroidal transformer, the power supply generates a minimal electromagnetic
field with no hum or mechanical noise. The output side is filtered by an RC
circuit to extract noise and hums inherent in commercial AC power.
All audio-related components are fed by two separate voltage regulators to
minimize disturbance from other components.
An AC power cord is included for connection to the standard 3-prong IEC
connector. The transformer, power cord and IEC connector are VDE, UL and
CSA approved. The AC fuse is rated at 315mA for 220/240 V and 630 mA for
110/120 V.
Before you begin
Power Supply
220-240V~50Hz
Fuse: 315 mA
110-120V~60Hz
Fuse: 630 mA
Voltage Setting / Fuse Rating

6MTC 2381
Graphics “DAW“ and “Speakers“ by courtesy of Christian Preissig,
media dell‘ arte - text&ton, E-Mail: media_dell_arte@mac.com
i. e. Metering, Recorder etc.
Alternative
Talkback
Monitoring
Footswitch or Key/Button
Stereo Sources (Audio Player etc.)
Headphone Preamp +
Headphones for Cue-Mix
and Talkback signals Speaker-Set 1Speaker-Set 2Speaker-Set 3
The following graph shows the correct wiring for connecting
unbalanced signals to the balanced XLR connectors:
12
3
12
312
3
Pin Wiring XLR Connectors:
1=GND, 2=hot (+), 3=cold (-)
Pin Wiring 1/4 inch Jacks:
Tip=hot (+), Ring=cold (-), Sleeve=GND
balanced unbalanced
Musician's Signal
RCA
RCA
Jacks
Jacks

7
MTC 2381
The MTC enclosure is EMC-safe and effectively shielded against HF interfer-
ence. Nonetheless, you should carefully consider where you place the unit
to avoid electrical disturbances. The MTC and all devices to be connected
should be turned off before connections are made. Always turn volume down
or mute your speakers when disconnecting or repatching audio cables to avoid
damage to your speakers and ears.
Musician
These balanced 1/4 inch jacks serve as inputs for the musician‘s signal (mic
preamps or DAW track direct outs from performer tracks).
Usually performer tracks are recorded mono. In this case use the Musician
Left input. The signal is automatically routed also to the right channel. Now it
appears in the center of all stereo outputs.
Tip: Latency Free Cue Mix
If one is available, consider using a second parallel mic/instrument preamp
output (not the DAW tracks). The signal will reach the performer without
computer/converter latency.
Mix
The mix signal is connected to these balanced 1/4 inch jacks. As a second
Cue Mix component this is therefore a complete mix signal, but without the
musician’s track.
IMPORTANT: A musician’s track must be toggled to “mute” in the DAW to
avoid a doubled routing to the Mix and Musician input in the MTC.
2Tr A to 2Tr D
These four stereo inputs (2Tr = 2 Track) provide monitoring connections for
four sources of the engineer’s choosing.
The inputs 2Tr A and 2Tr B are balanced 1/4 inch plugs ideal for the connection
of professional CD/DAT players or alternative DA converters.
The inputs 2Tr C and 2Tr D are executed as non-balanced RCA connectors and
suitable for audio inputs from CDs, MP3, MD, players, etc.—or for the connec-
tion to a TV-Receiver (just to be sure you can keep up on your favorite channel
during a break).
IMPORTANT: The level of these non-balanced RCA inputs is boosted by +10 dB
so that in comparing sources with differing professional and consumer signal
levels, you are not stuck with constantly juggling the monitor levels.
Footswitch
This 1/4 inch footswitch input can accept an on/off switch or key/button input
that allows remote control over which the Talkback function. Any sort of switch
(including footswitches familiar to keyboard players) can be used here.
General Advice Connectors
Rear Panel/Inputs
L
L
R
R
Musician
Musician
L
L
R
R
Mix
Mix
L
L
R
R
L
L
R
R
2Tr B 2Tr A
2Tr B2Tr A
L
L
R
R
L
L
R
R
2Tr C2Tr D
2Tr C 2Tr D
Footswitch
Talk Out

8MTC 2381
Slave Out
The balanced 1/4 inch Slave Out jacks provide for summed output of all active
2Tr inputs (Mix, 2TrA to 2Tr D). As an example, the monitor signal may also be
routed to a recording medium, or, while one listens to a CD player, the output
may simultaneously be routed to a DAW. You may likewise connect stereo
metering equipment.
The musician‘s signal (coming from the Musician input) is not routed to the
Slave Out, as it is only used for latency-free monitoring, but not for recording.
Talk Out
The Talk Out connection routes just the isolated Talkback mic signal through
its balanced 1/4 inch jack to create an alternative listening option (for example,
to another room).
This function is particularly useful when, for instance, the engineer wishes
to avoid forcing all performers in the recording room to wear headphones.
For example advertising narrators are not often happy wearing headphones.
Routing through the Talk Out circuit, the engineer can communicate directly
to narrators or musicians over an active monitor placed in the recording room.
The Talk Out signal volume is regulated with the Talk Level control (please see
Operation/Control Functions/Talkback Level on page 12).
Cue Mix
This Cue Mix output provides a monitor mix for musicians.
You can connect a headphone amplifier to these balanced 1/4 inch plugs.
Speaker 1-3
Speaker outputs 1 to 3 provide for the stereo out signal. A loudspeaker pair
may be connected to each pair of balanced XLR connectors.
Rear Panel/Outputs
L
L
R
R
Slave Out
Slave Out
Footswitch
Talk Out
R
R
L
L
R
Cue Mix
Cue Mix
Speaker 1L
L
R
RR
Speaker 1

9
MTC 2381
Mains Input
The included AC power cord is connected to this 3-prong IEC connector to
supply operating current to the unit.
Power Switch
You will find the main power switch right beside the Mains Input. The blue
power LED on the MTC front panel indicates that the power supply is tuned in.
Power Supply Voltage Switch
This slide switch toggles the power source between 220/240 Vand 110-120 V.
IMPORTANT: Before you operate your MTC, first check carefully whether the
local voltage corresponds to this switch setting!
Moreover, make sure you remove the plug from your MTC before changing this
switch setting!
If not, and the voltage is in one way or another, incorrect, you will either experi-
ence an immediate fuse burn through (if the setting is lower than the supplied
power) or, if the power is 110/120 V at a 220/240 V input switch setting, the
MTC will simply not function correctly.
Headphone Output
This is where your headphone can be connected for monitoring the control
room mix—in parallel to the chosen loudspeaker monitor pair. The Headphone
output can be toggled in or out with the HP On switch (refer to Operation/
Switch Functions/HP On on page 11).
If needed, the monitor pair can be deactivated over the corresponding front
panel SP switch (refer to Operation/Switch Functions/SP 1-3 on page 11).
The volume for the headphone, along with speakers, is regulated by the
Master Volume control, too. (refer to Operation/Control Functions/Master
Volume on page 13).
Rear Panel/Power Connection and Switches
Front Panel/Output
Mains Input
Power
220-240V~50Hz
Fuse: 315 mA
110-120V~60Hz
Fuse: 630 mA
Voltage Setting / Fuse Rating

10 MTC 2381
The most important test of good monitoring lies in achieving the most precise
and neutral mix and source reproduction possible. To guarantee this, the MTC
uses only high quality components and is based upon sophisticated designs
optimized for clean, consistent audio.
Status LEDs
An LED over each front panel switch indicates activity by illuminating when its
corresponding switch is turned on.
If the Talkback function is activated by an external switch, the Talk LED will
nonetheless illuminate (a footswitch or key/button connected via the rear
panel Footswitch Input is described in Rear Panel Inputs/Footswitch on page
7).
Musician
The Musician switch routes a musician’s signal to the MTC monitor buss. In
such cases, the Source Blend control adjusts this signal’s volume in relation
to the Mix/2Tr (please refer to Operation/Control functions/Source Blend on
page 13).
In this process the musician’s signal is switched parallel into the Cue Mix
buss—also when the Musician switch is deactivated. Here the volume of the
musician’s signal is controlled through the Musician potentiometer (please
refer to Operation/Control Functions/Musician on Page 12).
Mix
The Mix switch routes the Mix input signal to the monitor buss, whose volume
(in relation to the Musician’s signal) is regulated by the Source Blend potenti-
ometer (refer to Operation/Control Functions/Source Blend on Page 13).
In this process the Mix signal is switched parallel into the Cue Mix buss—also
when the Musician switch is deactivated. Here the Mix potentiometer deter-
mines the Mix signal volume in the Cue Mix buss.
2Tr A bis 2Tr D
These switches activate the corresponding stereo A-D inputs and route them
to the monitor buss. The Source Blend potentiometer regulates the this
signal’s volume relative to the Musician’s signal (please refer to Operation/
Control Functions/Source Blend on Page 13).
> Musician, Mix and 2Tr A to 2Tr D Switches:
These switches can be activated in two or altogether to determine routing for
monitor buss summing. This selection process also determines which signals
appear at the Slave Out output. Possible level differences must be compen-
sated for at the source units.
Operation/Switch Functions
u
sician
i
x
2Tr A

11
MTC 2381
Operation/Switch Functions
SP 1 to SP 3
These switches can toggle up to three loudspeaker pairs on and off (and may
serve as individual mute switches).
Mono
The Mono function creates a mono sum from the stereo signal left and right
channels and provides for a mono-compatibility check of the stereo mix. This
switch functions globally on all three monitor outs, and both speakers of a
pair receive the mono signal.
Dim
The Dim switch reduces (by about -20 dB) the monitor volume of all outputs
for loudspeakers and headphones and is a very practical addition to control
the overall mix—or to enable a suddenly needed and intelligible telephone
conversation. When the Talk function is activated, the Dim is automatically
enabled (refer to „Talk“ below).
HP On
This HP On switch toggles the headphone output in and out. Its presence
means that a connected headphone does not have to be unplugged should
the engineer only need them quiet for a moment.
Talk
The Talk button activates the Talkback function. As long as this button is
pressed, one can speak with the musician over the integrated MTC front micro-
phone. To avoid feedback, pressing this button automatically reduces monitor
volume by -20 dB..
The installed electret microphone has an omnidirectional pattern that allows
for good pickup even when a speaker finds himself several meters from the
MTC.
The talk function may also be activated over an external key/button or switch
which is connected to the rear panel footswitch input (refer to Rear Panel/
Inputs/Footswitch on page 7).
Tip: When employed, an external key/button behaves just as if it were the
installed talk button, e. g., you may speak until releasing the key/button. On
the other hand, using an external switch means that your talk function will
remain active until you again trip the switch.
SP 1SP 1
MonoMono
DimDim
HP OnHP On
Talk

MTC 2381
Control functions are divided in three areas: Cue Mix, Talkback and Control
Room.
The Cue Mix section contains all the necessary controls to set up a monitor
mix for the musician.
IMPORTANT: Be careful to ensure that all MTC input signals are properly
adjusted and provide proper levels. Due to the purist design philosophy of
the MTC, the controls Cue Mix/Musician, Cue Mix/Mix, Cue Mix/Volume and
Control Room/Source Blend are passive circuits that do not provide for gain
increases.
This means, for example, that were you to input a strong DAW mix with a weak
musician’s signal, the Musician Cue-Mix would then have to run at full volume
while your mix signal would have to be lowered—likely way too much. Under
such circumstances the total Cue Mix Volume would not be greater than its
weakest link (the musician’s signal). You would then have to raise the head-
phone amplifier level, which in turn would result in an unfavorable increase
in signal noise. Of course, this same consideration holds for the Source Blend
Control. Therefore, do make every effort to provide your MTC with proper
signal levels.
Cue Mix/Musician
With this Potentiometer you can control the volume of the musician‘s signal in
the Cue-Mix.
Cue Mix/Mix
The Mix potentiometer determines the level of the Mix signal as a second
Cue-Mix component.
Cue Mix/Volume
This potentiometer adjusts the total Cue-Mix volume.
Tip: Cue-Mix volume can also be adjusted by the musician himself through a
subsequent headphone amplifier.
Talkback/Level
This potentiometer controls the Talkback signal level.
Operation/Control Functions
Musician
Max
Min
Mix
Max
Min
Volume
Max
Min
Level
Max
Min
12

Control Room/Source Blend
With this control you can adjust the relative levels between the musician and
Mix and/or 2Tr signals for the control room monitor speakers.
Master Volume
The master volume potentiometer globally controls volume for the three
monitor speaker pairs. This analog control regulates the audio signal directly
to avoid any coloration/distortion typical of VCAs, DCAs, etc., which require
higher inter-channel tolerances and tend toward higher distortion figures.
Moreover, this potentiometer possesses an optimal rotational torque and
“feel” for precise hand control.
Tip: Speaker Calibration
The MTC dispenses with speaker output trims, as they would unnecessarily
stress the signal pathes—all active speakers and also power amps have input
trims.
The adjustment process should begin with the quietest monitor pair (smallest
sound pressure level) with the input sensitivity at maximum level.
Leaving the MTC Master Volume control as set, you then perform the same
adjustment for the other monitor/speaker pairs until each produces the same
sound level as the first pair. Lacking an sound pressure level meter, you may
still accomplish this adjustment well enough by ear.
MTC 2381
Operation/Control Functions
Source Blend
Mix/2Tr
Musician
13

14 MTC 2381
Specifications
Frequency range 10 Hz - 120 kHz (+/- 3 dB)
Input impedance
balanced via Sub-D 50 kOhm
unbalanced via RCA 100 kOhm
Output impedance
balanced via XLR 500 Ohm
THD + N
0 dBu input level 0.005 %
+10 dBu input level 0.002 %
+20 dBu input level 0.003 %
Noise (A-weighted) -89.4 dBu
Max. input level
Balanced, RCA +21 dBu
Unbalanced, RCA +19 dBu
Dynamic Range (bal./unbal.) 108,4/110,4 dB
CMRR › 70 dBu
Power Consumption 10 W
Dimensions H x B x T (mm): 91 x 272 x 220
Weight 2.5 kg/5.5lbs

15
MTC 2381
Warranty
SPL electronics GmbH (hereafter called SPL) products are warranted only in
the country where purchased, through the authorized SPL distributor in that
country, against defects in material or workmanship. The specific period of
this limited warranty shall be that which is described to the original retail
purchaser by the authorized SPL dealer or distributor at the time of purchase.
SPL does not, however, warrant its products against any and all defects:
1) arising out of materials or workmanship not provided or furnished by SPL,
or
2) resulting from abnormal use of the product or use in violation of instruc-
tions, or
3) in products repaired or serviced by other than authorized SPL repair faci-
lities, or
4) in products with removed or defaced serial numbers, or
5) in components or parts or products expressly warranted by another manuf-
acturer.
SPL agrees, through the applicable authorized distributor, to repair or replace
defects covered by this limited warranty with parts or products of original
or improved design, at its option in each respect, if the defective product
is shipped prior to the end of the warranty period to the designated autho-
rized SPL warranty repair facility in the country where purchased, or to the
SPL factory in Germany, in the original packaging or a replacement supplied
by SPL, with all transportation costs and full insurance paid each way by the
purchaser or owner.
All remedies and the measure of damages are limited to the above services
and descriptions. It is possible that economic loss or injury to person or prop-
erty may result from the failure of the product; however, even if SPL has
been advised of this possibility, this limited warranty does not cover any such
consequential or incidental damages. Some states or countries do not allow
the limitations or exclusion of incidental or consequential damages, so the
above limitation may not apply to you.
Any and all warranties, express or implied, arising by law, course of dealing,
course of performance, usage of trade, or otherwise, including but not limited
to implied warranties of merchantability and fitness for particular use, are
limited to a period of 1 (one) year from either the date of purchase or the
manufacturing date. Some states or countries do not allow limitations on how
long an implied warranty lasts, so the above limitations may not apply to you.
This limited warranty gives you specific legal rights, and you may also have
other rights, which vary from state to state and country to country.
SPL electronics GmbH, 41372 Niederkruechten, Germany

MTC 2381
Owner‘s Manual MTC 2381 <
Table of contents
Other SPL Controllers manuals
Popular Controllers manuals by other brands

Sinovo
Sinovo SD300-2S-0.7G user manual

MKS
MKS 252D manual

Omega Engineering
Omega Engineering Wireless Meter Scanner & Controller wi... user guide

Equilibar
Equilibar Research Series Use and Startup

Baldor
Baldor LD Series Installation and operating manual

Hytork Dossier
Hytork Dossier XL 45 Installation, operating and maintenance instructions