1. Place black bass drum head with the SPL logo on
front of the bass drum shell.
2. Place bass drum hoop onto drum head.
3. Insert long tension rod / washer / bass drum claw
hook assembly into bass drum lug. Make sure claw
hook is secure on the bass drum hoop. Tighten
with your fingers.
4. Repeat this for all the lugs on one side of the drum.
5. After all tension rods on one side are finger tight,
use the drum key to tighten the #1 tension rod 3
turns. Follow these steps for tension rods #2 through
#8 in a criss-cross pattern as shown. Repeat this
pattern, tightening each rod one half turn until the
drum head is taut and wrinkle free.
6. Repeat for the clear batter head on the opposite
side of the drum.
Bass Drum Head Assembly
Washer
Bass Drum Hoop
Bass Drum Claw
Long Tension Rod
Shell
Bass Drum Lug
FRONT - Audience Side
Bass Drum Leg Assembly (Spurs)
1. Loosen key screw on spur bracket.
2. Insert drum spur.
3. Tighten key screw on spur bracket.
Spur Bracket
Key Screw
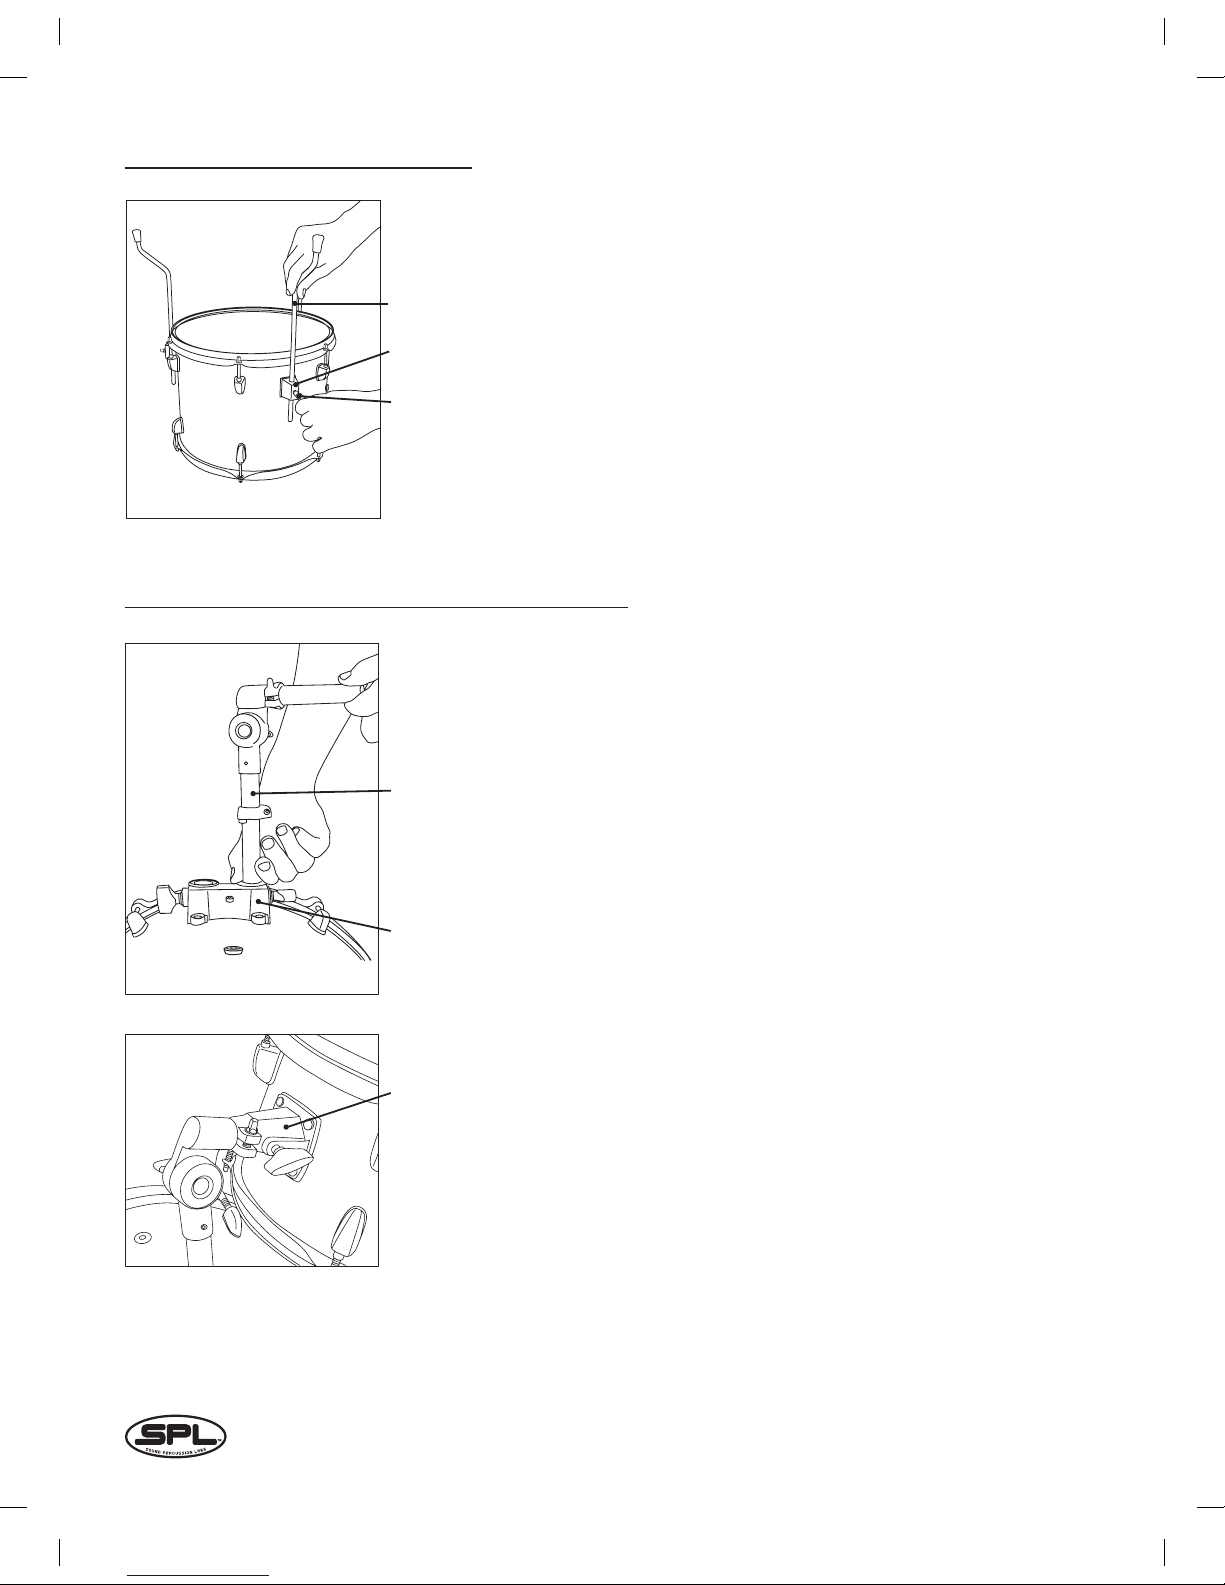
Tom Head Assembly
Drum Key
Washer
Hoop
Short Tension Rod
Shell
Lug
1. Place head on top of the drum shell.
2. Place metal hoop onto drum head, aligning the
holes in hoop with the drum lugs.
3. Insert short tension rods with metal washer through
the holes in the hoop.
4. Thread the tension rod into the lug and finger tighten.
5. Repeat with the rest of the tension rods for the top
of the drum. Using the drum key, gradually tighten
each tension rod in equal amounts using the same
criss-cross pattern as done on the bass drum until
the head is taut and wrinkle free.
6. Repeat for the bottom head.
Assembly Instructions
Drum Spur
1
2
3
4
5
6
7
8
10183 SPL D2518 Kicker Pro Assembly Manual.indd 4 6/12/14 10:58 AM