Sprout MAGNETIC WIRELESS CAR CHARGER User manual
MAGNETIC
WIRELESS
CAR CHARGER
PRODUCT MANUAL
01. What’s in the box? 2
02. Product overview 4
03. Quick start guide 6
04. Specifications 8
05. Troubleshooting 9
06. Important safety info 10
07. Consumer guarantee 12
CONTENTS
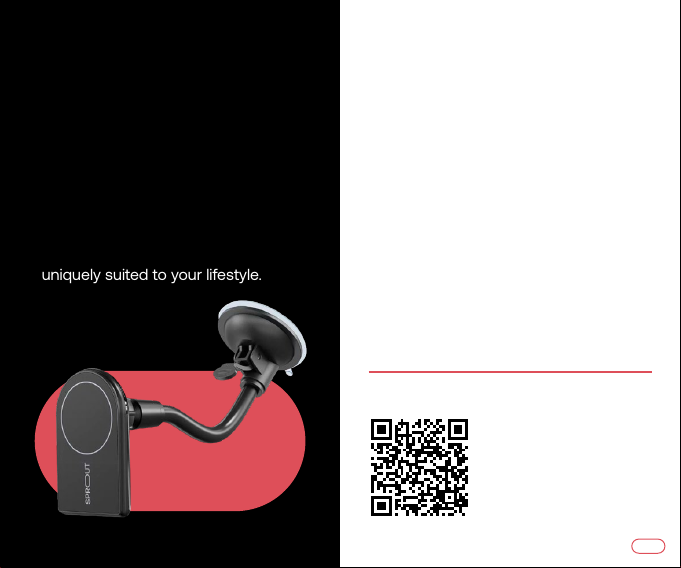
Scan the QR code
to access an online
version of this manual
WE PUT MORE INTO
OUR TECH, SO YOU CAN
GET MORE OUT OF LIFE.
At Sprout, our purpose is to help
you unlock the potential of your
technology. We’re an Australian
brand, and we design all of our
products locally to ensure they are
uniquely suited to your lifestyle.
1

1. WHAT’S IN THE BOX? 1. WHAT’S IN THE BOX?
Thank you for choosing the Magnetic Wireless
Car Charger bySprout.
For optimum performance and safety, please
readinstructions carefully before usage.
Please keep this manual for future reference.
1x Magnetic wireless charger
1x Cushioned vent mount aachment
(aached by default)
1x Windscreen mount with flexible
gooseneck aachment
1x USB-C to USB-C Cable (1.5 metre)
1x Car charger with USB-A and USB-C output
1x Product manual
32
2. PRODUCT OVERVIEW 2. PRODUCT OVERVIEW
This product provides the ability to wirelessly charge
your MagSafe compatible smartphone. Each person
may have a dierent set of circumstances that may
require the charger to be vent mounted, or windscreen
mounted, and this product has been designed to cater
for both scenarios.
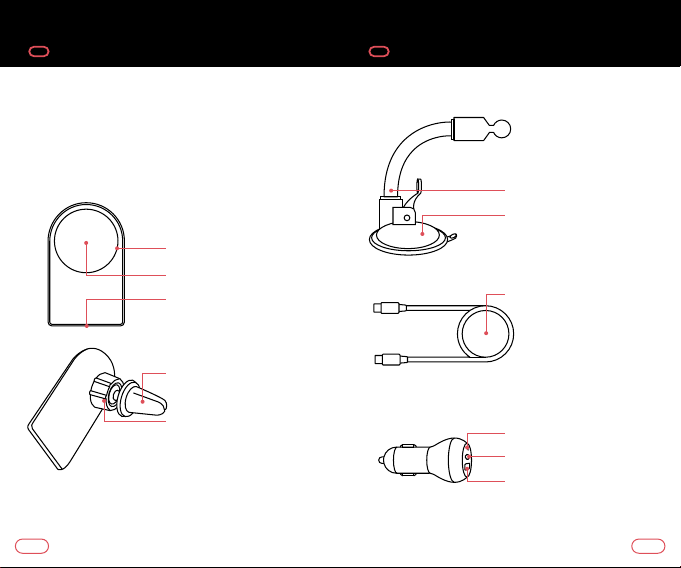
1. Magnetic wireless
charger
A. Magnetic circle
B. Wireless charging pad
C. USB-C input port
3. Windscreen mount
A. Flexible gooseneck
B. Suction cup with lever
2. Cushioned vent mount
(aached by default)
A. Tightening ring
4. USB-C to USB-C cable
(1.5 metre)
5. Car charger
A. Charging indicator light
B. USB-C port
C. Optional USB-A port
54
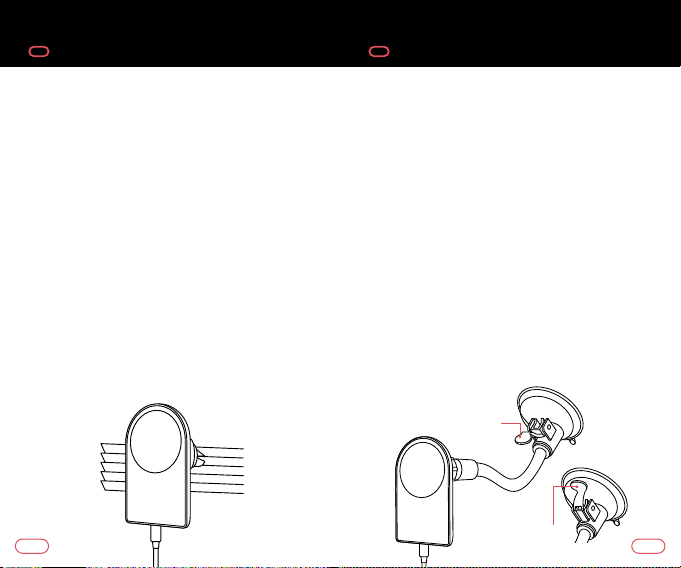
VENT MOUNT
1. Ensure cap is tightened around nut
(anti-clockwise to loosen, clockwise to tighten).
2. Insert the car charger into the vehicles
12V power socket.
3. Aach USB-C to USB-C cable between the
magnetic wireless charger and car charger.
4. Place vent mount onto the vent.
5. Close the airflow vane for that vent to reduce
the likelihood of hot air blowing onto the base
unit from use of the car heater.
6. Place the phone on the magnetic wireless charger
and test the magnet strength before use. The
magnets will assist in precise magnetic alignment.
7. If using an iPhone Series 12 or above, your device
should begin to charge wirelessly aer placing
onto the magnetic wireless charger.
WINDSCREEN MOUNT
1. Remove the aached vent mount by loosening
cap turning anti-clockwise.
2. Aach the windscreen mount with flexible
gooseneck and replace the cap tightening
clockwise.
3. Insert the car charger into the vehicle’s
12V power socket.
4. Aach USB-C to USB-C cable between the
magnetic wireless charger and car charger.
5. Place windscreen mount on the windscreen,
ensuring it does not obstruct your field of vision.
6. Place the phone on the magnetic wireless charger
and test the magnet strength before use.The
magnets will assist inprecise magnetic alignment.
7. If using an iPhone Series 12 or above, your device
should begin to charge wirelessly aer placing
onto the magnetic wireless charger.
3. QUICK START GUIDE 3. QUICK START GUIDE
Lever open
Lever closed
76
Other manuals for MAGNETIC WIRELESS CAR CHARGER
3
Table of contents
Other Sprout Automobile Accessories manuals


Popular Automobile Accessories manuals by other brands


ULTIMATE SPEED
ULTIMATE SPEED 279746 Assembly and Safety Advice

SSV Works
SSV Works DF-F65 manual

ULTIMATE SPEED
ULTIMATE SPEED CARBON Assembly and Safety Advice

Witter
Witter F174 Fitting instructions

WeatherTech
WeatherTech No-Drill installation instructions

TAUBENREUTHER
TAUBENREUTHER 1-336050 Installation instruction