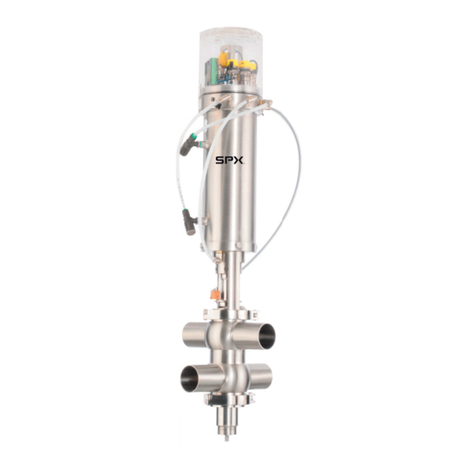
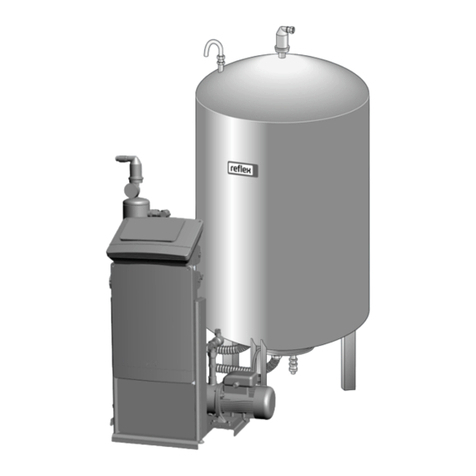
SPX APV DELTA PR2 User manual

Read and understand this manual prior to
operating or servicing this product.
Operating Manual
DELTA PR2
Sampling Valve


1
Sampling Valve
DELTA PR2
Operating Manual Rev.3
1. General Terms 2
2. Safety Instructions 2
3. Mode of Operation 2
4. Auxiliary Equipment 3
5. Cleaning 3
6. Installation 3
6.1 Welding Instructions 4
7. Maintenance 4
8. Dimensions / Weights 5
9. Materials 6
10. Technical Data 6
11. Service Instructions 7 - 9
12. Trouble Shooting 10
13. Spare Parts Lists
PR2 - HF RN 01.143.0
PR2 - FS - H RN 01.146-2
Table of Content Page
UK


This operating manual has to be read carefully and observed by
the competent operating and maintenance personnel.
We have to point out that we will not accept any liability for
damage or malfunctions resulting from the non-compliance with
this operating manual.
Descriptions and data given herein are subject to technical changes.
2. Safety Instructions
DANGER!
- Before any maintenance work, the line and cleaning system must
be depressurized.
- Observe service instructions for a safe maintenance of the valve!
3. Mode of Operation
I. Manual operation (PR2-HF)
The valve is actuated by turning the handle (B).
turn left = open
turn right = closed.
II. Pneumatic operation (PR2-FS-H)
Through the compressed air supply at "A", the valve is driven into
the "open" position. Reset is done by spring force.
The valve is equipped with an emergency handle (B) which allows
opening and closing by manual operation.
turn left = open
turn right = closed.
1. General Terms
2
B
D
D
A
B
C
Sampling Valve
DELTA PR2
Operating Manual Rev.3
UK

* Valve position indication
A switch to signal the limit position of the valve shaft (On/Off) can
be mounted in the yoke area (C) if required.
* Steam-resistant housing (DN 25)
This housing is available for both valve actuations and is welded
direct to the tank or pipeline. It has connections for the steam inlet
and outlet.
5. Cleaning
- With the standard designs, the valve is cleaned during the pipe
cleaning process.
- By short-term interval-opening of the valve, the contact surface
between the valve shaft and the seat is cleaned, whereas liquid
drains off the sampling nozzle (D).
- The valve with steam connection is cleaned and sterilized through
the connecting tubes.
6. Installation
- The installation of the valve must be undertaken in such a way
that liquids can drain off the valve housing.
- The steam-resistant valve must be mounted in horizontal position.
The connecting tubes must be to the top and to the bottom.
- The standard valves can be welded into the pipelines either in
vertical position (sampling connection to the bottom) or in
horizontal position.
-Attention! Observe welding instructions.
4. Auxiliary Equipment
3
steam-resistant housing
C
Sampling Valve
DELTA PR2
Operating Manual Rev.3
UK

PR2
- Before welding of the valves, the valve insert must be dismantled
from the housing. See to a careful handling to avoid damage.
- Welding may only be carried out by certified welders (EN 287-1).
(Seam quality EN 25817 "B").
- The welding of the valve housing must be undertaken in such a
way that deformation strain cannot be transferred from the outside
to the valve body.
- The preparation of the weld seam up to 3 mm wall thickness must
be carried out in butt manner as a square butt joint without air.
(Consider shrinkage!)
- TIG orbital welding should be preferred.
- After welding of the valve housings or of the mating flanges and
after work at the pipelines, the corresponding parts of the
installation or pipelines must be cleaned from welding residues
and soiling. If these cleaning instructions are not observed, welding
residues and dirt particles can settle in the valve and cause
damage.
- Any damage resulting from the nonobservance of these welding
instructions is not subject to our guarantee.
7. Maintenance
- The maintenance intervals are different depending on the
application and are to be determined by the operator himself
carrying out temporary checks.
- Complete seal kits for the valve service are available
(see spare parts lists).
- Exchange of seals according to service instructions.
- Provide all seals with a thin layer of grease before their installation.
Recommendation:
APV food-grade grease for EPDM,HNBR and FPM
(750 g /tin - ref.-No. 000 70-01-019/93)
(60 g /tube - ref.-No. 000 70-01-018/93)
or
APV food-grade grease for VMQ
(60 g /tin - ref.-No. 000 70-01-017/93)
(60 g /tube - ref.-No. 000 70-01-016/93).
! Do not use grease containing mineral oil for EPDM seals !
! Do not use Silicone-based grease for VMQ seals !
- Assembly of the valve according to service instructions.
6.1 Welding Instructions
4
Sampling Valve
DELTA PR2
Operating Manual Rev.3
UK

8. Dimensions / Weights
5
dimensions in mm
DN A B C D E F
25 50 26 29 37 99 134
40 67 38 41 46 101 138
50 72 50 53 52 107 144
65 85 66 70 60 115 152
80 98 81 85 68 122 159
100 111 100 104 77 132 169
inch
1,5” 67 34,9 38,1 44,4 99,4 137
2” 72 47,6 50,8 51,0 107,0 144
3” 90 72,9 76,1 63,0 117,5 155
weight in Kg
DN HF - manual FS - actuated
design design
25 0,9 1,9
40 1,0 2,0
50 1,2 2,2
65 1,4 2,4
80 1,9 2,9
100 2,6 3,6
10 x 1
37,6
133
pneumatically actuated
design with steam-resistant housing
DN 25
manual design
pneumatically
actuated
design
Sampling Valve
DELTA PR2
Operating Manual Rev.3
UK

housing, housing cover 1.4571 or 1.4404
spring cylinder, yoke,
upper part of shaft,
operating cam, screws,
air connection 1.4301
seals
standard design EPDM
options HNBR ,FPM, VMQ
lower part of shaft PTFE / 25 % glass fiber
handle Hostalen
10. Technical Data
- max. line pressure 10 bar
- max. operating temperature 135 °C EPDM, HNBR
*VMQ, *FPM
- short-term load 140 °C EPDM, HNBR
*VMQ, *FPM
*(no steam)
- max. stroke 4 mm
- control pressure for
air-operated valve 10 bar max. / 6 bar min.
- air connection for hose 6 x 1
Use dry and clean pneumatic air, only.
9. Materials
6
Sampling Valve
DELTA PR2
Operating Manual Rev.3
UK

11. Service Instructions
7
Manual design - PR2 HF
The item numbers refer to the spare parts drawing RN 01.143.0.
I. Dismantling from the line system
a. Shut off line pressure in the product line.
b. Turn handle (8) to the left until the valve is in open position.
c. Remove flange screw (4) and take the complete valve insert out
of the housing (11).
d. Remove O-ring (2).
e. Insert a small screw driver through the bore in the spring housing
and into the shaft (1) to prevent the shaft from turning.
f. Remove hexagon screw (10) and washer (9) and press the shaft (1)
into the direction of the PTFE part out of the housing.
g. Pull the PTFE shaft tip (1.2) from the metal part (1.1).
The PTFE tip is destroyed during this action.
h. Remove the shaft seal (3) from the spring housing.
II. Installation of seals and assembly of valve
a. Press the slightly greased shaft seal (3) into the groove of the
spring housing.
b. Place the PTFE shaft tip (1.2) on the metal part (1.1) and lock it
into place.
c. Push the valve shaft (1) with the metal part to the front through the
shaft seal into the spring housing.
d. Insert a small screw driver into the bore of the spring housing (5)
and of the shaft (1) to prevent the shaft from turning.
e. Screw the hexagon screw (10) with washer (9) in the shaft and
tighten it.
f. Insert the slightly greased O-ring (2).
g. Press the complete valve insert into the housing (11) and fix it
with the flange screws (4).
h. Check the function of the valve by turning on and off several times.
4
11
9
3
1
2
10
8
Sampling Valve
DELTA PR2
Operating Manual Rev.3
manual design
with steam-resistant
housing DN 25
UK

Pneumatically actuated design (PR2-FS-H)
The item numbers refer to the spare parts drawing
RN 01.146-2.
III. Dismantling from the line system
a. Shut off line pressure in the product line.
b. Remove pneumatic air line.
c. Release screw of feedback support and pull off
proximity switch.
d. Turn handle (14) to the left until the valve is in
open position.
e. Remove flange screws (4) and take the complete valve
insert out of the housing (1).
f. Remove O-ring (2).
g. Insert a small screw driver through the bore in the spring
housing and into the shaft (1) to prevent the shaft from
turning.
h. Remove union (17) and washer (16) and screw off the
handle (14).
i. Turn off the cover (12). Insert two pins into the bore of the
cover to move the cover. Spring (13) and distance tube (11)
are accessible, now.
j. Remove O-ring (15).
k. Release threaded pin (6) and press the shaft (5) out to the
top. The operating ring (7) backs out during this procedure.
l. Pull the PTFE shaft tip (5.2) from the metal part (5.1).
The PTFE tip is destroyed during this action.
m.Remove the shaft seal (3) and O-rings (9, 10).
11. Service Instructions
8
14
4
1
17
12
11 10
13
15
6
9
5
3
7
2
16
Sampling Valve
DELTA PR2
Operating Manual Rev.3
pneumatically actuated
design with steam-resistant
housing DN 25
UK

Pneumatically actuated design (PR2-FS-H)
IV. Installation of seals and assembly of valve
(PR2-FS-H)
a. Slightly grease the shaft seal (3) and O-Ring (9, 19, 15)
and place them into the grooves.
b. Place the PTFE shaft tip (5.2) on the metal part (5.1)
and lock it into place.
c. Push the shaft (1) from the top through the yoke (8),
the operating ring (7) and the shaft seal (3).
d. Insert spring (13) and distance tube (11) and tighten the
cover (12) until it stops.
e. Screw on the handle (14) and secure the shaft against
turning (bore in shaft).
f. Screw the union (17) with washer (16) into the shaft.
g. Adjust the operating ring (7) on the level of the yoke bore
by tightening the threaded pin (6) and open the valve by
turning the handle to the left.
h. Insert the slightly greased O-ring (2).
i. Press the complete valve insert into the housing (1) and
fasten it by the flange screws (4).
j. Connect the pneumatic air line.
k. Push the proximity switch into the holder up to a distance
of about 2 mm from the operating ring (7).
The shift point can be adjusted by moving the operating
ring and the proximity switch if necessary.
Fix the operating ring and proximity switch holder with
the clamp screws.
l. Check the function of the valve by several opening and
closing.
11. Service Instructions
9Sampling Valve
DELTA PR2
Operating Manual Rev.3
UK

12. Trouble Shooting
10
Manual design
The item numbers refer to the spare parts drawing RN 01.143.0.
Failure removal see chapter 11.I. and II. Service Instructions.
- Leakage at the
sampling connection : - turn handle (8) into
position "OFF"
- replace valve shaft
tip (1.2)
- Leakage between housing
and yoke flange : - replace O-ring (2)
- Leakage out of the yoke bore : - replace shaft seal (3)
- Valve does not open : - check whether
screw (10) sticks
Pneumatically actuated design
The item numbers refer to the spare parts drawing RN 01.146-2.
Failure removal see chapter 11.III. and II. Service Instructions.
- Leakage at the
sampling connection : - turn handle (14) into
position "OFF"
- replace valve shaft
tip (5.2)
- shut off pneum.
air supply
- Leakage between housing
and yoke flange : - replace O-ring (2)
- Leakage at the
shaft passage : - replace shaft seal (3)
Pneumatic air does not work,
air escapes ...
- ... at the handle : - replace O-ring (10)
- ... at the valve shaft : - replace O-ring (9)
- valve position does not work
or is unprecise : - carry out fine
adjustment.
Sampling Valve
DELTA PR2
Operating Manual Rev.3
UK

Your local contact:
APV
Zechenstraße 49
D-59425 Unna
Phone: +49(0) 23 03/ 108-0 Fax: +49(0) 23 03 / 108-210
For more information about our worldwide locations, approvals, certifications, and local representatives, please visit www.apv.com.
Copyright © 2008 SPX Corporation
The information contained in this document, including any specifications and other product details, are subject to change without notice.
While we have taken care to ensure the information is accurate at the time of going to press, we assume no responsibility for errors or
omissions nor for any damages resulting from the use of the information contained herein.
UK
Translation of original manual
BA PR2 0000002
ID-No.: H170787
rev. 3


Table of contents
Other SPX Control Unit manuals
SPX
SPX APV DELTA MS4 User manual
SPX
SPX APV DELTA SV1B User manual
SPX
SPX DSV User manual

SPX
SPX Waukesha Cherry-Burrell W Series User manual

SPX
SPX 9500 Product guide
SPX
SPX APV CU4 User manual
SPX
SPX APV DELTA DKRT2 User manual

SPX
SPX Waukesha Cherry-Burrell W-Series User manual
SPX
SPX APV DELTA DE3 User manual

SPX
SPX APV DELTA SWmini4 User manual
