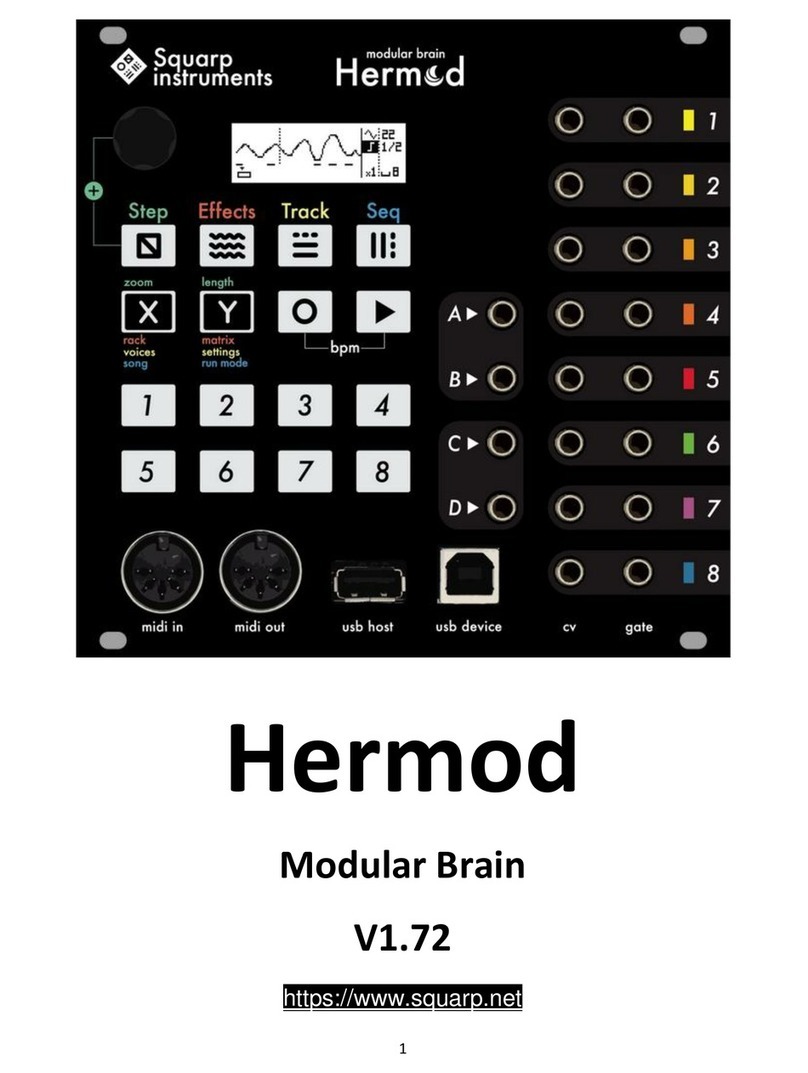
Squarp Instruments Hermod+ User manual

quickstart
your eurorack system.
16 tracks x 16 patterns —
8 effects per track —
grid--free polyphonic step sequencer —
live recorder & modulation editing —
back to back projects for endless performances —
4 CV inputs (assignable) —
8 CV/Gate outputs (with polymorphic layouts) —
extensive MIDI/USB connectivity.
16–track sequencer & interface for

BASICS
Sequencer workflow
Each of the 8 voices of Hermod+ (CV/Gate outputs) is controlled by a track.
A track can be configured to control more than 1 voice, for polyphonic use or
for velocity and aftertouch playback. A track can also be used as a "modulation"
track, to allow recording and playback of CV and CC messages.
A project includes up to 16 tracks. Each of these tracks contains :
•
16 patterns, which are arrangements of notes, gates or modulations
•
an effect rack, with up to 8 effects
•
a modMatrix, to control effect parameters using CV or CC
An unlimited number of Hermod+ projects can be stored on the SD card. They can
be saved and loaded without stopping the playback, for seamless project transitions.
The user interface of Hermod+ is designed around 4 main modes :
Inspect and edit
patterns : add or
edit notes, gates
and modulation.
Set the length of
the current
pattern.
Add effects,
configure their
parameters,
mute/unmute
effects, use the
modMatrix
to set up effect
modulations.
Mute/unmute
tracks, set up
voices layout,
enter global
settings.
Set the currently
playing sequence
on the fly, change
playback style
between
sequences,
program a chain
of sequence,
access the
save/load menu.

Hermod+ architecture
Project
• Tempo (1 BPM to 540 BPM)
• track mutes
• sequences run modes and loop sync
• song (chain of sequences)
• set of 16 tracks :
Global settings
• sync in/out, MIDI in/thru, CV/Gate in, misc, info
16...12111098765432track 1
• voices layout (NOTE, MODULATION, POLYPHONIC VOICES, ...)
• input config (MIDI, USB DEVICE, USB HOST, CV/GATE)
• output config (MIDI, USB DEVICE, USB HOST, CV/GATE)
• player options : quantize, gate retrig, allocator, transpose
• fx rack : modMatrix + up to 8 effects
• set of 16 patterns :
1 2 3 4 5 6 7 8
...765432
pattern 1
• pattern length (1 step ... 16 bars)
• MIDI events :
16
a note = MIDI pitch, velocity and length
recorded pitchbend,
aftertouch and sustain
a modulation
(waveform automation)
step notes
(mono/polyphonic notes)
TR9 ... TR16 = MIDI tracks

Wire up
Connect Hermod+ to your eurorack system power with the supplied ribbon cable.
Most eurorack power supplies have a dedicated +5V rail (in addition to the +12V
and –12V rails). If your power supply delivers +5V, we recommend to place the «
5V switch» in the top position, in order to use the +5V rail for the digital circuitry of
Hermod+. If your power supply does not deliver +5V, you may place the switch in
the lower position. This switch is located on the back of Hermod+ :
Selecting a track
In
track
mode,
scroll to choose the selected track.
Access t
racks 1to 8(the CV/Gate tracks) on the first page.
Access t
racks 9to 16 (the MIDI tracks) on the second page.
For faster track selection, press the corresponding track selection switch .
Play/stop
To start the sequencer, press play . Pressing play again will stop the sequencer
and return to the beginning of the sequence.
eurorack power ribbon cable
use the +12V rail
and use the
onboard +12V to
+5V converter
use the +5V
eurorack rail
(recommended)

Live recording
Press rec while playing to capture a live performance (notes, pitchbend,
aftertouch, sustain, modulation) coming either from an external MIDI instrument or
controller, a computer or a modular system sending CV/Gate. Recording inputs is
possible at any time, in every mode.
TIP
By default, events will be recorded on the currently selected track.
Pressing rec while holding
step
will enable multitrack recording (all your
MIDI/CV routed tracks will be recorded at the same time).
TIP
Holding and pressing rec enables hard recording : previously recorded
notes will be overwritten (= no overdub).
Project tempo
Hold rec and press play to enter the BPM menu. Scroll the encoder to change
the BPM, or press rec repeatedly to tap the tempo.
NOTE Go to the SYNC INPUT settings to synchronize Hermod+ with a MIDI or analog
clock.
CV/Gate voices
The color of the backlit track switches help visualize the voices layouts, and the
CV/Gateoutput values:
= NOTES
= VELOCITY
= AFTERTOUCH
= MODULATION
By default, each track is set to 1 voice
= notes = CV pitch + gate output.
Please refer to the track chapter to
change track layouts (assign voices to
output mono or poly notes, velocities,
aftertouch, modulations and/or
gates).

Reset and Clock outputs
In addition to the 8 pairs of CV/Gate, Hermod+ adds two dedicated gate outputs
for transport :
•
Reset : outputs a trig when Hermod+ starts (RESET ON PLAY).
•
Clock : outputs a BPM--synchronized clock.
TIP
The behavior of these outputs can be configured in the SYNC OUTPUT settings.
Calibration
Calibrating Hermod+ can improve the factory accuracy of the analog inputs/out-
puts. For this operation, a voltmeter is required.
First, power on Hermod+ while pressing to start calibrating the CV outputs. Follow
the steps on screen and use a voltmeter (and a patch cable) to measure and finetune
each of the 8 CV outputs. At the end, press to save the calibration settings on the
SD card.
The CV inputs can now be calibrated, using the previously calibrated CV outputs of
voice 1. Power on Hermod+ while pressing , and follow the steps on screen. At the
end, the calibration is done and saved automatically.
Usb device and host
Both ports are plug-and-play (USB Class Compliant) and act as MIDI inputs/outputs :
USB device
USB host
link a computer (or any MIDI equipment fitted
with an USB host port)
link a MIDI controller or synthesizer (or any MIDI
equipement fitted with an USB device port) -- if
necessary, this port will supply 5V power to the
attached device

STEP MODE
Press
step
to enter step mode. This mode allows the editing of notes, modulations,
gate events or live recordings.
Notes (or modulation events) of the current page are shown both on the screen and
the 16 pads.
Under the piano roll, the bottom bar shows the number of bars in the current pattern,
the currently viewed page, and the track playhead :
Pattern length, zoom and navigation
•
Hold and turn the encoder to set the pattern length, from 16 (1 bar) to 256
steps (16 bars). When increasing the length, new pages will be available to display.
TIP
Hold and press the encoder while scrolling for finer resolution (17 = 1 bar +
1/16 note, 18 = 1 bar + 2/16, …)
•
Hold and turn the encoder to set the zoom value. Zoom in for precise editing,
zoom out to get a global view. This will affect the number of pages.
TIP
Itʼs possible to set a zoom of 2/3 to easily create triplets.
•
Briefly press (left) or (right) to select the page to display.
The number of pages depends on the pattern length and the zoom value.
playhead
track length
(64 steps = 4 bars)
zoom
(x1 = no zoom)
page viewed (highlighted)
pages needle
pattern pages (4 pages = 4 bars)
notes
as MIDI
events
C0
C10

Edit a note pattern
On a note track, patterns are polyphonic and grid--free. It is therefore possible to
add chords, superpose notes, record off--grid events, program complex grooves and
compose intricate harmonies.
Each note event has 3 parameters : pitch, length and velocity. Pitch goes from
note C0 to C10 (CV out –5V to 5V). Length is the duration of the note. Velocity is
used when the track outputs MIDI, or when the layout has VELOCITY voices, which
will output note velocities as control voltages.
ADD/DELETE A NOTE
To add or delete a note, simply press the corresponding step (pad 1 to 16).
A note will be added with the parameter values displayed on screen.
To set the pitch parameter before adding a note, rotate the encoder.
To add a note with a new length or velocity : hold the corresponding step, click
the encoder to select the parameter (pitch, length, velocity) and scroll.
EDIT A NOTE
Editing a note works exactly in the same way, just press and hold the step where
the note lies, and edit its parameters. The note will be updated in real time. If several
notes are in the same step, all of them will be edited simultaneously.
TIP
Hold multiple pads (instead of a single step) to select a range to be edited.
TIP
Hold a pad to quickly copy its content. Then, press any other pad to paste it.
this step range is selected (by holding a pad)
note pitch highlighted :
rotate the encoder to set the pitch
click the encoder to switch to
length or velocity editing

ROW EDITING
By default, the 16 pads show all notes in their corresponding step. For example, if a
chord is present on the first step (pad 1), editing this step will edit the entire chord.
It is also possible to only display notes of a given pitch on the 16 pads. Hold
step
and scroll right to enter row editing. An arrow ( ) will appear next to the selected
note.
Notes can be added, edited and removed in the same way as in the regular step
editing. Itʼs a great way to fine--tune a pattern note per note, and program chords or
drums.
To exit row editing, hold
step
and scroll left. Next to the selected note, will
reappear.
TIP
Press
step
to cycle through the notes already used in the pattern.
NOTE LEARN
Step mode greatly benefits from the use of an external MIDI controller. A keyboard
can be used to set the current pitch (and velocity) before adding a note, and even
learn a chord :
note C8 selected :
only these notes will be available
for editing on the 16-pads
a chord of 3 notes is learned,
its first pitch is C7
this chord has been added on
4 steps

Edit a modulation pattern
NOTE
To create a modulation layout (mod track), please refer to the
track
chapter.
In a mod track pattern, two kind of events can be edited : mod and gate .
Press
step
to cycle through the event type to be edited.
CREATE AND EDIT MODULATIONS
•
Scroll to set the mod value .
•
Press the corresponding step to add or delete a mod event.
•H
old a step and scroll to offset the mod value of this step.
CREATE AND EDIT GATES
•
Scroll to set the gate length .
•
Press the corresponding step to add or delete a gate event.
•H
old a step and scroll to edit the gate length of this step.
this step range is selected by holding a pad
mod highlighted :
turning the encoder sets the value
gate is highlighted :
pressing pads adds/removes gates
gates events

Recording notes vs. recording a modulation
Another way to program patterns is to press rec while playing to capture a live
performance. On a mod track, a CV input (or a CC MIDI input) will be used to
create the events. On a note track, a CV/Gate input (or a MIDI channel input) will
be used. These inputs are configured in the TRACK CONFIGURATION menu.
Pattern context menu
Press the encoder in
step
mode to access the pattern context menu, including the
usual copy, paste and delete functions. Itʼs also possible to copy the current page,
and delete only the pitchbend, the aftertouch, the modulation, or the sustain.
TIP
Hold
step
and press to delete all events of the current active pattern.
TIP
Hold and turn the encoder to rotate all the notes or modulations in a pattern. It
will move all the events left/right, in time increments related to the zoom level.
Generator
Hermod+ boasts a powerful pattern randomizer : the Generator. This algorithm
generates random notes (or modulations) in accordance to its parameters, which
can be found under PATTERN EDIT MENU > GENERATOR SETTINGS (quantize grid, note
amount, note range, pitch range, velocity range and length range).
To generate a new pattern, enter PATTERN EDIT MENU > GENERATOR and select
RANDOMIZE. Rather than generating a entire new pattern, randomization can be
applied to individual parameters of existing notes, such as pitch, length or velocity.
TIP
Use a SCALE effect to quantize the randomized notes and get amusical pattern.
TIP
Hold
step
and press to delete and randomize the entire pattern.
a sine wave modulation recorded
from a CV input onto a mod track

EFFECTS MODE
Each track can have up to 8 effects. Notes played live or recorded in a pattern are
processed and sent to the outputs in real–time by the effect engines. All the effects
are non-destructive, and can handle polyphony.
The position of an effect in the chain is very important: an Harmonizer placed after
an Arpeggiator will not sound like an Arpeggiator placed after an Harmonizer.
Please note that it is possible to add multiple effects of the same engine on the same
track (e.g. chaining two arpeggiators).
Every effect parameter can be edited in real-time via CC message and CV inputs,
thanks to the modMatrix. Press in EFFECTS mode to access the modMatrix.
Effects list
ARPEGGIATOR Turns notes and chords into running patterns.
CHANCE Plays or skips an event, based on probability.
DELAY Simulates an analog delay effect, using the velocity data.
ENVELOPE AHDSR envelope, triggered with every new note.
EUCLID Generates rich polymetric rhythmicpatterns.
FILTER Drops a range of events.
LFO Generates high resolution waveforms.
GLIDE/SMOOTH Interpolates note pitch.
HARMONIZER Turns notes into chords.
RANDOMIZER Randomly alters notes velocity/pitch/octave.
RATCHET Repeats incoming notes at a given rate.
SCALE Quantizes incoming notes to a given scale.
SWING Swings notes to create groovy rhythms and go "off the grid".
the effect chain : in this track,
incoming notes will be harmonized,
then arpeggiated, a chance will be
applied, then notes will be quantized
to a scale and finaly, swung.
3 effect slots are empty.

Add an effect
To add an effect, select an empty effect slot by scrolling with the encoder, then
press the encoder to enter the effect selection menu :
Select the desired effect and press the encoder to confirm.
Edit an effect
Select an effect and press the encoder to enter the effectʼs parameter menu :
TIP
Select an effect and hold the encoder to enter the effectʼs contextual menu, which
includes actions such as EDIT, COPY, DELETE, ...
TIP
To paste an effect in an empty slot , hold the slot and select PASTE.
Mute an effect
You can experiment with different effects in the same rack by
muting/unmuting them the same way you would with tracks.
Just press the corresponding pad (FX1 to TR8).

TRACK MODE
The 16 tracks of Hermod+ can be configured in
track
mode.
•
The first 8 tracks (TR1…TR8) are the CV/Gate tracks (which can also output MIDI).
Press one of the 8 track selection switch to select the corresponding track.
•
The 8 remaining tracks (TR9…TR16) can only output MIDI.
Scroll past track 8 to display the MIDI page and select a MIDI track (once this page
is selected, the track selection switches can also be used).
Mute/unmute tracks
Press the corresponding pad to mute/unmute a track.
Track layouts of CV/Gate tracks
The first 8 tracks can be configured to perfectly fit your eurorack system. CV/Gate
tracks are "polymorphic", which means they can use one or more CV/Gate voices to
output monophonic or polyphonic CV/Gate notes, velocity, aftertouch, etc...
To set a track layout :
•
Select the track to configure by turning the encoder.
•
Press to start the configurator.
•
Select the number of voices the selected track will control.
•
Select the final pre-defined layout for these voices.
There are always 8 voices (the 8 CV/Gate outputs of Hermod+), but the number of
tracks can be variable. Of course, different layouts can be mixed and matched.
track 4 is muted
tracks 5, 6, 7, 8 are empty
tracks 1, 2, 3, 4 contain notes

Some examples of track layouts :
1 VOICE ►MONO (the default layout)
1 track = 1 voice. Plays note events on a single voice, for controlling "mono"
CV/Gate eurorack modules (most of them are).
1 VOICE ►MODULATION (mod track)
1 track = 1 voice. Plays both a CV modulation automation and Gate events. Its
purpose is to control eurorack CV modulation inputs (e.g. a filter cutoff frequency).
3 VOICE ►MONO + AFTERTOUCH + VELOCITY
1 track = 3 voices. The first CV/Gate voice outputs the note events. The second and
the third voices output aftertouch and velocity respectively.
4 VOICE ►POLY
1 track = 4 voices. Plays note events in a polyphonic way, using voice–stealing.
TIP
When a track uses a voice for modulation, velocity or aftertouch, itʼs possible to
program the gate output of this voice to control drum sequences, or use it as an
additional clock by placing notes at a given time interval.
Track context menu
Enter the track context menu by pressing the encoder. Available actions are : copy,
paste, and clear of the currently selected track.
TR5 has a 3–voices layout : NOTE, AFTERTOUCH and VELOCITY
(contains note+pitchbend+aftertouch events)
TR2 is set to MODULATION layout (and contains gate+mod events)
TR3 has a 2–voices layout : POLY
(contains notes, will play them
in polyphony)
TR8 has a 1–voice layout : NOTE
(this track is empty)
TR1 has a 1–voice layout : NOTE (and contains only note events)

Track configuration
To enter the configuration menu (TR1…TR16), hold the corresponding track switch .
Track settings are listed below :
Player options
QUANTIZE :OFF, 1/32, 1/24, 1/16
Enables the track timing quantization, and select the grid.
GATE RETRIG : OFF, ON
When enabled, the track will trigger the gate output each time a new note is
overlapping an other note, in order to break the glide/legato.
ALLOCATOR : POLY, CYCLIC, FIRST, RANDOM
Defines how the voice--stealing works when the track layout is set to polyphonic.
APPLY SUSTAIN : OFF, ON
When enabled, sustain pedal messages (MIDI CC64) will directly affect the note
events being sent out.When the sustain pedal CC is high (pedal is pressed), all
note-off events will be held.
TRANSPOSE : OFF, ON
When enabled, the current track can be transposed by track 16 (TRSP).
Inputs
INPUT PORT : OFF, MIDI, USB DEVICE, USB HOST
INPUT CHANNEL : CH01, …, CH16
Sets the track input port and channel (the track will be controlled by events coming
from the selected port and channel).
INPUT MOD :CC0, …, CC119 (default = CC1 = modulation wheel)
The track can listen to any incoming MIDI CC to record the modulation waveform.
(TR1…TR8 ONLY)
(TR1…TR8 ONLY)

INPUT CV/GATE :OFF, CV/GATE AB, CV/GATE CD, MOD A, B, C, D
Sets the track analog input to be listened, in order to play and record notes or
modulations.
INPUT GENERATOR : OFF, GATE A, GATE B, GATE C, GATE D
Any of the 4 analog inputs can be used to trigger the random generator.
Outputs
OUTPUT PORT : OFF, MIDI, USB DEVICE, USB HOST, ALL
OUTPUT CHANNEL : CH01, …, CH16
Sets the track output port and channel.
DEST MOD : CC0, …, CC119
DEST PITCH: pitchbend, CC0, …, CC119
DEST AFTERTOUCH : aftertouch, CC0, …, CC119
The modulation automation, as well as the recorded pitch and aftertouch, are sent to
this defined MIDI message.
OUTPUT CV RANGE : –5V +5V, –1V +1V
Allow Hermod+ to follow the video synthesis CV standard (–1V 1V).
OUTPUT CV FINETUNE : –63, …, +63
Finetune the output voltage of the voice.
OUTPUT CV BEND RANGE : 1, …, 24
Sets how the recorded pitchbend affects the note pitch.
OUTPUT CV MOD MIN : –5V, …, +5V
OUTPUT CV MOD MAX : –5V, …, +5V
Sets the range of the modulation output on this voice.
(TR1…TR8 ONLY)
(TR1…TR8 ONLY)
(TR1…TR8 ONLY)
(TR1…TR8 ONLY)
(TR1…TR8 ONLY)

SEQUENCE MODE
In Hermod+, sequences (SE1, SE2, …, SE16) are used to arrange the patterns of each
track. For example, when selecting sequence SE3, every track will switch to
pattern 3in sync.
Launching a sequence
To select a new sequence, simply press the corresponding pad (1 to 16).
The sequence will be launched as defined by the LOOP value and the RUN mode.
Hold and turn the encoder to select the RUN mode :
•
Sync = synchronized sequence change, using the LOOP parameter.
•
Beat = sequence change will happen on next beat.
•
Free = all patterns will keep their previous playhead position.
•
Restart = all pattern positions will be restarted at their beginning.
Hold and turn the encoder to select the LOOP value (the synchronization of
sequence change). Loop can be set from 1 bar to 16 bars, or can be auto–set to
shortest pattern length, longest pattern length, or the length at which all tracks
resynchronize (least common multiple of all pattern lengths).
TIP
Clicking the encoder while scrolling allows for 1/16TH LOOP precision.
project name
playing sequence (SE1)
LOOP value and RUN mode
next sequence to be played (SE2)
tracks overview : progress bars for each patterns, playing in concurrency (as each pattern
has its own length, the progression % may be different, leading to polymetric effects)

Chain sequences
Sequences can be chained together to form a "song".
To set a song, hold and press one of the 16 pads to add sequences to the song.
To delete a song, press briefly.
After pressing play, the entire song will play in a loop. Each sequence will be
playing according to the time set by to the LOOP parameter.
Sequence context menu
Press the encoder to access the sequence context menu. Available actions are :
copy, paste and clear the selected sequence, as well as access the project menu.
Project save/load
Hermod+ can load a project without stopping the playback,
for endless performances and seamless transitions.
While in
seq
mode, press the encoder and select PROJECT SAVE LOAD :
•
SAVE PROJECT : save current project.
•
SAVE PROJECT AS : save with a new name.
•
DELETE PROJECT : browse the project list and select a project to be deleted.
•
NEW PROJECT : create a new, empty project with default settings.
•
LOAD PROJECT : Hermod+ can load a project in the background, while the
current project is playing. The background--loaded project can be launched in sync,
without interrupting the performance.
a song chain of 8 sequences,
SE1 is currently playing. All tracks
are playing patterns 1together
in a loop, for a duration
of LOOP = 1 BAR

SETTINGS
In
track
mode, press to enter the global settings menu.
Select SAVE to store any changes onto the SD card (Anything not saved will be lost.)
Please note that settings are global and are used by all projects.
Sync input
CLOCK SOURCE :INTERNAL, MIDI, DEVICE, HOST, CV A, CV B, CV C, CV D
Hermod+ can use its internal clock or follow an incoming clock.
CV RESET :OFF, CV A, CV B, CV C, CV D
Use an analog gate to reset the playback position.
CV PLAY :OFF, CV A, CV B, CV C, CV D
Use an analog gate to start the playback. A high state will run the sequencer.
CV REC :OFF, CV A, CV B, CV C, CV D
Use an analog gate to enable/disable the recording.
CV CLOCK DIV :1/96, 1/48, 1/32, 1/16, 1/8, 1/4, 1/2, 1/1
When CLOCK SOURCE = CV, sets the speed of the expected incoming clock (defines
the time of a step at which Hermod+ will advance in response to an incoming trig).
Sync output
MIDI/DEVICE/HOST CLOCK :OFF, CLOCK+TRANSPORT, ONLY CLOCK
Transmit clock and start/stop messages to the selected output.
CLOCK ON STOP :OFF, SEND
Hermod+ can always send MIDI clocks, even when player is stopped.
RESET OUT MODE : RESET ON PLAY, RESET ON STOP, RUN, STOP
Configure the behavior of the dedicated reset gate output.
Table of contents
Other Squarp Instruments Recording Equipment manuals
