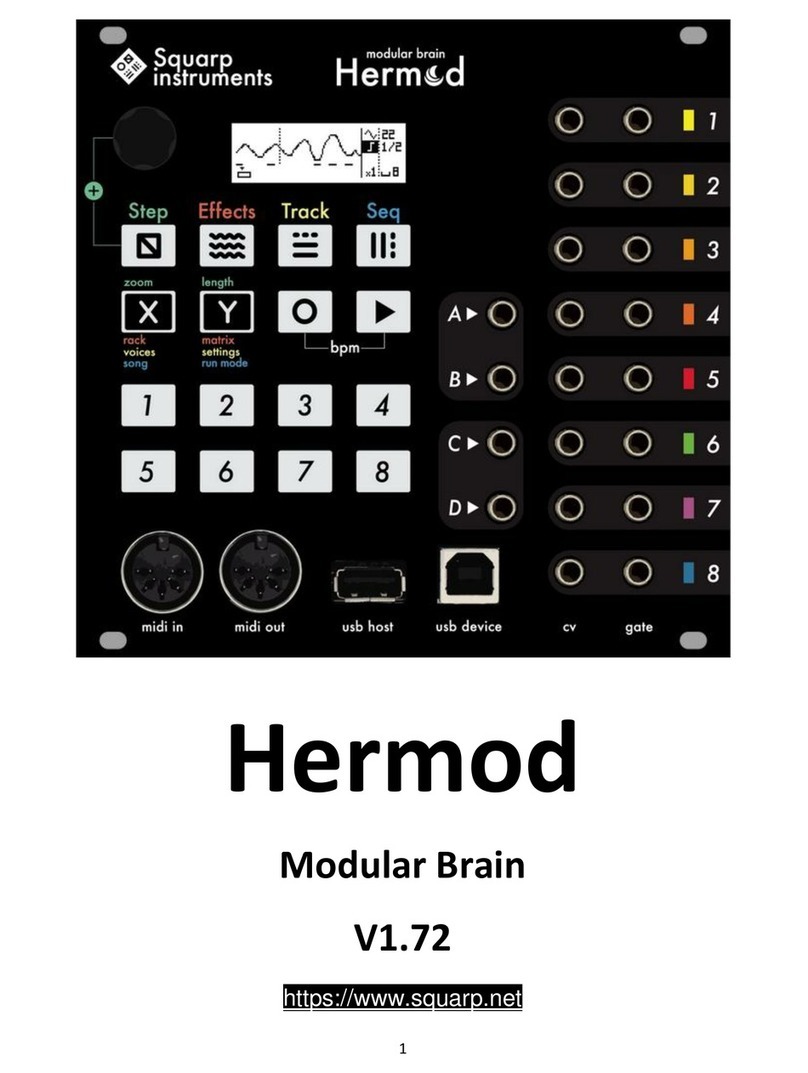
Squarp Instruments Pyramid Sequencer User manual

Pyramid Sequencer
User Guide
Squarp Instruments

Manual based on PyraOS version V 3.0
Transcribed from Squarp Instrument’s original HTML to L
A
T
E
X by Juan Pumarino.
Edited and revised by Ryan Gallagher (ryanpg).
This document was generated on September 12, 2018.

Contents
1 Quickstart 1
Pyramid Workflow . . . . . . . . . . . . . . . . 1
WireUp ................... 1
Sequencer workflow . . . . . . . . . . . . 1
Tracks vs Sequences . . . . . . . . . . . . 1
Quick tour of the four Pyramid modes . . . 2
Screen.................... 3
Basics....................... 4
How to select the current track (TR01A to
TR16D) ............... 4
Capturing a performance . . . . . . . . . . 4
Using the step sequencer . . . . . . . . . 4
Muting and unmuting tracks . . . . . . . . 5
Selecting the current sequence . . . . . . 5
Creating and editing sequences . . . . . . 5
Performing sequences . . . . . . . . . . . 5
Tempo.................... 6
Undo..................... 6
Saving and loading a project . . . . . . . . 6
Effect manager . . . . . . . . . . . . . . . 6
Assign a control . . . . . . . . . . . . . . . 7
Display features . . . . . . . . . . . . . . . 8
Quick track settings . . . . . . . . . . . . . 8
Play / Pause / Stop . . . . . . . . . . . . . 8
Metronome ................. 8
Settings menu . . . . . . . . . . . . . . . . 8
Inputs/Outputs . . . . . . . . . . . . . . . . . . 9
MIDI connectivity . . . . . . . . . . . . . . 9
USB connectivity . . . . . . . . . . . . . . 9
CV/Gate connectivity . . . . . . . . . . . . 10
DIN Sync connectivity . . . . . . . . . . . 10
Pedal foot-switch . . . . . . . . . . . . . . 10
Connectivity examples . . . . . . . . . . . . . . 11
Pyramid on stage . . . . . . . . . . . . . . 11
Pyramid sequencing virtual instruments . 11
Pyramid on the studio table . . . . . . . . 11
2 The Live mode 13
Screen....................... 13
Pads........................ 13
Play with the keypad . . . . . . . . . . . . . . . 13
Record your performance . . . . . . . . . . . . 13
Hardrecord................. 13
Countdown ................. 13
Livelooper ................. 14
Change smartpad type . . . . . . . . . . . . . . 14
Chord smartpads . . . . . . . . . . . . . . . . . 14
Scale smartpads . . . . . . . . . . . . . . . . . 14
Repeat smartpads . . . . . . . . . . . . . . . . 15
Custom smartpads . . . . . . . . . . . . . . . . 15
Hold........................ 16
Relatch ...................... 16
Copy/Paste/Delete . . . . . . . . . . . . . . . . 16
3 The Step Mode 17
Screen....................... 17
Pads........................ 17
Change the Stepmode . . . . . . . . . . . . . . 17
Note Stepmode . . . . . . . . . . . . . . . . . . 17
Addnotes.................. 17
Poly / Mono editing . . . . . . . . . . . . . 18
Note parameters: velocity, width, offset . . 18
Quick step edits: velocity, width, offset,
transpose, move horizontally . . . 18
Note learn with a keyboard . . . . . . . . 19
Muteastep................. 19
Pianoroll .................. 19
Chord Stepmode . . . . . . . . . . . . . . . . . 20
Addchords ................. 20
Quick step edits: velocity, width, offset,
transpose, move horizontally . . . 20
Pianoroll .................. 21
Euclid Stepmode . . . . . . . . . . . . . . . . . 21
Note learn with a keyboard . . . . . . . . 22
CC messages Stepmode . . . . . . . . . . . . 22
Create step automation . . . . . . . . . . 22
Draw automation . . . . . . . . . . . . . . 23
Step-lock automation . . . . . . . . . . . . 23
Effects Stepmode . . . . . . . . . . . . . . . . . 23
Create step automation . . . . . . . . . . 23
Draw an automation . . . . . . . . . . . . 24
i

Step-lock automation . . . . . . . . . . . . 24
Track player: pages, zoom and length . . . . . 24
Rotate....................... 25
Duplicate ..................... 25
Copy/Paste .................... 25
Delete....................... 25
Encoder step edit . . . . . . . . . . . . . . . . . 25
Filter........................ 26
Player tracking . . . . . . . . . . . . . . . . . . 26
4 The Track Mode 27
Screen....................... 27
Pads........................ 27
Mute/unmute tracks on the fly . . . . . . . . . . 27
Mute/unmute in sync . . . . . . . . . . . . 28
Mute/unmute tracks to create sequences . . . . 28
Save mute states OFF . . . . . . . . . . . 28
Track options (2ND+TRACK) . . . . . . . . . . 28
Trackname................. 28
Call instruments . . . . . . . . . . . . . . . 29
Consolidate . . . . . . . . . . . . . . . . . 29
Track run mode . . . . . . . . . . . . . . . 29
Track transpose . . . . . . . . . . . . . . . 29
Track patterns . . . . . . . . . . . . . . . . 29
Track PC + bank . . . . . . . . . . . . . . 30
Soloatrack.................... 30
MIDIChannel................... 30
Zoom ....................... 30
Length....................... 31
Copy/Paste/Delete a track . . . . . . . . . . . . 31
How to use PATTERNS . . . . . . . . . . . . . 31
Trackmode PATTERNS . . . . . . . . . . . . . 32
Time signature and polyrhythm . . . . . . . . . 32
Polyrhythms signature (x:4) (default) . . . 33
Polymeters signature (x/4) . . . . . . . . . 33
Track length fraction and polymetry . . . . . . . 34
Irrational rhythms (advanced users) . . . . . . . 34
DISP track view . . . . . . . . . . . . . . . . . . 34
Microstep track . . . . . . . . . . . . . . . . . . 35
5 The Seq Mode 37
Screen....................... 37
Pads........................ 37
How to create and edit sequences . . . . . . . 37
“PERFORM” project . . . . . . . . . . . . . . . 38
PERFORM delay selection . . . . . . . . 38
“PLAY” project . . . . . . . . . . . . . . . . . . 38
“LOOP” project . . . . . . . . . . . . . . . . . . 39
Note about track lengths concurrence & se-
quences................... 39
Track run modes: FREE, RELATCH & TRIG . . 39
RELATCH run mode . . . . . . . . . . . . 40
TRIG run mode . . . . . . . . . . . . . . . 40
FREE, RELATCH & TRIG mixed . . . . . 40
Copy/Paste/Delete a sequence . . . . . . . . . 40
DISPSEQview.................. 40
6 Effect Manager 41
Effect manager principles . . . . . . . . . . . . 41
How to add effects to a track . . . . . . . . . . . 41
Othertools .................... 42
Effectlist...................... 43
Quantizer / humanizer . . . . . . . . . . . 43
Arpeggiator . . . . . . . . . . . . . . . . . 43
Harmonizer ................. 44
Swing .................... 44
Randomizer................. 44
Delay .................... 45
Equalizer .................. 45
Scale .................... 46
NotetoCC ................. 46
BPM..................... 46
Chance ................... 47
LFO ..................... 47
7 Assign 49
Assign principles . . . . . . . . . . . . . . . . . 49
Assign a CC message . . . . . . . . . . . . . . 49
Assign an FX parameter . . . . . . . . . . . . . 50
Assign a master FX . . . . . . . . . . . . . . . 51
Automation recording and overdub . . . . . . . 51
Assign touchpad to smartpads . . . . . . . . . 52
Assign external knobs (midi in ”learn” CC mes-
sages).................... 53
Note about analog input voltage assignment . . 53
ii | Contents

Analog sync (CV inputs or pedal) . . . . . . . . 53
8 Save/Load 55
Save/load principles . . . . . . . . . . . . . . . 55
Save........................ 55
SaveAs...................... 55
Load........................ 55
New ........................ 55
Projectfiles .................... 55
Import and export files . . . . . . . . . . . . . . 56
9 Settings 57
Settings menu . . . . . . . . . . . . . . . . . . 57
MIDIin....................... 57
MIDIout...................... 58
CV/pedal ..................... 58
Misc........................ 59
Info ........................ 60
Save........................ 60
CV calibration tool . . . . . . . . . . . . . . . . 60
10 Shortcuts 61
Inanymode.................... 61
Livemode..................... 61
Stepmode .................... 61
Trackmode.................... 62
FX manager mode . . . . . . . . . . . . . . . . 62
Assignmode ................... 62
Save/load mode . . . . . . . . . . . . . . . . . 62
11 Definition Files 63
Definition files principles . . . . . . . . . . . . . 63
How to create a CC definition file . . . . . . . . 63
How to create a NOTE definition file . . . . . . 64
Filters ....................... 64
Call an instrument . . . . . . . . . . . . . . . . 65
Download users definition files . . . . . . . . . . 65
Contents | iii


1 Quickstart
Pyramid Workflow
WIRE UP
Connect the Pyramid to the supplied mini USB power
supply, or connect the Pyramid to a computer with a stan-
dard mini USB cable, and press the on/off button.
SEQUENCER WORKFLOW
Pyramid provides 64 tracks. A track is a loop that contains
polyphonic or monophonic notes, automation and effects;
plays repeatedly, and controls instruments connected to
MIDI A, MIDI B, USB MIDI, or CV outputs.
The Pyramid workflow is designed around muting and
unmuting tracks to build sequences (groups of tracks).
Moreover, you can create up to 32 patterns (P1, P2, ...)
per tracks, to add variations to your sequences.
Pyramid allows you to easily produce your tracks from
scratch thanks to powerful creative tools, such as:
• smart chord harmonizer,
• scale generator,
• beat repeat,
• hold and relatch,
• groundbreaking step sequencer (unlimited number of
notes and CC messages per step, per-step FX param-
eter locks),
• euclidean sequencer,
• polyrhythmy & polymetry,
• real-time effects.
Pyramid is an instant source of inspiration to start and fin-
ish your song. You will never run out of ideas!
TRACKS VS SEQUENCES
A Pyramid project can include up to 64 tracks. Tracks are
organized into 4 banks: A, B, C, D. Each bank contains
a group of 16 tracks. Thus all 64 tracks and four banks
are organized from TR01A to TR16A (track 1 through 16,
bank A) up to TR01D to TR16D (track 1 through 16, bank
D).
Each track can be configured according to your needs.
A track can be:
• a standard pattern (e.g. a 4 bar track)
• a linear clip (e.g. a 384 bar track)
• an euclidean pattern
• a polymetric pattern (e.g. a 1+1/4 bar track)
• a polyrhythmic pattern (e.g. a 8 bar track with 7/8 time
signature)
• a micro track with a high zoom resolution (e.g. a 1/4
bar track with 1600% zoom)
A Pyramid project can be composed of up to 32 se-
quences. A sequence defines the mute states of each
of the 64 available tracks. In each sequence, you choose
which track is unmmuted (active) or muted (inactive) in
order to build your song or arrange your set:
You can choose to play 64 tracks at the same time in
a single sequence, or mute/unmute any of the 64 tracks
across 16 sequences: it’s a great and versatile way to
create songs very quickly.
1

In the example below SE01, (sequence 01) has only
TR02 (track 02) unmuted. In SE02 (sequence 02),
TR02A and TR11A (tracks 02 and 11) are unmuted. In
SE03 (sequence 03), tracks 01, 06, and 14 are unmuted:
Individual tracks are shared between sequences.
Changes to TR02A will apply to all sequences where
TR02A is active (SE01 and SE02 in the example above).
When the sequence changes, if a previously active track
is still active in the next sequence, it will not restart from
the beginning like a classic sequencer. It will continue
to play & loop and therefore keep its shift with the other
tracks, to keep the polymetry running (see ”Note about
track lengths concurrence & sequences” section). If you
want to restart your track from the beggining like a classic
sequencer, configure your track in ”relatch mode”.
Moreover, if you want to add some MIDI effects on
TR02A, you can assign a control (e.g. an encoder) for
this effect, and affect the sound of the TR02A in real-time,
no matter which sequence you are in.
QUICK TOUR OF THE FOUR PYRAMID
MODES
Pyramid is a dynamic sequencer that allows you to inter-
act intuitively with tracks and sequences. All modes are
always accessible. Launch sequences in SEQ mode;
mute/unmute tracks in TRACK mode; play with effects,
and even add notes and CC messages in LIVE and
STEP modes. You can assign one of the 5 multi-
functional rotary encoders to control MIDI effect parame-
ters in real-time. Encoder assignments are independent
of the sequence you are viewing or the mode you are
working in.
Press LIVE : record notes and CC automation to the cur-
rent track using the built-in keypads, smartpads (8 pads
that can be configured as chord generator, note repeat
or scaled piano), an attached MIDI controller, a Control
Voltage instrument, or your computer.
Press STEP : fill steps of the currently selected track with
notes and chords using the 16 pads of the NOTE
&CHORD stepmodes. Configure velocity, width, and
offset of a single note or a group of notes. Edit your
live recording with surgical precision. Switch to EUCLID
stepmode to auto-fill steps. Switch to CC MESSAGES
stepmode to create or edit MIDI CC automation. Switch
to EFFECTS stepmode to create or edit effect parame-
ter locks. Each step (and even microstep) can contain an
unlimited number of notes, CC and FX automation!
Press TRACK : mute/unmute the tracks using the 16
pads. Change the current BANK (A/B/C/D) with <and
>. Set up the length, time signature, zoom, and MIDI
channel of the current track. Build the current sequence.
Press SEQ : launch your sequences (stored mute states
of the 64 tracks) on the fly, or program a chain of se-
quences to create a complete structured song.
2 | Quickstart

SCREEN
In each of the four modes, the following data is displayed:
Pyramid mode:LIVE STEP TRACK SEQ
Track name: name of the current track.
Track zoom: zoom of the current track (/4, /2, x1, x2, x4,
x8, x16).
Track time signature: time signature of the current track
(from 1/1 to 24/16).
MIDI in flashes if a MIDI message is received; MIDI out
A,MIDI out B and USB out flash when a MIDI message
is sent.
Current track: track number and bank (A, B, C, D) in Live
and Step Modes.
Track out sequence number and the tracks you are editing
in TRACK mode. Can also display the next sequence to
be played in the chain.
Current sequence: shows the playing sequence (and so
the group of tracks you are editing in TRACK mode).
Can also display the next sequence to be played in the
chain.
Mode zone: highlights the main parameters of each
mode, which generally can be edited via the clickable
data encoder .
Player zone: track player (a representation of the current
track, the level of zoom, the track length), the player posi-
tion, and the page you are viewing in Live, Step and Track
modes:
The example above shows a 12 and 1/4 measure long track
(12 measures + 1 beat). The four outlined squares represent
the first page of the track. The arrow icon indicates the player
is currently at the twelfth measure.
In SEQ mode the Player zone the set sequence chain:
In the example above, 6 sequences are chained and SE06
(highlighted) will play 2 measures.
Quickstart | 3

Basics
HOW TO SELECT THE CURRENT
TRACK (TR01A TO TR16D)
As described in ”TRACKS VS SEQUENCES” a Pyramid
project can include up to 64 tracks:
• 16 tracks in the bank A
• 16 tracks in the bank B
• 16 tracks in the bank C
• 16 tracks in the bank D
In any mode hold TRACK while pressing one of the 16
pads to select the track of the current BANK you
want to work with (for example TR03A).
To change the current track BANK (A/B/C/D), hold
TRACK and press <or >.
The current track number and its output channel are dis-
played on the screen:
Change the MIDI output channel of the selected track by
pressing TRACK +MIDI channel . Multiple tracks can
transmit on the same MIDI channel.
Note: A track is created as soon as you edit a note or a
CC message in LIVE or STEP mode.
CAPTURING A PERFORMANCE
When in LIVE mode, capture a performance on a cur-
rently playing track by pressing press rec . If the track
is paused, press rec to ”arm” the track, then press
to begin a count-off before recording begins.
You can play and record notes with the built-in keyboard
and smartpads . Use the 5 assignable en-
coders and the assignable touchpad to record
CC and FX automation.
You can also use an external MIDI controller to record
notes and automation. It’s even possible to record CV
events thanks to the CV/gate input!
Pyramid allows unlimited polyphony and CC automation
data per track. Quantize is not active by default, so you
will capture the “human feel” of your performance.
Enter STEP mode then press DISP to view the piano
roll and recorded notes:
Of course, it’s possible to add, remove, edit notes in a
flash in STEP mode with the step-by-step sequencer.
USING THE STEP SEQUENCER
Enter STEP mode. The default stepmode is NOTE: that
means that you can add, remove, edit notes on the cur-
rent track:
Enter STEP mode:
• to select the note (e.g. C4), rotate
• to add a note, press one of the 16 steps
• to remove the note, press again this step
• you can also hold one of the 16 steps, and rotate to
set the note.
Pyramid is fully polyphonic, so you can add as many
notes as you want on one step. You can set the velocity ,
the width , and the offset of a note. You can zoom to
set the resolution of steps (by default 1 step = a quarter
note, but you can zoom in so that 1 step = a 1/64 note).
Finally, you can set the length and the time signature
of the track, so you can work on very short or very long
patterns!
4 | Quickstart

Press DISP to view the piano roll of the current track and
the notes entered in LIVE and STEP mode.
Cycle through stepmodes by holding STEP and rotating
. There are 5 stepmodes:
•NOTE (add, delete, edit notes)
•CHORD (add, delete, edit chords)
•EUCLID (generate algorithmic patterns)
•CC MESSAGES (add, delete, edit CC automation)
•EFFECTS (add, delete, edit FX automation)
Multiple stepmodes can be used on a single track (except
EUCLID) to add notes, chords, CC automation, and FX
automation. Of course, you can also create tracks that
only contain note or CC information.
MUTING AND UNMUTING TRACKS
Enter TRACK mode. Press < > to select the track
bank.
Use the 16 pads to mute/unmute any tracks you
have created, from TR01A to TR16D.
You can play up to 64 tracks simultaneously! Muting and
unmuting tracks is a great and intuitive way to perform
your project spontaneously.
Press DISP in TRACK mode to display track progres-
sion:
Note: Changes in mute/unmute states sync differently de-
pending on the PERFORM type selected in SEQ mode.
SELECTING THE CURRENT SEQUENCE
The current sequence number is displayed on the screen:
In any mode, hold SEQ and select a sequence (from
SE01 to SE16) by pressing the corresponding pad
. If you select an empty sequence a new sequence
will be created and the track mute states of the last se-
quence will be applied.
To display sequences from SE17 to SE32, hold SEQ and
press >.
To launch a new sequence after the end of the currently
playing sequence, enter SEQ mode and press one of the
16 pads . The newly selected sequence will begin
when the current one ends. Holding SEQ while pressing
one of the 16 pads will start the newly selected se-
quence without waiting for the end of the currently playing
sequence (instant jump).
CREATING AND EDITING SEQUENCES
In TRACK mode, hold SEQ and select the sequence
you want to create or edit by pressing one of the 16 pads
.
To display sequences 17 through 32, hold SEQ and
press >.
The current sequence number is displayed on the screen:
Then mute/unmute your active tracks to build the se-
quence. A sequence is automatically created as soon
as you change the mute state of a track.
PERFORMING SEQUENCES
Once you have created several sequences, enter SEQ
mode to play them. Make sure PERFORM is selected in
order to perform sequences on the fly. Sequences will
always remain in sync:
Quickstart | 5

You can select how Pyramid transitions between se-
quences: instant, 1 beat, 1 bar, 2 bars, which gives you
deep control over performing with sequences.
Press any sequence number to launch it. Pyramid
waits until the current sequence ends (the end of the bar,
if “1 BAR” selected) before launching the next sequence.
The current sequence will play in a loop until you press
another sequence number.
TEMPO
Tap BPM to set the tempo, or hold BPM and turn the
data knob . To fine tune BPM to decimal values, press
while rotating. Tempo resolution ranges from 10.0 BPM
to 999.9 BPM.
TIP Hold 2ND +BPM and turn the data knob . The
tempo change will be applied only when you release
2ND .
TIP Hold 2ND +BPM and slide the touchpad X axis to
temporarily shift the tempo up or down. Very handy for
manually syncing Pyramid to an external sound source
(for example a turntable).
TIP Hold 2ND and press <or >to double or divide the
BPM in a flash.
By default Pyramid automatically synchronizes BPM to any in-
strument providing a sync signal at the MIDI input.
UNDO
In any mode, press 2ND +undo to cancel the last edit,
for example notes or automation recorded in Live mode.
Another press of undo will redo the last edit.
Undo will work on the following actions:
• REC ON in Live mode,
• PLAY ON,
• stepmode change,
• new track selection,
• step copy,
• track delete.
SAVING AND LOADING A PROJECT
In every mode, press 2ND +save/load to save, save
as, load, or create a new project.
An SD card must be inserted or you will be unable to enter the
save/load menu.
EFFECT MANAGER
Press FX to access the EFFECT MANAGER screen.
Chain up to 5 real time MIDI effects per track:
6 | Quickstart

There are 12 effects to choose from:
• Quantizer (with integrated humanizer)
• Arpeggiator
• Harmonizer
• Swing
• Randomization
• Delay
• Equalizer
• Scale
• Note to CC converter
• BPM
• Chance (probability)
• LFO
Effect parameters can be edited using the 5 encoders
. Experiment to find your favorite settings:
TIP You can still play or add notes in LIVE and STEP
mode, mute/unmute tracks in TRACK mode, and even
launch sequences in SEQ mode with the effect manager
activated.
Change an effect’s position in the chain by holding 2ND
and rotating . Different arrangements may produce very
different results. Experiment!
TIP The effect manager is also a great tool if you are a
keyboardist and you want to revive your old synths. Give
them new features like arps and effects and they’ll sound
like they never did. You can also use Pyramid to control
your modular system using CV in & out to create a truly
unique instrument.
The effect engine also works when the player is stopped, as
Pyramid clock always runs.
ASSIGN A CONTROL
Pyramid provides 5 clickable encoders and a touchpad.
You can assign values by holding ASSIGN and turning
an encoder or sliding the touchpad.
For each controller you can:
• send a CC MIDI message to the current track’s MIDI
channel (for example pitch or a CC message)
• link to a track’s effect parameter (for example the
quantization grid, the swing % or the arpeggiator rate
of the track)
TIP Press an encoder to display its assignment and its
value (for example TR01A Swing Grid = 1/16).
Once a controller has been assigned use it to make real-
time changes in any mode.
Press rec in LIVE mode to record automation on the
current track:
• If the encoder is assigned to a CC message, automa-
tion will be recorded to the track only if the MIDI out and
the MIDI channel of the CC is the same as the current
track out settings (for example MIDI A channel 04).
• If the encoder is assigned to an effect parameter, au-
tomation will be recorded to the track only if this effect
is active on the current track.
Quickstart | 7

DISPLAY FEATURES
You can access extra information in some modes by
pressing DISP . For example, in STEP mode, pressing
DISP will show the piano roll editor:
The above is an example of a track programmed with notes of
different lengths. You are viewing the page 1 of 1. The current
note is C4, the current velocity is 127, the current note length
is 2 steps and the current note offset is 0%. If you add a step
by pressing a pad you will add another note with these
parameters.
QUICK TRACK SETTINGS
This is one of Pyramid’s most useful features, we strongly
advise you try it!
To change the current track settings, in any mode, hold
TRACK to use the shortcuts:
•solo
•MIDI channel
•zoom
•length
•time signature
For example, when in STEP mode, hold TRACK +
zoom and rotate to change the zoom resolution (from
25% to 1600%) in a flash.
PLAY / PAUSE / STOP
Press to play/pause the sequencer. flashes (de-
pending on the BPM and the current track time signature)
if the project is playing, and is softly backlit if the project
is paused.
Press to stop the sequencer. If you are working with
multiple pages (see Step Mode section), pressing once
stops the player at the current track page, while pressing
twice rewinds to the beginning of the track.
Two presses on STOP will send an All Note Off MIDI message
to your instruments, a third press will send an All Sound Off MIDI
message to silence the synth’s note release instantly. In addi-
tion, the third STOP press also sends Program Change mes-
sages of active tracks, if set.
By default MIDI clock is sent to MIDI A out, MIDI B out and USB
out. Play/stop/continue messages are disabled by default. You
can activate them separately in the SETTINGS menu.
METRONOME
Hold 2ND and press LIVE to activate the metronome:
The metronome will send a specified MIDI note on the selected
output channel and will follow the tempo. You can configure it
in SETTINGS > MISC.
SETTINGS MENU
Press 2ND +FX to enter General Settings.
Select a category to configure your project:
•MIDI IN (MIDI input configuration)
•MIDI OUT (MIDI output configuration)
•MISC (other project and core options)
•CV/PEDAL (CV/Gate inputs+outputs analog configura-
tion, pedal control assignment)
•INFO (version, memory, analog inputs and outputs,
midi monitors)
•SAVE (save/restore all general settings, save/restore
all track settings)
8 | Quickstart

Inputs/Outputs
MIDI CONNECTIVITY
MIDI input
Connect one or more MIDI controllers (e.g. keyboard,
drumpad, fader surface) to Pyramid’s MIDI in, and trans-
mit MIDI notes and MIDI CC messages to Pyramid. In
SETTINGS you can choose between OMNI-mode (con-
trol the selected track, regardless of controller output
channel) and MULTI-mode (control TR01A if a con-
troller’s channel = 01, control TR14A with a controller
set to channel 14, etc.). This option allows you to record
multi-channel events as a MIDI looper.
Synchronize Pyramid’s clock (tempo) with an external
machine and even control play, pause, and start re-
motely.
MIDI outputs
Pyramid provides two MIDI outputs (A and B) to control a
large range of electronic instruments such as synthesiz-
ers, drum machines, and MIDI enabled effects. Because
both MIDI outputs provide 16 MIDI channels Pyramid can
control up to 32 instruments.
USB CONNECTIVITY
USB MIDI input
Connect Pyramid to your computer with a standard mini
USB cable and Pyramid will receive MIDI notes, CC mes-
sages, pitch, aftertouch, transport messages and MIDI
clock. USB works exactly like a MIDI DIN input.
USB MIDI output
Pyramid can also control and sequence up to 16 virtual
instruments (VST) on your computer, and sync your DAW
via MIDI clock.
Quickstart | 9

CV/GATE CONNECTIVITY
CV/Gate inputs
There is one CV and one Gate input on the Pyramid.
You can use them to convert CV/Gate notes to MIDI
notes, then add real-time MIDI effects to your CV/Gate
performance, and finally send these notes to MIDI OUT,
CV/Gate OUT, or USB OUT.
To use these inputs, plug a CV pitch output from your
instrument to the Pyramid’s 3.5mm CV input jack, and
plug the gate output of your instrument to the 3.5mm CV
Gate input jack. Your external instrument will control MIDI
notes on the currently selected Pyramid track.
You can also use the CV inputs as a voltage controlled
MIDI CC MESSAGES. For example, a CV voltage of +5V
can be converted to a CC MESSAGE value of 127. Pyra-
mid will then send the CC Message via MIDI OUT, or you
can choose to control an internal MIDI effect (e.g. control
TRACK04 arpeggiator rate with CV input #1, and control
the TRACK11 quantize grid with the CV input #2).
We added these 2 CV/Gate inputs to Pyramid for those
who like to experiment.
CV/Gate outputs
Pyramid has only one CV output and one Gate output be-
cause we wanted to keep the machine compact. “ENV”
is another control voltage output that is very useful for
sequencing filters or any voltage-controlled input on your
modular or CV synth.
DIN SYNC CONNECTIVITY
Pyramid provides an optional DIN sync output (config-
urable to Sync48, Sync24, Sync12, …in menu SET-
TINGS) that lets you synchronise your vintage instru-
ments with tempo clock and a run/stop message.
The DIN sync output is available on MIDI out B, routed as
following:
In SETTINGS, you can also configure the 3.5mm CV ENV
jack as a DIN Sync output to provide analog clock to your
modular.
PEDAL FOOT-SWITCH
You can plug a foot-switch type pedal and assign it to an
internal control (REC, play/pause or play/stop). You can
also use a double pedal (stereo jack) to control 2 actions
in Pyramid.
10 | Quickstart

Connectivity examples
PYRAMID ON STAGE
PYRAMID SEQUENCING VIRTUAL
INSTRUMENTS
PYRAMID ON THE STUDIO TABLE
Quickstart | 11


2 The Live mode
Live Mode is the quickest way to create tracks from
scratch.
In your studio, use Live mode to experiment and record
your music using the built-in keypad, knobs, touchpad
and smartpads (that can be configured as chords harmo-
nizer, advanced beat repeat or a scaled piano).
On stage, play with Pyramid and make your performance
lively and creative. Real-time effects allow you to easily
generate complex music, always in sync.
Screen
Note: the track player zone is described in the Step Mode sec-
tion.
Pads
Pads in Live Mode are divided into two parts: a one-
octave keyboard and 8 smartpads .
Note: Processed & recorded notes are displayed on the 13
black & white keypads with low luminosity.
Play with the keypad
Use the keypads to play your performance live.
Press <or >to shift down and up octaves.
You can also use external MIDI controllers (keyboards,
drumpads, fader surfaces) connected to the Pyramid’s
MIDI input to control the current track (control notes with
velocity + aftertouch + pitch, or control CC messages).
With OMNI-mode disabled, a controller transmitting MIDI on
channel 01 will control track 01A, a controller transmitting MIDI
on channel 12 will control track 12A,…
TIP MIDI effects on the current track will be applied to your
live performance, even when using an external controller.
Record your performance
Press rec (or rec + if the track is paused or
stopped) to record your live performance on the current
track using the keypads, smartpads, or an external MIDI
controller.
Record FX and MIDI automation using the assignable en-
coders , the touchpad , and the analog inputs.
(See the Assign section to learn how to assign a control.)
HARD RECORD
Press 2ND +RECORD to activate ”hard recording.”
Previously recorded notes are overwritten in this mode
of recording.
COUNTDOWN
When the player is stopped , ”arm” the track for record-
ing by pressing rec . When you press , Pyramid sends
a MIDI metronome countdown before recording starts -
and remains until the end of the track loop.
Define the countdown duration in SETTINGS > MISC >
REC COUNTDOWN.
13

LIVE LOOPER
Pyramid provides you a new way to capture your per-
formance in the style of looper pedals! In this mode,
the length of a track grows to fit your initial performance.
Press rec to start recording a loop. Press rec a sec-
ond time to stop recording. Track length is now fixed. Per-
form freely without worrying about pre-determining track
length.
To activate Live looper, enter SETTINGS >MISC >
LIVE LOOPER and select the looper time quantization
(beat = the track length is set to the nearest beat, 1bar
= the track length is set to the nearest bar,…)
Change smartpad type
Hold LIVE and rotate the data knob to change the func-
tion of the 8 smartpads :
•CHORD (default)
•SCALE
•REPEAT
Chord smartpads
The Chord Smartpads represent the 7 degrees of the har-
monized scale. These harmonized scales are the basis
on which almost every song you know is built.
In Pyramid, we use two parameters to build chords:
”tonality” is the first note of your harmonized scale and
”complexity” represents the number of notes in each
chord and chord inversion.
If we choose a CMaj tonality and 4 notes of complexity,
we can obtain the following chords by pressing one (or
more) of the smartpads:
Pyramid’s original harmonizer algorithm allows you to
quickly select a relative tone by rotating . Unleash your
creativity by building complex harmonies.
Holding 2ND + rotating will jump to the next ma-
jor/minor tonality. Add complexity by pressing and rotat-
ing :
Press <or >to shift the chord down or up by octaves.
TIP Increasing complexity will add «alterations» and even-
tually bring you to complex jazzy chords.
TIP Set a low complexity value to perform simple chords
and then add additional tones with the keypads.
Press DISP to display the generated chords for the 8
smartpads and the currently recorded notes:
Scale smartpads
A scale is an ordered set of musical notes based on a root
note. Predifined scales help you easily compose melodic
patterns.
Pyramid includes a varied set of scales: Minor scale, Har-
monic minor, Minor blues, Major blues, Romanian minor,
Tunis scale, Dominant 7th, Spanish scale, Gipsy scale,
Arabian scale, Egyptian scale, Hawaiian scale, Japanese
scale, Minor third, Fourth scale, Fifth scale, Octave scale,
Ionian scale, Dorian scale, Phrygian mode, Lydian mode,
Mixolydian mode, Aeolian mode, Locrian mode.
14 | The Live mode
Table of contents
Other Squarp Instruments Recording Equipment manuals
