Stahls Hotronix POWER PLATEN User manual
Hotronix®
POWER PLATEN™Quick Start Guide
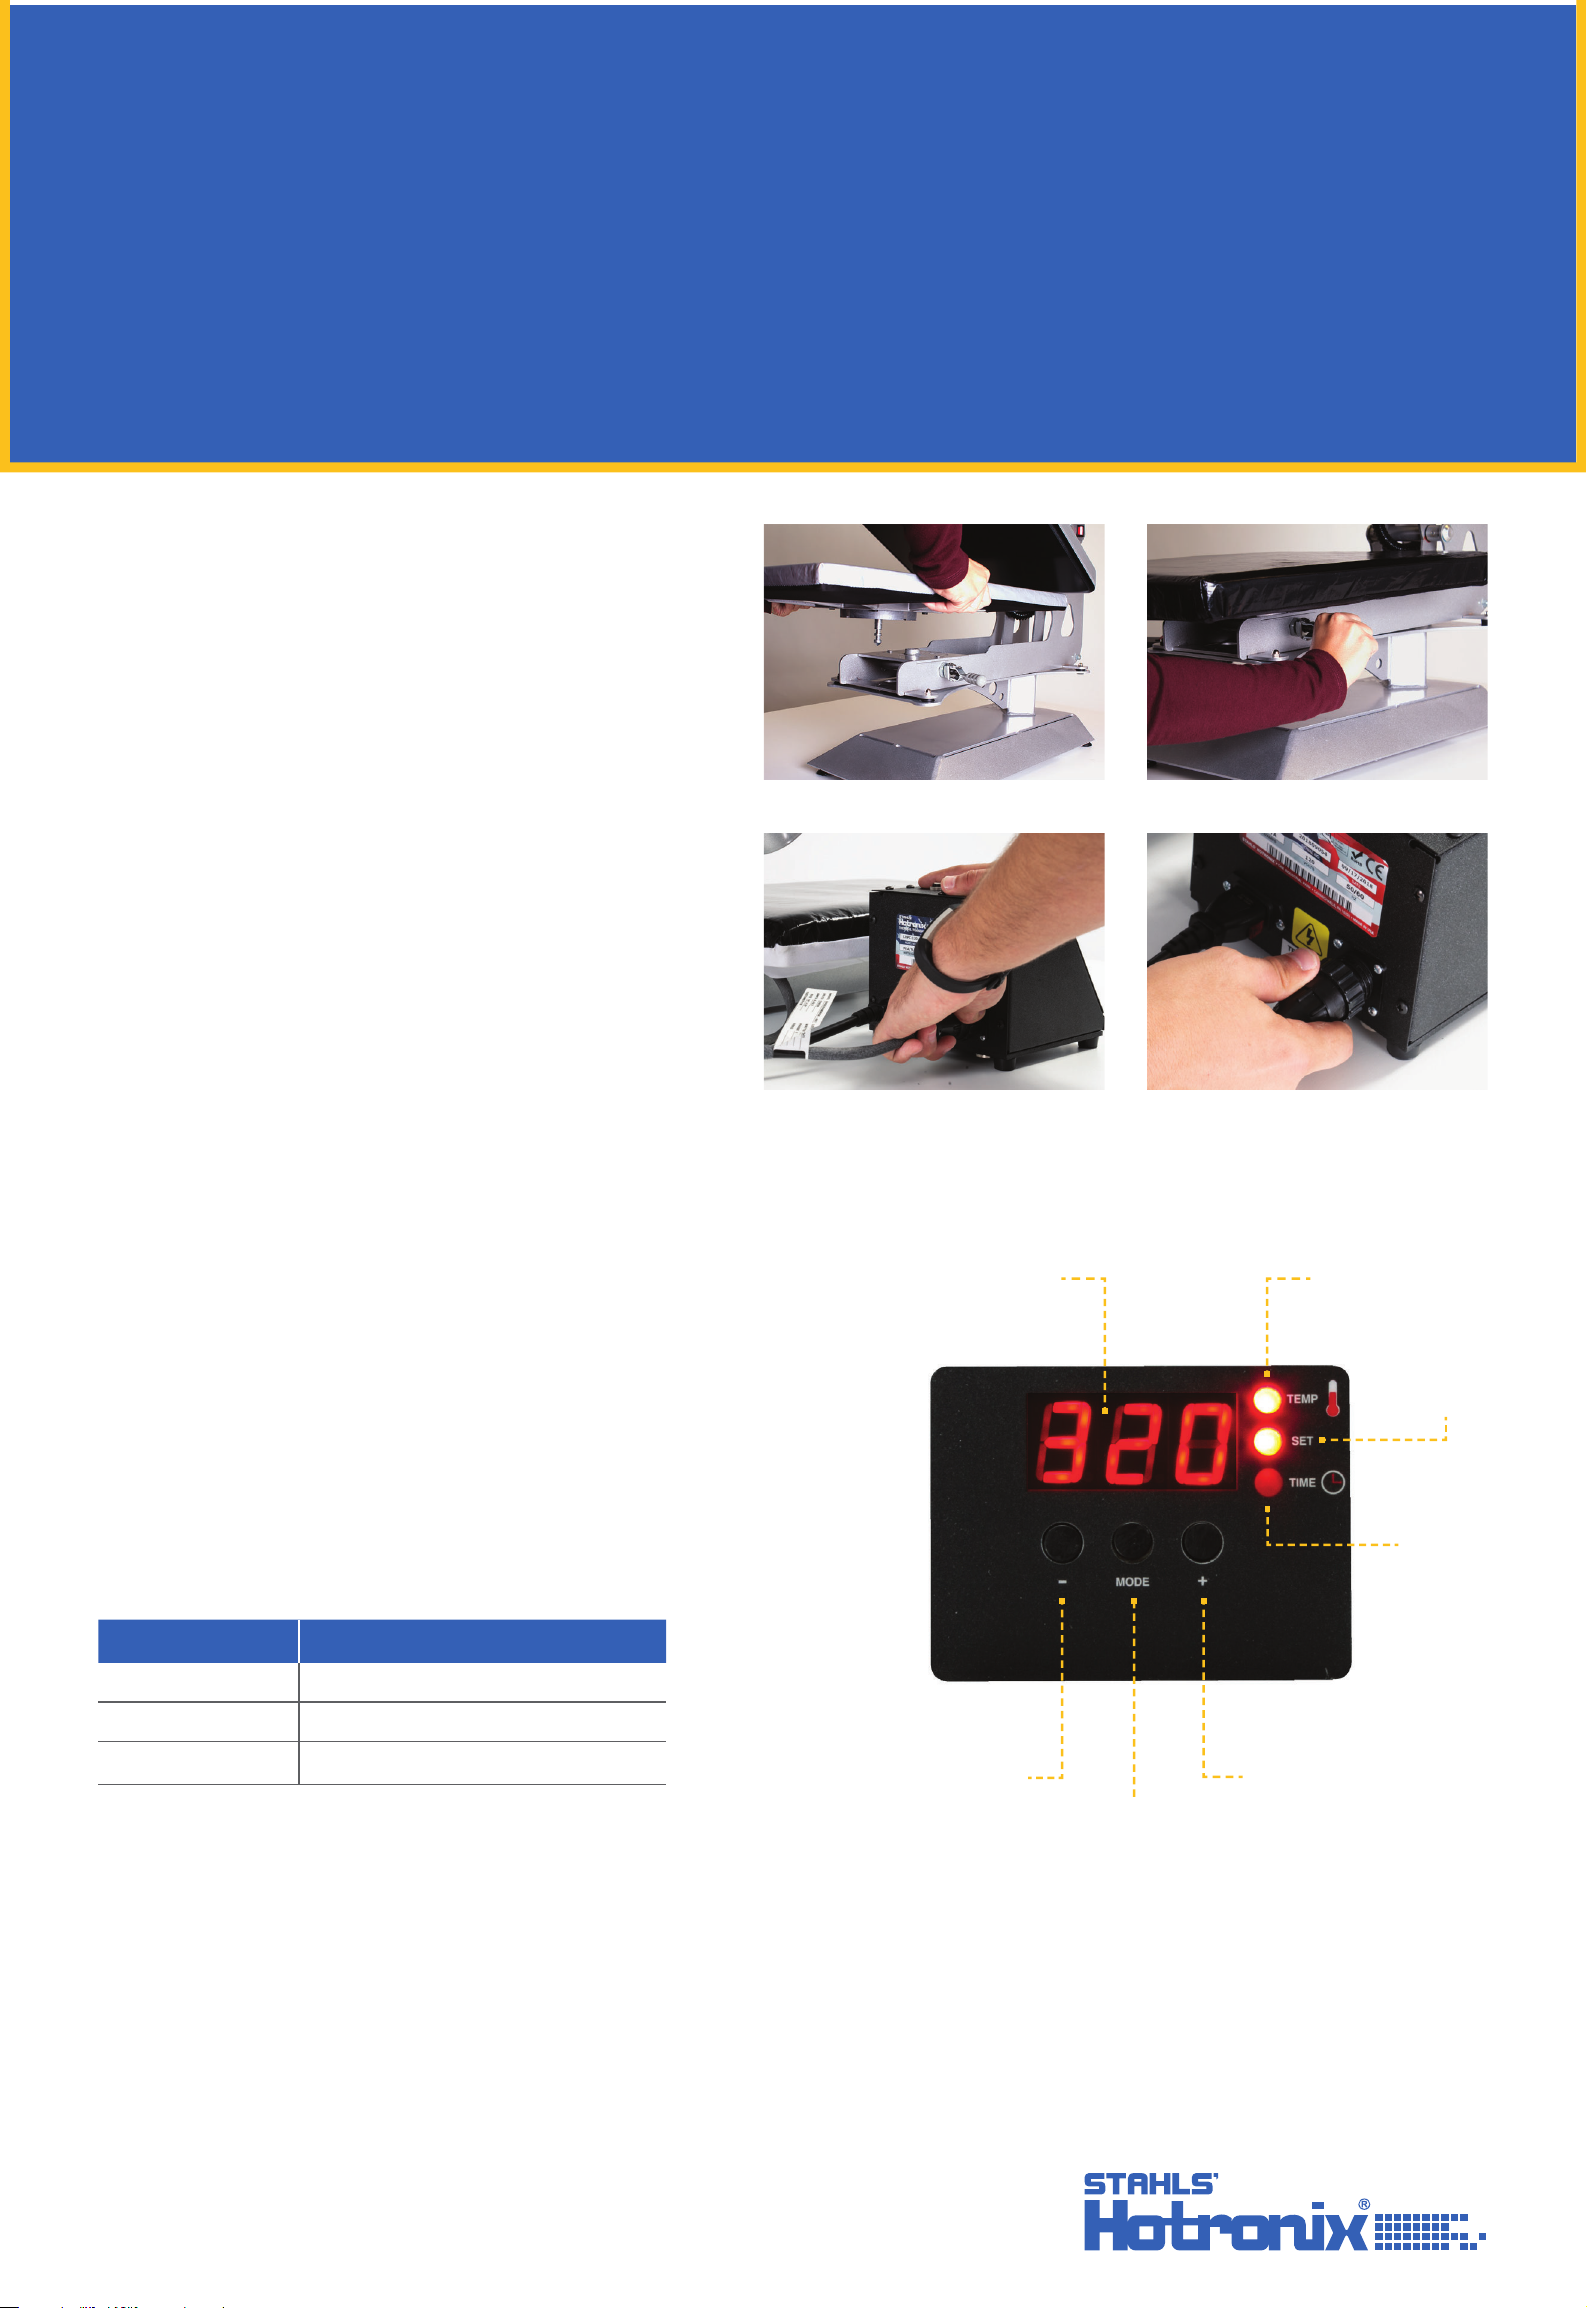
Attaching to Press
Remove existing lower platen (1.1).
Leave Power Platen controller disconnected and
to the side.
Insert Power Platen spindle and secure (1.2).
Attaching Controller to
Power Platen
Once the platen is securely in place, attach the
UNPLUGGED controller by inserting the cable (2.1)
and finger tightening the clamp (2.2).
Now plug the Power Platen controller into
a dedicated circuit.
Note:
Do not lay platen face down on any surface when hot.
Adjusting Temperature
Press the Mode Select button in the center of the Control Panel.
The (SET) and (TEMP) lights located next to the display will illuminate.
Press the (+) or (-) button to raise or lower the temperature setting.
The temperature can be set from 205°F (96°C) to 320°F (160°C).
The LED Display will show changes as you make them.
Pressure will be adjusted on the upper platen.
Note: The temperature indicator will only display temperatures 200°F
(93°C) and up
.
Pressure
For best results, pressure should not exceed the below chart.
Note:Failure to follow these instructions could result in damage to the Power Platen
™
.
FOR YOUR SAFETY
Must be on a dedicated 20-amp circuit.
This product is designed for a specific and intended use;
do not use this product for anything other than its intended use.
CAUTION: HOT Do not remove until unit is completely cooled.
1.1 1.2
2.22.1
WWW.HOTRONIX.COM
|
800.727.8520
Digital
Display
Temperature
Indicator
Set
Indicator
Time
Indicator
Decrease Increase
Mode Select
SIZE DO NOT EXCEED
6x620 psi 2 manual pressure
6x20 and 11x1540 psi 4 manual pressure
16x2050 psi 5 manual pressure
1

1
DO NOT UNDER ANY CIRCUMSTANCE THREAD THE CABLE
BACK THROUGH ANY WORKING PARTS OF YOUR HEAT PRESS.
DO NOT ROTATE PLATEN WHEN CONNECTED.
ALWAYS USE THE POWER PLATENS AS SHOWN WITH THE
POWER PLATEN LEAD TO THE LEFT.
Connect the Power Platen power cord/cable
from the left and fasten to the control board
Power Platen 15 x 15cm
Power Platen 15 x 50cm
Power Platen 28 x 38cm
Power Platen 40 x 50cm
HOW TO CONNECT
WWW.HOTRONIX.COM
|
800.727.8520
2
Power cord for controller.
Connect directly into the main, do not use an extention lead.
Table of contents
Other Stahls Industrial Equipment manuals


