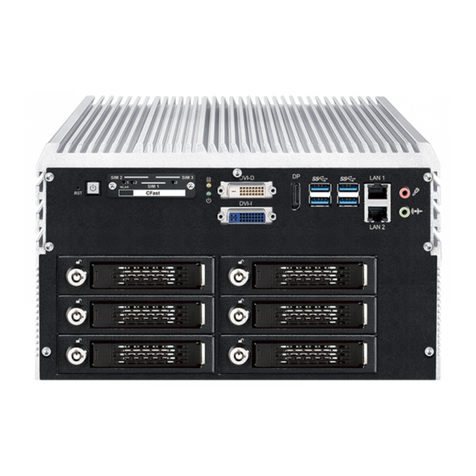
Star Lake THOR200-D15EG User manual

User’s Manual
Revision Date: May.31. 2023
THOR200-D15EG
2U/2 Military GPU Rugged Computer Intel XEON D-1577
Processor, Nvidia A2000 GPU MIL-STD-461 EMI 18-36V
DC-In

THOR200-D15EG User’s Manual
Revision Date: May. 31. 2023
1
Safety Information
Electrical safety
To prevent electrical shock hazard, disconnect the power cable from the electrical outlet before relocating the
system.
When adding or removing devices to or from the system, ensure that the power cables for the devices are
unplugged before the signal cables are connected. If possible, disconnect all power cables from the existing
system before you add a device.
Before connecting or removing signal cables from the motherboard, ensure that all power cables are unplugged.
Seek professional assistance before using an adapter or extension cord. These devices could interrupt the
grounding circuit.
Make sure that your power supply is set to the correct voltage in your area.
If you are not sure about the voltage of the electrical outlet you are using, contact your local power company.
If the power supply is broken, do not try to fix it by yourself. Contact a qualified service technician or your local
distributor.
Operation safety
Before installing the motherboard and adding devices on it, carefully read all the manuals that came with the
package.
Before using the product, make sure all cables are correctly connected and the power cables are not damaged. If
you detect any damage, contact your dealer immediately.
To avoid short circuits, keep paper clips, screws, and staples away from connectors, slots, sockets and circuitry.
Avoid dust, humidity, and temperature extremes. Do not place the product in any area where it may become
wet.
Place the product on a stable surface.
If you encounter any technical problems with the product, contact your local distributor
Statement
All rights reserved. No part of this publication may be reproduced in any form or by any means, without prior
written permission from the publisher.
All trademarks are the properties of the respective owners.
All product specifications are subject to change without prior notice

THOR200-D15EG User’s Manual
Revision Date: May. 31. 2023
2
Revision History
Packing list
Ordering information
If any of the above items is damaged or missing, please contact your local distributor.

THOR200-D15EG User’s Manual
Revision Date: May. 31. 2023
3
Index
1. CHAPTER 1: PRODUCT INTRODUCTION ....................................................................................5
......................................................................................................................................................5
2. CHAPTER 2: JUMPERS AND CONNECTORS LOCATIONS ...........................................................8
......................................................................................................................8
3. CHAPTER 3: AMI BIOS UTILITY.........................................................................................12
...........................................................................................................................................................12
...............................................................................................................................................12
........................................................................................................................................................13
...............................................................................................................................................15
.............................................................................................................................................17
.........................................................................................................................................18
.....................................................................................................................................19
...........................................................................................................20
.............................................................................................................21
...........................................................................................................................22
...................................................................................................................................23
....................................................................................................................................24
...............................................................................................................25
.........................................................................................................................................26
..............................................................................................................27
..........................................................................................................................................29
...................................................................................................................................................30
................................................................................................................................31
.....................................................................................................................................33
......................................................................................................................34
.........................................................................................................35
...............................................................................................................36
........................................................................................................37
.......................................................................................................39
....................................................................................................................40
................................................................................................................................42
.....................................................................................................................................43

THOR200-D15EG User’s Manual
Revision Date: May. 31. 2023
4
..................................................................................................................44
.................................................................................................................................45
...........................................................................................................................................46
...................................................................................................................................................47
..................................................................................................................48
..............................................................................................................................49
.............................................................................................................................50
..........................................................................................................................................51
...................................................................................................................................52
.........................................................................................................................53
........................................................................................................................54
....................................................................................................................................55
.......................................................................................................................56
.......................................................................................................................57
.................................................................................................................................58
.....................................................................................................................................59
..............................................................................................................................60
..........................................................................................61
..............................................................................................................................62
...............................................................................................................................................63
.....................................................................................................................................................64
.......................................................................................................................................................65
.......................................................................................................................................................68

THOR200-D15EG User’s Manual
Revision Date: May. 31. 2023
5
1. CHAPTER 1: PRODUCT INTRODUCTION

THOR200-D15EG User’s Manual
Revision Date: May. 31. 2023
6

THOR200-D15EG User’s Manual
Revision Date: May. 31. 2023
7

THOR200-D15EG User’s Manual
Revision Date: May. 31. 2023
8
2.CHAPTER 2: JUMPERS AND CONNECTORS LOCATIONS
X1
CON1
CON2
CON3
1
1
Vcc
2
2
Date-
3
3
Date+
4
4
GND
5
1
Vcc
6
2
Date-
7
3
Date+
8
4
9
10
11
1
Vcc
12
2
Date-
13
3
Date+
14
4
GND
15
16
17
18
19
20
21

THOR200-D15EG User’s Manual
Revision Date: May. 31. 2023
9
SYSTEM
D38999
Pin define
CON2
CON3
CON4/5
1
WHITE / ORANGE
1
2
ORANG
2
3
WHITE / GREEN
3
4
GREEN
6
5
WHITE / BLUE
5
6
BLUE
4
7
WHITE / BROWN
7
8
BROWN
8
9
WHITE / ORANGE
1
10
ORANG
2
11
WHITE / GREEN
3
12
GREEN
6
13
WHITE / BLUE
5
14
BLUE
4
15
WHITE / BROWN
7
16
BROWN
8
17
18
19
20
21
DCD
1
22
RXD
2
23
TXD
3
24
DTR
4
25
GND
5
26
DSR
6
27
RTS
7
28
CTS
8
29
DCD
1
30
RXD
2
31
TXD
3
32
DTR
4
33
GND
5
34
DSR
6
35
RTS
7
36
CTS
8
37

THOR200-D15EG User’s Manual
Revision Date: May. 31. 2023
10
SYSTEM
D38999
Pin define
CON2
CON3
1
DPA_TN0
1
2
DPA_TP0
2
3
GND
3
4
DPA_AUXP_CLK(p)
23
5
DPA_AUXP_CLK(n)
24
6
GND
22
7
DPA_TN1
9
8
DPA_TP1
10
9
GND
11
10
DPA_PWR
14
11
Return GND
15
12
DPA_DET
16
13
DPA_TN2
17
14
DPA_TP2
18
15
GND
19
16
CLOCK Shield
17
DPA_TP3
6
18
DPA_TN3
7
19
GND
shell
20
21
VS
14
22
SCL
15
23
HS
13
24
SDA
12
25
GND
10/5
26
PWR
9
27
RED
1
28
BLUE
3
29
GREEN
2
30
31
32
33
34
35
36
37

THOR200-D15EG User’s Manual
Revision Date: May. 31. 2023
11
Pin define
D38999
Power DC-IN
Y端
TN1
(+)
A
TN2
(-)
B

THOR200-D15EG User’s Manual
Revision Date: May. 31. 2023
12
3.CHAPTER 3: AMI BIOS UTILITY
To enter the setup screens, perform the following steps:
• Turn on the computer and press the <Del> key immediately.
• After the <Del> key is pressed, the main BIOS setup menu displays. Other setup screens can
be accessed from the main BIOS setup menu, such as the Chipset and Power menus.
The BIOS setup/utility uses a key-based navigation system called hot keys. Most of the BIOS
setup utility hot keys can be used at any time during the setup navigation process.
Some of the hot keys are <F1>, <F10>, <Enter>, <ESC>, and <Arrow> keys.
Left/Right
The Left and Right <Arrow> keys moves the cursor to select a menu.
Up/Down
The Up and Down <Arrow> keys moves the cursor to select a setup
screen or sub-screen.
+− Plus/Minus
The Plus and Minus <Arrow> keys changes the field value of a particular
setup setting.
Tab
The <Tab> key selects the setup fields.
F1
The <F1> key displays the General Help screen.
F10
The <F10> key saves any changes made and exits the BIOS setup utility.
Esc
The <Esc> key discards any changes made and exits the BIOS setup utility.
Enter
The <Enter> key displays a sub-screen or changes a selected or
highlighted option in each menu.

THOR200-D15EG User’s Manual
Revision Date: May. 31. 2023
13
The Main menu is the screen that first displays when BIOS Setup is entered, unless an
error has occurred.
When you first enter the BIOS Setup Utility, you will encounter the Main setup screen. You can
always return to the Main setup screen by selecting the Main tab. There are two Main Setup
options. They are described in this section. The Main BIOS Setup screen is shown below.
The Main BIOS setup screen has two main frames. The left frame displays all the options that
can be configured. Grayed-out options cannot be configured; options in blue can. The right
frame displays the key legend. Above the key legend is an area reserved for a text message.
When an option is selected in the left frame, it is highlighted in white. Often a text message will
accompany it.
System Date
Use this function to change the system date.
Select System Date using the Up and Down <Arrow> keys. Enter the new values through
the keyboard. Press the Left and Right <Arrow> keys to move between fields.
The date setting must be entered in MM/DD/YY format.
System Time
Use this function to change the system time.
Select System Time using the Up and Down <Arrow> keys. Enter the new values through

THOR200-D15EG User’s Manual
Revision Date: May. 31. 2023
14
the keyboard. Press the Left and Right <Arrow> keys to move between idles.
The time setting is entered in HH:MM:SS format.
Note: The time is in 24-hour format. For example, 5:30 A.M. appears as 05:30:00, and 5:30 P.M.
as 17:30:00.

THOR200-D15EG User’s Manual
Revision Date: May. 31. 2023
15
The Advanced Menu allows you to configure your system for basic operation. Some entries are
defaults required by the system board, while others, if enabled, will improve the performance
of your system or let you set some features according to your preference. Setting incorrect field
values may cause the system to malfunction.

THOR200-D15EG User’s Manual
Revision Date: May. 31. 2023
16

THOR200-D15EG User’s Manual
Revision Date: May. 31. 2023
17

THOR200-D15EG User’s Manual
Revision Date: May. 31. 2023
18
When enabled, a VMM can utilize the additional hardware capabilities provided by
Vanderpool Technology.
Number of cores to enable in each processor package.
Enable or Disable Hyper-Threading Technology.
Enable/Disable AES (Advanced Encryption Standard).
Enable/Disable Monitor Mwait.
Enables utilization of additional hardware capabilities provided by Intel (R) Trusted
Execution Technology.

THOR200-D15EG User’s Manual
Revision Date: May. 31. 2023
19
This manual suits for next models
4
Table of contents
Other Star Lake Desktop manuals

Star Lake
Star Lake SR700 User manual
Star Lake
Star Lake CPT330B User manual
Star Lake
Star Lake SCH-406 User manual
Star Lake
Star Lake SR10B User manual
Star Lake
Star Lake AV710 User manual

Star Lake
Star Lake SR10-SCH User manual

Star Lake
Star Lake SCH-406 User manual

Star Lake
Star Lake ROC286BB User manual
