Starfire SF-HC25G User manual

SF-HC25G Cutting torch height
controller
The user manualV1.2
北京斯达峰控制技术有限公司
http://www.starfcnc.com
北京市石景山区海特花园 44 号楼 206

Directory
1. Preface
1.1 Purpose
1.2 Important statement
1.3 warning
2. Overview
2.1 Technical features
2.2 main technical indicators
3.Install
3.1 Install
3.2 Electrical installation connect
4. Parameters illustration
5. Use guide
5.1 Manual operation
5.2Automatic operation
6. CNC system and block adjustment for M instructions
6.1 CNC system control direct output port of the M function
6.2 Fixed cycle of M function
6.3 CNC system recommended settings (STARFIRE of SF-2012 AH system)
7. Troubleshooting
8. Appendix
9. Contact us

1 introduction
Both flame cutting and plasma cut way, in the process of cutting torch between
nozzle and the distance (heighten)of cutting board is very important to the
stability, it will directly affect the cutting speed and the quality of the incision.
Main engine
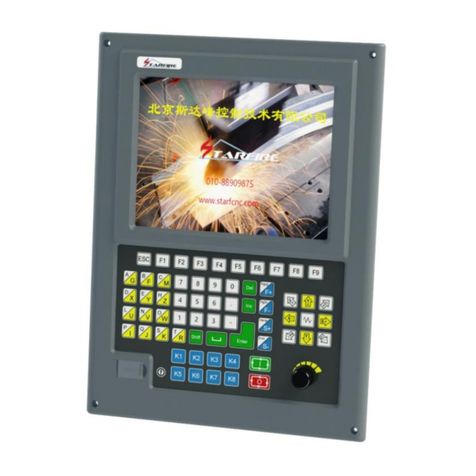
Display setting panel
Separate voltage board
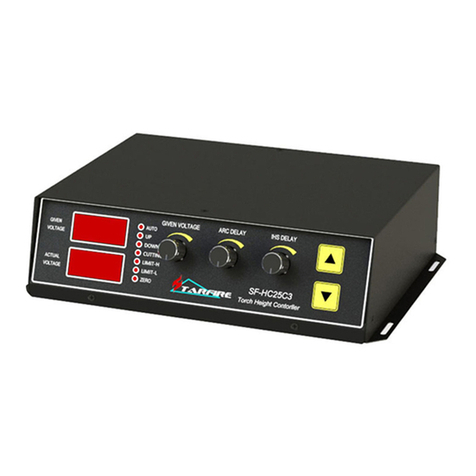
SF-HC25G Plasma cutting torch height controller

1. Purpose
SF-HC25G plasma cutting torch height controller is specially designed for
portable plasma cutting machine cutting torch height automatic control
module.
SF-HC25G plasma cutting torch height controller, simple operation, convenient
debugging, affordable, adopts digital control, reliable performance. It is an
ideal product of form a complete set of welding equipment manufacturers.
Adopt the host and the panel split type structure, especially suitable for
portable cutting machine.
1.2 Important statement
SF-HC25G plasma cutting torch height controller and the content of the
manual may be there are some differences, please in kind prevail. After this
product or its accessories have any changes, without prior notice. Need to
refer to update content.
Please be sure to read the safety warnings and precautions, so as to avoid
improper use lead to dangerous accidents.
Before install anduse this product, must be strictly carried out in accordance
with the details of the product system manual operation, in order to ensure the
correct use of the product.
About SF-HC25G plasma cutting torch height controller and the contents of
this manual, be carried out if any specific illegal use, do not represent the
position of the company, and refused to acknowledge its legal liability, the
consequences shall be borne by the users.
Safety warning is used to prevent the human body and property damage.
In the use of SF-HC25G cutting torch height controller, if there is any quality
problem, consumers can contact our service center or authorized office,
dealers, agents to get the corresponding products and services.
Without the explicit written permission to use any of this information may not
be copied, reproduced or content, the offenders will be fully liable to damage.
1.3 Warning
To safe operation of this product, and achieve the design of the product control
accuracy, to avoid damage to its, carefully read the related warning and strictly
abide by it.

Installation person must be related industry or related experience of technical
personnel.
You must be carefully read this manual before installation.
To confirm the selected power supply is consistent with his requirement
specification.
You are strictly been prohibited under the conditions of electricity installation or
plug or unplug.
Installation position should as far as possible away from heat source.
Controller enclosure must be good grounding, or influence the controller in
work.
The be cutting steel plate must be in good grounding and keep good
connection with controller shell, to ensure the accuracy of the height control.
Please careful carry away, and please do not intense collision, vibration, in
order to avoid damage to the product.
Please don not do something without authorization to open cutting torch height
controller or change its internal structure, to prevent the accident or failure.
Note: the controller casing and cut steel without good grounding, height control
will not be able to work properly.
2.Overview
2.1 Technical features
SF-HC25G plasma cutting torch height controller is after many years of
practice and several generations of related products into play.
This product adopts the 32-bit arm as the core, two groups of three digital tube
display, adopts digital control mode. Do not contain linear adjustment device
internal, greatly improving the stability.
!

Velocity parameters can be modified, according to the lifting mechanism with
power supply and any modification.
Circuit adopts the technology of the patch. There is not internal adjustment
device, full digital control technology to ensure that the product has high
reliability.
Operation simple, two groups of digital tube display setting arc voltage and the
arc pressure respectively, concise and straightforward. Setting parameters
operating in total of three knobs.
Interface simply and control convenient, it suitable for all plasma cutting
numerical control system, can also be used alone.
It adopts the proximity switch initial alignment method.
PWM output, speed adjustable of level 255, control of motor speedprecise,
several current setting, short circuit protection.
Cutting with the function of collision. When cut lips touch the steel plate, the
controller can quickly cut raise a certain distance, effective protection of
nozzle.
All input and output adopt photoelectric isolation, plasma voltage feedback
using linear photoelectric isolated, independent power supply, can very good
compatibility with the partial pressure of various brands of imported plasma
power supply.
It is integration starting arc successful judgment function, and arc successful
feedback function.
2.2 Main technical indicators
Power supply requirements: DC24V + / - 10% 3A
Suitable motor: 24V with DC motor
Drive mode: PWM
Output current: < power input current
Initial alignment method: proximity switch (normally open normally closed
through the jumper cap set)

Highest accuracy: + / - 1V
Box body size: Host:145 x90x42
Panel: 120x55x40
Working environment temperature: - 10 ~ 60 ℃
Weight: 0.6 Kg
Detection system: isolation of arc electric subsection platen (B2 type)
3. Installation
3.1 Installation
The related parts name of height controller, location components are as
follows.
Figure the 3-1-1: host controller
Figure the 3-1-2: display setting panel

Figure 3-1-4: communication line
Bottom highly controller of the four M4 screw hole used for fixed box body onto
the mounting plate. Its size is shown in figure 3-1-5. You can also use DZ47
type guide rail installation.

Figure 3-1-5
Display setting panel uses two M4 screw to install, installation dimensions
such as figure 3-1-6.
Figure 3-1-6

Partial pressure board uses four M3 screw to install, installation dimensions as
shown in figure 3-1-7. H is not less than 10MMabout installation requirements.
Figure 3-1-7
3.2 Electrical installation and connect
3.2.1 interface definition description
Table 3-2-1connect lifting mechanism
No. Character Illustration Remark
MOT+ Output Lifting motor +
MOT- Output Lifting motor -
24V+ Output For 3 lines close to the switch No use for others
Zero Input Initial location input - proximity switch
Limit+ Input Up limited location
Limit- Input Down limited location
COM Public port Positioning, the public port of the limit switch

The limit switch is recommended to use normally open type.
The initial position switch is recommended to use type NPN normally open.
(See appendix wiring method, 23 pages)
The initial position switches can also use the protective cap + relay mode.
Table3-2-2 Connect NC System
No. Character
Illustration Remark
24V+ Input Connect NC system power positive of output
connection
Supply by NC
connection
24V- Input Connect NC system power negative of output
connection
0-OK Output After start arc to feedback signal Output as 0V
DOW Input Manual decline signal-connect NC decline output
signal
Low effective
UP Input Manual rising signal- connect NC rising output
signal
Low effective
AUTO Input Manual and automatic switch(M38, turn corner
signal)
Low effective
ARC Input Start arc input-connect CNC start arc output
signal
Low effective
Note: when using STARFIRE NC system, this table all wiring is direct
numerical control input/output interface, don't need to relay equipment
transformation. It is best to use shielded cable.

Figure 3-2-2
Supporting STARFIRE SF-2012AH cutting machine CNC system wiring
diagram.
Table 3-2-3 4 cores sub - plasma power supply
No. Character Illustration Remark
24V+ Power Points linking piece 24V power
positive supply Never to use others
VOL INT
Input After points linking piece action,
the voltage input
ARCOUT
Output Output to points linking piece of
signal of the arc
24V- Power Points linking piece 24V power
supply ground
Note: the arc output need to use an intermediate relay output, is included in the
matching points on the pressure plate.

Table 3-2-45PIN Connector-connect panels
No. Character Illustration Remark
5V+ Power Panel 5V power supply Never to use others
RXD Input Serial data input
TXD Output Serial data output
GND Power Panel power supply
GND Power Used for shielding
Figure 3-2-4
Here attachment random has been included in the accessories, length of 100
cm.
3.2.2 Points linking piece function introduced
Points linking piece is after the plasma cutting torch arcing voltage according
to certain proportion is reduced, and according to the isolation of converted to
reflect the cutting nozzle and the function modules of the low voltage signal of
cutting plate height, is the height measurement and control of plasma cutting
indispensable accessories. Points linking piece can choose according to need
to install location, it is recommended that the installation within the plasma
power supply and the platen each interface description as shown in figure
3-2-5.

Clockwise pressure ratio increases the score (about 110: 1), the output voltage
become low, 100V input voltage, for example the partial pressure than to
maximum (110:1), the display of 45V block.
Counterclockwise points pressure ratio (minimum about 40:1), namely the high
output voltage and 100V input voltage, for example the partial pressure than to
a minimum (bound), the block is shown as 125V.
Partial pressure ratio adjustment potentiometer factory of 50:1, try not to
adjust.
24V Positive Start arc control
Partial pressure
output
24V
ground
9 core outlet
9 4 6 2,5
Screw
terminal
24+ ST V 24-
4. Parameters shows
There are three commonly used parameters and two debugging: 1. Set
voltage. 2. Starting arc delay. 3. Locate latency. These parameters can be
directly set corresponding knob on the panel to adjust adjustment.
1. Set voltage, this can at any time by the knob to adjust the "height", on the
left side of the digital tube display voltage value set, the unit: (V), clockwise
to increase the voltage, counterclockwise to reduce voltage. Automatic
Type

cutting according to the parameters of the controller adjust the distance
between the nozzle and the steel plate, make the arc voltage is always
closer to set the voltage. This parameter can be directly as a set of highly.
Specific set number according to the selected power supply manufacturers
provide technical parameter settings.
2. Start arc latency, punch time should be used according to the actual
perforated time settings, different thickness of steel plate and different
current when the time is also different. Clockwise to lengthen the period of
rev arc, counterclockwise to reduce arcing time.
3. Positioning delay, initial positioning time is the initial positioning, cut down
to touch with steel plate, after ascending to the time required for setting
height. The time required for different lifting mechanism to promote a
certain distance is different too.It should be set according to the actual
situation. Clockwise rotation for higher position height, counterclockwise to
reduce positioning height.
4. The speed parameters, the parameters for debugging, available to open
less than 3mm of a word or a cross screwdriver adjustment, to reduce the
clockwise and counterclockwise to increase. Adjust the parameters affect
the motor rotation speed and the response time of the whole. The knob
position as shown in figure 4-1.
5. Set position limit switch logic, S1 jumper cap inserted between 1 and 2 for
the low effective, suitable for use normally closed proximity switch. Inserted
between 2 and 3 for the high effective suitable for open still proximity switch.
The factory default for the low effective. Jumper on the panel position as
shown in figure 4-2.
6. With or without positioning function setting, S2 jumper cap inserted in
between 1 and 2 for positioning function. Inserted between 2 and 3 for no
positioning function. Jumper on the panel position as shown in figure 4-2.
Figure 4-1
The speed and
sensitivity

5. Tutorials
Noun explanation: control signal effectively, refers to the input signal with the
corresponding public end (24V) through. Disconnect as invalid.
Raise the controller after power-on self-test, self-check project has panels and
the host software version number display, and host communications, electrical
circuit is normal. If the introspection through digital tube display not normal or
up and down limit indicator lamp lights up at the same time and cannot perform
any action. Self-checking by into working state and working state is divided
into two kinds: manual and automatic state.
5.1 Manual operation
Manual rising signals (UP): When is effective, cutting torch rising.
Manual down signal (DOW): When is effective, torch down.
Manually drop signal (DOW): Long time effectively executed when positioning
movements.
Start arc signal (ARC): If is effective, the positioning action first, and then
control and arc plasma power.

5.2 Automatic operation
Reach to automatically adjustable requirement:
1. Start arc (ARC) signal effectively.
2. Automatic (AUTO) signal effectively.
3. Appropriate plasma cutting voltage ((set voltage-50) ~ (set voltage + 60)).
Initial positioning: the block after receives the start arc (ARC) block driving
down hoisting mechanism, Zero point (Zero) signal is valid, said cutting device
has met the steel plate, the tones to rise block driven lifting gear, rise time for
"IHS time", "IHS time" to finish the initial alignment is complete.
Start arc output: after the completion of the initial positioning output and arc
signal to the plasma power, such as waiting for a time after acquisition of arc
voltage.
Start arc successful feedback: the arc voltage within a certain amount of time
keeping within the normal range is rev arc (perforated) has been successful,
the block signal success (0-OK) to the numerical control system.
Automatic tracking: in success (0-OK) signal was given and the numerical
control system that start arc can be cut to walk successfully, at this time as
long as the numerical control to the block signal automatic (AUTO) to the block,
the block will enter into the state of automatic tracking.

6. NC system associated with adjustable block M instructions
6.1 M function of NC system to control the output port directly
M12 / M13 start arc switch, M12 (open), M13 (close)
M14 / M15 cutting torch rises switch, M14 (open), M15 (close)
M16 / M17 cutting torch switch, M16 (open), M17 (close)
M38 / M39 adjustable block automatic/manual mode switch M38 (automatic)
M39 (manual)
6.2 M function fixed cycle
M07 perforation fixed cycle
Plasma cutting operation sequence is as follows:
M07:
1. The cutting torch fell (cutting torch down latency, see M71).
2. Open the arc switch.
3. If the parameter setting is in the arc pressure detection from 0 (no), there is
no any arc pressure, delayed perforation delay (seconds).
4. If the parameter is set in the arc pressure detection choose 1 (testing) arc
pressure measurement, waiting for the starting arc "success".
5. Delay "higher automatic delay".
6. Open the block (M38), began to run after the program.
M08 close cut fixed circulating
Plasma cutting operation sequence is as follows:
M08
1. Shut down the block (M39).
2. Close the arc pressure switch.
3. The cutting torch rises (M70).
6.3 CNC system recommended settings (STARFIRE of SF-2012AH system)
plasma mode
The initial position detection chooses: 0.
The initial position detection logic: 0.
Cutting positioning delay: 0.
Cutting up delay(M70): 1 second.
Cutting down delay (M71): 0 second.
Arc pressure detection: 1.
Perforated delay: 0.
The corner to close the height distance: 10 mm.

To break the arc end in advance distance: 2 mm.
Raise the automatic signal delay: 3 seconds.
7.Troubleshooting
Trouble list
Fault not limit
alarm lights
unstable
Check the project Corrective action
Motor does not
turn
Whether connected to
power Connect the power
If supply voltage is
normal Check power
If motor locked-rotor Reduce the load
No display Check power Power supply is
connected
Only to display a
certain
Check connection panel
communication line
To reconnect or
replace
communication line
Above limit alarm
lights
Running more than
mechanical upper limit
Check the high limit
switch
Lower limit alarm
lights
Running more than
mechanical lower limit Check low limit switch
Up and down limit
at the same time
bright and do
other operations
Motor open circuit, the
positive and power
positive short circuit,
negative and power
grounding short circuit
Check line motor
Signal swings If steel is reliable
grounding Firmly grounded
Up and down
swings
Sensitivity value is too
small Enhance sensitivity
Low accuracy Sensitivity value is too
big Decrease sensitivity

8.Appendix
2LineNPN normal shut series connection method. 2 Line NPN normal open parallel methods
3LineNPN normal shut series connection method.
3 Line NPN normal open parallel methods
Table of contents
Other Starfire Controllers manuals
Popular Controllers manuals by other brands
LS Industrial Systems
LS Industrial Systems XGT Series user manual

Garnet
Garnet SPILLSTOP ULTRA 815-UHP user manual
Gossen MetraWatt
Gossen MetraWatt PROFITEST MF Series operating instructions

National Instruments
National Instruments cRIO-9023 User manual and specifications

Mitsubishi Electric
Mitsubishi Electric Melsec WS Series user manual
PS Automation
PS Automation PSF-Q-M Series operating instructions
