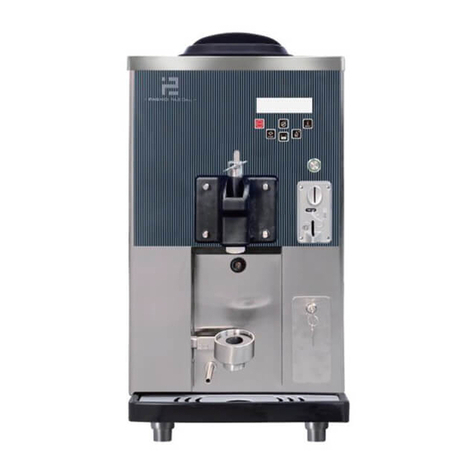
Starfood BQ116Y1 User manual

1
Thank you for choosing our ice cream machines. Our ice cream machines have applied
the international advanced refrigeration industry, the famous brand compressors and good
quality refrigeration components. With good looking and reliable performance, our products
measure up the national safety standard of food processing machinery and electric appliance,
and can be used in bars, fast food shops, hotels, schools and cold drink stores. We have
achieved the certificate for ISO 9001:2000(International Standard for Quality Management
System 9001:2000). Some ice cream machines have got CB and CE approval.This model is
commercial ice cream machine, which should be operated by the qualified trained staff or
follow the instructions of trained staff. Please read the operation manual carefully and follow
the instructions strictly then install, adjust and operate the machines.
Major Technical Data
Item Figure
Model
Main
Power Rating
kW Refr Capacity
Kg/h Cups per
hour
Net
Weight
㎏
Measurement
mm
BQ116Y1 BQJ-10BY1 220V/50Hz
(60Hz) 1.7 R404a
(R22)
10-14kg
(14-20L) 160-230 105 518×745×756
BQ116PY1
BQJ-10BPY1 220V/50Hz
(60Hz) 1.7 R404a
(R22)
10-14kg
(14-20L) 160-230 110 518×745×756
BQ816Y1 BQJ-11/2AY1 220V/50Hz
(60Hz) 1.7 R22
(R404a)
12~18 kg
(17~28L)200~300 116 518×745×770
BQ620Y1 BQJ-10/2CY1 220V/50Hz
(60Hz) 1.7 R22
(R404a)
12~18 kg
(17~28L)200~300 143 518×760×1420
BQ620Y BQJ-10/2CY 220V/50Hz
(60Hz) 1.8
R404a/
R134a
(R22)
12~18 kg
(17~28L)200~300 158 518×760×1420
BQ820Y1 BQJ-10/2BY1 220V/50Hz
(60Hz) 1.7 R22
(R404a)
12~18 kg
(17~28L)200~300 145 518×745×1420
BQ820Y BQJ-10/2BY 220V/50Hz
(60Hz) 1.8
R404a/
R134a
(R22)
12~18 kg
(17~28L)200~300 160 518×745×1420
BQ633Y1 BQJ-20/2BY1 220V/50Hz
(60Hz) 2.6 R22
(R404a)
20~25 kg
(28~36L)330~420 158 518×760×1420
BQ633PY1
BQJ-20/2BPY1 220V/50Hz
(60Hz) 2.6 R22
(R404a)
20~25 kg
(28~36L)330~420 168 518×760×1420
BQ633Y BQJ-20/2BY 220V/50Hz
(60Hz) 2.7
R404a/
R134a
(R22)
20~25 kg
(28~36L)330~420 173 518×760×1420
BQ633PY BQJ-20/2BPY 220V/50Hz
(60Hz) 2.7
R404a/
R134a
(R22)
20~25 kg
(28~36L)330~420 183 518×760×1420
BQ833Y1 BQJ-20/2AY1 220V/50Hz
(60Hz) 2.6 R22
(R404a)
20~25 kg
(28~36L)330~420 160 518×745×1420
BQ833PY1
BQJ-20/2APY1 220V/50Hz
(60Hz) 2.6 R22
(R404a)
20~25 kg
(28~36L)330~420 170 518×745×1420
1.

2
Note: 1) The capacity is measured when the environment temperature is 25 degrees
centigrade, and the ingredient temperature 7 degrees centigrade.
2) Cups per hour is measured at 60g to 70g per cup.
3) For P, it means the machine is equipped with air pump system.(Please refer it in
Operation Instruction for Air Pump System.)
4) For Y1, it means hopper pre-cooling and keeping temperature at night.
5) For Y, it means hopper pre-cooling, keeping temperature at night and independent
compressor to control hopper cooling.
Item Figure
Model
Main
Power Rating
kW Refr Capacity
Kg/h Cups per
hour
Net
Weight
㎏
Measurement
mm
BQ833Y BQJ-20/2AY 220V/50Hz
(60Hz) 2.7
R404a/
R134a
(R22)
20~25 kg
(28~36L)330~420 175 518×745×1420
BQ833PY BQJ-20/2APY 220V/50Hz
(60Hz) 2.7
R404a/
R134a
(R22)
20~25 kg
(28~36L)330~420 185 518×745×1420
BQ747Y BQJ-45/4Y 3-380V/50Hz
(60Hz) 2x2.8 R404a
(R22)
45~50 kg
(62~70L)750~830 320 880×830×1420
BQ836Y1 BQJ-22/2AY1 220V/50Hz
(60Hz) 2x1.6 R22
(R404a)
22~28 kg
(32~40L)360~460 194 540×775×1414
BQ836Y BQJ-22/2AY 220V/50Hz
(60Hz) 3.3
R404a/
R134a
(R22)
22~28 kg
(32~40L)360~460 210 540×775×1414
BQ818PY BQJ-12/2PY 220V/50Hz
(60Hz) 1.8
R404a/
R134a
(R22)
12~18 kg
(17~28L)200~300 135 518×860×880
BQ818Y BQJ-12/2Y 220V/50Hz
(60Hz) 1.8
R404a/
R134a
(R22)
12~18 kg
(17~28L)200~300 125 518×860×880
BQ368PY BQJ-32/2PY 3-380V/50Hz
(60Hz) 3.6
R404a/
R134a
(R22)
28~35 kg
(40~55L)460~580 210 642×835×1435
BQ368Y BQJ-32/2Y 3-380V/50Hz
(60Hz) 3.6
R404a/
R134a
(R22)
28~35 kg
(40~55L)460~580 210 642×835×1435
BQ112Y1 BQJ-8Y1 220V/50Hz
1.0 R404a 7-10kg
(10-14L) 110~160 83 420×720×815
BQ112PY1
BQJ-8PY1 220V/50Hz
1.0 R404a 7-10kg
(10-14L) 110~160 88 420×720×815
BQ816Y1 BQJ-11/2AY1 220V/50Hz
(60Hz) 1.7 R404a
(R22)
12~18 kg
(17~28L)200~300 116 518×745×770
BQ8530Y1
BQJ-20/3Y1 220V/50Hz
2.6 R404a
(R22)
20~25 kg
(28~36L)330~420 175 676×740×1414
BQ8533Y BQJ-20/3AY 3-380V/50Hz
(60Hz) 2.6 R404a
(R22)
22~28 kg
(32~40L)380~460 185 676×740×1414

3
2.
Schematic Diagram For the Basic Structure: (Fig.1)
1) Main Body 2) Feed Hopper Lid 3) Top Cover
4) Bulk Inner Tube 5) Bulk Outer Tube 6) Automatic Controlling Assembly
7) Plug of the Throat Block 8) Handle 9) O-ring Gasket of the Plug
10) Bridge Gasket 11) Horizontal Bar 12) Bolt of the Throat Block
13) Socket Wrench
*
14) Discharge Throat Block 15) Star Screw of the O-ring Gasket
16) Gasket 17) Star Shape Screw 18) Star Screw Wrench
*
19) Square Gasket 20) Ingredient Leakage Holder 21) Stirrer Shaft
22) Ground Terminal
Note:‘*’is the spare parts, it would be different from each models.
Fig.1

4
3. Control Panel(Fig.2)
Control Panel Indicator
Fig.2
4. Notice
Using Environment
●
Environmental Temperature:10℃~38℃。
● Relative Humidity:55%~85%。
Power
●Please do install the ground wire according to the national electric safety standard. The
section area of the ground wire can not be smaller than 1mm².
● Use the connection of power supply which is measured up the safety standard, including the
acceptable wire connection and electric equipment.
● Make sure the power supply of the machine has the short-circuit and electricity
leakage-protector.
●Single phaze electricity is 220V/50HZ. Voltage range is 198V-242V.
●Three phase electricity is 380V/50HZ.
●Three phase four wires electricity is 380V/50Hz and
one wire is neutral wire.
●The section area of the power cable should not be
less than1.5mm2.
● For 380V machines: Observe the turning direction of
the stirrer shaft. The shaft should run in clockwise direction.
If the shaft runs in wrong direction, just alternate any two of
the power phases.
Installation
●
The machine should be used indoors. It should be placed on a flat dry solid ground.
500mm around the machine there should not be heat source over 70℃.
●
Distance between machine and wall or the one between machine and other objects are
shown in Fig.3. The air inlet and outlet of condenser should be kept smooth. There should
not be any inhaled thing around the machine.
●For machine with truckle brake, to avoid shift during operation, please stamp the

5
truckle brake after placing the machine at using place. (For some models only)
Operation
●
To ensure safety, machine must be operated or supervised by qualified staffs, who
possess enough safety common sense on electric appliance and mechanism as well as
know special requirements of the machine fully.
●
The product from the machine is direct food. The operator should know food hygiene
fully and have emdical certificate which is approved by sanitary administration of local
government and accordance of law.
●
The operation procedure should meet sanitary requirement. Sanitized aiding tools,
containers and sanitation material (headgear, respirator, glove, etc.) should be used
and used in a correct way.
Machine testing
After installing all the accessories, to make sure all functions in a good state, before
production a necessary operation test for functions of machine should be taken.
●
Switch the WASH BUTTON, the stirrer motor works, and the driving device will bring
along the stirrer shaft, thus the stirrer shaft works. Switch STOP BUTTON, the stirrer
motor stops.
● Switch the AUTO BUTTON, the machine will enter refrigeration mode. The stirrer
motor works first, after 30 seconds the compressor and condenser fan work. There is
hot air from the condenser outlet, the temperature in the stirrer drum decreases
quickly, there will be frost in it after 1 minute. Switch the STOP BUTTON, the
machine will stop working.
Safety
Note
●
It is unavoidable that the machines will get vibrated during transportation. Please leave
the machine unused for above 24 hours before operation.
● Keep the machine from sunshine and high temperature radiant source.
Warning
● To ensure safety, machine must be operated by trained staffs, who know special
operation requirement of the machine fully.
● If the machine malfunctions or the cable is damaged, it must be serviced or replaced
by the manufacturer or its service agent or a similarly qualified person in order to
avoid a hazard.
Caution:
Caution:Caution:
Caution:
Please take out the stirring shaft when the machine is tested without
Please take out the stirring shaft when the machine is tested without Please take out the stirring shaft when the machine is tested without
Please take out the stirring shaft when the machine is tested without
material.And testing time should not be longer than 3 minutes. Long time
material.And testing time should not be longer than 3 minutes. Long time material.And testing time should not be longer than 3 minutes. Long time
material.And testing time should not be longer than 3 minutes. Long time
testing without material will make ice in the refrigeration tank and damage
testing without material will make ice in the refrigeration tank and damage testing without material will make ice in the refrigeration tank and damage
testing without material will make ice in the refrigeration tank and damage
the machine greatly.
the machine greatly.the machine greatly.
the machine greatly.

6
● If the machine is not used for a long time, please cut off the electric supply and let
out the water in water inlet soft tube.
● Keep the machine clean at any time. Clean the alterative waste ingredients to avoid
accessory rust.
● Pay attention when you open and close the top cover to avoid hands hurt.
● Don’t clean any part inside the machine by water faucet.
● For ice cream machines with three flavours, do not make only one refrigeration tank
work or add ice cream material to one hopper and other material to the other
hopper. (except BQ836*)
Danger
● Don’t touch electriferous plug or switch when your skin is exposed or wet, or you are
wearing wet glove or wet clothes.
● Don’t operate the machine which is not connected to the ground in a correct way.
● Don’t do any maintenance to the machine before cutting off electric
supply.
Transportation and Storage
●
During transportation, collision, over 45 degrees inclination and strong vibration is not
allowed.
● The machine should be stored at a place where the environmental temperature is
around -15℃~55℃and relative humidity is not more than 85%. Also it should be
kept from sunshine and rain.
Maintenance area
● Maintenance area can be entered after side boards (or other boards) are opened.
● Maintenance area should be operated by qualified trained staff.
. Ice Cream Material
Buy packaged ice cream powder directly and prepare it with water according to the manual.
Note:1. When making the ice cream slurry, do stir it well. Do not leave any deposit.
Otherwise the hole at the bulk tube may be blocked, causing the material to fail
in going down quickly, making the refrigeration tank frosted and damaging the
stirrer shaft.
2. If the ice cream slurry can not go down smoothly, please remove the bulk tube
for a while to make sure the slurry can go down smoothly.
3.Temperature of ice cream material should be between 5℃and 40℃otherwise
the machine will be damaged.

7
Special Advice:
It would be better if our ice cream powder is used. (There are tens of flavor to meet your
choice, such as milk, chocolate, vanilla, mango, etc.)
6. Cleaning
1) Cleaning before Production
a. By hand in counterclockwise direction unscrew throat screws(or by spanner unscrew four
throat bolts.)
b. Clean the feed hopper, refrigeration tank, stirring shaft, bulk tube and hopper lid with
cleanser essence water of sanitary standards, brushes or dishcloth.
c. Put the throat block in cleanser essence water of Point b, push and pull each handle 2 to 3
times. Remove the horizontal bar at the handles, pull out every plug of the throat block,
and then clean the throat block and plugs. After cleaning put them into the disinfector for
3-5 minutes and clean them with clean water. Lubricate the circle around the plug gasket
with edible oil. Install the throat block and plugs as before.(See Fig 4、5)
Fig 4
Fig 5
2) Cleaning after Production
a. Fill the feed hopper with clean water. Push the CLEANING button, then the
CLEANING LIGHT is on; make the stirrer shaft run for about 3 minutes. When the
rest of ice cream in the refrigeration tank has melted, pull the handle at the throat
block and drain the water. Then repeat the above several times. When the cleaning
is finished, push STOP BUTTON, then the machine stops production.
b. Clean the discharge throat block.
Repeat Point a and c in Cleaning before Production.
7. Machine Operation
1) Production
a. Connect the electric power, then the indicator shows the temperature of the hoppers
and the refrigeration tanks(The first two numbers on the left side are for hoppers while
the two on the right side are for the refrigeration tanks). For example, if the indicator
shows12-2, it means the hopper temperature is 12℃while the refrigeration tank
temperature is -2℃(only for the machine with Y and Y1 function).
b. Insert two bulk tubes into the discharge hole of the hoppers respectively.
Note: Do not clean the machine with hot water which is above 40 degrees
centigrade. Otherwise the sealing accessories inside the machine will be
damaged.

8
c. Pour the prepared ice cream slurry into two hoppers. The liquid surface should not be
higher than the top hole of the outer tube. Screw the outer tube making the top holes
for the inner tube and outer tube coaxial. Then the bottom holes are completely open.
The ice cream slurry can go to the refrigeration tank through the bottom holes. (Fig. 6)
d. When the ice cream slurry flows into the tank, after
about 3 minutes, push the AUTO button and start the
stirrer motor. After about 30 seconds, the compressor
starts and the machine gets in RUN mode. At this time,
the indicator shows the rate of progress of ice cream by
percentage. When the indicator shows FlnE(FINE),
then the ice cream is ready. Pull the handle then
appetizing ice cream can be discharged.
e. Push the STOP button when production needs to be
stopped. And then the indicating lights are off. Then
the machine will stop production.
f.
According to the speed of ice cream
discharging, adjust the outer tube of the bulk tube, control the open state
of the bottom holes. Then the air and ice cream slurry go into refrigeration
tank together.
And an excellent bulky and soft effect can be achieved.
2) Discharge, Automatic Reset & Continuous Running
a. When the machine shows“F1nE”, pulling any one of the handles of the throat block,
the stirrer motor can be started, and then the ice cream in the refrigeration tank will be
discharged. The ice cream discharged from left and right of the throat block is in
single color and is made from the material in left and right refrigeration tank
respectively. The ice cream discharged in the middle is in double colors and is made
from the mixed material in both tanks.
Note: When part of ice cream is discharged, the material in the refrigeration tank will
decrease. If the amount of material is too little, there will be abnormal noise in the
refrigeration tank. What’s worse, the stirrer shaft will be damaged. In this case, check whether
the bottom holes of the bulk tube are blocked or not open adequately.
b. When the ice cream reaches the preset hardness, the indicator will show FlnE and the
machine will stop automatically. In about 5 minutes the machine will restart
automatically. During this period, if production needs to be continued, push the
RESET button (or pull the throat block handle), the machine will start production at
once.
2) The Hardness Setting of Ice Cream
The principle of hardness adjustment is as follows. First, increase the load of stirrer motor.
Second, the current is increased and the circuit is controlled. Then the machine stops working.
Before delivery, the ice cream hardness has been set according to our recipe. If different recipe
is used, reset the hardness again.
a. The hardness setting is divided into 20 points, from point 01 to point 20. The bigger
the number is, the harder the ice cream is.
b. Pressing AUTO BUTTON for 10 seconds, the indicator shows the points at work and
flashes, such as 1-01.One point will be increased if BUTTON + is pressed. One point will be
decreased if BUTTON – is pressed. When the setting is finished, after 10 seconds the indicator
shows SAVE and exits.
Note: BQJ Model is designed for intermittent production. i.e. After a certain amount of ice
cream is discharged from the refrigeration tank, it will take several minutes for
refrigeration before the machine is ready to discharge the next batch.(The time is
depended on the amount of refrigerant in each model.)
Fig 6

9
c. If you want to change the point, please change it after the machine runs for one minute.
Otherwise the effect of hardness adjustment is affected.
4) Keeping fresh function of ice cream machine
a. When the machine is in the state of AUTO, the machine precools the material in the
hoppers automatically, making the material at a certain low temperature and fresh.
b. When the machine is not in production mode for a short time and there is still some ice
cream material not used, press KEEP FRESH BUTTON, then the machine can automatically
keep the material in the hoppers and refrigeration tanks fresh.
5) Function of Low Mix Indicator (Only for some special models at customers’request)
a. Single Low Mix Indicator
When the material in the hoppers is not enough, the indicator shows -CL-. Meanwhile the
buzzer will sound every 20 seconds to remind the user to add the material in time. And the
production state of the machine is not affected.
b.
Double Low Mix Indicator
When level of ice cream material in hopper reduces by one half, the indicator shows -CL-.
Meanwhile the buzzer will sound every 20 seconds to remind the user to add the material in
time. At that time the production of the machine is not affected. But when level of ice cream
material reaches the bottom of the hopper, the machine will stop working at once and will
be in locked state.AUTO light is on and the indicator shows -CL-.Meanwhile the buzzer
will sound every 20 seconds. At that time, please press STOP button, add ice cream material
in the hoppers and press AUTO again. Then locked state will be off.
6) Ice Cream Calculator&Indicator
a. When the machine is in the state of AUTO, pull the handle, and then it takes count of one
time. (The figure ranges from 000 to 999.)
b. Keep on pressing AUTO for 10 seconds, then the indicator shows 1-XX and flashes. Again
press AUTO for three times, then the indicator shows 4-XXX. XXX shows the quantity of ice
cream discharged. (When the indicator reaches 999, the calculator comes to zero. In other
words, the calculator starts again.)
c. If no action takes on the keys for 10 seconds, the indicator shows SAVE and exit. Then the
previous state is kept.
8. Maintenance
1) Clean the dust of the condenser every half year. Otherwise the refrigeration effect will be
affected.
2) Cleaning Procedure
①Cut off electric supply of the machine.
②By screwdriver remove locking screw at the side board of air outlet of
condensor. Then remove the side board.
③By brush remove the dust and fuzz accumulated on the condensor.
Note: Hopper precooling is not in effect(except the machine with Y function) when the
machine is making ice cream. The temperature range of precooling is 0-10 ℃.
Note: ①Don’t clean the section between the wings by prick or other metal objects.
②If the dust is hard to clean, please ask help from professional refrigeration
maintenance.

10
9. Electrical Drawing
Please refer to the electrical drawing which is stick to the cover of the electrical case
10. Easily Worn-out Parts List
No.
Model
Size Quan
633*\620*\833*\
820*\836*\818*
\816*
368*
116*
112* 8530* 747*
1
O Shape Gasket
φ19×3.9
3 3
1 5 7
2
O Shape Gasket
φ26×5.2
3 3
1 5 7
3
Bridge Gasket
1 1
2 3
4
Quadrate Gasket
φ91×φ80×4.5
2
1 3 4
5
Quadrate Gasket
φ100×φ92×4
2
6 Bulk Tube
2 2
1 3 4
7 Star Shape Screw
(Different from
Models) 2 2
1 3 5
8 Socket Wrench
(Different from
Models) 1 1
9 Star Screw
Wrench (Different
from Models) 1 1
1 1 1
Our company maintains the right to improve all the machines. We are subject to modification
without prior notification.

11
11. Trouble Shooting
Trouble Reasons Analysis Disposal
A. The
compressor
does not run.
A. The starter or
capacitor
malfunctions.
B. The compressor
or controlling board
is damaged.
C. Power voltage is
too low or the
section area of the
power cable is too
small, making the
voltage drop.
*A.B. Change the
defective parts.
*C. Increase the
size of cross section
area of the cable
and increase the
capacity of power
source.
B. The cooling
system is
blocked by ice
or foreign
material.
Moisture or foreign
material enters the
system.
*Remove moisture
and foreign
material from the
refrigeration
system.
C. Refrigerant
Leaking. The refrigeration
system is not
properly sealed.
*After checking the
leaking place do the
reparation,
vacuumize the
system and fill the
refrigerant again.
Refrigeration
Failure
D. Throttle is
not adjusted
well.
Throttle is not
adjusted well or
damaged.
*Again adjust the
throttle or replace
it.
A. The current
of the motor is
larger than the
preset.
A.Outer diameter of
stirring shaft is
expanded.
B.Voltage is too
high.
C.Capacitor of
stirring motor is
damageed.
*A. Make outer
diameter of stirring
shaft smaller.
B. Make ice cream
harder by hardness
adjustor.
C.Change stirring
motor or capacitor.
The indicator
shows FlnE, but
ice cream is not
hard enough.
B. Improper
adjustment of
the hardness.
The hardness is set
too low. Adjust the hardness
adjustor to a harder
graduation.
Material or
Water leakage. A. Throat block
leakage.
A. The plug gasket
or the rubber gasket
between the stirring
drum and throat
block is damaged.
B. The fixing bolts
for discharge throat
block are not tight
or not properly
A. Change rubber
gaskets.
B. Install the throat
block in proper
position and tighten
the bolts.

12
Trouble Reasons Analysis Disposal
installed.
B. Oil leakage
in the bearing
pedestal or
material
leakage.
The Y-gasket or
O-ring for the
bearing pedestal is
defective.
Change the
defective gaskets.
A. Not enough
slurry in the
refrigeration
tank.
A. The bottom hole
of the bulk tube is
blocked by the ice
cream ingredients.
B. The amount of
ice cream
ingredients is too
small in the feed
hopper.
A. Remove the bulk
tube for a while.
B. Refill the ice
cream ingredients.
B. Ice-cream is
too hard. A. Too little sugar
in the recipe.
B. The hardness is
not properly
adjusted.
A. Increase the
proportion of white
sugar in the recipe.
B. Turn the pointer
of hardness adjustor
to SOFT position.
C. The stirrer
shaft does not
run.
A. The motor or
control circuit is
damaged.
B. The transmission
belts are too loose.
C. The gear box is
defective.
*A. Change the
damaged
components.
B. Adjust the
position of the
motor.
*C. Repair the gear
box.
No ice-cream
discharge.
D. Discharge
throat block is
blocked by ice.
The water left by
throat block
cleaning ices over
and blocks the
throat block.
Drain the water in
the throat block or
discharge some
ingredients to
remove the water.
The machine
does not run but
whistle.
Machine is at
the protection
state.
A. Indicator shows
EO and limit switch
can not go back
over one minute
after it is pressed.
B. Indicator
displays ‘E2--’,
protection of high
voltage.
C. Indicator
displays ‘E3—‘,
protection of power
supply.
First disconnect the
power, deal with
the troubles
according to the
indicator, and then
connect the power
again.
A. Top pole is stuck
or it has not been
pushed back.
B. The condenser is
blocked or the fan

13
Trouble Reasons Analysis Disposal
D. Indicator
displays ‘E4--’,
hopper temperature
sensor
malfunctions.
E. Indicator
displays ‘E5--’,
refrigeration tank
temperature sensor
malfunctions.
F. Indicator displays
‘CU—‘, the electric
phase is lacked.
G. Indicator
displays ‘CE—‘, the
order of electric
phase is wrong.
malfuctions.
C. The voltage of
the power supply is
too low or too high.
D. E. The
temperature sensor
is short circuit or
open.
F.G. Check three
phases electric
power supply.
* means the problem should be serviced by the manufacturer or its service agent
or a similarly qualified person.
This manual suits for next models
51
Table of contents
Popular Ice Cream Maker manuals by other brands

Aroma
Aroma AIC-305EM Instruction manual & recipe guide
Steba
Steba IC20 Instructions for use
Cuisinart
Cuisinart ICE-35 user manual

HELEBES
HELEBES BL1530D instruction manual
Nostalgia Electrics
Nostalgia Electrics FDM100 Instructions and recipes

Kambrook
Kambrook Little Chefs Soft Scoops KLCIA4 Instruction booklet
