Starling Technologies Pocket Spin Drift User manual
www.starling-tech.com
Instruction Manual
Warning : Protect Board from electrostatic discharge. Ground yourself before handling.
Protect bottom of board from shorting against anything metal.
Read Entire Manual Before Starting Your Project.
Thank you for purchasing the Pocket Spin rift lighting kit from Starling
Technologies™.
From the 960's Irwin Allen Hit Series “ Land of the Giants,” we've produced a
Plug-N-Play light kit for the Moebius Pocket Spindrift.
Our highly efficient Light kit features pulsing Intake, as seen in the show, engine and interior
lighting, all running off a single CR2032 or CR2025 button cell battery. Runs continuously for
hours with our low power circuit.
Kit features our “No Show” switch design, no external wires or switches, kit uses a magnet
with reed switch to power-on, allowing you to handle the model without a stand.
Built In The U.S.A with top quality components for longevity and long lasting battery life.
Kit Includes:
1x Fully assembled Plug-N-Play Pocket Spindrift board and lighting kit.
With red LEDs soldered to board, with wired reed switch and 2032 battery socket.
1x white LED light panel to illuminate interior of ship.
1x /4” magnet
1 PDF manual emailed after purchase.
1
Required
No soldering required
CR2032 or CR2025 battery (Energizer or Duracell recommended for longer life)
Normal modeling tools and paints.
Xacto knife.
Drill bits.
Clear polystyrene sheet(optional)
Clear epoxy, model glue of choice
ParaGrafix Pocket Spindrift photo-etch(Optional)
You can drill out the grill holes and light block instead.
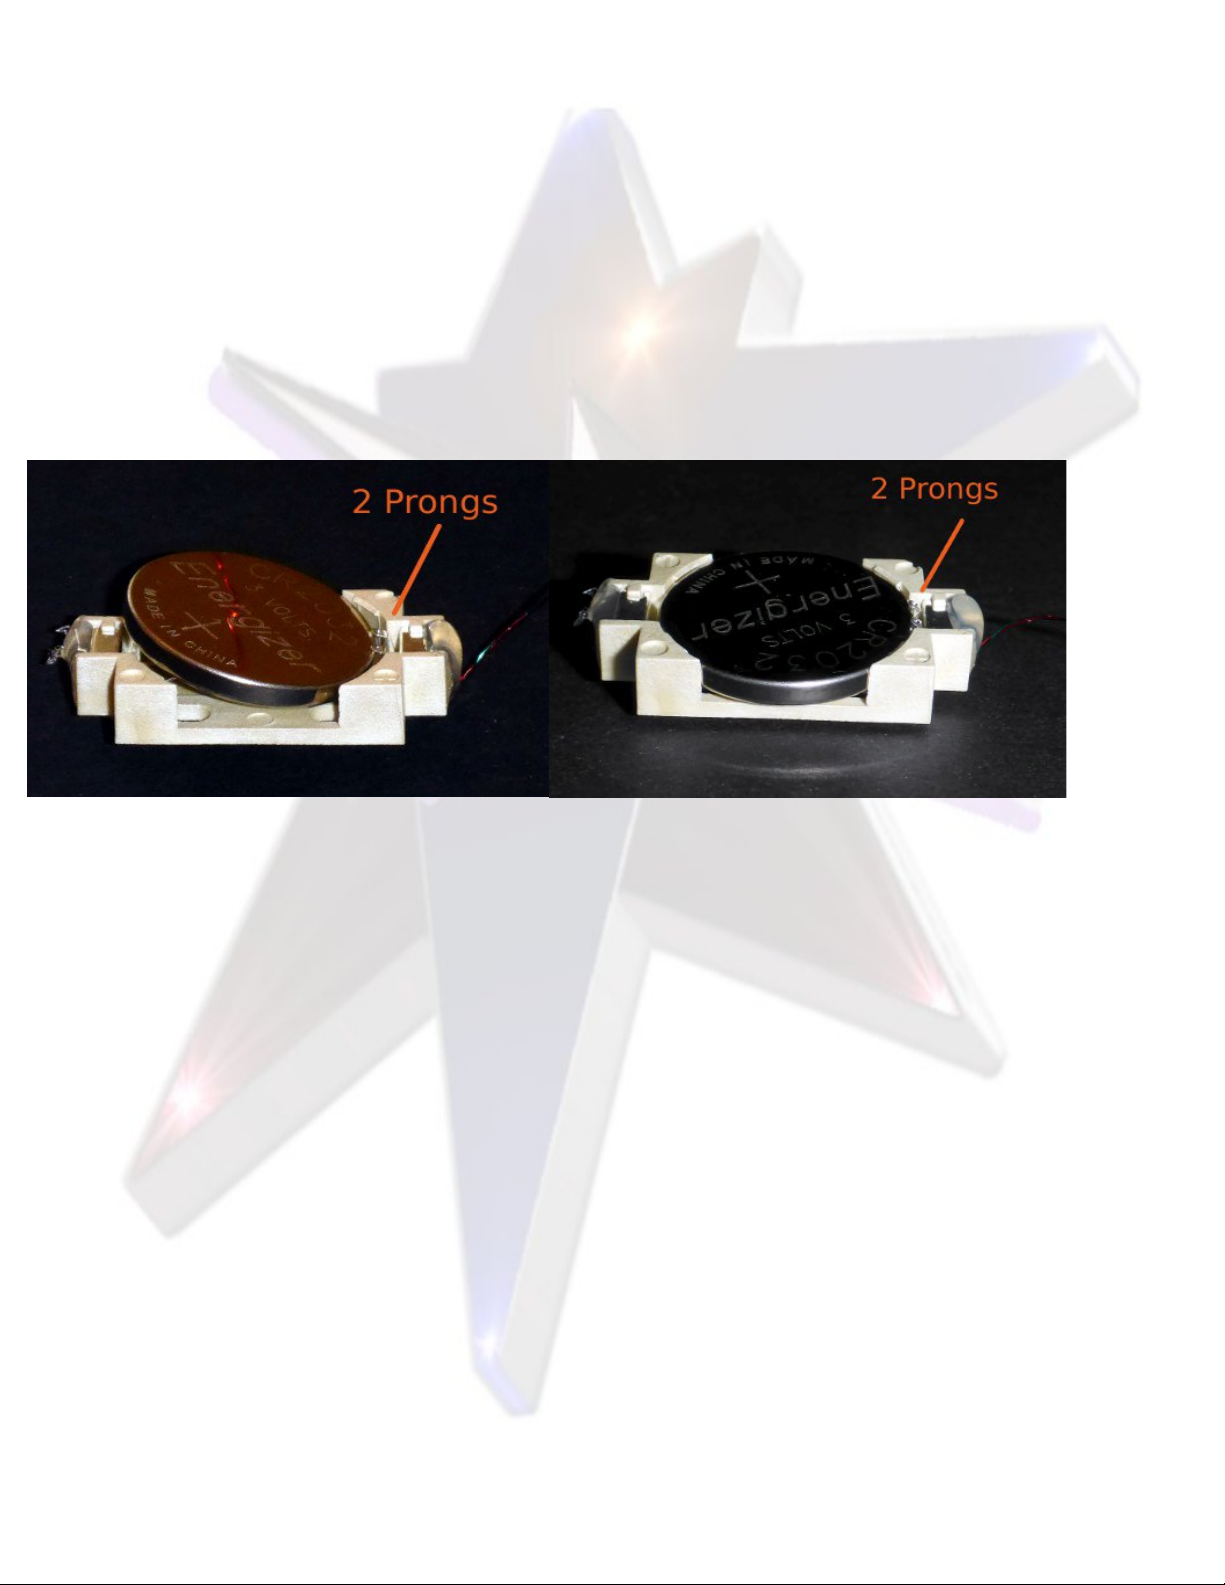
Battery installation and removal:
Caution!! o not install battery incorrectly.
Battery installs + side up.
To install : Insert as shown, the lip of the battery under the 2 side prongs,
then press the other side down until it pops in place. It takes a little effort.
To remove : Do the opposite, pry the end up that you pressed down while installing. It will
take some effort, so if you are unable to do it by finger, slide a small flat screw driver under
that end and pop it up.
The kit:
You will need to light block the entire model, using a bright flash light as you test. Use
multiple layers of black paint. When light no longer penetrates, use gloss white on all interior
as shown in photos throughout the manual.
The kit is designed so that you may permanently glue the board in the rear of the model, up
against the back of the engine, while letting you change the battery after removing the cockpit
interior. Once light blocking is complete and you have tested the board and wired connections
placement, you may glue the board from underneath the board to the bottom of the rear
section. Use hot-glue or epoxy.
2

You can use handiTak reusable adhesive to hold things down while you test everything out.
Adjust your LEDs by bending outward and up or down to light the intakes. The rear of the
LEDs will provide light for the glowing engines.
Position the LED light panel on the upper cockpit section. This section of the ship will be left
unglued for changing batteries.
Note: the upper cockpit has not been light blocked yet for the photo.
Reed Switch: You will need to place the reed switch in the lower section underneath the
3
paper interior. Make sure you place it where the magnet,that will attach on the outside, will
not be noticeable. You can leave it loose or glue it into position.
Note: If you leave it loose, you will have more room to extend the wire when replacing
battery.
You will need to remove your interior when replacing battery, so do not glue it in
place.
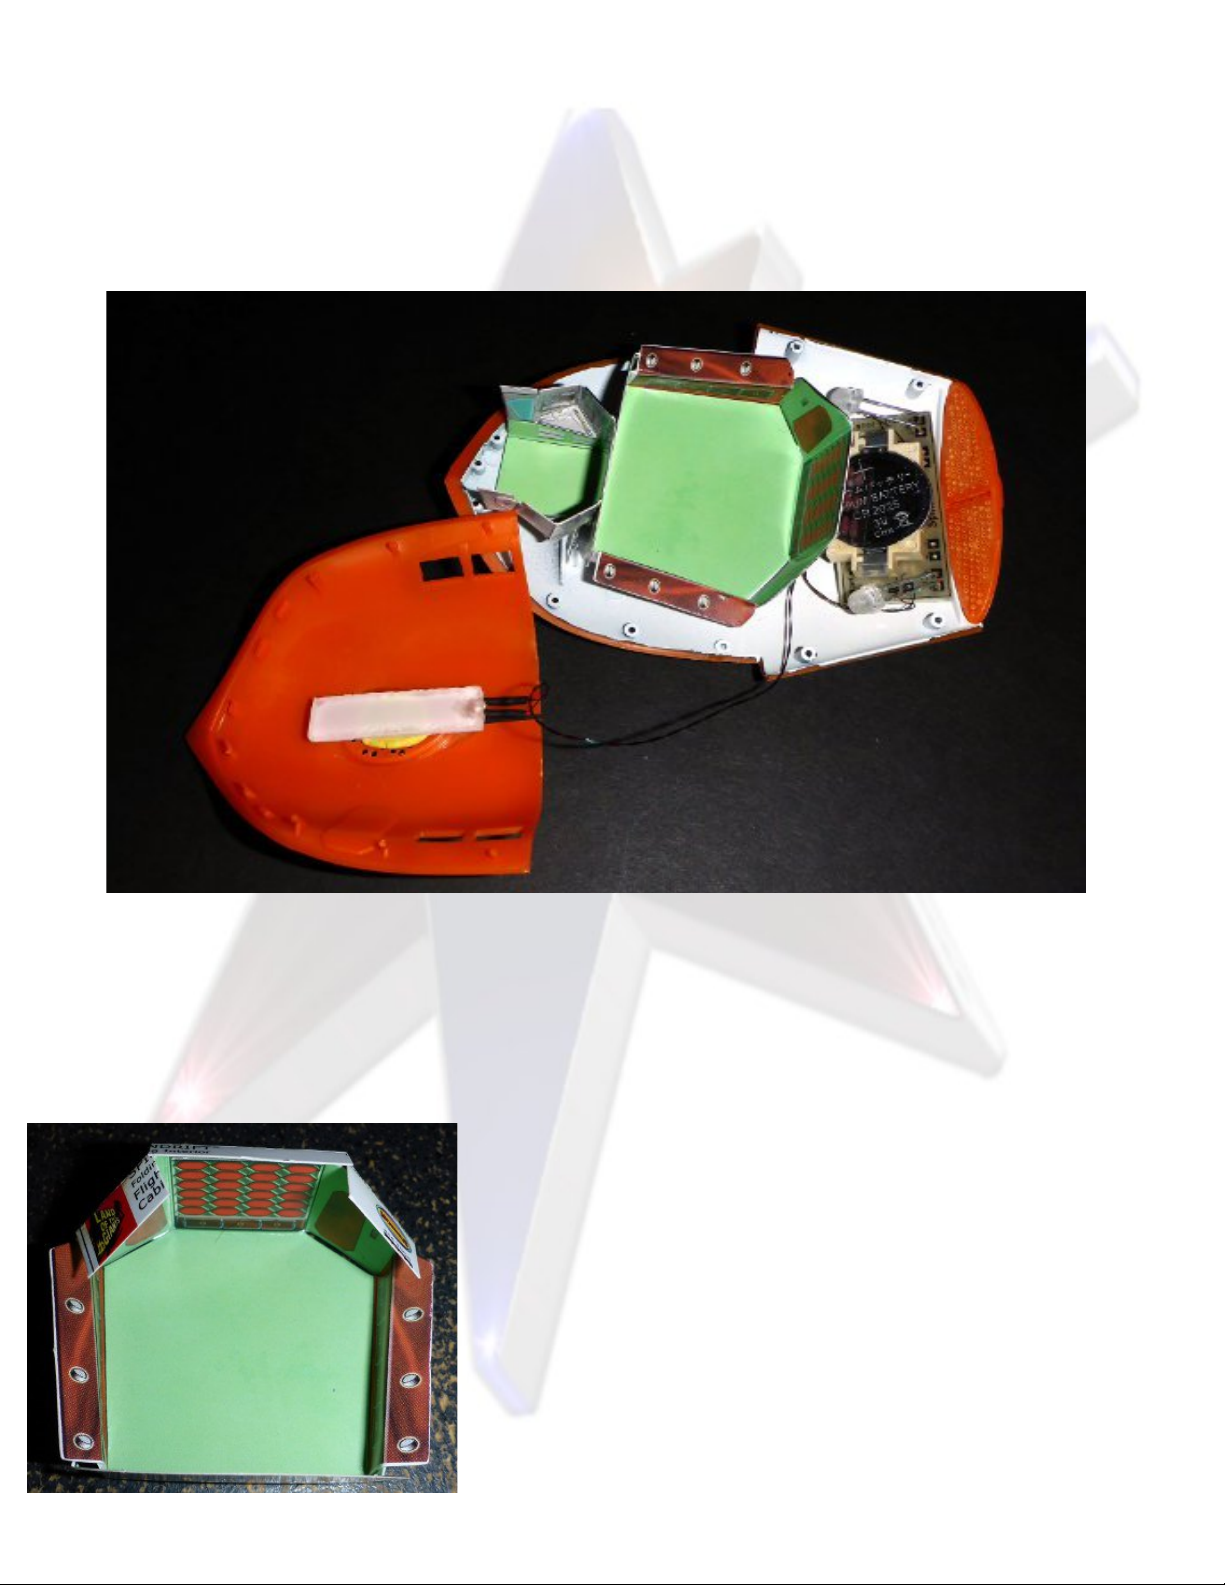
Basically how everything will sit.
The battery is left loose sitting on top of the board, in between the 2 LEDs.
Interior must be removed for changing battery.
You may need to add small pieces of card board to the paper interior for blocking out the
white light from the engine and intake sections. If the white light bothers you, tape or glue
pieces of card stock( thick paper) to the models paper interior.
4

I also added aluminum tape to the back of the paper interior to direct light back to
the engines.
You may either drill the holes in the grills or use ParaGrafix photo-etch. Follow their
instructions for prepping the parts.
You may use .0 5” or thinner clear polystyrene sheet to place behind the grills. Use clear flat
acrylic paint or sand paper to diffuse the light. This will help hide the LEDs.
Place your clear plastic over the part and trace the shape. Cut out with scissors.
Always test with lighting before gluing them permanently to the back of the grills.
5

Photo1 side painted Photo2 side2 unpainted.
LE Panel light : if you are using all white to light the cockpit and the rest of interior, peel
the white film from the LED Panel and paint it all white. This will reflect the light better below.
Blue Cockpit lighting: If you want the cockpit a little blue lighting, do as above, but paint
the end that hovers over the cockpit,facing down, clear blue acrylic mixed with future floor
polish. Test the light as you add layers of blue. Too many layers will restrict light.
You may need to extend the blue farther than shown.
If you do not like the effect, remove the color with alcohol or sand paper. Use sand paper to
scuff it up or clear flat paint.
In photo1 you will notice the unpainted section in the middle. This will allow some lighting
through the dome grill. You can glue clear red plastic under the dome grill to make the lighting
look red. Test before making permanent.
When completed, you may attach the LED panel into position using epoxy or hot-glue. The
wire is long enough to allow you to move the upper cockpit out of the way when changing the
battery.
Light Testing:
Thank you again for purchasing the E/FX™ kit from Starling,
We hope you enjoy it as much as we do :)
Stanley J. Koziol
6

Specifications
Board supported voltage: 3 volts supplied by x CR2032 or CR2025 button
cell battery.
Continuous Run time: Depends on brand of battery.
Max brightness will begin to fade for white interior lighting after 5hrs.
Red pulsing lights remain bright for over 48hrs while white interior dims
considerably, almost turning off as red LEDs pulse.
Trouble Shooting: If your white Lights begin to fade, you can change the
batteries for best effect, though red LEDs will brightly pulse for well over 48hrs
on a good battery.
No Name batteries purchased in bulk can be a hit and miss. Some of the
batteries seem to bad in the batch. If you install one of these new batteries and
yourwhite Lights fade off from the start, the battery is defective.
All photos contained in this document are property of Starling technologies. This document may not be
copied, sold or transferred without permission.
E/FX™ is a trade mark of Starling Technologies™
Copyright © 2016 Starling Technologies™ www.starling-tech.com
7
Table of contents
Other Starling Technologies Lighting Equipment manuals

Popular Lighting Equipment manuals by other brands


MAC TOOLS
MAC TOOLS SPL2500M instruction manual

Lighting Technologies
Lighting Technologies SKYLINE LED/M manual

ML Accessories
ML Accessories T8LED Series Installation & maintenance manual

Chameleon Lighting
Chameleon Lighting P59 Installation instruction

Laserworld
Laserworld Club Series manual

BSVILLAGE
BSVILLAGE Coperture Telescopiche Assembly instructions

Ledj
Ledj Rapid QB1 RGBW Battery Uplighter user manual

ADJ
ADJ MOD HEX100 User instructions

Grundig
Grundig 871125206986 instruction manual

Equinox Systems
Equinox Systems Kaleido EQLED85 user manual

Verde Energy Group
Verde Energy Group VER-VT8 Series Product instructions

Elation
Elation ELED STRIP 50RGB User instructions