manuals.online logo
Brands
  1. Home
  2. •
  3. Brands
  4. •
  5. StarTech.com
  6. •
  7. Enclosure
  8. •
  9. StarTech.com S251BMU313 User manual

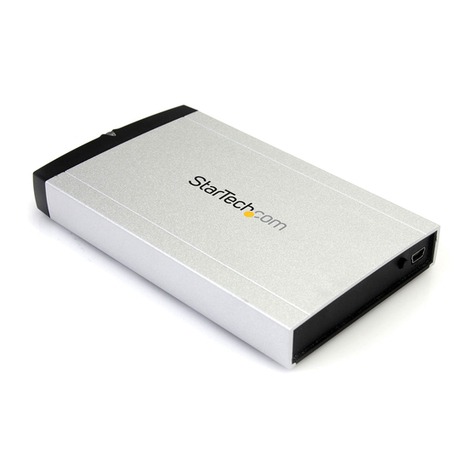
StarTech.com S251BMU313 User manual

Other StarTech.com Enclosure manuals

StarTech.com SAT1810U2 User manual

StarTech.com

StarTech.com SAT1810U2 User manual

StarTech.com S252BU313R User manual

StarTech.com

StarTech.com S252BU313R User manual

StarTech.com RK2537BKM User manual

StarTech.com

StarTech.com RK2537BKM User manual

StarTech.com S2510BU33PW User manual

StarTech.com

StarTech.com S2510BU33PW User manual

StarTech.com SAT3540U2E User manual

StarTech.com

StarTech.com SAT3540U2E User manual

StarTech.com SAT3510U2V User manual

StarTech.com

StarTech.com SAT3510U2V User manual

StarTech.com RK123WALHM User manual

StarTech.com

StarTech.com RK123WALHM User manual

StarTech.com SAT3520U2ER User manual

StarTech.com

StarTech.com SAT3520U2ER User manual

StarTech.com InfoSafe SAT3510U2B User manual

StarTech.com

StarTech.com InfoSafe SAT3510U2B User manual

StarTech.com S3520BU33ER User manual

StarTech.com

StarTech.com S3520BU33ER User manual

StarTech.com SAT2510B12U3 User manual

StarTech.com

StarTech.com SAT2510B12U3 User manual

StarTech.com UNI3510U2 User manual

StarTech.com

StarTech.com UNI3510U2 User manual

StarTech.com 8STS25SLOTR User manual

StarTech.com

StarTech.com 8STS25SLOTR User manual

StarTech.com ATXFULL635V Manual

StarTech.com

StarTech.com ATXFULL635V Manual

StarTech.com RK616WALM User manual

StarTech.com

StarTech.com RK616WALM User manual

StarTech.com InfoSafe UNI3510U2E User manual

StarTech.com

StarTech.com InfoSafe UNI3510U2E User manual

StarTech.com SAT2510U2REM User manual

StarTech.com

StarTech.com SAT2510U2REM User manual

StarTech.com DRW150ATA Manual

StarTech.com

StarTech.com DRW150ATA Manual

StarTech.com SAT2510BU32 User manual

StarTech.com

StarTech.com SAT2510BU32 User manual

StarTech.com SAT3540U2E User manual

StarTech.com

StarTech.com SAT3540U2E User manual

StarTech.com S2510BMU33 System manual

StarTech.com

StarTech.com S2510BMU33 System manual

StarTech.com S3510BMU33B User manual

StarTech.com

StarTech.com S3510BMU33B User manual

StarTech.com S2510U33RUSM System manual

StarTech.com

StarTech.com S2510U33RUSM System manual

StarTech.com S2510BU3PW User manual

StarTech.com

StarTech.com S2510BU3PW User manual

Popular Enclosure manuals by other brands

Antec Veris Fusion Remote Max Specification sheet

Antec

Antec Veris Fusion Remote Max Specification sheet

ENERMAX iVektor.Q ECA 3371 Series user manual

ENERMAX

ENERMAX iVektor.Q ECA 3371 Series user manual

Lindy 43095 user manual

Lindy

Lindy 43095 user manual

SICK C4000 Select operating instructions

SICK

SICK C4000 Select operating instructions

Geeek A60 PLUS installation guide

Geeek

Geeek A60 PLUS installation guide

OVE SYDNEY 48 installation manual

OVE

OVE SYDNEY 48 installation manual

SilentiumPC Armis AR5 Hardware installation

SilentiumPC

SilentiumPC Armis AR5 Hardware installation

Pulsar 17/TRP80/DSPR Assembly instructions

Pulsar

Pulsar 17/TRP80/DSPR Assembly instructions

MSI MPG SEKIRA 500X quick start guide

MSI

MSI MPG SEKIRA 500X quick start guide

Antec Dark fleet DF-10 user manual

Antec

Antec Dark fleet DF-10 user manual

Peavey DS 1502 Specifications

Peavey

Peavey DS 1502 Specifications

D-Link ShareCenter Pro DNS-1550-04 user manual

D-Link

D-Link ShareCenter Pro DNS-1550-04 user manual

Rosewill RX82-U(JBOD) user manual

Rosewill

Rosewill RX82-U(JBOD) user manual

QNAP SAS JBOD CLI 1.0 user guide

QNAP

QNAP SAS JBOD CLI 1.0 user guide

GAMDIAS Talos P1 Quick installation guide

GAMDIAS

GAMDIAS Talos P1 Quick installation guide

Auvs KR615 user manual

Auvs

Auvs KR615 user manual

Antec AR300 user manual

Antec

Antec AR300 user manual

CommScope FDH 3000 user manual

CommScope

CommScope FDH 3000 user manual

manuals.online logo
manuals.online logoBrands
  • About & Mission
  • Contact us
  • Privacy Policy
  • Terms and Conditions

Copyright 2025 Manuals.Online. All Rights Reserved.

Instruction Manual
DE: Bedienungsanleitung - de.startech.com
FR: Guide de l'utilisateur - fr.startech.com
ES: Guía del usuario - es.startech.com
IT: Guida per l'uso - it.startech.com
NL: Gebruiksaanwijzing - nl.startech.com
PT: Guia do usuário - pt.startech.com
Manual Revision: 04/28/2015
For the latest information, technical specications, and support for
this product, please visit www.startech.com/S251BMU313.
Packaging contents
• 1x USB 3.1 to SATA enclosure
• 1x USB cable
• 4x assembly screws
• 1x screwdriver
• 1x quick start guide
System requirements
• USB enabled computer system with an available USB port
Note: To obtain the maximum USB throughput, StarTech.com
recommends that you use a PC with a USB 3.1 Gen 2 port.
Operating systems are subject to change. For the latest
requirements, please visit www.startech.com/S251BMU313.
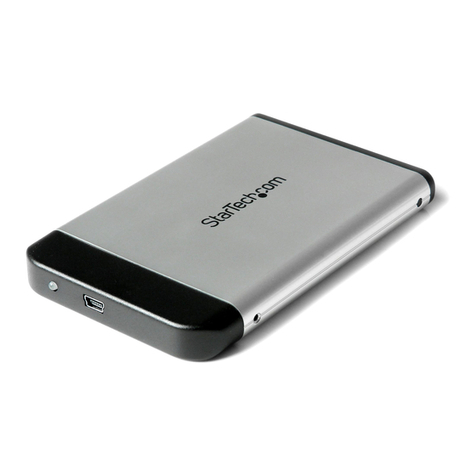
S251BMU313
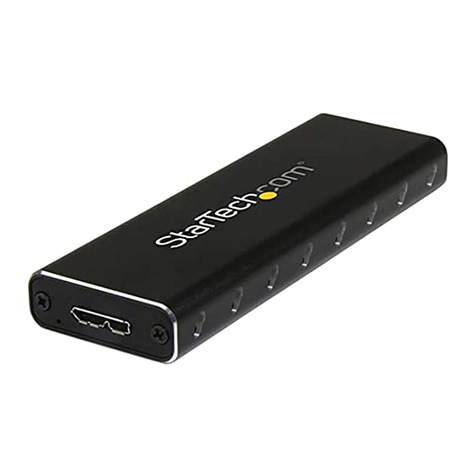
USB 3.1 (10 Gbps) enclosure for 2.5” SATA drives
*actual product may vary from photos
Install the hardware
Warning! Hard drives and storage enclosures should be handled
carefully, especially when they’re transported. If you’re not careful
with your hard disk, you may lose data as a result. Make sure that
you’re properly grounded by wearing an anti-static strap when you
install any computer component. If an anti-static strap isn’t available,
touch a large grounded metal surface (for example, the computer
case) for several seconds to discharge any built-up static electricity.
1. Use the provided screwdriver to remove the four small screws
from the bottom of the enclosure. When the screws are removed,
the two halves of the enclosure should pull apart.
2. Place the 2.5”SATA drive into the half of the enclosure that
contains the SATA connector, and slide the drive onto the SATA
connector.
Note: If you’re using a 7 mm SSD drive, use the provided 7 mm to
9.5 mm spacer.
3. To reassemble the enclosure, place the two halves together and
replace the four small screws into the bottom of the enclosure.
4. Connect the USB cable to the enclosure and to the host computer
system.
About driver installation
No driver or software installation is required if you use an operating
system with USB support. However, this enclosure only operates at
the speed level of the USB port it’s plugged into (for example, USB
1.x, 2.0, 3.0, 3.1 Gen 2).
Use the storage device
If you install a hard drive that already has data on it, after you plug in
the drive, it appears under My Computer or Computer with a drive
letter assigned to it.
If you install a brand-new hard drive that doesn’t have any data on it,
you must prepare the hard drive for use.
Product overview
FCC Compliance Statement
This equipment has been tested and found to comply with the limits for a Class A digital device, pursuant to Part 15 of the FCC rules. These limits are designed to provide reasonable protection against
harmful interference when the equipment is operated in a commercial environment. This equipment generates, uses and can radiate radio frequency energy and, if not installed and used in accordance
with the instruction manual, may cause harmful interference to radio communications. Operation of this equipment in a residential area is likely to cause harmful interference in which case the user will
be required to correct the interference at his own expense.
This device complies with part 15 of the FCC Rules. Operation is subject to the following two conditions: (1) This device may not cause harmful interference, and (2) this device must accept any
interference received, including interference that may cause undesired operation.
Changes or modications not expressly approved by StarTech.com could void the user’s authority to operate the equipment.
Industry Canada Statement
This Class A digital apparatus complies with Canadian ICES-003.
Cet appareil numérique de la classe [A] est conforme à la norme NMB-003 du Canada.
CAN ICES-3 (A)/NMB-3(A)
Use of Trademarks, Registered Trademarks, and other Protected Names and Symbols
This manual may make reference to trademarks, registered trademarks, and other protected names and/or symbols of third-party companies not related in any way to
StarTech.com. Where they occur these references are for illustrative purposes only and do not represent an endorsement of a product or service by StarTech.com, or an endorsement of the product(s)
to which this manual applies by the third-party company in question. Regardless of any direct acknowledgement elsewhere in the body of this document, StarTech.com hereby acknowledges that all
trademarks, registered trademarks, service marks, and other protected names and/or symbols contained in this manual and related documents are the property of their respective holders.
Technical Support
StarTech.com’s lifetime technical support is an integral part of our commitment to provide industry-leading solutions. If you ever need help with your product, visit www.startech.com/support and
access our comprehensive selection of online tools, documentation, and downloads.
For the latest drivers/software, please visit www.startech.com/downloads
Warranty Information
This product is backed by a two-year warranty.
StarTech.com warrants its products against defects in materials and workmanship for the periods noted, following the initial date of purchase. During this period, the products may be returned for
repair, or replacement with equivalent products at our discretion. The warranty covers parts and labor costs only. StarTech.com does not warrant its products from defects or damages arising from
misuse, abuse, alteration, or normal wear and tear.
Limitation of Liability
In no event shall the liability of StarTech.com Ltd. and StarTech.com USA LLP (or their ocers, directors, employees or agents) for any damages (whether direct or indirect, special, punitive, incidental,
consequential, or otherwise), loss of prots, loss of business, or any pecuniary loss, arising out of or related to the use of the product exceed the actual price paid for the product. Some states do not
allow the exclusion or limitation of incidental or consequential damages. If such laws apply, the limitations or exclusions contained in this statement may not apply to you.
Note: The following task will delete any data on the disk drive and
should only be completed if the hard drive is brand-new and doesn’t
have any data on it.
If you use a computer that’s running Windows 2000, Windows XP,
Windows Vista, or Windows 7, do the following:
1. Depending on the OS version that you’re running, do one of the
following:
• On your desktop, right-click My Computer.
• On your desktop, right-click Computer.
2. Click Manage.
3. On the Computer Management screen, click Disk Management.
4. Locate the disk that is labeled Unallocated. To conrm that the
hard drive is the correct one, check the hard drive capacity.
5. Right-click the section of the window that says Unallocated and
click New Partition.
6. To set up the drive, complete the instructions in the New
Partition wizard.
When the drive is successfully installed, the disk appears under My
Computer or Computer with a drive letter assigned to it.