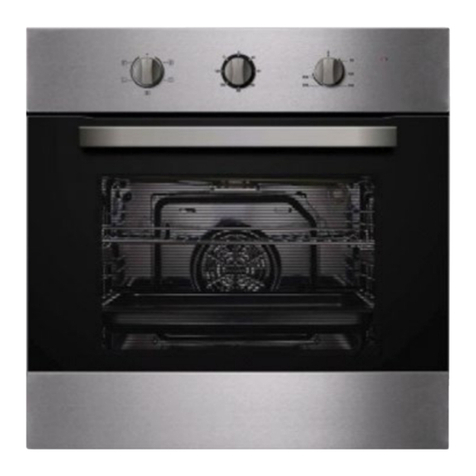
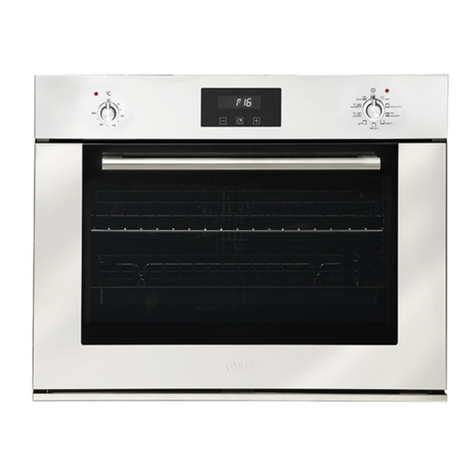
STATESMAN BDM373SS User manual

BDM373SS / BDM373BL
BUILT-IN 88CM 35/70L DOUBLE OVEN
STAINLESS STEEL / BLACK
Instruction Manual
Please read these instructions carefully before use and retain for future reference.
Before switching on your appliance – Always check for any damage that may have
been caused in transit.
Serial number:

CONTENTS
Important Safety Instructions ................................ 3-4
Installation................................................................ 5-6
Operating Instructions .......................................... 7-20
- Using the Grill - Electric .............................................7
- Using the Top Oven - Electric (If Fitted).....................8
- Top Oven Baking Guide.............................................9
- Using the Main Oven - Electric .......................... 10-12
- Main Oven Baking Guide................................... 13-15
- Oven & Grill Functions .............................................16
- Operation ........................................................... 17-18
- Using the Programmer/Clock ............................ 19-20
Cleaning & Maintenance..................................... 21-23
Troubleshooting Guide..............................................24
Disposal Information.................................................26
2

SAFETY INSTRUCTIONS
BEFORE USING THE PRODUCT
Make sure that you have removed all packaging and wrapping. Some of the items inside this
appliance may have additional wrapping.
WARNING! The appliance and its accessible parts become hot during use. care should
be taken to avoid touching heating elements. children less than 8 years of age shall be
kept away unless continously supervised.
• This appliance can be used by children aged from 8 years and above and persons with
reduced physical sensory or mental capabilities or lack of experience and knowledge if they
have been given supervision or instruction concerning the use of the appliance in a safe way
and understand the hazards involved. children shall not play with the appliance. cleaning and
user maintenance shall not be made by children without supervision.
WARNING! Unattended cooking on a hob with fat or oil can be dangerous and may result
inre.
• NEVERtrytoextinguisharewithwater,butswitchotheapplianceandthencoverthe
amewithalidordampcloth.
WARNING!Dangerofre:Donotstoreitemsonthecookingsurfaces.
WARNING! Servicing should be carried out only by authorised personnel.
• Theappliancemustneverbedisconnectedfromthemainssupplyduringuse,asthiswill
seriouslyaectthesafetyandperformance,particularlyinrelationtosurfacetemperatures
becominghot.Thecoolingfan(iftted)isdesignedtorunonafterthecontrolknobhasbeen
switchedo.
• Do not modify this appliance.
• Prolongedintensiveuseoftheappliancemaycallforadditionalventilation,forexample
openingofawindow,ormoreeectiveventilation,forexampleincreasingthelevelof
mechanical ventilation where present.
• Excess spillage must be removed before cleaning.
WARNING! Do not operate the appliance without the glass door correctly closed.
WARNING! Never put items directly on the base of the oven or cover the oven base with
foil,asthiscancausethebaseelementtooverheat.
WARNING! Do not modify the outer panels of this appliance in any way. WARNING! -
This appliance must be earthed.
WARNING! Always allow the product to cool down before you change a bulb.There is
ariskofelectricshock,soalwaysmakesureyouhaveturnedoandunpluggedyour
appliance before starting.
WARNING! Thetopelementgetsextremelyhotwheninuse,sotakeextracaretoavoid
touching it.
WARNING! Do not use harsh abraisive cleaners or sharp metal scrapers to clean the
ovendoorglasssincetheycanscratchthesurface,whichmaywellresultinshatteringof
the glass.
3

• CAUTION: Thisapplianceisforcookingpurposesonly.Itmustnotbeusedforotherpurposes,
for example room heating.
WARNING! Ifthesupplycordisdamaged,itmustbereplacedbythemanufacturer,its
serviceagentorsimilarlyqualiedpersonsinordertoavoidahazard.
WARNING! Do not use a steam cleaner to clean any part of the product.
WARNING! The appliance must not be installed behind a decorative door in order to avoid
overheating.
• Always take care when removing food from the oven as the area around the cavity may be hot.
• Always use oven gloves when handling any utensils that have been in the oven as they will be
hot.
• Always make sure that the oven shelves are resting in the correct position between two runners.
Donotplacetheovenshelvesontopofthehighestrunner,asthisisnotstableandcanleadto
spillage or injury.
• AlwaysusetheMinuteMinder(iftted)ifyouareleavingtheovenunattended-thisreducesthe
risk of food burning.
• Never place items on the door while it is open.
• Neverwrapfoilaroundtheovenshelvesorallowfoiltoblocktheairue.
• Neverdrapeteatowelsneartheovenwhileitison;thiswillcauseaehazard.
• Neverpullheavyitems,suchasturkeysorlargejointsofmeat,outfromtheovenontheshelf,as
they may overbalance and fall.
• Caution: Accessible parts may be hot when the grill is used - young children should be kept
away.
4

This product must be installed by the manufacturers authorised service agent or an
equallyqualiedperson.
• Ensurethatasafedistanceisleftbetweentheapplianceandthektichenunits/furniture
• Surfacesmustbeheatresistanttoaminimumof120°C
INSTALLATION
Fitting the Oven into the Kitchen Unit
• Do not lift the appliance by the door handle.
• Whilst every care is taken to eliminate burrs and raw edges
fromthisproduct,pleasetakecarewhenhandling-we
recommend the use of protective gloves during installation.
• Please note that the weight of this appliance is approximately
45kg (unpacked). Take care when lifting it into the housing
unit - always use an appropriate method of lifting.
• Leavethexingscrewsinthebasetraypackaginguntilyou
are ready to install it. If this appliance is to be installed near
to a corner where the adjacent cabinets run at right angles
forwardoftheappliance,theremustbeagapofatleast
90mmbetweentheapplianceandthecabinets,toprevent
overheating of the cabinets.
Housing dimensions
Theapplianceisdesignedtotintoastandard600mmwidehousingunitwithminimuminternal
dimensions as shown. 590mm is to the underside of the worktop when the appliance is built
under,ortotheundersideofthepanelabove,whentheapplianceisinstalledintoatallhousing
unit.
1. Fix the two brackets to each side of the cabinet with screws provided. Please set the leading
edge of the brackets 50mm from the front edge of the furniture. Please set face A of the
brackets 885mm from top of the furniture as illustrated by below picture.
2. Lift and slide the oven onto position on the brackets face A.
5

Securing The Oven To The Cabinet
1. Fit oven into the cabinet recess.
2. Open the oven door.
3. Secure the oven to the kitchen cabinet with two
distanceholders“A“whichttheholesintheoven
frameandtthetwoscrews“B“.
6
Connection of the Oven

7
USING THE GRILL - ELECTRIC
Caution: Accessible parts may be hot when the grill is used - young children should be
kept away.
Ifcleaningthegrillpanwhenitishot,useovenglovestomoveit.
Food for grilling should be positioned centrally on the trivet.
Using the TOP Oven Grill
Grill
Important: The grill door must be fully open when the grill is used.
openthegrilldoor.Turnthecontrolknobtotherequiredsetting.Forbestcookingresults,we
recommend that you preheat the single grill for 5 minutes.
pushthegrillpantowardsthebackoftheshelf,topositionitunderthegrill.
Fortoasting,andforgrillingfoodssuchasbacon,sausagesorsteaks,useahighershelf
position.Forthickerfoodssuchaschopsorchickenjointpieces,useamiddletolowshelf
position.
Toswitcho,turnthecontrolknobtotheoposition.
Using Aluminium Foil
Caution: Using aluminium foil to cover the grill pan, or putting items wrapped in foil under
thegrillcreatesarehazard.
The Cooling Fan
Whenthegrillisswitchedon,thecoolingfancomesontokeepthefasciaandcontrolknobs
coolduringgrilling.Duringusethefanmaycycleonando,thisisnormal.

8
USING THE TOP OVEN - ELECTRIC (IF FITTED)
• When you are cooking keep children away from the vicinity of the oven.
• Caution: The top element gets extremely hot when in use, so take extra care to avoid
touching it.
• The top oven is a conventional oven.
• Note: Thetopovenisnotcontrolledbytheprogrammer(iftted).
To Turn on the Top Oven
Turn the temperature control knob until the required temperature is selected.
Theredthermostatindicatorwillcomeonuntiltheselectedtemperatureisreached,andthen
goo;itwillturnonandoperiodicallyasthethermostatoperatestomaintaintheselected
temperature.
Toswitcho,returnthetopovencontrolknobtotheoposition.
Important: Never put items directly on the base of the oven, or cover the oven base with
foil, as this may cause the element to overheat. Always position items on the shelf.
The Cooling Fan
Whenthetopovenisswitchedon,youwillhearthecoolingfancomeon-thiskeepsthefascia
and control knobs of the appliance cool during cooking.
Preheating
Theovenmustbepreheatedwhencookingfrozenorchilledfoods,andwerecommend
preheatingforyeastmixtures,batters,soués,andwhiskedsponges.
Preheattheovenuntiltheindicatorlightswitchesoforthersttime,thiswilltakeupto15
minutes depending on the temperature selected.
Ifyouarenotpreheatingtheoven,thecookingtimesinthefollowingguidemayneedtobe
extended,astheyarebasedonapreheatedoven.
Shelf Positions
Thereare3shelfpositionswhicharecountedfromthebottomoftheovenupwards,soshelf
position 1 is the lowest.
Whencookingfrozenorchilledfood,usethehighestpossibleshelfposition,whileallowing
some clearance between the food and the top element.
The oven shelf must be positioned with the up-stand at the rear of the oven and facing up.
Positionbakingtraysandroastingtinsonthemiddleoftheshelves,andleaveoneclearshelf
positionbetweenshelves,toallowforcirculationofheat.
When Using the Top Oven
Whenopeningtheovendoor,careshouldbetakentoavoidanypossiblecontactwith
potentiallyhotair,sincethismaycausediscomforttopeoplewithsensitiveskin.We
recommend that you hold the underneath of the oven door handle.

9
TOP OVEN BAKING GUIDE
Cooking Times
These times are based on cooking in a preheated oven.
Thesecookingtimesareapproximate,becausethesizeandtypeofcookingdishwillinuence
cooking time.
Shelf Positions
Asageneralguide,whencookingfrozenorchilledfood,usethehighestpossibleshelfposition,
while allowing some clearance between the food and the top element. Follow the instructions
given on packaging.
Cooking Temperatures
The temperature settings and time given in the Baking Guides are based on dishes made with
blockmargarine.Ifsofttubmargarineisused,itmaybenecessarytoreducethetemperature
setting.Ifarecipegivesadierenttemperaturesettingtothatshownintheguide,therecipe
instruction should be followed.
Becausethetopovenismorecompact,itmaybenecessarytoreducecookingtemperatures
speciedinrecipesbyupto20°c.
Use the baking guide as a reference for determining which temperatures to use.
Item Temperature(°C) Shelf Position Approximate Cooking Time
Small cakes 160 - 170 2 20 - 25 mins
Victoria sponge
(2 x 180mm / 7”) 160 1 20 - 25 mins
Swiss roll 200 1 8 - 12 mins
Semi rich fruit cake
(180mm x 7”) 140 1 2¼ - 3¾ hours
Scones 215 1 10 - 15 mins
Meringues 90 - 100 1 2 - 3 hours
Shortcrust pastry 200 - 210 1
depends on size & type of cooking
dish&alsothelling
Pu/akepastry 200 - 210 1
Choux pastry 200 - 210 1
Biscuits 160 - 200 2 10 - 20 mins
Sponge pudding 150 1 30 - 45 mins
Milk pudding 140 1 2 - 2½ hours

10
USING THE MAIN OVEN - ELECTRIC
Accessible parts may be hot when the oven is used. Young children should be kept away.
To Switch on the Oven
Turn the oven control knob(s) to the required setting.
Theredthermostatindicator(iftted)willcomeonuntiltheselectedtemperatureisreached
andthengoo;itwillturnonandoperiodicallyasthethermostatoperatestomaintainthe
selected temperature.
Toswitcho,returnthecontrolknobtotheoposition.
When Using the Oven
Aspartofthecookingprocess,hotairisexpelledthroughaventintheoven.Whenopening
theovendoor,careshouldbetakentoavoidanypossiblecontactwithpotentiallyhotair,since
this may cause discomfort to people with sensitive skin. We recommend that you hold the
underneath of the oven door handle.
PREHEATING
Fanned Oven
WhencookingsensitiveitemssuchassoueandYorkshirepuddingsor,whencookingbread,
werecommendthattheovenispreheateduntiltheindicatorswitchesoforthersttime.For
anyothertypesofcooking,apreheatmaynotberequired.
Conventional Oven
Preheating is always required
Manual Operation (fanned only)
The Cooling Fan
The cooling fan may operate when the main oven is on and may continue to operate for a
periodaftertheovenhasbeenswitchedo.
OVEN FURNITURE
Oven Shelves
The oven shelf must be positioned with the upstand at the rear of the oven and facing upwards.
Position baking trays and roasting tins on the middle of the shelves.
Baking Tray and Roasting Tins
Forbestcookedresultsandevenbrowning,therecommendedsizebakingtraysandroasting
tins that should be used are as follows;
Baking tray 473mm x 370mm
We recommend that you use good quality cookware. poor quality trays and tins may warp
whenheated,leadingtounevenbakingresults.

11
Aluminium foil
Use foil only to cover food or cooking dishes, using foil to cover the shelves or oven base
createsarehazard.
Cooking with a fanned oven
Asthisisahigheciencyoven,youmaynoticetheemissionofsteamfromtheoven
when the door is opened. Please take care when opening the door.
Ifyouareusedtocookingwithaconventionalovenyouwillndanumberofdierencesto
cookingwithafanovenwhichwillrequireadierentapproach:
• There are no zones of heat in a fan oven as the convection fan at the back of the oven
ensures an even temperature throughout the oven. This makes it ideal for batch baking - eg;
when planning a party as all the items will be cooked within the same length of time.
• Foodsarecookedatalowertemperaturethanaconventionaloven,soconventionalrecipe
temperature may have to be reduced. please refer to the conversion chart.
• Preheating is generally not necessary as a fan oven warms up quickly.
• When batch baking foods that will rise during cooking - eg; bread - always ensure that
enough space has been left between the shelves to allow for the rise.
Note: When2ormoreshelvesarebeingused,itmaybenecessarytoincreasethecooking
time slightly.
• Becausethe2ovenshelvesarewiderthaninmanyovens,itispossibletocook2itemsper
shelf - eg; 2 victoria sponge or 2 casseroles.
• Although you need to keep in mind the points ‘To help the air circulate freely’ with careful
choiceofdishesandtins,itispossibletocookacompletemeal,andperhapssomething
elseforthefreezer,intheovenatthesametime.
• Whenroastingmeats,youwillnoticethatfatsplashingisreduced,whichisdueinpartto
theloweroventemperatures,andwillhelpkeepcleaningoftheoventoaminimum.
• Becauseafanovenhasaneventemperaturethroughouttheoven,thereisnoneedto
follow the shelf positions given in the baking guide.
• Thereisnoneedtointerchangedishesontodierentshelvespartwaythroughcooking,as
with a conventional oven.
To Help the Air Circulate Freely
Position the shelves evenly within the oven and maintain a clearance from the oven roof and
base.
Ifmorethanonecookingdishorbakingtrayistobeusedonashelf,leaveagapofatleast
25mm between the items themselves and the oven interior.
Defrosting and Cooling in the Main Oven
Todefrostfrozenfoods,turnthemainovencontroltothedefrostposition,placethefoodinthe
centre of the oven and close the door.
Tocoolfoodsaftercookingpriortorefrigeratingorfreezing,turnthemainovencontroltothe
defrost position and open the door.

12
Defrosting Times
• Smallorthinpiecesoffrozenshormeate.g.shllets,prawns&mincewilltake
approximately 1 - 2 hours.
• Placing the food in a single layer will reduce the thawing time.
• A medium sized casserole or stew will take approximately 3 - 4 hours.
• A1½kg/3lbovenreadychickenwilltakeapproximately5hours,removethegibletsassoon
as possible.
Be Safe
• Donotdefroststuedpoultryusingthismethod.
• Do not defrost larger joints of meat and poultry over 2kg/4lb using this method.
• Neverplaceuncookedfoodfordefrostingnexttocookedfoodwhichistobecooled,asthis
can lead to cross contamination.
• Defrostingmeat,poultry,andshcanbeacceleratedusingthismethodbutmakesurethey
are completely thawed before cooking thoroughly. place meat and poultry on a trivet in a
meat tin.

13
MAIN OVEN BAKING GUIDE
Cooking Times & Temperatures
• The temperature settings and times given in the baking guide are based on dishes made with
block margarine. If soft tub margarine is used it may be necessary to reduce the temperature
setting.
• Allow enough space between shelves for food that will rise during cooking.
• Do not place items on the oven base as this will prevent air circulating freely.
Note:Thisisahigheciencyoven,thereforesomeadjustmentwillhavetobemadeto
conventional cooking temperatures. The table below shows conventional cooking temperatures
and‘A’eciencytemperatures.Foroptimumresults,conventionaltemperaturesneedtobe
convertedto‘A’eciencytemperatures.
Forexample,anitemwhichwouldnormallycookataconventionaltemperatureof180°C,will
nowcookatthe‘A’eciencytemperatureof160°C.
Conventional Temperature (°C) ‘A’EciencyOven(°C)
100 100
110 110
130 120
140 130
150 140
160 150
180 - 190 160
200 170
220 180
230 190
250 200
Food Type Temperature Settings (°C) Time Approx. Shelf Position
Conv. Fanned
Small Cakes 170 160 15 - 25 min 3
Victoria Sponge 180 160 20 - 30 min 3
Semi Rich Fruit Cake 150 125 2½ - 3 hrs 2
Christmas Cake 150 125 2½ - 3 hrs 2
Bread and Butter Pudding 170 150 45 min - 1 hr 3
Fruit Crumble 200 175 40 min - 1 hr 3
LargeYorkshirePudding 220 200 40 - 48 min 4 - 5
SmallYorkshirePudding 220 200 15 - 20 min 4 - 5
Shortcrust Pastry 200 180 depends on
lling 4 - 5

14
Traditional Fruit Cakes
Itshouldberememberedthatovenscanvaryovertime,thereforecookingtimescanvary,making
itdiculttobeprecisewhenbakingfruitcakes.
Itisnecessarytherefore,totestthecakebeforeremovalfromtheoven.Useanewarmedskewer
insertedintothecentreofthecake.Iftheskewercomesoutclean,thenthecakeiscooked.
• Follow the temperatures suggested in the recipe and then adjust accordingly to the conversion
table.
• Donotattempttomakechristmascakeslargerthantheovencancopewith,youshouldallow
at least 25mm (1 inch) space between the oven walls and the tin.
• Always follow the temperatures recommended in the recipe.
• Toprotectaveryrichfruitcakeduringcooking,tie2layersofbrownpaperaroundthetin.
• Werecommendthatthecaketinisnotstoodonlayersofbrownpaper,asthiscanhinder
eectivecirculationofair.
• Donotusesofttubmargarineforrichfruitcakes,unlessspeciedintherecipe.
• Always use the correct size and shape of tin for the recipe quantities.
Roast Turkey
Roastingturkeyinvolvescookingtwodierenttypesofmeat-thedelicatelightbreastmeat,which
mustnotbeallowedtodryout,andthedarkerlegmeat,whichtakeslongertocook.
Theturkeymustberoastedlongenoughforthelegstocook,sofrequentbastingisnecessary.
The breast meat can be covered once browned.
• Always make sure that the turkey is completely thawed and that the giblets are removed before
cooking.
• Turkeyshouldberoastedat160°c
• 180°C(fanned)or180°C-200°C(conventional)for20minutesper450g(1lb),plus20minutes,
unless packaging advises otherwise.
• Theturkeycanbeopenroasted,breastsidedown,forhalfofthecooktime,andthenturned
over for the remainder of the cooking time.
• Iftheturkeyisstued,add5minutesper450g(1lb)tothecookingtime.
• Ifroastingturkeycoveredwithfoil,add5minutesper450g(1lb)tothecookingtime.
• Totestiftheturkeyiscooked,pushaneskewerintothethickestpartofthethigh.Ifthejuices
runclear,theturkeyiscooked.Ifthejuicesarestillpink,theturkeywillneedlongercooking.

15
Roasting guide
Thetimesgivenintheroastingguideareonlyapproximate,becausethesizeandageofthebird
willinuencecookingtimesaswilltheshapeofajointandtheproportionofthebone.
Frozen meat should be thoroughly thawed before cooking. For large joints it is advisable to thaw
over night.
Frozen poultry should be thoroughly thawed before cooking. The time required depends on the
size of the bird - eg; a large turkey may take up to 48 hours to thaw.
Use of a trivet with a roasting tin will reduce fat splashing and will help to keep the oven interior
clean.Alternatively,tohelpreducefatsplashing,potatoesorothervegetablescanberoasted
around the meat/poultry.
Notes:
• Whencookingstuedmeatorpoultrycalculatethecookingtimefromthetotalweightofthe
meatplusthestung
• Forjointscookedinfoilorcoveredroasters,andforliddedcasseroles,add5minutesper
450g (1lb) to the calculated cooking time.
• Smaller joints weighing less than 1.25kg (2½lb) may require 5 minutes per 450g (1lb) extra
cooking time.
• Position the oven shelf so that the meat or poultry is in the centre of the oven.
• It is recommended that the appliance is cleaned after open roasting.
Cook in main oven at: 160°C - 180°C
(fanned) 180°C - 200°C (conventional) Approximate Cooking Time (preheated oven)
Beef
Rare 20minutesper450g(1lb),plus20minutes
Medium 25minutesper450g(1lb),plus25minutes
Well Done 30minutesper450g(1lb),plus30minutes
Lamb Medium 25minutesper450g(1lb),plus25minutes
Well Done 30minutesper450g(1lb),plus30minutes
Pork 35minutesper450g(1lb),plus35minutes
Poultry 20minutesper450g(1lb),plus20minutes

16
OVEN & GRILL FUNCTIONS
The chart below details all of the functions which are available.
Symbol Function/Feature Recommended Uses
Grill,SmallArea
Forgrillingsmallamountsofsteaks,sausages,toast
andpiecesofsh.Thecentrepartofthegrillheating
element becomes hot.
Grill,LargeArea
Forgrillingsteaks,sausages,toastandpiecesof
sh.Thewholeareabelowthegrillheatingelement
becomes hot.
Conventional Grill
This function is ideal for traditional roasting. The meat
isplacedinthemiddleoftheoven,roastpotatoes
towards the top.
Fanned Oven The even temperature in the oven makes this function
suitableforbatchbaking,orbatchcookingfoods.
Defrosting and Cooling
Todefrostfoods,suchascreamcakes/gateaux,use
with the oven door closed. For cooling dishes prior to
refrigeration,leavethedooropen.
Oven Temperature
Control Use to select the oven temperature.
Lights Only Usewhentheovenisswitchedoandcoldtoaid
cleaning the oven.

17
Manual Operation
The programmer must be set to manual operation before the main oven or grill functions can be
used.
To Turn on the Main Oven
• Step 1 - Select the function
Turntheselectorcontrolknobineitherdirection,untilthefunctionyourequireappearsinthe
window.
• Step2-SetthemainovencontrolIfyouhaveselectedanovencookingfunction,thensimply
turn the main oven temperature control knob to the required temperature - this brings on the
neonindicatorlight,whichwillstayonuntiltheovenreachestherequiredtemperature.To
switchothemainoven,returnthecontrolknobtotheoposition.
Automatic Operation
See ‘programmer / clock’ section.
Using The Main Oven
Caution: Accessible parts may be hot when the appliance is in use - keep children away from
the vicinity of the oven.
Neverputitemsdirectlyonthebaseoftheovenorcovertheovenbasewithfoil,asthiscan
cause the base element to overheat.
Manual Operation
Set the programmer to manual operation. See ‘programmer / clock’ section. Turn the selector
control knob to the symbol for the desired oven function. Turn the main oven temperature control
knobtothedesiredtemperature.Theredthermostatindicatorlightwillcomeonandountil
theselectedtemperatureisreachedandthengoo;itwillturnonandoperiodicallyasthe
thermostat operates to maintain the selected temperature.
Toswitchothemainoven,returnthemainovencontrolknobtotheoposition.
Automatic Operation
See ‘programmer / clock’ section.
Preheating
Always use the fan oven setting for preheating to save time and electricity. After the oven has
beenpreheatedonthefanovensetting,turntheselectorcontrolknobtotheovensettingyou
require.Theovenmustbepreheatedwhencookingfrozenorchilledfood,andwerecommend
preheatingforyeastmixtures,batters,souéandwhiskedsponges,otherwisepreheatingisnot
necessaryasafanovenwarmsupquickly.preheattheovenuntiltheindicatorlightswitcheso
fortherstime;thiswilltakebetween5-15minutes,dependingonthetemperatureselected.

18
To Help the Air Circulate Freely
• Position the shelves evenly within the oven and maintain a clearance from the oven roof and
base.
• Ifmorethanonecookingdishorbakingtrayistobeusedonashelf,leaveagapofatleast
25mm between the items themselves and the oven interior.
• Allow enough space between shelves for food that will rise during cooking.
• Do not place items on the oven base as this will prevent air from circulating freely.
Fan Oven
• Turn the selector control knob to the base heat symbol.
• Turn the main oven control knob to the required temperature.
The fan oven comes on when the oven is switched on and circulates the air around the oven to
give a fairly even temperature throughout the oven.
Defrosting and Cooling
• Turn the selector control knob to defrost
• Turn the oven control to the light symbol.
Todefrostfrozenfoods,placefoodinthecentreoftheovenandclosethedoor.
Tocoolfoodsaftercookingpriortorefrigerationorfreezing,placefoodinthecentreoftheoven
with the door open.
CAUTION
• Donotdefroststuedpoultryusingthismethod.
• Do not defrost larger joints of meat or poultry over 2kg / 4lb using this method.
• Never place uncooked food which is to be defrosted next to cooked food which is to be
cooled, as this can lead to cross contamination.
Please refer to the cooking Guide for more information on using the defrost function.

19
USING THE PROGRAMMER / CLOCK
Alarm
Duration
Lock
Clock
End Time
Function Minus Plus Lock
Afterpoweron,‘0:00’andtheclockiconwillashonthescreen,pressanybuttontoquit.
Button 1: Function - * clock > alarm setting > duration setting > end time setting > clock setting >
* clock (*: default)
Button 2: minus (-)
Button 3: plus
Button 4: Lock
Set Alarm
1. Pressbutton1,alarmiconashingmeansalarmfunctionchosen.“0:00”willdisplay.Press
button 2 and 3 to set alarm time. Time adjust range is “0:01~23:59”. Press once to plus or
minus1,andholdfor3secondsforquick-adjust.Waitfor5secondstoconrmsetting,the
alarmiconwilldisplay,alarmtimewillbeshownandalarmstarts.Afterthecountdown,
“0:00”willdisplay,buzzingstarts4timesevery5seconds.Pressanybuttontostop.
2. Ifthere’snooperationfor2minutes,buzzingwillstop.
Duration Setting
1. Pressbutton1,choose‘duration’function,durationiconwillash,“0:00”willdisplay.Press
button2and3tosetdurationtime,adjustingrangeis“0:01~23:59”.Pressoncetoplus
orminus1,holdfor3secondsforquick-adjust.Theashingwilllastfor5seconds,sothe
settingsmustbedonewithinthistimeframeorthetimeofdaywillshowagain.Aftersetting,
thedurationiconwilldisplay,countingdownstarts.Whencountingdownstops,power
willturno,‘Duration’iconwillash,“0:00”willdisplay,buzzingwillstarttwiceforevery5
seconds.Pressanybuttontostopbuzzing,andpressbutton1toshowthetimeofday.
2. Duringthecookingduration,pressbutton1tocheckandchangethecookingtime.
3. Aftercountingdown,ifthere’snooperationfor2minutes,buzzingwillstop.

20
Time Function
1. Pressbutton1tochoosetimefunction.Timeiconwillash,pressbutton2or3tosettime.
Therangeis24hrs.Pressoncetoplusorminus1,holdfor3secondsforquick-adjust.No
operationfor5seconds,thetimeofdaywillshow,timeiconwillturno.
2. Iftimesettingischangedaftersettingalarm,durationandendtime,thealarmwillnotbe
changed,anddurationandendtimewillreset.
Lock Function
1. Presslockbuttonfor3secondsanytime,thelockfunctionwillbecomeactive,andlockicon
willdisplay.Presslockbuttonfor3secondsagain,itwillbeunlocked.Theiconturnso.
2. Whenlocked,pressinganybuttonwillcausebuzzing,meanwhilethelockiconwillashfor3
seconds.
OtherNotication
1. Ifsettingalarm,durationtimeandendtime,alarmtimewilldisplay,andalarm,duration,end
time icons will display.
2. Aftersettingalarm,duration,andendtime,Button1canbepressedtocheckandchange
alarmtime,durationtime,endtimeanddaytime.
3. Ifdurationtimeislaterthanalarmtime,therewillbeonlybuzzingforalarm.Ifdurationisearlier
thanalarmtime,therewillbeonlybuzzingforalarm.
This manual suits for next models
1
Table of contents
Other STATESMAN Oven manuals
Popular Oven manuals by other brands
Garland
Garland Mealstream 501 Installation and operating instructions

Tricity Bendix
Tricity Bendix GD 290 operating instructions

Weka Holzbau
Weka Holzbau SHG Classic 37.462.20 Installation and operating instructions
NEFF
NEFF B57CS24.0B User manual and installation instructiions
Xpress
Xpress MXP522 owner's manual
Sunbeam
Sunbeam Bake & Grill BT5300P Instruction booklet
