Stealth C6 500 Manual

UK: SET-UP & INSTRUCTIONS

TRANSMITTER FUNCTIONS
4
1 When the LED ashes between blue and red, this signals the headset isn't paired
2 When the LED is solid blue, this indicates the headset is paired with your device (PS4/PC)
3 If the LED is solid red this signals the mic mute function is active and chat will be disabled
(To activate the mic mute function simply press the "pair" button on your headset. press again to turn off)
RE SET BUTTON – To reset the headset & Transmitter, simply use a pin to press the button positioned between the + & - on the headset.
1 2 3

HEADSET CONNECTIONS and FUNCTIONS
5
1 Power ON/OFF & QUICK PAIR
2Circular LED
· Flashing Blue & Red – Not Paired
· Solid Blue – Paired
· Solid Red – Mic Mute activated
· Flashing Blue – Disconnected
· Slow Flashing Blue – Battery running low (Audio signal- beep)
3 PAIR Button & Mic Mute Function
4 Detachable Mic with Locking System
5Charging Port
6 LED charging indicator
· Charging - solid red
· Charged – LED turns off
7Game & Chat Volume Control
· Volume at highest level when beeping in ear cup
8Re-set button
1
4
2
3
5 6 7 8

Please note: Make sure the headset is powered OFF.
1Insert the micro USB charging cable (C) into the charging port on the headset. The smaller end of the cable goes into the socket on the headset
2 Plug the other end (USB Type A) of the cable into an available USB port on your chosen device (PS4/PC). Please note: make sure your chosen device is powered on to
charge the headset.
3 Charging will now begin and the LED will light solid red. Charging usually takes around 3.5 hours for the headset to be fully charged. THE LED will turn OFF when
charging is complete.
After around 14 hours of use, the LED on the headset and transmitter will slowly start ashing blue, this will signal that the battery needs to be recharged.
The headset will also give you an audio signal (beep) when the battery is running low, after this beep the headset will turn off after around 10 minutes.
CHARGING THE BATTERY
Please ensure the battery is fully charged before you use the headset. To charge the headset follow the instructions below...
6
1
2
3

PAIRING THE HEADSET - PLAYSTATION®4 / PC
7
1
2

8
PAIRING THE HEADSET - PLAYSTATION®4 SET-UP (P7)
1 Connect the USB transmitter in to a spare USB slot on your PS4 (D). Once inserted the small LED will FLASH RED & BLUE
2 Once you have fully charged the headset, press and HOLD the power button on the headset (3-5 seconds). The LED’s will FLASH BLUE and then SOLID BLUE on both the
transmitter and Headset. Once the LED on the transmitter and Headset are SOLID BLUE, this will signify that the headset is paired to your PS4 and ready for use.
If you are struggling to PAIR the headset to your PS4, please follow Steps 1 and 2 above, and then press and hold the PAIR button (3-5 seconds) situated by the
Microphone connection on your headset. This will pair the headset with your PS4.
Your Headset should now be working upon connection. In order to use the microphone and hear the in-game audio through the headset, you must make sure that your
PS4 is set-up as follows:
Settings > Devices > Audio Devices > Input Device > select USB HEADSET (2.4G WIRELESS HEADSET)
Settings > Devices > Audio Devices > Output Device > select USB HEADSET (2.4G WIRELESS HEADSET)
Settings > Devices > Audio Devices > Output to Headphones > select ALL AUDIO
ADJUST THE HEADSET AUDIO LEVELS
The volume level of the headset and microphone can be adjusted to your needs within the PS4 menu
HEADSET VOLUME
Settings > Devices > Audio Devices > Volume Control (Headphones)
MICROPHONE LEVEL
Settings > Devices > Audio Devices > Adjust Microphone Level (Adjust the microphone level until the indicator shows Good)
You can also test your Microphone by talking into it and hearing your voice back in the headset. You will notice the sound bar activity when you do.
PAIRING THE HEADSET - PC/MAC SET-UP (P7)
1 Connect the USB transmitter in to a spare USB slot on your PC/Mac (D). Once inserted the small LED will FLASH RED & BLUE
2 Once you have fully charged the headset, press and HOLD the power button on the headset (3-5 seconds). The LED’s will FLASH BLUE and then SOLID BLUE on both the
transmitter and Headset. Once the LED on the transmitter and Headset are SOLID BLUE, this will signify that the headset is paired to your PC/Mac and ready for use.
If you are struggling to PAIR the headset to your PC/Mac, please follow Steps 1 and 2 above, and then press and hold the PAIR button (3-5 seconds) situated by the
Microphone connection on your headset. This will pair the headset with your PC/Mac.
Your Headset should now be working upon connection. In order to use the microphone and hear audio through the headset, you must make sure that your PC/Mac is
set-up as follows:
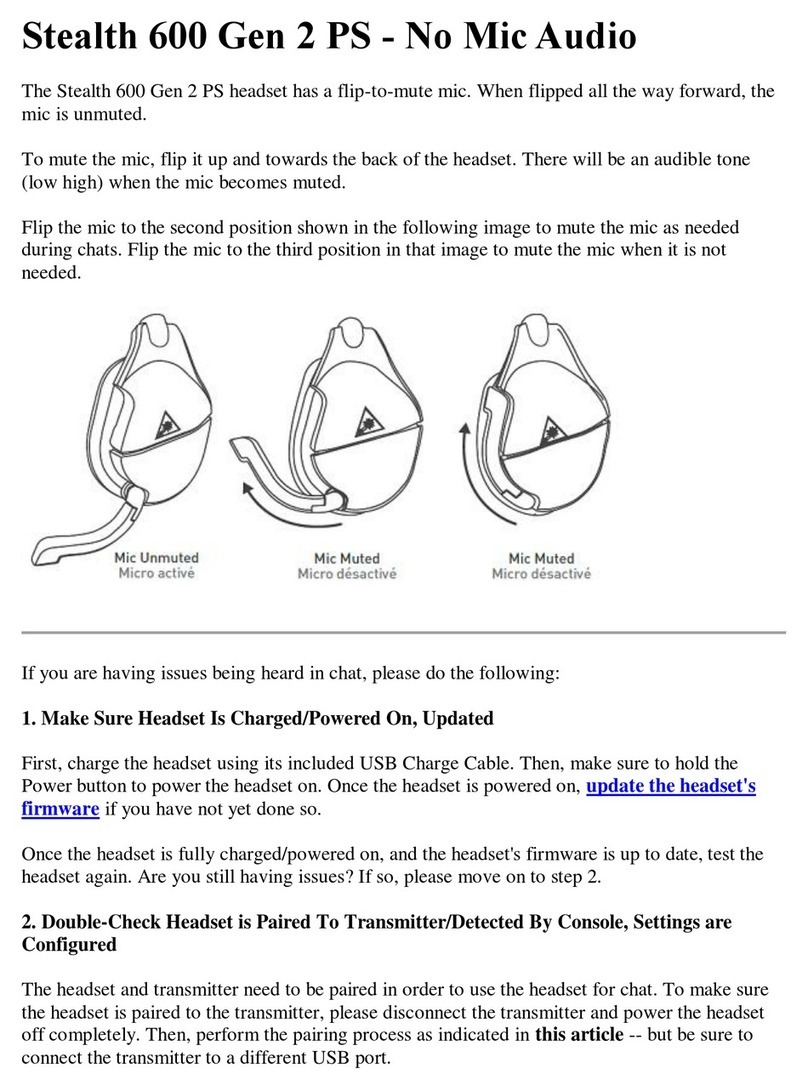
PC SETTINGS - WINDOWS 7 - 10 PRO (QUICK SET-UP)
1 Right click the Speaker Icon situated on your task bar along the bottom right hand corner of your screen
2 Select Sound from the options provided
3 Go to Playback tab and select Headphones 2.4G USB WIRELESS HEADSET > choose Set Default
4 Go to Recording and select Microphone 2.4G USB WIRELESS HEADSET > choose Set Default
PC settings conguration is now complete - please test both the microphone and audio playback.
9
PC SETTINGS - WINDOWS 7 - 10 PRO (DETAILED SET-UP)
1 Right click on the Start menu (Bottom Left Windows Icon)
2 Select System
3 Select the Sound tab
4 Choose your Output Device. Make sure Headphones (2.4G USB WIRELESS HEADSET) is selected from the dropdown box
5 Choose your Input Device. Makes sure Microphone (2.4G USB WIRELESS HEADSET) is selected from the dropdown box
You should be able to tap or breath into the mic and see activity in the sound bar under Test your Microphone
To test and check the volume of your Microphone…
1 Select Device properties in the input section
2 Adjust the volume to your desired level
3 Press Test
For further options go to the Sound tab and select Advanced Sound Options
MAC SETTINGS (MAC MODELS WITH USB A CONNECTION ONLY)
1 Go to System Preferences
2 Select Sound
3 Go to Input and select 2.4G WIRELESS HEADSET
4 Go to Output and select 2.4G WIRELESS HEADSET
5 Go to Sound Effects and tick all options under Alert Volume and Output Volume
Make sure the Output Volume is turned up fully on both the Input and Output tabs.
Mac settings conguration is now complete - please test both the microphone and audio playback
AUDIO DROP OUTS OR OTHER INTERMITTENT AUDIO ISSUES (SOUND & MIC)
If you do experience any audio drop outs during gameplay or any other audio issues please consider the below which could help in xing any issues you are experienc-
ing with sound or your microphone:
• Try re-setting your wireless headset by disconnecting all cable and re pairing the headset with your console
• Failing that, you can re set the Headset by using the re set button situated between the + & - volume control on the headset
• Always keep the USB transmitter in close proximity to your headset (No more than 10 metres)
• Move your headset in direct line of the transmitter
• Please disable any other wireless devices or anything that could interfere, within 6ft of the headset and USB transmitter. For example, anything connected to
Bluetooth... mobile phones, PC’s, audio speakers, DAB digital radios etc
• Make sure there is no Wi-Fi router located within 6ft of the headset and its transmitter
• Depending on the strength of your router it would be a good idea to temporarily disable (power off) and test your headset again by playing a single player or in ofine
mode. If the issue does not persist then it is more than likely your router was interfering with your headset and transmitter
• Please note. Poor internet connection can also interfere with your headset during online play
• When using the USB Transmitter to pair the headset with your chosen device, try a different USB port on your console to what you were using previously
• Disable any downloads you have going on in the background

10
• If you are using your PS4 controller wirelessly please try another controller if available
• Also try connecting your controller to your console using a USB cable
• Some PS4 controllers have wireless transmission issues which can cut the sound off, so connecting a cable as mentioned in the point directly above
would eradicate this issue
• You can also try resetting your controller (please refer to use your manufacturer’s instructions)
STILL NEED OUR HELP?
STEALTH GAMING SUPPORT PAGE
SUPPORT ARTICLES
TECHNICAL SUPPORT
QUESTIONS / SET-UP / NOT WORKING?
ONLINE: STEALTHGAMING.NET/SUPPORT
EMAIL: [email protected]
PHONE: 01204 369 237
MON-THURS- 9AM-5PM
FRIDAY - 9AM TO 4PM (ALL CALLS CHARGED AT NATIONAL RATE)
TO ENSURE THAT YOUR CALL IS HANDLED QUICKLY AND
EFFECTIVELY PLEASE ENSURE THAT YOU HAVE THE MODEL
NUMBER, (SITUATED BY THE BARCODE ON THE BASE OF THE BOX)
AND ANY OTHER RELEVANT INFORMATION REGARDING YOUR
PRODUCT TO HAND WHEN YOU RING.

LEGAL INFORMATION
Please keep this instruction manual for future reference. If you require any help or assistance please contact the Helpline or VISIT STEALTH GAMING SUPPORT PAGE
WARRANTY
This product is guaranteed for a period of one year from the date of purchase. During this period if there is a defect due to faulty materials, or workmanship the retailer
from whom you purchased it will replace it with the same or a similar model on production of your purchase receipt or proof of purchase. This guarantee does not cover
defects arising from accidental damage, misuse or wear and tear, and is available only to the original purchaser of the product. This does not affect your statutory rights.
To prevent possible hearing damage, do not listen at high volume levels for long periods.
PRECAUTIONS
• Ensure that the volume control is set to the minimum level before connecting the headset to your system
• Before wearing the headset, set the volume control to its minimum level then slowly increase until you reach your desired volume level
• Listening to your headset at its maximum level may cause damage to both the headset and your ears
• Long term exposure to loud music or other sounds in a headset may cause hearing damage. It is best to avoid very high volume levels when using a
headset, especially for extended periods
IMPORTANT SAFEGUARDS & PRECAUTIONS
• Never expose to direct sunlight or wet weather conditions
• Do not expose the unit to splashing, dripping, rain or moisture. Do not immerse in liquid
• Do not expose to dust, high humidity, high temperatures or mechanical shock
• Avoid any unnecessary strain of the cable
• Do not carry the headset by its cable
• Do not use if the equipment is damaged
• Do not disassemble; there are no serviceable parts inside
• For external cleaning, use a soft, clean, damp cloth only. Use of detergents may damage the cabinet nish and leak inside
BATTERY CARE
• The headset is only to be charged under adult supervision
• Once the headset is fully charged disconnect the USB charging cable
• Do not attempt to charge any other battery pack or device using the USB charging cable
• Do not leave the headset on charge for longer than 8 hours
• We do not recommend leaving the headset on charge overnight or while unattended
• Never dispose of batteries in re, as this can cause them to explode
• Do not attempt to remove the headsets built in battery pack, it is not replaceable
NOTE
This equipment generates, uses, and can radiate frequency energy and, if not installed and used in accordance with the instructions, may cause interference to
radio communications. However, there is no guarantee that interference will occur in a particular installation. If this equipment does cause interference to radio or
television reception, which can be determined by turning the equipment on and off, the user is encouraged to try to correct the interference by one or more of the
following measures:
11

• Move or relocate the receiver/transmitter unit
• Increase the distance between any Wi-Fi equipment and receiver/transmitter unit
• Actual battery life varies depending on factors such as the volume level, etc
• Actual wireless range will vary with use, settings and environmental conditions
RECYCLING
Where you see this symbol on any of our electrical products, batteries or packaging, it indicates that the relevant electrical product or battery should not
be disposed of as general household waste in the EU or Turkey. To ensure the correct waste treatment of the product and battery, please dispose of them
in accordance with any applicable local laws or requirements for disposal of electrical equipment/batteries. In so doing, you will help to conserve natural
resources and improve standards of environmental protection in treatment and disposal of electrical waste.
The recycling and processing of Waste Electrical and Electronic Equipment will make a signicant contribution towards helping protect the environment by reducing
landll waste.
Not recommended for children under 6 years of age.
MADE IN CHINA
12

Not recommended for children under 6 years of age. Please retain this packaging for future reference. Due to the company’s policy of constant improvement and technical renement, the company reserve the right to alter the specication.
This product is not sponsored, endorsed or approved by Sony Interactive Entertainment. PS4™ is a registered trademarks of Sony Interactive Entertainment. Manufactured by ABP Technology Ltd. Bolton, BL2 1BX. MADE IN CHINA.
Table of contents
Other Stealth Headset manuals

Stealth
Stealth SX-01 Manual

Stealth
Stealth Shadow X User manual

Stealth
Stealth 700 Gen 2 Xbox User manual

Stealth
Stealth XP-NIghthawk Application guide

Stealth
Stealth Shadow V User manual

Stealth
Stealth SX-02 Manual

Stealth
Stealth C6-300 Manual

Stealth
Stealth 600 Gen 2 PS User manual

Stealth
Stealth C6 300 V User manual