Steel mate PTS810 V10 User manual

Steelmate Industrial Park, Heping Street, Dongfu Road, Dongfeng Town,
Zhongshan City, Guangdong, P.R. China 528425
STEELMATE CO., LTD.
Front & Rear Parking Assist System
PTS810 V10
Manual
PRI0886R/A
Think safety think Steelmate
Steelmate Co., Ltd. All rights reserved.
The right to change the design and specifications reserved.
The trademark, patent and copyright are owned by
Steelmate Co., Ltd.

02 03
The PAS is designed as a driver assistance device,
and should not be used as a substitute for safe
parking practices. The area into which the vehicle
is to be reversed must be constantly visually
monitored while parking.
The manufacturer and its distributors do not
guarantee or assume liability for collisions or
damages while reversing the vehicle.
Parking Assist System (PAS) helps to provide
assistance when reversing and parking. Driving
skills such as slowing down, use of mirrors etc. is
always essential.
This system is for vehicles with 9~16V DC only.
This system should be installed by a professional
auto technician.
Route wiring harness away from heat source
and electrical components.
It is strongly recommended to check the position
of the sensors before the actual drilling of the
holes.
Perform a functional test after installation.
1.
2.
3.
4.
5.
This PAS comes with 8-sensor and a display that
is an ultrasonic detects the area behind the vehicle
while reversing and driving forward, and alerts with
audible tones & visual warnings, if the system
detects an obstacle. It assists the driver
when parking and in manoeuvring situation.
PTS800V10 is a front and rear parking assist
system with slim black LCD display. All the
detachable sensors are waterproof and can be
easily changed. Combined with the anti-interference
and anti-false alert technology, the system can
detect obstacles in any weather conditions and
response quickly. The system has intelligent
detection, which is ideal for vehicles with tow-bar
or spare tire.
Every part of the product has passed the most
stringent test before releasing to the market. It is
reliable at a wide storage temperature range (-
40 C~+85 C/ -40 F~+185 F) and becomes very
useful when you are parking at a raining day,
snowing day or at night etc. With the help of parking
assist system, you can enjoy a comfortable, relaxed
and safer parking experience.
9~16V
<350mA
-40 C~+80 C/ -40 F~+176 F
-20 C~+70 C/ -4 F~158 F
-40 C~+85 C/ -40 F~+185 F
0.30m~2.59m/ 1.0ft~8.4ft
70~90dB
Operating voltage:
Operating current:
Operating temperature:
ECU:
Display:
Storage temperature:
Detection range:
Siren SPL:
Slim black display with digital showing
Complete front & rear car protection with 8-
sensor
Can change to 6-sensor system (2 front + 4rear)
1 control unit and 1 display for easy installation
All weather design
Sensor with waterproof wire connector
Voice/ beep alert selectable
Anti-false alert technology
Intelligent detection for vehicles with tow-bar,
spare tire or other protrusion
Self-test function
Detection range:
Front:
Rear:
0.30~0.89m/ 0.3~3.2ft
0.30~0.59m/ 0.3~1.9ft
(reversing)
0.30~2.59m/ 0.3~8.4ft
Important notice
Disclaimer
About the product Key features
Specifications
LCD display
Digital distance
Matrix obstacle position
SET button Speaker
Universal joint
Pedestal
A parkolást segítő rendszer segítséget nyújt
tolatáskor és parkoláskor. A járművezetői
készségek, mint gyelem, tükrök használata,
stb. a rendszer használata mellett is
nélkülözhetetlenek.
1. Az egységet 9-16 V feszültségű járművekhez
tervezték.
2. Az egység telepítését csak szakember
végezheti.
3. A vezetékköteget hőforrástól és elektromos
részektől távol vezesse el.
4. Javasoljuk, hogy a furat kifúrása előtt
ellenőrizze az érzékelő kívánt elhelyezési
pontjait.
5. A telepítés után végezzen tesztet.
Fontos tudnivalók
Nyilatkozat
A parkolást segítő rendszer egy vezetést segítő
eszköz, amely nem használható a biztonságos
parkolás helyettesítésére. Parkolásnál
folyamatosan gyelje a területet ahova a
járművel tolat.
A gyártó és a forgalmazó nem vállal semmilyen
felelősséget a parkolásból eredő esetleges
sérülések vagy károk miatt.
Termék bemutatása
Parkolást segítő rendszer 8 szenzorral és
kijelzővel. A szenzorok érzékelik a jármű előtti és
mögötti területet, az LCD kijelző és a hangjelző
gyelmezteti, amikor akadályt észlel. Segíti a
vezetőt parkolás és manőverezés közben.
Minden érzékelő vízálló és könnyedén
cserélhető. A rendszer bármilyen időjárási
körülmények között képes érzékelni és jelezni
az akadályokat. Ideális vonóhoroggal és hátsó
pótkerékkel rendelkező járművekhez is.
A Steel Mate parkolást segítő rendszerrel
kényelmesen, nyugodtan és biztonságosan
parkolhat.
Főbb tulajdonságok
• Vékony, digitális kijelző
• Első és hátsó érzékelők (8 db)
• 1 vezérlőegység és 1 kijelző az egyszerű
beszereléshez
• Bármilyen időjárási körülmények között
használható
• Érézékelők vízálló csatlakozóval
• Választható hangjelzés (beszéd vagy
csipogás)
• Téves riasztás elleni technológia
• Kettős intelligens funkció, vonóhoroggal
vagy hátsó pótkerékkel rendelkező
járművekhez
• Öntesztelő funkció
Működési feszültség: 9-16V
Működési teljesítmény: <350mA
Hangjelző hangterjedelem: 70-90dB
Működési hőmérséklet:
Központ: -40°C~+80°C
LCD kijelző: -20°C~+70°C
Tárolási hőmérséklet: -40°C~+85°C
Érzékelési tartomány: 0,30m~2.59m
Érzékelési tartomány:
Elől: 0.30~0.89m
0.30~0.59m(tolatva)
Hátul: 0.30~2.59m
Akadály távolsága
Akadály távolsága
(digitális)
Beállítás gomb
Csatlakozó
Hangszóró
Talp
LCD kijelző

04 05
Self-testing function Volume adjustment
Voice adjustment
Once ACC ON and reverse gear is selected. press "SET" button to select the volume level, it will saved and
exit after 1 second later. ("3" for Max, "2" for Middle, "1" for Min)
Default setting: Max volume
1. When ACC ON, the system will test 4 front sensor (E,F,G,H) automatically.
1) Normal 2) Damaged or defective sensor is detected
3) Once the self-test procedure is completed, when you press the footbrake, the system will detect in front of
the vehicle for 5 seconds.
1) Normal 2) Damaged or defective sensor is detected
When detected damaged/ defective sensor:
Beep 3 times for alarm
Other proper sensors will keep working after the alarm
No. of sensor damage/ defective (E1~E6) will be show
on the display together with the corresponding LCD lights
on for showing which sensor(s) is(are) damaged/ defective
The system will not alarm when sensors (F&G) are
damaged/ defective as it will work as 2-sensor system
automatically.
Once ACC ON and reverse gear is selected, press "SET" button for 2 seconds with "Bi" sound once enter the
voice adjustment mode.. Then press the SET button again to turn ON/ OFF the voice function.
Default setting: Voice alarm turn on
"00": Voice alarm turn off
"01": Voice alarm turn on
2. When reverse gear is selected, the system will teat (A,B,C,D,E,H) sensors automatically.
3) Once the self-test procedure is completed,
the system will detect rear of the vehicle
automatically.
Be---Be---Be---No beep
Be--- Be---Be---Be---
Normal & no obstacle
Öntesztelő funkció
1. Amint a gyújtáskapcsoló be van kapcsolva, a rendszer automatikusan tesztelni fogja a 4 első
szenzort (E,F,G,H).
1) Megfelelően működnek - Nincs csipogás 2) Valamelyik érzékelő hibás
- Van csipogás
3) A tesztelés befejezése után a fékpedál lenyomásakor a rendszer 5 mp-en keresztül érzékeli a jármű előtti
területet.
2. Kapcsolja R fokozatba a sebességváltót, a rendszer az A,B,C,D,E,H szenzorokat ellenőrzi.
1) Megfelelően működnek 2)Sérült vagy hibás szenzor
3) A tesztelés befejezése után a rendszer
automatikusan érzékeli a jármű mögötti területet.
Megfelelően működik és nincs akadály.
Ha sérült vagy hibás szenzort érzékelt:
• 3x csipog
• A jelzés után a többi szenzor megfelelően működik
• A sérült/hibás érzékelő száma (E1-E6) és helye
megjelenik a kijelzőn
• A rendszer nem jelzi, ha az F&G szenzorok sérültek,
ugyanis így automatikusan 2-érzékelős rendszerként
működik.
Kapcsolja be a gyújtáskapcsolót és kapcsolja a sebességváltót R fokozatba, majd a hangerő
szintjének beállításához nyomja meg a Beállítás gombot. 1 mp után automatikusan kilép és elmenti
a beállításokat. (3 - max hangerő, 2 - közepes, 1 - min hangerő)
Gyári beállítás: max hangerő
Hangerő beállítása
Hang beállítása
Kapcsolja be a gyújtáskapcsolót, kapcsolja a sebességváltót R fokozatba és nyomja meg 2
mp-ig a Beállítás gombot, egy csipogás jelzi, ha belépett a hang beállítása menübe. A hang ki/
bekapcsolásához nyomja meg újra a Beállítás gombot.
Alapbeállítás: Hang bekapcsolva
„01”: Hang bekapcsolva
„00”: Hang kikapcsolva

06 07
Learning function for cars with tow-bar or spare wheel Dual intelligent function
Clearing the learning function:
X10
+
1"
Be------
1.
2.
3.
4.
With the ignition "ON", change the gear from "N" to "R" for 10 times (Each gear change must be within
1 second)
After 10th times, leave the gear in "R" position.
The display will beep and flash once to complete the learning process.
When the learning function is activated, the system will ignore the tow bar or spare wheel and only
detect other object behind the vehicle.
1.
2.
3.
With the ignition "ON", change the gear from "N" to "R" for 12 times (Each gear change must be within
1 second)
After 12th times, leave the gear in "R" position.
The display will beep and flash once will dark in turn to indicate that learning function is cleared
successfully and the system is reset.
When this function is ON, the detected distance will increase 20cm between the sensor and obstacle
which is designed for the tow-bar/ Spare wheel.
Jumper position: "0" (Default setting)
Normal detected distance
Jumper position: "20"
The detected distance from sensor to obstacle
should be increased 20cm.
Note:
1. If you make a mistake while carrying out the above procedure, leave vehicle in the "R" position for 2
seconds to clear the system memory and then start the procedure again.
2. If the vehicle does not have tow-bar or spare wheel, you do not need to use this function.
0.5m
0.3m
Tanítási funkció vonóhoroggal vagy hátsó pótkerékkel rendelkező
járművekhez
Keressen egy akadálymentes helyet a funkció aktiválásához.
1. Kapcsolja be a gyújtást és 1 másodpercenként 10x kapcsolja a sebességváltót „N” fokozatból
„R” fokozatba, majd vissza.
2. A 10. alkalommal hagyja a sebességváltót „R” fokozatban.
3. A tanítási folyamat befejeztével a kijelző egyet csipog is villog.
4. A rendszer ezután tolatáskor gyelmen kívül fogja hagyni a vonóhorgot és a pótkereket, csak
a jármű mögötti területet gyeli.
A tanítási funkció visszaállítása:
1. Kapcsolja be a gyújtást és 1 másodpercenként 12x kapcsolja a sebességváltót „N” fokozatból
„R” fokozatba, majd vissza
2. A 12. alkalomnál hagyja a sebességváltót „R” helyzetben
3. A kijelző egyszer csipog és villog, majd elsötétül,jelezve, hogy a tanítási funkció törlődött, a
rendszer visszaállt.
Megjegyzés:
1. Ha a leírt folyamat alatt elront valamit, hagyja a sebességváltót „R” fokozatban 2 másodpercre,
így törlődik a rendszer memóriája, ezután újrakezdhető a folyamat.
2. Amennyiben a jármű nem rendelkezik vonóhoroggal vagy hátsó pótkerékkel nem szükséges
használnia ezt a funkciót.
3. Miután végzett a folyamattal tesztelje a rendszert.
Kettős intelligens funkció
Amennyiben be van kapcsolva ez a funkció, az érzékelő és az akadály közötti távolság 20
cm-rel meg fog növekedni (30 cm helyett 50 cm lesz).
Kapcsoló pozíció: „0” (gyári beállítás)
Valós észlelt távolság
Kapcsoló pozíció: „20”
Az észlelt távolság a szenzor és az akadály
között 20 cm-rel meg fog növekedni

08 09
Distance: (<0.30m/1.0ft)Distance: 0.4m/1.2ftDistance: >0.6m/2.0ft
Driving forward (6 sensors)
Be---Be--- Be------
Jumper position: "55~65cm"
Normal sensor sensitivity
Recommended for the sensor which is installed
between 55~65 cm from ground
Jumper position: "45~54cm" (Default setting)
Low sensor sensitivity
Recommended for the sensor which is installed
between 45~54 cm from ground
How does the system work
Sensor sensitivity adjustment
Szenzor érzékenységének beállítása
Kapcsoló pozíció: „55~65cm”
Normáls szenzor érzékenység
Ajánlott, ha a szenzor beszerelési
magassága a talajtól számítva 54~65 cm.
Kapcsoló pozíció: „45~54cm” (gyári
beállítás)
Alacsony szenzor érzékenység
Ajánlott, ha a szenzor beszerelési
magassága a talajtól számítva 45~54 cm.
Hogyan működik a rendszer?
Előre haladás (6 szenzor)
Távolság: >0.6m Távolság: 0.4m Távolság: <0.3m

10 11
Distance: >1.0m/3.3ft Distance: 0.4m/1.2ft Distance: (<0.30m/1.0ft) Distance:<0.3m/1.0ft Distance:0.8m/2.6ft Distance:>1.5m/4.9ft
Driving forward (8 sensors)
+12V +12V +12V
Reversing
Be---Be--- Be------ Be------ Be---Be--- No Beep
Előre haladás (8 szenzor)
Távolság: >1m Távolság: >0.4m Távolság: <0.3m
Tolatás
Távolság: <0.3m Távolság: 0.8m Távolság: >1.5m

12 13
Attention Sensor maintenance
Be--Be--Be--
Distance: 0.4m/1.3ft
Be--------
Distance:<0.3m/1.0ft
Zigzag reversing
After installation, please fully test the system
before use.
Heavy rain, dirty or damaged sensors may
result in false alarm occasionally.
Ensure that the self-test procedure is comple-
ted and all sensors are functioning before
reversing.
False detection may occur in the following
situations:
Do not wash the sensor with squirt gun or swab
them forcibly.
Please wash car with low-pressure water.
Please melt the ice with water when the sensors
are covered by ice.
Please clean the sensors with cloth or low-
pressure water when the sensors are covered
by mud or snow.
Cikcakk tolatás
Távolság: 0.4m Távolság: <0.3m
Hibás érzékelés a következő helyzetekben
fordulhat elő:
Figyelmeztetés
Telepítés után, használat előtt tesztelje le a
rendszert.
Erős esőzés, koszos vagy sérült szenzor
okozhat alkalmanként hibás riasztást.
A rendszer használata előtt ellenőrizze, hogy
az önteszt befejeződött és az összes érzékelő
működik.
Ne mossa az érzékelőket magasnyomású mosóval
és ne dörzsölje erősen.
Kérjük, hogy alacsonnyomású vízsugárral mossa
az autót.
Amennyiben hó vagy jég fedi az érzékelőket,
kérjük vízzel olvassza le.
Amennyiben koszosak vagy sarasak a szenzorok,
kérjük ruhával vagy alacsony nyomású vízsugárral
tisztítsa le őket.

14 15
Installation Manual
60' ~ 80'
Brief installation diagram
Includes
Installation tools
Manual
The above graphics are for reference only.
Display
ECU
Telepítési útmutató
Bekötési rajz
A csomag tartalma
Beszerelési eszközök
A képek tájékoztatő jellegűek.

Érzékelő beszerelése
Kérjük állítsa be az érzékelők szögét az érzékelő magasságának és a lökhárító szögének megfelelően,
hogy elkerülje a talaj érzékelését.
Megjegyzés:
1. 2 szenzoros első rendszernél javasolt az érzékelőket E&H pozícióban
elhelyezni.
2. Néhány járművön a rendszámtábla elhelyezkedése vagy a lökhárító
kialakítása miatt a két központi szenzor közötti távolság (L2) nagyobb
lesz, azaz L2>60cm. A készlet így is működni fog, azonban a keskeny
tárgyak (pl.: oszlopok) érzékelése csökken.
16 17

Az érzékelő fedelének cseréje
Tipp: Győzödjön meg
róla, hogy a fok jelzés
csatlakoztatás után a szenzor
tetején van.
Mielőtt kifúrná a
lyukakat ellenőrizze,
hogy a csomagban
található lyukfúró
egyezik-e a szenzorok
átmérőjével.
1918

Ha beszerelés után rés található a lökhárító és a szenzor között, kérjük állítsa be a a furat
szögét az alábbiak szerint:
20 21

22 23
Wire connection
Display
ECU
ABCDEFGH
H
G
F
E
D
C
B
A
Black
White
GNG
ACC+
Reversing light
Red
Footbrake light
Pink
Bekötési rajz
Rózsaszín
Piros
Fehér
Fekete
Gyújtás
Tolatólámpa
Féklámpa
Test
Kijelző

24 25
Functional test Troubleshooting
1. After installation, the buzzer/display doesn't
work.
Make sure the wires connected properly.
Make sure the vehicle is ACC ON.
Make sure the reverse gear is selected (the
reversing light should be lighted on).
2. Damaged sensor detected
Make sure ALL sensors plugged into the ECU
correctly and tightly.
Make sure no snow or dirt covered on the
sensor.
Please check the sensor is damaged or not.
3. False alarm
Make sure ALL sensors plugged into the ECU
in the correct position tightly.
Please check if any of sensors detected the
ground.
Please check if the rubber ring of the sensor
came out (if sensor comes with rubber ring).
4. Display alarm sound is too low or too high
Press the SET or volume button to adjust the
volume to a suitable level.
5. If the problem persists, please follow below.
For consumer: Please contact the nearby
dealer or customer service center.
For installer/dealers:
Test the sensors with a certified ECU by
performing a functional test.
Replace another ECU and retest the sensors.
Plug the certified sensors into the ECU and
performing a functional test again.
about the problems with details.
Functional testing is possible
by holding a wooden board
(0.3 x1.0m/1x3.3ft) standing
at the front or rear of the car,
and drive the car forward and
backward to test each
function respectively as
shown in this manual.
1.0m/3.3ft
Rear sensor function test
Front sensor function test
0.3m/1.0ft
2.5m/8.2ft
a.
b.
Telepítés utáni működési teszt
A teszt elvégzéséhez
tartson egy falapot (0.3x1m)
a jármű előtt és mögött,
lassan guruljon előre majd
tolasson hátra az autóval
és tesztelje a leírásban
található funciókat.
1. Telepítés után a hangjelző nem működik
• Ellenőrizze, hogy minden vezeték
helyesen van csatlakoztatva
• Ellenőrizze hogy a gyújtás be van-e
kapcsolva
• Ellenőrizze, hogy a sebességváltó „R”
fokozatban van.
2. Sérült érzékelő észlelése
• Ellenőrizze, hogy minden érzékelő
helyesen és xen van csatlakoztatva a
központba
• Ellenőrizze, hogy nem havas vagy
koszos az érzékelő.
• Ellenőrizze, hogy az érzékelő sérült-e
vagy sem.
3. Téves riasztás
• Ellenőrizze, hogy minden érzékelő
helyesen és xen van csatlakoztatva a
központba.
• Ellenőrizze, hogy valamelyik érzékelő
érzékelte-e a talajt.
• Ellenőrizze, hogy az érzékelő
gumigyűrűje kicsúszott-e (gumigyűrűs
érzékelőknél).
4. A hangejlző túl halk vagy túl hangos
• Nyomja meg a hangerő gombot és állítsa
be a megfelelő hangerőt.
5. Amennyiben a probléma még mindig
fennáll, kérjük hajtsa végre a következő
lépéseket:
a) Felhasználó: Vegye fel a kapcsolatot a
forgalmazóval.
b) Szerviz:
• Tesztelje az érzékelőket az eredeti
központtal a működési teszt
végrehajtásával.
• Cserélje ki az központot és tesztelje újra
a rendszert.
• Amennyiben a hiba továbbra is fennáll
vegye fel a kapcsolatot az importőrrel.
Hibaelhárítás
Table of contents
Other Steel mate Automobile Accessories manuals

Steel mate
Steel mate TP-S7 User manual

Steel mate
Steel mate PTS810 V10 User manual

Steel mate
Steel mate PTS400-COM Series User manual

Steel mate
Steel mate PTS411M8 User manual

Steel mate
Steel mate PTS411M23 User manual

Steel mate
Steel mate PTS411M21 User manual

Steel mate
Steel mate PTS410V11 User manual

Steel mate
Steel mate PTS800V3 User manual
Popular Automobile Accessories manuals by other brands
Warn
Warn 90930 installation instructions

Peruzzo
Peruzzo PARMA E-BIKE Fitting instructions
Thule
Thule 1039 instructions

Classic Accessories
Classic Accessories StormPro RainProof Instructions & Care
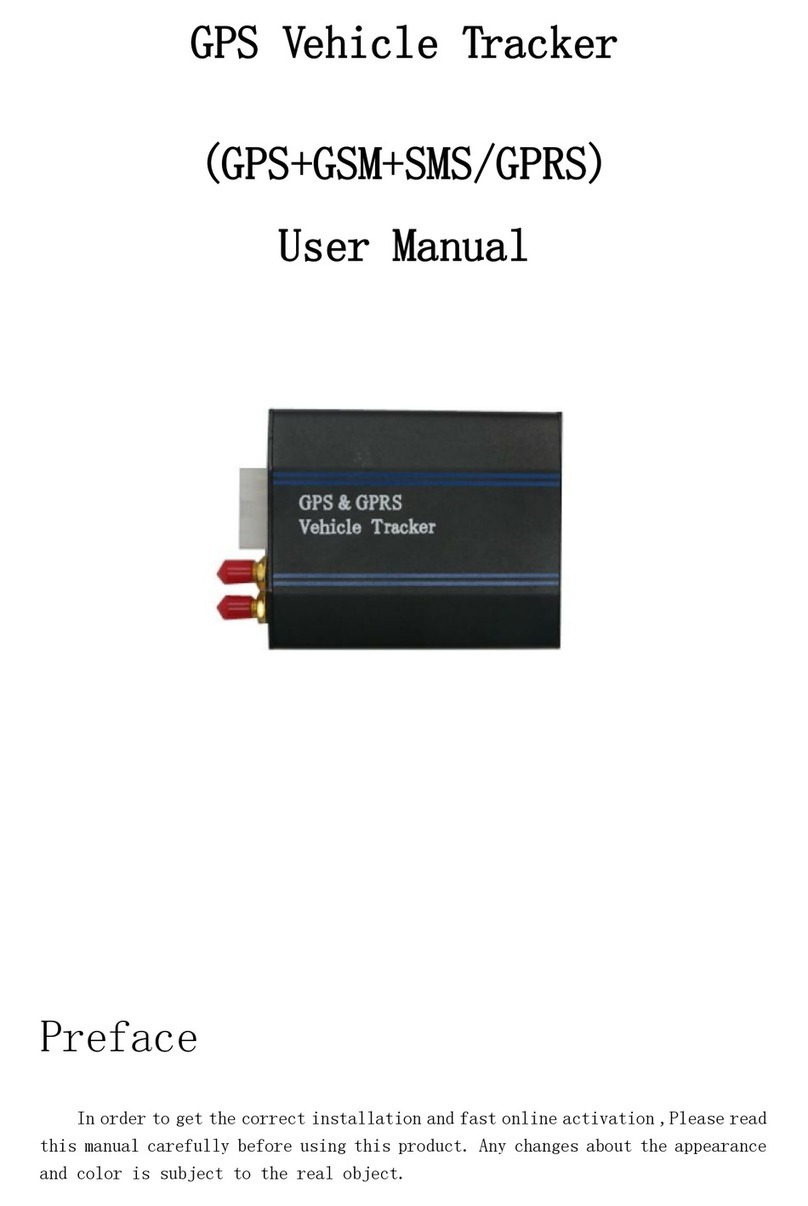
Sunsky
Sunsky S-GPS-0142 user manual

APS Auto Parts Specialist
APS Auto Parts Specialist IB06EAG7 installation instructions
