manuals.online logo
Brands
  1. Home
  2. •
  3. Brands
  4. •
  5. SteppIR
  6. •
  7. Antenna
  8. •
  9. SteppIR MonstIR PRO DB42 User manual

SteppIR MonstIR PRO DB42 User manual

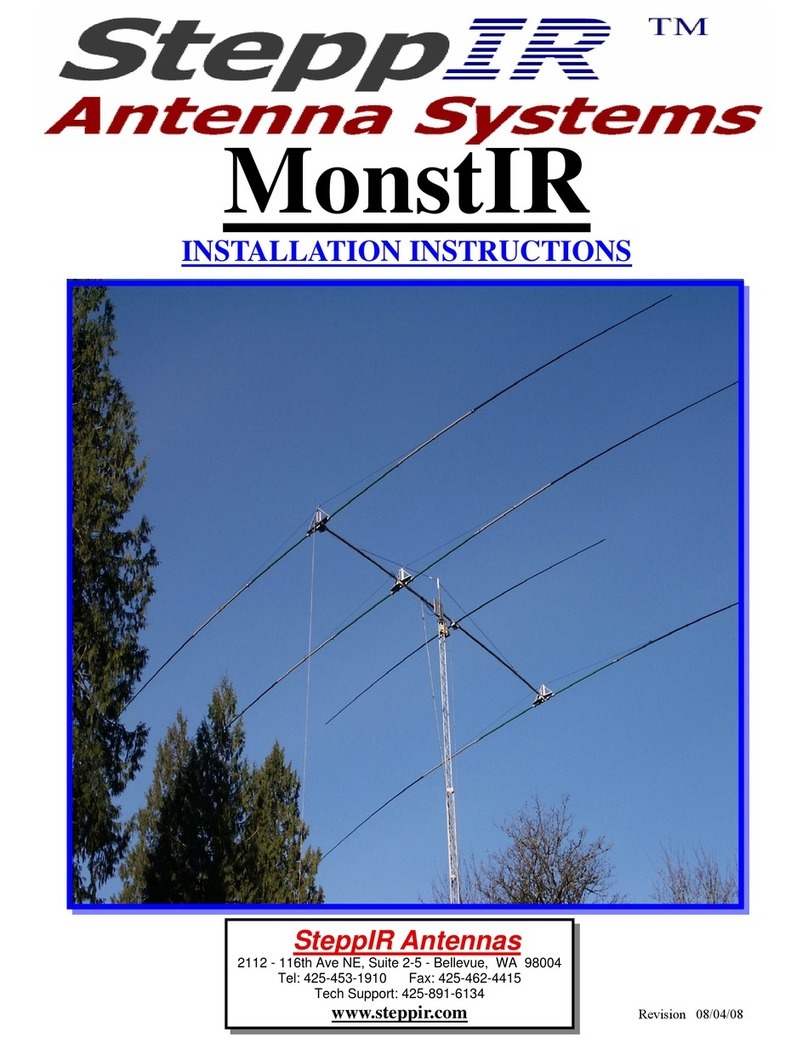
DB42 MonstIR PRO Installation Manual
SteppIR Antennas ⚫ 13406 SE 32nd St. Bellevue, WA 98005 ⚫ Tel: 425.453.1910 ⚫ www.steppir.com
This assembly manual is intended to be
printed in full COLOR. If the manual is
printed in black and white, many im-
portant details could be lost.
REV 10.14
05/22/2023
Tech Support: www.steppir.com/support ⚫ Tel: 425.453.1910 ⚫ supp[email protected]
Page 2
DB42 MonstIR PRO Specifications
Specifications DB42 Element Yagi
Boom length 42 ft 8 in / 13.0 m
Boom outside diameter 1.75 in—3 in / 4.45—7.6 cm
Longest element 49 ft / 14.9 m
Turning radius 29 ft / 8.8 m
Weight 238 lb / 108 kg
*Projected Area 32.38 sq ft / 3.0 sq m
Wind rating 100 mph
Adjustable elements 5
Power Rating 3000w Key Down / *1500w on 80m
(option)
Feed points 2
Frequency coverage 6.8 MHz—54 MHz (*3.5MHz w/ 80m option)
Control cable 24 conductor shielded, 22AWG
Gain / Front to
rear
by band
Gain, dBi
Forward DIR
Front to rear,
db forward
Gain, dBi
Reverse
DIR
Front to rear,
dB reverse
80M 1.7 NA 1.7 NA
40M 8.0 25.5 8.0 23.2
30M 9.0 12.4 9.0 12.4
20M 10.1 22.0 10.0 23.2
17M 10.8 23.2 10.7 21.9
15M 11.0 25.7 10.6 20.0
12M 11.9 24.1 10.4 8.9
10M 12.2 20.0 10.5 11.7
6M 14.0 25.0 NA NA
*Projected area is the total perpendicular surface area measured in square feet/square meters, that is exposed to wind. To calculate wind
load you always take the largest projected area whether that is from the perspective perpendicular to the boom or perpendicular to the
elements. In the case of SteppIR Yagi's, the maximum projected area will always be the sum of the surface area's perpendicular to the
Yagi elements. This calculation is a constant number and will not change regardless of EIA specification changes. Do not mistake this
projected area calculation as anything more than a datapoint to present to your structural engineer, tower manufacturer or rotator manu-
facturer so that they can determine what is necessary for your application.
When sizing an antenna to a tower, many factors need to be taken into consideration including, but not limited to: projected area of
antenna in square feet or square meters, weight of the antenna and other items on tower, turning radius, element lengths, antenna height,
location exposure category, locations three-second gust wind-speed, locations maximum radial ice loading.
Improper specification of an antenna or rotator to a tower can result in product failure, injury or death. SteppIR is not an expert on tow-
er or rotator sizing and for this reason will never offer any recommendation – this specification process is meant for industry profes-
sionals such as a structural engineer, tower manufacturer or rotator manufacturer. Please do not attempt to self-specify our products –
the information provided by SteppIR is to be utilized by industry professionals only and we will not accept any liability for improperly
specified antenna/tower/rotator applications.
Tech Support: www.steppir.com/support ⚫ Tel: 425.453.1910 ⚫ supp[email protected]
Page 3
DB42 TABLE OF CONTENTS (page 1 of 4) Page(s)
PREAMBLE
OK, NOW WHAT? Advice by Jim Streible K4DLI 7—8
DB42 Bill of Materials (BOM) 9—10
DB42 Kits Bill of Materials (BOM) 11-14
A word about stainless steel galling 15
Preparing to build the DB42 Yagi 16
Element configuration drawing 17
CHAPTER ONE—BOOM ASSEMBLY
SECTION 1.0
Boom assembly overview 18
Boom bolt / EZ-Eyebolt drawings 19
SECTION 1.1
Measuring and marking the boom 20
Boom marking table 21
CHAPTER TWO— MOUNTING THE EHU’s ON THE BOOM
SECTION 2.0
Center-to-center spacing measurements 22
Section 2.1
Element housing unit (EHU) wiring overview 23
Wiring the EHU 24—25
CHAPTER THREE—DIRECTOR 1 EHU
SECTION 3.0
Director 1 EHU and return tube assembly drawing 26
Attach the element mounting plate to boom 27—28
SECTION 3.1
Element support tube (EST) mounting overview 29
Prepare the mounting plate for attaching the EST’s30
SECTION 3.2
Attach the EST’s to the mounting plate 31
SECTION 3.3
Secure the Director 1 EHU to the mounting plate 32—33
SECTION 3.4
Install the CPVC inner-guide tubes 34—35
SECTION 3.5
Return tube assembly—Director 1 36 –38
Tech Support: www.steppir.com/support ⚫ Tel: 425.453.1910 ⚫ [email protected]
Page 4
DB42 TABLE OF CONTENTS (page 2 of 4) Page(s)
CHAPTER FOUR—REFLECTOR EHU
SECTION 4.0
Reflector EHU and return tube overview 39
Secure mounting plate and EHU to boom—Reflector 40
SECTION 4.1
Return tube assembly—Reflector EHU 41
CHAPTER FIVE—DRIVEN ELEMENT
SECTION 5.0
Driven element assembly drawing 42
Mount the Driven element on the boom 43
CHAPTER SIX—DIRECTOR 2
SECTION 6.0
Director 2 EHU assembly drawing 44
Mount the Director 2 EHU on the boom 45
CHAPTER SEVEN—DIRECTOR 3 EHU
SECTION 7.0
Director 3 EHU and element return assembly drawing 46
Mount the Director 3 EHU on the boom 47
SECTION 7.1
Return tube assembly—Director 3 48
CHAPTER EIGHT—MAST PLATE AND BOOM TRUSS
SECTION 8.0
Mounting the mast plate to the boom 49—50
SECTION 8.1
Secure the mast plate to the boom 51
SECTION 8.2
Attach the truss mast 52
SECTION 8.3
Attach the truss mast plate to the truss mast 53
SECTION 8.4
Attach the truss boom to the truss mast plate 54
SECTION 8.5
Phillystran boom truss attachment points 55—56
Tech Support: www.steppir.com/support ⚫ Tel: 425.453.1910 ⚫ [email protected]
Page 5
DB42 TABLE OF CONTENTS (page 3 of 4) Page(s)
CHAPTER EIGHT (continued) - MAST PLATE AND BOOM TRUSS
SECTION 8.6
Phillystran boom truss assembly 57—60
CHAPTER NINE—6M PASSIVE ELEMENT KIT
SECTION 9.0
Mounting the 6m passive element kit 61
SECTION 9.1
Attach the 6m passive elements to the boom 62
CHAPTER TEN—COAX SWITCH HOUSING
SECTION 10.0
Mounting the coax switch housing 63
SECTION 10.1
Coax switch wiring 64
SECTION 10.2
Sealing and securing the coax switch housing 65
SECTION 10.3
Attach the coax jumpers and feed line 66
CHAPTER ELEVEN—WIRING THE CONNECTOR JUNCTION BOX
SECTION 11.0
Mount the connector junction box onto the boom 67
SECTION 11.1
Wiring the connector junction box 68—70
Connect the cable from coax switch to the connector junction box 71
SECTION 11.2
Connect the control cable to the dSub splice 72—73
SECTION 11.3
Wiring Test 74—75
Tech Support: www.steppir.com/support ⚫ Tel: 425.453.1910 ⚫ [email protected]
Page 6
DB42 TABLE OF CONTENTS (page 4 of 4) Page(s)
CHAPTER TWELVE—ELEMENT SUPPORT TUBE (EST) PREPARATION
SECTION 12.0 Prepare the telescoping fiberglass poles 77
SECTION 12.1 Attach sweeps and diverters to fiberglass pole tips 78
SECTION 12.2 Attach the sweep couplers to the sweep tubes 79
Section 12.3 Mount the fiberglass spreaders 80
Section 12.4 Final tightening 81
Section 12.5 Attach foam plug housings to non-loop elements 82
CHAPTER THIRTEEN
SECTION 13.0
Prepare the CPVC inner-guide tube and diverter cone 83
SECTION 13.1
Attach the EST to the EHU 84—85
CHAPTER FOURTEEN—40.30 ELEMENT TRUSS KIT
SECTION 14.0
Installing the truss support mast 86
SECTION 14.1
Attach the element truss couplers 87
SECTION 14.2
Routing the Dacron truss cord 88—89
CHAPTER FIFTEEN—SECURE CABLES & MOUNT DB42 ON TOWER MAST
SECTION 15.0
Secure the cables onto the boom 90
SECTION 15.1
Mount the DB42 onto the tower mast 91—92
Last steps—read before attaching antenna mast tower mast! 92
CHAPTER SIXTEEN—TROUBLESHOOTING TIPS
SECTION 16.0
Troubleshooting tips 93—94
Warranty Information 95
SteppIR Contact information 96
Connector Junction Box Schematic—experienced users only! 97
Tech Support: www.steppir.com/support ⚫ Tel: 425.453.1910 ⚫ [email protected]
Page 7
READ THIS BEFORE STARTING INSTALLATION
You have ordered you SteppIR Antenna, and are
waiting for delivery. What do you do in the meantime?
1. Go to the SteppIR web site at consumer.steppir.com/ and download the latest manual for your an-
tenna, and also the Operators Manual for the controller. Look for any new or updated documents
that may pertain to your antenna.
2. Read the manuals from cover-to-cover ---TWICE! Don’t just read them –Study them, so you are
familiar the terminology used about the antennas and have a good idea of how the antenna is as-
sembled and where the various parts go.
3. As you go through the manuals make notes of any instructions you may not clearly understand,
then call or email for clarifications. It is better to have it all sorted out before you start assembly.
We don’t mind answering your questions beforehand.
4. Now, wait for notification your antenna is being shipped.
Your antenna has arrived!
What is the first thing to do?
1. If the antennas is to arrive on Wednesday----DO NOT plan an antenna party for Saturday
2. Even if you plan to install the antenna weeks later, the first thing to do is to unpack the antenna
and do a complete inspection. Make sure nothing is missing or has been damaged in shipment.
3. Do a complete inventory of every part, nut and bolt. Yes it takes time, but it also allows you to noti-
fy SteppIR if anything is missing and allow time to get it to you before you start assembly of the
antenna. There is nothing more frustrating than realizing that something is missing, just hours be-
fore you want to install the antenna.
4. Go back to the SteppIR website and download the latest manual. SteppIR constantly is improving
and adding to the manual, so even though your paper instruction manual is going to have all the
data you need, it makes sense to check for the latest updates online. This is especially true If you
purchased the antenna and a period of time has passed between arrival and install dates.
5. Take the controller and power supply out of their wrappings and connect them. The controller does
not have to be connected to the antenna in order to familiarize yourself with it. In fact, it is best to
get familiar with the controller when it is not connected to the antenna. Turn on the controller and
read through the Operators Manual again while operating the controller in all it modes. Go through
Tech Support: www.steppir.com/support ⚫ Tel: 425.453.1910 ⚫ [email protected]
Page 8
READ THIS BEFORE STARTING INSTALLATION (continued)
the menus so you know what each does and how to navigate through the various menus and func-
tions.
6. When you have finished working with the controller be sure the display indicates “Elements Home”
and the controller has been turned OFF. When the controller is connected to the antenna and the
controller is turned back on the next time, it will immediately tune to whatever position the con-
troller was left in last time you were using it, so you want to be sure that position is HOME.
7. Once the antenna is completely assembled and ready to mount on the antenna tower, use an an-
tenna analyzer, if you have one, to test resonance of the antenna.. If you don’t have an analyzer,
try to borrow one. It will save you a lot of time and worry. Check the antenna on each band for
some sign of resonance within the frequency range. Leave the antenna on the default frequency
and tune the analyzer to see where the dip occurs. It will be somewhere below the lower band
edge on each band with the antenna 3 or 4 feet above the ground on sawhorses. Also, don’t ex-
pect to see a 1:1 SWR here, just look for a good indication of resonance.
Once it has been determined this part of the antenna is working correctly do the following: Select
the lowest band and establish the dip condition by tuning the analyzer. Do not touch the analyzer
again. Retract the elements and then reselect the same band. The antenna should come back the
very near the same setting. Do this 2 or 3 times on each band. Also, try going from the band being
tested to any other band and back again and observe that the antenna comes back to the same
resonant point. Now you know the antenna is tuning correctly from band to band and is consistent.
8. DO NOT put the antenna up onto the tower until you are positive it is working correctly—this is
what these tests are helping you determine. Err on the side of caution.
9. When you are ready to use the antenna, be sure to “enable” the DB42 in the controller menu, or
your antenna will not work properly on 40m and 30m. If you purchased the 6m option, be sure to
enable that in the “options” menu of the controller. When done enabling, save and then turn the
controller off, and back on again.
10. Enjoy the antenna!
Tech Support: www.steppir.com/support ⚫ Tel: 425.453.1910 ⚫ [email protected]
Page 9
DB42 BILL OF MATERIALS
Antenna Box (61” x 13” x 10”) 92 lbs
✓QTY PART NUMBER DESCRIPTION
16 10-1013-02 Telescoping Pole, 18 foot 4 section (in pole box)
110-1501-23 Cover for Black EHU, With countersunk drain hole
121-6040 Splitter, 6” 3-1/2mm, Stereo Male to Two RCA Female
16 60-1006-22 QUICK DISCONNECT, 1-1/2” to 1-1/4”, Fernco, (1056-150-125)
170-3408-01 EHU, DB42 20m Driven w/ Normal Driven Relay
170-3409-01 EHU, DB42 40m Driven w/ Normal Passive Relay
170-3412-01 EHU, DB42 20m Driven w/ Normal Passive Relay
270-3422-01 EHU, 40m Passive w/ Terminal lug Assembly
1QR Code—Instruction Manual
It is important that you do an inventory of the items that were shipped to you. Nothing is worse than
discovering a day before a planned installation that there are missing parts! We do our very best to en-
sure that you receive everything needed for construction of your antenna, but better to be safe than
sorry—inventory your parts well in advance of your installation. The items in blue represent options
available for the DB42 Yagi—you will need to check these items off only if you purchased them.
Sweep Box 1 (32” x 24” x 7”) 48 lbs
✓QTY PART NUMBER DESCRIPTION
110-1021-43 Boom to Mast Plate, 8”, HIGH WIND..with saddle holding holes
110-1050-21 Counter Weight, DB42
410-1509-02 Diverter Cones
310-1153-01 Poly Sweeps (100psi)
610-1511-01 Sweep Diverter
610-1059-21 Polyolefin Heat Shrink 1.1” x 6”
310-1503-21 Fiberglass rod, 3/8” x 31-3/4” long, black
110-1605-12 Element Support Plate, 49 ft element
310-1608-01 Element Return Plate
210-1610-23 Boom to Mast plate 11” X 1/4”
65 ft 21-5001-01 Control cable, 4 conductor
40 21-5013 Cable, 6 conductor 22 GA with shield
121-6301-80 Coax jumper, 8’, PL259/RG213
121-6301-96 Coax jumper, 11’ 6”, PL259/RG213
121-6301-98 Coax jumper, 15’, PL259/RG213
95 ft 21-7002-01 Dacron double braided poly rope, 3/16”
78 ft 21-8002 Phillystran, 2100i
270-1015-11 EST return tube, 1-3/4” x 12”, fiberglass (DB style)
470-2030-11 DB style mounting plate with foam mounting guide
170-2038 Connector Junction Box, DB42
170-3003-01 Balun Switch Box, 80m, 4:1
Tech Support: www.steppir.com/support ⚫ Tel: 425.453.1910 ⚫ [email protected]
Page 10
DB42 BILL OF MATERIALS
Sweep Box 2 (32” x 24” x 7”) 61 lbs
✓QTY PART NUMBER DESCRIPTION
310-1153-01 Poly Sweeps (100psi)
610-1511-01 Sweep Diverter
610-1059-21 Polyolefin Heat Shrink 1.1” x 6”
310-1503-21 Fiberglass rod, 3/8” x 31-3/4” long, black
210-1606-01 Element support plate, 2-1/4”
410-1607-11 Truss Attaching Plate V2
110-1619-01 BRACKET, Coax Switch
170-3000-11 33v 100 watts 33v Power Supply—DB42
170-3001-01 Antenna Coax Switch Box
272-0018-31 Kit, 39’ Element Truss, 2E, 3E, DB18/18E/36/42 end Elements
372-0030-61 Kit, Sweep Hardware
172-0110 Kit, DB42 Hardware
172-0112 Kit, DB42 Saddle
172-0114 Misc. Parts, DB42
172-1001-81 Kit, DB42—6m Hardware
172-3000 Kit, DB42 80m Dipole Hardware
Boom Box (72” x 8” x 8”) 93 lbs
✓QTY PART NUMBER DESCRIPTION
370-6001-01 DB 6m passive element
110-1018-11 Aluminum tube, 1-3/4” (4’ Boom)
310-1054-02 Truss Support, 30m/40m, 36”
210-1202-01 DB style aluminum boom section, 1-3/4” x 72”
210-1202-11 DB style aluminum boom section, 2.00” X 72”
210-1202-21 DB style aluminum boom section, 2”-1/4 x 48”
210-1202-71 DB style aluminum boom section, 2-1/2” x 44”, DB42
110-1202-81 aluminum boom section, 3” x 72” x 1/4”, wall, for DB42
210-1203-21 Reinforcing sleeve, 2” x 10” - 2-1/4” boom section, DB36, DB42
110-1618-21 Boom truss support, 1-3/4” x 36”, DB42
410-1630-11 Aluminum reinforcing sleeve, 2” x 3”, DB36, DB42
110-1630-21 Aluminum reinforcing sleeve, 2” x 12”, DB36, DB42
670-2025-13 CPVC tube, 49” x 3/4”, with coupler
670-2025-23 CPVC tube, 39-7/8” x 3/4”, w/o coupler
270-2025-33 64” x 3/4” CPVC tube with foam sealing ring and rubber coupler
270-2028-01 EST extension, 66-3/8”, with aluminum reinforcing ring, - DB36, DB42
270-2029-01 EST extension, 60-3/4”, with aluminum reinforcing ring, - DB36, DB42
Tech Support: www.steppir.com/support ⚫ Tel: 425.453.1910 ⚫ [email protected]
Page 11
39’ Element Truss Kit, 2E, 3E, DB18/18E/36/42 end Elements (2 qty)
72-0018-31
✓QTY PART NUMBER DESCRIPTION
210-1601-03 1-3/4” ALUMINUM SADDLE HALF
410-1510-21 ELEMENT TRUSS COUPLER (SETS)
260-0083 4” STAINLESS TURNBUCKLE
160-0110 1/4” x 1-1/4” HEX HEAD BOLT
160-0030 1/4” NYLOCK NUT
260-0065 5/16” x 3-1/2” HEX HEAD BOLT
260-0046 5/16” NYLOCK NUT
260-0033 5/16” FLAT WASHER
75 ft 21-7001-01 1/8” DACRON ROPE
16 60-0014 6-32 NYLOCK NUT
16 60-0014-01 6-32 x 7/8” PAN HEAD SCREW
260-0158 1/8” THIMBLE
460-0157 1/8” WIRE CLAMP
110-1028-01 ANTI SEIZE PACKET
109-0001 ELECTRICAL TAPE
160-0112 SET SCREW
DB42 KITS BILL OF MATERIALS
Sweep Hardware Kit (3 qty)
72-0030-61
✓QTY PART NUMBER DESCRIPTION
28 60-0014 NUT, 6-32 NYLOCK
20 60-0016 WASHER, 6-32, FLAT
28 60-0186 SCREW, 6-32 x 2”, 18-8 SS, BUTTON SOCKET CS
810-1155-01 SWEEP CLAMP, SCH-160 CLAMP HALF
160-9000 TURN KEY, LONG ARM HEX TIP 5/64”
Tech Support: www.steppir.com/support ⚫ Tel: 425.453.1910 ⚫ [email protected]
Page 12
DB42 KITS BILL OF MATERIALS
✓QTY PART NUMBER DESCRIPTION
20 60-0014-01 6-32 X 7/8” SS PAN HEAD SCREW
20 60-0014 6-32 SS NYLOK NUT
35 60-0112 10-32 X 1/4” SET SCREW
660-0113 10-32 X 5/8” SS PAN HD SCREW (SADDLES TO MAST PLT)
50 60-0017 10-32 X 3/4” SS SCREW
360-0017-10 10-32 X 7/8” SS FLAT HEAD SCREW
560-0101 3/4” X 10-32 PAN HD SCREW WITH NYLOK PATCH
70 60-0018 #10 SS WASHER
55 60-0019 10-32 NYLOK NUT
160-0110 1/4” -20 X 1-1/4” SS BOLT
560-0029 1/4”-20 X 3” SS BOLT
560-0063 1/4”-20 X 3-1/4” SS BOLT
560-0100 1/4”-20 X 3-1/2” SS BOLT
60 60-0041 1/4” SS WASHER
20 60-0030 1/4” NYLOK NUT
36 60-0075 5/16” X 3-1/4” SS BOLT
13 60-0065 5/16” X 3-1/2” SS BOLT
17 60-0114 5/16” X 3-3/4” SS BOLT
17 60-0066 5/16” X 4” SS HEX BOLT
960-0115 5/16” X 4-1/2” SS HEX BOLT
760-0141 5/16” X 5” SS BOLT
100 60-0046 5/16” NYLOK NUT
10 60-0033 5/16” SS WASHER
260-0151 3/8” x 2-1/2” Eye-bolt S/S
160-0145 3/8” X 4-1/2” EYEBOLT
360-0034 3/8” SS WASHER
260-0152 3/8” X 1-3/4” SS BOLT
660-0050 3/8” SS NYLOK NUT
160-0142 7/16” X 5” BOLT, ALL THREADED
160-0143 7/16” NYLOCK NUT
260-0160 7/16" LOCK WASHER
260-0161 7/16" STANDARD NUT
860-0144 7/16” GALVANIZED WASHER
460-0157 1/8” Wire Clamp
260-0158 1/8” Thimble
32 60-0045 3/16” WIRE CLIPS
860-0048 3/16” WIRE THIMBLE
410-1613-01 1” ALUM SPACER
16 10-1613-11 1/4” ALUM SPACER
860-0044 PHILLYSTRAN CAP, BLACK
260-6000-15 SS HOSE CLAMP #016
260-0083 1/4" x 4" SS TURNBUCKLE
460-0070 3/8" x 6 “ GALV TURNBUCKLE
DB42 HARDWARE KIT
72-0110
Tech Support: www.steppir.com/support ⚫ Tel: 425.453.1910 ⚫ [email protected]
Page 13
DB42 KITS BILL OF MATERIALS
DB42 ALUMINUM SADDLES KIT
72-0112
✓QTY PART NUMBER DESCRIPTION
36 10-1601-03 1-3/4” ALUMINUM SADDLE HALF
28 10-1601-22 2” ALUMINUM SADDLE HALF
410-1601-32 2-1/4” ALUMINUM SADDLE HALF
610-1601-41 2-1/2” ALUMINUM SADDLE HALF
10 10-1601-61 3” ALUMINUM SADDLE HALF
DB42 MISC. PARTS KIT
72-0114
✓QTY PART NUMBER DESCRIPTION
4 ft 09-1022 COAX SEAL, 12’ x 1/2”
50 10-1059-01 POLYOLEFIN HEAT SHRINK 1-1/2” x 3”
160-0117 CABLE CLIP, ACC19-AT-C0
470-1007-01 FOAM PLUG ASSEMBLY
110-1028-21 TM-1 THREAD MAGIC ANTI-SEIZE STICKS
172-0009-03 GLUE KIT
309-0001 ELECTRICAL TAPE 3/4” PVC MERCO 307
170-6010-01 ADAPTER, 25 PIN DSUB FIELD SPLICE
109-1025 CONICAL GRINDING STONE, 3/4”, (ENCO)
110-1029-01 CONNECTOR PROTECTOR CAT, NO CP-1, .14 oz
810-1510-21 ELEMENT TRUSS COUPLER (SETS)
6M PASSIVE ELEMENT KIT
72-1001-81
✓QTY PART NUMBER DESCRIPTION
310-1019-31 6M MOUNTING PLATE
460-0075 5/16” X 3 1/4” SS BOLT
260-0115 5/16” X 4 1/2” SS BOLT
660-0046 5/16” SS NYLOK NUT
660-0001 1 INCH SS U- BOLT .25”
12 60-0030 1/4” NYLOK NUT
660-6000-60 7/32" - 5/8", 5/16" width, #4 SS HOSE CLAMP
410-1601-22 2” ALUM SADDLE
210-1601-61 3” ALUM SADDLE
Tech Support: www.steppir.com/support ⚫ Tel: 425.453.1910 ⚫ [email protected]
Page 14
DB42 KITS BILL OF MATERIALS
80M DIPOLE KIT
72-3000
✓QTY PART NUMBER DESCRIPTION
50 ft 21-5009-01 ULTRA-FLEX 12 GA WIRE WITH TERMINAL LUGS
60 ft 21-7002-01 3/16” DACRON ROPE
260-0066 5/16” x 4” SS HEX BOLT
260-0114 5/16” X 3 3/4” SS BOLT
260-0075 5/16” X 3 1/4” SS BOLT
860-0046 5/16” NYLOK NUT
210-1601-03 1 3/4” ALUM SADDLE
260-0028 1/4” X 2 1/4” SS BOLT
260-0030 1/4” X 20 NYLOK NUT
260-0116 1/4” X 20 REGULAR NUT
260-0034 3/8” SS WASHER
260-0094 3/16” SS QUICK LINK
260-0037-21 4” X 5/16” GALVANIZED EYEBOLT
460-0033 5/16” SS WASHER
210-1613-01 1” ALUMINUM SPACER
210-1607-01 TRUSS ATTACHMENT PLATE
121-6301-70 4' COAX JUMPER CABLE
5 ft 21-5001-01 4 CONDUCTOR 22 GA CABLE
109-0001 ELECTRICAL TAPE 66' X 3/4”
110-1029-01 CONNECTOR PROTECTOR
160-0117 CABLE CLIP WITH ADHESIVE BACK
360-0112 10-32 X 1/4” SET SCREW
Tech Support: www.steppir.com/support ⚫ Tel: 425.453.1910 ⚫ [email protected]
Page 15
From time to time, we get complaints from customers regarding galling of stainless steel fasteners.
Here is an excerpt from the Industrial Fastener Institute's Standards Book:
Thread galling seems to be the most prevalent with fasteners made of stainless steel, aluminum, titani-
um and other alloys which self-generate an oxide surface film for corrosion protection. During fastener
tightening, as pressure builds between the contacting and sliding thread surfaces, protective oxides are
broken, possibly wiped off and interface metal high points shear or lock together. This cumulative clog-
ging-shearing-locking action causes increasing adhesion. In the extreme, galling leads to seizing - the
actual freezing together of the threads. If tightening is continued, the fastener can be twisted off or its
threads ripped out.
During minor galling, the fastener can still be removed, but in severe cases of galling, a strong bond be-
tween the bolt and nut can prevent removal of fasteners. Unfortunately, little is known on how to con-
trol it, but here are two ways to minimize this effect:
Decreasing installation RPM speed will cause less friction and decrease heat generation.
Lubrication
used prior to assembly can dramatically reduce or eliminate galling. Recommended lubricants should
contain higher amounts of molybdenum disulfide, such as graphite which is very commonly used as a
solid lubricant or special anti-galling lubricants sold by chemical companies.
We provide an anti-seize compound stick called “Thread Magic” (shown in picture below) with all of our
antennas and strongly encourage you to use it to reduce the aggravation of galling. The Thread
Magic stick is fantastic—you can get plenty of anti-seize on the fastener without getting it on your
hands!
Turn-of-nut tightening of nuts to bolts is recommended where torque values are not named, with metal
to metal connections. Turn the wrench/socket until it is flush with the material it will seat against and
snug-tightened, and then turn approximately 2/3 of a rotation past that point. When in doubt use com-
mon sense to ensure the fastener is not too loose, or not too tight—both positions can cause issues. On
all connections, check the tightness 30 minutes or more later to ensure no creeping has taken effect.
Contrary to popular belief, galling of stainless steel is not a symptom of a "cheap" fastener - it is preva-
lent in all types of stainless steel, aluminum and titanium fasteners. You can be assured that the stain-
less steel fasteners we provide with our products are manufactured of very high quality.
Save yourself a lot of grief and always use a thread lubricant when working with stainless
steel fasteners.
A WORD ABOUT STAINLESS STEEL GALLING
Tech Support: www.steppir.com/support ⚫ Tel: 425.453.1910 ⚫ [email protected]
Page 16
Before beginning assembly of this antenna, please read the manual in it’s entirety to familiarize your-
self with the task at hand.  Doing so will eliminate potential confusion.
Be sure to do an inventory of your parts as soon as possible after receipt of the antenna, and well be-
fore your intended installation date - this way we can get you the parts required before it’s too late.
A large, cleared flat area is recommended for assembly of an antenna of this size and complexity. Typ-
ically, an area 40 ft x 50 ft would be ideal. We recommend using sawhorses or sturdy tables when in-
stalling the boom. By having the boom elevated, it is easier to ensure that the elements are level.  
Rubber or nitrile gloves are recommended when applying the anti-seize to the stainless steel fasteners
or the aluminum boom sections.
If you do not have room near the tower to assemble the antenna, we suggest you find a place that you
can put the antenna together in it’s entirety and then disassemble as needed for transportation to the
tower area.
Be sure to refer to the DB42 configuration drawing on the following page so that you can fully under-
stand how the antenna operates. In addition, the configuration drawing identifies EHU placement,
which is important as you progress in your installation of the antenna.
Use of a level for adjusting the Element Housing Units (EHU’s) is highly recommended. This is a sur-
prisingly accurate and consistent method. Simply place the level on the mast plate, and adjust each
element accordingly.
Be sure to use the anti-seize compound supplied to prevent the galling of the stainless steel fasteners.
If you do not use the anti-seize, count on issues with the hardware galling.  Heat is one of the primary
culprits with galling, so if you use a ratchet, steady speed as you tighten will help minimize galling. We
have found that when the anti-seize is applied to the bolt portion of the hardware, it will eliminate any
galling issues.
Preparing to Build the DB42 Yagi
Tech Support: www.steppir.com/support ⚫ Tel: 425.453.1910 ⚫ [email protected]
Page 17
DB 42 ELEMENT CONFIGURATION DRAWING
DIRECTOR 2 (20M-6M)
NOT ACTIVE (40M/30M)
DIRECTOR 1 (20M-6M)
DRIVEN (40M/30M)
DRIVEN (20M-6M)
NOT ACTIVE (40M/30M)
REFLECTOR (ALL BANDS)
Optional 6m passive element
BOOM
MAST
PLATE
DRIVEN (20M-6M)
NOT ACTIVE (40M/30M)
DIRECTOR 1 (20M-6M)
DRIVEN (40M/30M)
DIRECTOR 2 (20M-6M)
NOT ACTIVE (40M/30M)
FORWARD DIRECTION (Normal)
REVERSE DIRECTION (180 deg)
DIRECTOR 3 (20M-6M)
DIRECTOR (40M/30M)
DIRECTOR 3 (20M-6M)
DIRECTOR (40M/30M)
Optional 6m passive element
RELAY
RELAY
RELAY
Tech Support: www.steppir.com/support ⚫ Tel: 425.453.1910 ⚫ [email protected]
Page 18
CHAPTER ONE
SECTION 1.0 BOOM ASSEMBLY
Our boom pieces are all drilled on a very precise drill press. This ensures that all the bolts are snug
when assembled. It is always better to be too tight than too loose. If your boom ever gets damaged
or destroyed we can send the specific replacement boom piece(s) required. Always apply an anti-seize
lubricant to stainless steel bolts that are using stainless steel nuts. This will prevent the two from gall-
ing together. Galling of stainless steel is common and has nothing to do with the quality of the materi-
al. Each bolt has a specific length for the tubing it is holding together this is critical so that only the
shank is engaged in the tubing. Use 5 washers per bolt to secure the bolt as shown in figure 1.02.
1. Apply a thin film of connector protector or a spray-on lubricant (i.e. Anti-seize, Noalox) to the male
engagement area of the boom sections. Failure to do so may cause the tubes to seize inside each
other.
2. Match the boom pieces as shown in figure 1.01 below and slide each boom piece together until the
pre-drilled holes align.
3. Secure the correct bolts and washers onto the boom as shown in figure 1.02.
4. Repeat this for each section until the boom is completely assembled.
5. Secure the 7/16” eyebolt as shown in figure 1.01 and figure 1.03. Note that in the event of a tight
fit, it is acceptable to use a mallet to drive the eyebolt in as shown in figure 1.04.
1-3/4”
Boom Section
10-1202-01
2”
Boom Section
10-1202-11
2-1/4”
Boom Sec-
tion
10-1202-21
2-1/2” Boom
Section
10-1202-71
3” Boom
Section
10-1202-81
2-1/2” Boom
Section
10-1202-71
2-1/4” Boom
Section
10-1202-21
2” Boom
Section
10-1202-11
1-3/4” Boom
Section
10-1202-01
7/16” Eyebolt
QTY 2: 60-0029
1/4” x 3” Hex bolt
and
QTY 10: 60-0041
1/4” Flat washer
and
QTY 2: 60-0030
1/4” Nylock nut
QTY 2: 60-0063
1/4”x3-1/4” Hex bolt
and
QTY 10: 60-0041
1/4” Flat washer
and
QTY 2: 60-0030
1/4” Nylock nut
QTY 2: 60-0100
1/4”x3-1/2” Hex bolt
and
QTY 10: 60-0041
1/4” Flat washer
and
QTY 2: 60-0030
1/4” Nylock nut
QTY 4: 60-0066
5/16”x4” Hex bolt
and
QTY 4: 60-0033
5/16” flat washer
and
QTY 4: 60-0046
5/16” Nylock nut
QTY 2: 60-0063
1/4”x3-1/4” Hex bolt
and
QTY 10: 60-0041
1/4” Flat washer
and
QTY 2: 60-0030
1/4” Nylock nut
QTY 2: 60-0029
1/4” x 3” Hex bolt
and
QTY 10: 60-0041
1/4” Flat washer
and
QTY 2: 60-0030
1/4” Nylock nut
QTY 2: 60-0100
1/4”x3-1/2” Hex bolt
and
QTY 10: 60-0041
1/4” Flat washer
and
QTY 2: 60-0030
1/4” Nylock nut
Be sure the
10-1203-21
Boom sleeve
is in place
Be sure the
10-1203-21
Boom sleeve
is in place
Note: Check the following page for information on washer placement
FIG. 1.01
BOOM ASSEMBLY OVERVIEW
Tech Support: www.steppir.com/support ⚫ Tel: 425.453.1910 ⚫ [email protected]
Page 19
CHAPTER ONE
SECTION 1.0 BOOM ASSEMBLY (continued)
When securing the eye-bolt and boom bolts to the boom, install the eye and the head of the bolts on
the same side of the boom, so that they will be facing upwards when the boom is secured to the tow-
er. The 1/4” boom bolts require 5 washers, as shown below in figure 1.02. The 5/16” boom bolts will
use only 1 washer on the nut side against the boom.
Note: In the event the EZ-eyebolt resists when you insert it into the boom, you can use a hammer or
mallet as long as you strike it with something that will not damage the eyebolt, as shown in figure
1.04.
BOOM BOLT / EZ EYEBOLT DRAWINGS
FIG. 1.02—Inserting the boom bolts into the boom
See prior page for the
specific bolt lengths
required for each boom
section
QTY 3: 60-0041
1/4” Flat washers
QTY 1: 60-0030
1/4” Nylock nut
QTY 2: 60-0041
1/4” Flat washers
Bolt head facing up
Top of boom
FIG. 1.03—EZ Eyebolt configuration
No washers are required
for the eyebolt
QTY 1: 60-0145
3/8”x4-1/2”
Stainless Eyebolt
QTY 1: 60-0050
3/8” Nylock nut
Top of boom
FIG. 1.04
Tech Support: www.steppir.com/support ⚫ Tel: 425.453.1910 ⚫ [email protected]
Page 20
CHAPTER ONE
SECTION 1.1 BOOM ASSEMBLY (continued)
On the DB42 Yagi there are many components that are mounted on the boom. All of these items are
mounted using aluminum saddles. The following instructions will allow you to pre-measure the place-
ment of the saddles, making it much easier to assemble the required items. In addition to marking
the saddle placement, you may also want to label the marking so you can easily identify it later.
Measuring and marking helps to simplify the process, but NEVER use the saddle marks as the perma-
nent measurement— you must always defer to the center-to-center measurements for each element
or the antenna will not function properly.
We recommend that you use an aluminum saddle half for drawing your marks on the boom. Deter-
mine your mark using the table on the following page. The measurement shown is to the closest edge
of the saddle from the starting point, then draw a line on each side of the saddle piece as shown in
figure 1.12 and figure 1.13. This prevents any possible mistakes on where the saddle edge should be
on the measurement. The truss anchor point between the boom bolts shown below in figure 1.10 is
the same configuration on each side of the boom.
The EZ-Eye is NOT at the center point of the boom. Because of this, you will have a short side and a
long side (on the 3” boom section) in relation to the EZ-Eye. Position boom as shown below when
measuring for your marks. Mount each aluminum plate and truss saddle as shown in the table, be
aware that the dimensions shown in the table refers to the saddles closest to the reflector end of the
boom for the mounting plates.
MEASURING AND MARKING THE BOOM
Continue measuring to the right
for all boom items located on the
table below. Place your respective
part at your mark and fasten to
boom
Start your measurements by
securing your measuring
tape to the edge of boom
that is 251-5/8” inches from
the EZ eye-bolt located near
center of the boom.
Using a permanent mark-
er, precisely mark the
location for placement of
each item to be placed
on the boom.
0.75” 20.75” 30.75” 84.75”70.125”
START HERE
Boom truss bracket
Remainder of boom
FIG. 1.10
Short side of boom Long side of boom
FIG. 1.11
EZ Eyebolt is NOT at the center of the boom

Other SteppIR Antenna manuals

SteppIR 2 Element Yagi User manual

SteppIR

SteppIR 2 Element Yagi User manual

SteppIR 3 Element Yagi User manual

SteppIR

SteppIR 3 Element Yagi User manual

SteppIR Dream Beam 36 User manual

SteppIR

SteppIR Dream Beam 36 User manual

SteppIR DB18 Yagi User manual

SteppIR

SteppIR DB18 Yagi User manual

SteppIR 3 Element Yagi User manual

SteppIR

SteppIR 3 Element Yagi User manual

SteppIR SmallIR User manual

SteppIR

SteppIR SmallIR User manual

SteppIR 4 Element Yagi User manual

SteppIR

SteppIR 4 Element Yagi User manual

SteppIR MonstIR User manual

SteppIR

SteppIR MonstIR User manual

SteppIR 2 Element Yagi User manual

SteppIR

SteppIR 2 Element Yagi User manual

SteppIR DB18E Yagi User manual

SteppIR

SteppIR DB18E Yagi User manual

SteppIR DB42 MonstIR PRO User manual

SteppIR

SteppIR DB42 MonstIR PRO User manual

SteppIR DB11 Yagi User manual

SteppIR

SteppIR DB11 Yagi User manual

SteppIR 80m Dipole User manual

SteppIR

SteppIR 80m Dipole User manual
SteppIR BigIR MK III User manual

SteppIR

SteppIR BigIR MK III User manual

SteppIR BigIR User manual

SteppIR

SteppIR BigIR User manual

SteppIR 2 Element Yagi User manual

SteppIR

SteppIR 2 Element Yagi User manual
SteppIR SmallIR User manual

SteppIR

SteppIR SmallIR User manual

SteppIR CrankIR Installation guide

SteppIR

SteppIR CrankIR Installation guide

SteppIR UrbanBeam Yagi User manual

SteppIR

SteppIR UrbanBeam Yagi User manual

SteppIR 4 Element Yagi User manual

SteppIR

SteppIR 4 Element Yagi User manual
SteppIR Dream Beam 42 User manual

SteppIR

SteppIR Dream Beam 42 User manual

SteppIR Dream Beam 11 User manual

SteppIR

SteppIR Dream Beam 11 User manual

SteppIR BigIR User manual

SteppIR

SteppIR BigIR User manual
SteppIR BigIR - MK IV Vertical User manual

SteppIR

SteppIR BigIR - MK IV Vertical User manual

Popular Antenna manuals by other brands

MFJ MFJ-1456 instruction manual

MFJ

MFJ MFJ-1456 instruction manual

UPS Aviation Technologies Apollo A-34 installation manual

UPS Aviation Technologies

UPS Aviation Technologies Apollo A-34 installation manual

HDView360 Mini-State HDMS9100 instruction manual

HDView360

HDView360 Mini-State HDMS9100 instruction manual

Alpha Antenna Sky user guide

Alpha Antenna

Alpha Antenna Sky user guide

Siro CB 27 U installation manual

Siro

Siro CB 27 U installation manual

Antenna Pros AX-912 manual

Antenna Pros

Antenna Pros AX-912 manual

Netkrom AIRNET 11Mb CPE BRIDGE installation guide

Netkrom

Netkrom AIRNET 11Mb CPE BRIDGE installation guide

US Robotics USR5481 Specifications

US Robotics

US Robotics USR5481 Specifications

Sirius XM RAdio XMPT-MA installation guide

Sirius XM RAdio

Sirius XM RAdio XMPT-MA installation guide

Novatel SMART7 Installation and Operation User Manual

Novatel

Novatel SMART7 Installation and Operation User Manual

Ubiquiti Power beam PBE-5AC-500 quick start guide

Ubiquiti

Ubiquiti Power beam PBE-5AC-500 quick start guide

EET MAXIMUM XO-Flat Mounting instruction

EET

EET MAXIMUM XO-Flat Mounting instruction

Self-Sat Snipe user manual

Self-Sat

Self-Sat Snipe user manual

LAPLACE INSTRUMENTS RF200 user manual

LAPLACE INSTRUMENTS

LAPLACE INSTRUMENTS RF200 user manual

Butternut TBR-160-S instructions

Butternut

Butternut TBR-160-S instructions

Thrane&Thrane SAILOR 150 user manual

Thrane&Thrane

Thrane&Thrane SAILOR 150 user manual

Ventev M6050060D37202WST quick guide

Ventev

Ventev M6050060D37202WST quick guide

Racelogic VBSS100SL quick start guide

Racelogic

Racelogic VBSS100SL quick start guide

manuals.online logo
manuals.online logoBrands
  • About & Mission
  • Contact us
  • Privacy Policy
  • Terms and Conditions

Copyright 2025 Manuals.Online. All Rights Reserved.