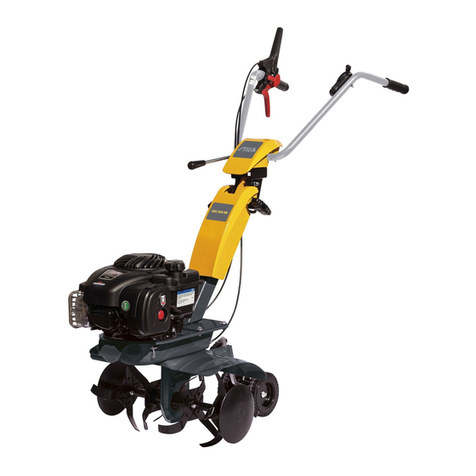
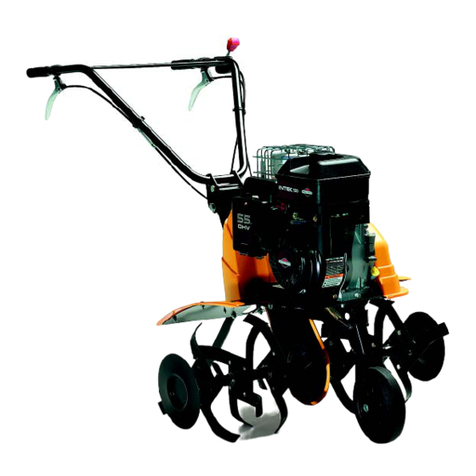
Stiga RC 585 User manual

171506857/0 10/2022
TYPE
RC 585
IT
Motozappatrice condotta a piedi -
MANUALE DI ISTRUZIONI
ATTENZIONE: prima di usare la macchina, leggere attentamente il presente libretto.
BG
УПЪТВАНЕ ЗА УПОТРЕБА -
Motokultivatoru kontrolisano pješacima
- UPUTSTVO ZA UPOTREBU
CS
- NÁVOD K POUŽITÍ
DA
Motorfræser betjent af gående personer
- BRUGSANVISNING
ADVARSEL: læs instruktionsbogen omhyggeligt igennem, før du tager denne maskine i brug.
DE
Handgeführte Motorhacke
- GEBRAUCHSANWEISUNG
ACHTUNG: vor inbetriebnahme des geräts die gebrauchsanleitung aufmerksam lesen.
EL
- ΟΔΗΓΙΕΣ ΧΡΗΣΠΣ
EN
Tiller
- OPERATOR’S MANUAL
WARNING: read thoroughly the instruction booklet before using the machine.
ES
Motoazada conducida de pie
- MANUAL DE INSTRUCCIONES
ET
Kõndiva juhiga mullafrees
- KASUTUSJUHEND
TÄHELEPANU: enne masina kasutamist lugeda tähelepanelikult antud kasutusjuhendit.
FI
Kävellen ohjattava puutarhajyrsin
- KÄYTTÖOHJEET
VAROITUS: lue käyttöopas huolellisesti ennen koneen käyttöä.
FR
Motobineuse à conducteur à pied
-
MANUEL D’UTILISATION
ATTENTION: lire attentivement le manuel avant d’utiliser cette machine.
HR
- PRIRUČNIK ZA UPORABU
HU
- HASZNÁLATI UTASÍTÁS
LT
NAUDOJIMO INSTRUKCIJOS -
.
LV
LIETOŠANAS INSTRUKCIJA
MK
- УПАТСТВА ЗА УПОТРЕБА
NL
Lopend bediende motorhakfrees
- GEBRUIKERSHANDLEIDING
LET OP: vooraleer de machine te gebruiken, dient men deze handleiding aandachtig te lezen.
NO
Motordrevet håndført jordfres
- INSTRUKSJONSBOK
ADVARSEL: les denne bruksanvisningen nøye før du bruker maskinen.
PL
Glebogryzarka prowadzona przez operatora pieszego
INSTRUKCJE OBSŁUGI
PT
Motoenxada para operador apeado
-
MANUAL DE INSTRUÇÕES
RO
MANUAL DE INSTRUCŢIUNI
RU
РУKОВОДСТВО ПО ЭKСПЛУАТАЦИИ
- NÁVOD NA POUŽITIE
SL
-
PRIROČNIK ZA UPORABO
SR
Motokultivator na guranje
- PRIRUČNIK SA UPUTSTVIMA
SV
Förarledd jordfräs
-BRUKSANVISNING
VARNING: läs igenom hela detta häfte innan du använder maskinen.
TR
- KULLANIM KILAVUZU
BS
SK

1EN
Warning!
Please pay special attention to the following information:
Please read carefully this operation and maintenance manual before operation
and strictly comply with the manual while operating. If you operate in
compliance with the manual, the tiller designed by our company can work safely
operate in compliance with the manual, there may occur severe damage or
NOTE: Should there be any problem with the machine, or should you have any doubt about it,
please contact our company’s local sales agent.
INDEX
1. SAFETY WARNINGS 2
1.1. TRAINING.................................................................................................................................................... 2
1.2. PREPARATION............................................................................................................................................2
1.3. OPERATION ................................................................................................................................................2
1.4. REPAIR, MAINTENANCE AND STORAGE ................................................................................................ 3
2. SAFETY SYMBOLS 3
3. BRIEF INTRODUCTION OF TILLER 4
......................................................................................................... 4
............................................................... 4
4. OPERATION METHOD OF THE TILLER 5
4.1. ROUTINE CHECK ....................................................................................................................................... 5
................................................................................................... 6
5. STARTING 10
5.1. STEPS TO START IT .................................................................................................................................10
5.2. HOW TO STOP THE ENGINE ...................................................................................................................11
6. MAINTENANCE OF GASOLINE ENGINE 12
6.1. CHANGE OF ENGINE OIL........................................................................................................................13
6.2. MAINTENANCE OF AIR FILTER ..............................................................................................................13
6.3. MAINTENANCE OF SPARK PLUG...........................................................................................................14
.....................................................................................15
7. MAINTENANCE OF TILLER 16
7.1. RUNNING IN..............................................................................................................................................16
7.2. TECHNICAL MAINTENANCE OF TILLER................................................................................................16
........................................................................16
...........................................................................................................17
7.5. TRANSPORT ............................................................................................................................................17
8. TROUBLE SHOOTING 18

2EN
1. SAFETY WARNINGS
1.1. TRAINING
a) Carefully read the operation manual. Get fully familiar with the correct method of operation of this
machine and its mechanisms. Understand how to stop it and how to quickly disengage the operation
mechanism.
b) No child is allowed to use the machine! No adult is allowed to use the machine before carefully reading
the manual!
c) Ensure no other persons or things with potential safety risk, especially children and pets, are inside
the working area!
1.2. PREPARATION
a) Thoroughly check the area for the machine to work in, and remove all sundries.
b) Before starting the engine, put shift gear in neutral position!
c) Don’t operate the machine without the proper clothing.If the working area has a slippery ground, wear
a pair of anti-skid shoes to improve your standing stability.
d) Take care when treating fuel, which is inammable! Pay attention to the following rules:
1) Use an appropriate container to hold the fuel.
2) When the engine is running or is hot, never try to add fuel into it!
3) Take extra care when fueling the engine outdoors; never try to fuel the engine indoors!
4) Before starting, tighten the fuel tank cap and wipe o any fuel spilled out!
e) Never try to make any adjustment when the engine is running!
f) For any operation or work on the machine, for example, preparation and maintenance of the machine,
wearing a pair of safety glasses is necessary.
1.3. OPERATION
a) When starting the engine, the shift lever shall stay in the neutral position.The operator’s hands and feet
are not allowed to approach revolving parts or to be under such parts.
b) When operating the machine on (or while crossing) a cobbled road, sidewalk, or highway, stay alert to
the trac conditions to notice any potential trac risk! Never use the machine to carry any passenger!
c) If the machine bumps against any foreign thing, please shut o the engine immediately, and thoroughly
check whether the tiller is damaged; if so, repair it before restarting and operating it.
d) Always pay attention to the surrounding conditions to avoid slipping down, or dropping.
e) If the machine shows any abnormal vibration, shut o the engine without any delay! Check to nd the
reason, it’s important because abnormal vibration normally is harbinger of fault.
f) Before leaving the operating position to repair, adjust, check or remove of things jammed between
blades, always remember to shut o the engine rst!
g) If the machine is to be left uncared by the operator, all necessary preventive measures, such as disen-
gaging power output shaft, lowering of accessory devices, shift to neutral position of gear shift lever,
and shutting o the engine shall be taken rst!
h) Before cleaning, repair or checking the machine, the operator must shut o the engine and ensure all
moving parts are in a stationary state!
i) Engine’s emission is hazardous, so never try to run it indoors!
j) Never operate the tiller without proper protection equipment, guard or other protection devices in place!
k) When the machine is running, always keep it away from children and pets!
l) Never overload the machine with a big tilling depth and a high speed!
m) The machine is not allowed to run at a high speed on a slippery road. Watch back to take care when
driving backward!

3EN
n) Never allow any looker-on to approach a running machine!
o) Only the accessory devices and equipment (like the counter weight) allowed by the manufacturer of
the tiller may be used
p) Never try to operate the tiller when the view is limited or lighting conditions are poor!
q) Take care when tilling a hard eld, because the blades may hook into the ground, hence pushing the
tiller forward. If such a result does occur, just let free the handle and don’t try to control the machine!
r) Never operate the tiller on an abrupt slope!
s) Take care not to let the machine turn over when it is ascending or descending a slope!
1.4. REPAIR, MAINTENANCE AND STORAGE
a) Keep the machine, accessory devices and equipment, including the battery, in a safe working condi-
tion.Whenever possible, detach the battery before storage to prevent freezing, and charge it to some
extent when it is necessary to do so.
b) Checkwhether bolts under shear stress,mountingbolts of engineand otherbolts are tightened properly
at a xed interval, so as to ensure the machine can work safely.
c) The machine shall be stored indoors and away from ames, and cool the engine before storing it.
d) If the tiller is to be stored for a long time, the manual shall always be kept as an important material.
e) Don’t repair the machine at will unless you have the proper tools and the manual to instruct disassem-
bling, assembling and repairing of the machine.
2. SAFETY SYMBOLS
The following symbols are to remind you that if you don’t pay attention, you might be severely injured.
Please carefully read the symbols in the manual and notices about safety.
If these symbols peel o or are illegible, please contact the distributor to replace such symbols.
WARNING!
Read the instructions before operating the
machine
DANGER! Engines emit carbon monoxide.
DANGER! Fuel is ammable and explosive.
WARNING
DANGER! Keep away from hot surfaces.
DANGER! Keep hands and feet away from
rotating parts.
DANGER! Keep the work area free of people,
children and animals.
DANGER! Turning rotor Always keep away from
tilling blades

4EN
3. BRIEF INTRODUCTION OF TILLER
3.1.
Power 3.5 kW
Engine rotations 3300 min-1
Starting Recoil start
Net weight/ gross weight 62.5 kg
Tilling width 82cm
Tilling depth ≥10 cm
Working speed 0.1~0.3 m/s
Transmission With belt and chain wheel
Rotate speed 120 r/min
Measured sound power level 95.21 dB (A)
Uncertainty 2.0 dB (A)
Guaranteed sound power level 97 dB (A)
Sound pressure level 75.21 dB (A)
Uncertainty 1.46 dB (A)
Vibrations transmitted to handlebar < 2.5 m/s2
Uncertainty 2.0 m/s2
3.2.
Figure 1
1. Gasoline engine 2. Belt guard 3. Front wheel assembly
4. Reduction box 5.Tilling blade 6. Fender
7. Damping lever 8. Bracket 9. Handle pipe assembly
10. Clutch handle, forward 11. Extinguishing switch 12. Accelerator valve regulator
13. Clutch handle, reverse 14. Lifting part
11
14
1
2
3
4
5
6
8
12
9
710
13

5EN
4. OPERATION METHOD OF THE TILLER
Before each tiller leaves the factory, it has gone through shakedown test, but the user still should check all
mechanisms of the machine and adjust them before actually using it, so as to let it work better.
4.1. ROUTINE CHECK
1. Check engine oil
Warning!
lower than the normal one when the user is using the engine, the engine will be
severely damaged!
Warning!
oil or any other type of engine oil will shorten the engine’s service life.
• Put the engine in a horizontal position.
• Screw out the oil dipstick of the engine and clean it by wiping it (See Fig. 2).
• Insert the oil dipstick into the oil ller (don’t engage their threaded parts)
• Take out the oil dipstick to check oil level, if it’s within the marked range of the oil dipstick, it is OK.
• SAE15W-40 engine oil is a recommended general-purpose lubricant, and is suitable for a common
ambient temperature (See Table 1)
Oil number
Recommended
numbers
Extreme usable
numbers
Temperature
Figure 2 Table 1

6EN
2. Check lubricant in reduction box
• Put the tiller on a horizontal ground and screw out the plug (See Fig.4).
• Advise append appropriate lubricant to the reduction box every 50 hours.
• Recommended lubricant is Calcium base grease .
Figure 4
3. Check air lter
Warning!
4.2.
1. Adjustment of handle frame
Note: Before adjusting height of handle frame, please put the machine on a at horizontal
ground to prevent it from accidental falling.
• Loosen the lifting handle and select the hole in an appropriate position, then adjust the handle’s
cross bar to as high as user’s waist, then turn the lifting handle to tighten it (See Fig. 5).
2. Adjustment of tilling depth:
• By adjusting height of damping lever, tilling depth can be adjusted. Specically, adjusting the lever
downward will increase tilling depth, and adjusting it upward will decrease tilling depth. (See Fig. 6).
Figure 5 Figure 6

7EN
3. Adjustment and use of clutch:
Note: Before using the clutch, lower the engine speed.
• By “engage ” and “disengage ”of the clutch, the user can control output of engine’s power.
• When the user holds tight the clutch lever, the clutch is engaged and transmits engine power to the
tiller and tilling blades begin to rotate (See Fig. 7).
Figure 7 Figure 8
• When the user releases clutch lever, clutch will be disengaged, and the engine power can’t be
transmitted to the tiller, and tilling blades stop rotating (See Fig. 8).
Note: Before adjusting height of handle frame, please put the machine on a at horizontal
ground to prevent it from accidental falling.
• First conrm tension of clutch cable. Normally the cable shall have a 4~8mm degree of freedom, if
not, please loosen the locking nut and adjust the cable, and tighten the locking nut after nishing
adjustment (See Fig. 9).
• If necessary, the user may start the engine to check whether the clutch can engage and disengage
properly.
Figure 9

8EN
5. Adjustment of accelerator cable:
• Idling within normal speed range: 1800±100 Rpm; within high speed range 3300 Rpm, and it can be
adjusted using a speed counter.
• Method of conrming speed and adjustment of it. Adjustment of accelerator cable
Figure 12 Figure 13
Accelerator valve regulator
• Turn the accelerator valve regulator on the handle frame to the maximum adjustable position without
any load, and check if speed counter shows the speed is 3600±50, and then turn the accelerator
valve regulator to the minimum adjustable position and check whether speed counter shows the
speed is 1800±100.
• If the speed value displayed by the speed counter isn’t within the said ranges, it is necessary to
adjust the gasoline engine.
4. Adjustment of belt tension:
• If belt tension isn’t in the normal tension range, it needs adjustment. Please loosen the engine’s
4 mounting bolts (See Fig.10 10 and 11).
• After loosen the engine’s 4 mounting bolts, then if belt is too loose, push the engine forward, and if
belt is too tight, move backward the engine till belt tension falls in the normal range, nally tighten
engine’s mounting bolts and connection plate’s mounting bolts (See Fig. 12).
Figure 10
Engine mounting bolt
Figure 11
Engine mounting bolt
To maximum
To minimum

9EN
Steps to adjust the engine:
a) Observe whether connection points of the accelerator cable are loose or have broken o, if so, retighten
them to their original places.
b) Turn accelerator valve regulator on the handle frame to the maximum adjustable position without load,
and then adjust the speed adjusting bolt of the gasoline engine’s accelerator operation mechanism to
a proper position.
c) After long work, the user may adjust the ne-adjusting bolt of the accelerator cable to adjust the engine.
6. Use the clutch of reverse gear:
Warning!
Before using the clutch of reverse gear, lower the engine speed.
• By “engage ” and “disengage ”of the clutch of reverse gear, the user can control output of engine’s
power.
• When the user holds tight the clutch lever, the clutch is engaged and transmits engine power to the
tiller and tilling blades begin to reverse rotate (See Fig. 14).
Figure 14 Figure 15
• When the user releases clutch lever, clutch will be disengaged, and the engine power can’t be
transmitted to the tiller, and tilling blades stop rotating (See Fig. 15).
Note: When using the clutch of reverse gear , especial pay attention to safety . Sure , improper
adjustment of clutch cable will aect normal use of the product.
7. Adjustment of front wheel:
• Adjust front wheel of tiller to the state shown in Fig. 15 when it is going to drive on the road.
• Adjust front wheel of tiller to the state shown in Fig. 16 when it is going to till the eld.
Figure 15 Figure 16

10 EN
5. STARTING
5.1. STEPS TO START IT
Warning!
Before starting the engine, gear shift lever must be put in the neutral position.
Clutch lever shall be released.
1. Put the choke lever to the
CLOSE position.
Choke Lever
CLOSE
CLOSE
2. Turn the accelerator valve
regulator lever slightly to the
direction for high speed To minimum
To maximum
3. Put the engine switch to ON
(open) position.
Slightly pull the starter cable until you feel a resistance, and then pull it out fast with a big force.
Never abruptly release the lever, which would let it bounce back to hit and damage the engine,
so if you want to release, slowly let it back in the direction of the starter cable’s resilience.
Starting cable grip

11EN
4. After the engine has warmed
up, slowly push the choke lever
to OPEN position.
Choke Lever
OPEN
OPEN
5. Use the accelerator valve
regulator (or throttle valve lever)
to regulate the engine speed to
the need level.
To minimum
To maximum
5.2. HOW TO STOP THE ENGINE
• Under an emergency, the engine can be stopped, which means the user can directly shift the engine
switch to OFF position.
• Under a normal condition, the steps to stop the engine are as follows:
1. Push the accelerator valve
regulator to the minimum
position. To minimum
To maximum
2. Turn the engine switch to OFF
position.

12 EN
6. MAINTENANCE OF GASOLINE ENGINE
Warning!
• Stop the engine before any maintenance.
• In order to prevent inadvertent starting of the engine, please put the engine switch on
OFF (stopped) position and pull o the line connecting spark plug.
• Check and maintenance of the engine can only be conducted by an authorized
distributor, unless the user itself has proper tools and materials for check and
maintenance, and has the ability to repair and maintain the engine.
Note: If you want to maintain a good performance of the engine, it must undergo regular check
and adjustment.The routine maintenance guarantees the long-term service life. In the following
table, the required maintenance intervals and the items to be maintained will be described.
Maintenance cycle
As per months shown.
Or actual running hours,
whichever is earlier.
Item
Daily
use
After the
or after 20
hours
Every
season or
50 hours
Every 6
months or
100 hours
Every year
or 300
hours
Engine oil Check oil level ●
Change oil ● ●
Lubricant in reduction
box (applicable to
some models)
Check
lubricant
●
Append
lubricant
● ●
Air lter Check ●
Clean ●
Spark plug Check and
clean
●
Spark arrester
(optional) Clean ●
Fuel tank and lter Clean ●
Air valve Check-adjust ●
Fuel line Check Every two years (if necessary, change it) ●
Note:
1. If the machine is to be used in a dusty condition, maintenance frequency shall be increased.
2.The user may not disassemble the engine unless he has proper tools and mechanic repair ability.

13EN
6.1. CHANGE OF ENGINE OIL
Drain engine oil after warming up the engine because such operation can ensure a quick and complete
drainage of oil:
• Loosen engine oil dipstick and oil drain bolt to drain the engine oil.
• Screw back the oil drain bolt and tighten it.
• Rell the engine with recommended engine oil and check engine oil level.
• Ret the engine oil dip stick.
• The volume of engine oil shall be 0.6 L.
Filler cap
Oil level
Engine oil
Oil drain bolt
6.2. MAINTENANCE OF AIR FILTER
A dirty air lter will obstruct air into the carburetor. So in order to prevent fault of carburetor, the air lter
shall be maintained regularly. If the engine is to work in a dusty environment, its maintenance frequency
should be increased.
Warning!
may cause burning.
MAINTAIN AIR CLEANER
Clean up in cleansing solvent and dry up once every 50
hours (every 10 hours in unusually dusty circumstances)
and then immerse in clean engine oil until saturated,
Note: never try to run the engine without an air lter, because such operation would cause quick
wear of the engine.
• Take apart the wing nut and air lter housing and take out the lter element.
• Use an uninammable or high-burning-point detergent to clean lter
element and let it dry up.
• Drench lter element with engine oil and then squeeze the oil out.
• Ret lter element and air lter housing.
Wing nut
Air lter housing
Filter
element

14 EN
6.3. MAINTENANCE OF SPARK PLUG
Note: Never use any spark plug with an incorrect heat range. In order to guarantee normal running of
the engine, the spark plug shall have an appropriate gap without deposit on it.
• Use a special socket spanner to detach the spark plug.
Special socket spanner for spark plug 0.7-0.8mm
(0.028-0.031in)
Warning!
• If the engine has just stopped running, the muer will be very hot. So keep clear of
hot temperature to avoid scald.
• Check the spark plug. If it is obviously worn or the insulation has any crack or
damage, please replace it, if it has too much carbon deposition; use a wire brush to
clean it.
• Use a clearance gauge to measure the spark plug gap, correct value of which shall
be 0.70 to 0.80mm.
• Check whether spark plug washer is good. In order to avoid thread alternating, use
hand to screw spark plug in rst.
• After screwing spark plug to the bottom, use a special socket spanner to tighten it
and the washer below it.
Note: If the spark plug is a new one, tighten the spark plug further by 1/2 turn after the washer is
pressed down tightly.
If the spark plug has been used, tighten it further by 1/8 - 1/4 turn after the washer is pressed
down tightly.
The spark plug must be tightened adequately, or it will be heated and damage the engine.
Warning!
the engine before it has cooled.

15EN
Note: Spark arrester must be maintained every 100 hours to ensure it can work eectively.
• Loosen out two 4mm screws from the exhaust deection pipe and take apart the exhaust deection
pipe.
• Loosen out four 5mm screws from the muer guard to detach the muer guard.
• Loosen out the 4mm screws from the spark arrester to detach it from the muer.
• Use a brush to remove carbon deposition from the mesh enclosure of the spark arrester.
Note: No cracks or damage in the spark arrester is allowed. If there is any crack or damage,
replace the spark arrester.
6.4.
• Start the engine to warm it up to the normal temperature.
• When engine is idle running, adjust the throttle valve’s
limit screw to set the normal idling speed.
Normal idling speed: 1800±150rmp
Throttle valve limit screw

16 EN
7. MAINTENANCE OF TILLER
Due to wear from running, friction and change of load, the tiller’s bolts may get loose, and parts and
components may get worn, causing lower power of the gasoline engine, higher fuel consumption rate and
other faults that will aect use of the tiller. In order to keep the above adverse conditions to a minimum
level, it is necessary to strictly and regularly conduct maintenance of the tiller, so that it can maintain a
good technical condition and have a longer service life.
7.1. RUNNING IN
1. Please refer to the manual for information about running-in of the gasoline engine.
2. A new or overhauled tiller shall work for one hour without load rst, then work for another nine hours,
then the machine can be used for normal farming.
7.2. TECHNICAL MAINTENANCE OF TILLER
Warning!
Before commencing any inspections, cleaning or maintenance/adjustments on the
machine:
•
• Make sure that any moving component has stopped.
• Wait until the engine cools down.
1. Maintenance per shift (before and after each shift of work):
a) Listen and watch to check if there is any abnormal phenomenon like abnormal noise, overheating,
loose bolts, etc.
b) Check if there is any oil leakage from the gasoline engine .
c) Check if oil levels of the gasoline engine are between the upper and lower marks of its oil level
indicators
d) Timely remove dirt, slime, weeds and oil stains on the whole machine and its accessories.
e) Keep the farming record.
2. First-level maintenance (every 150 hours of work):
a) Conduct all items of maintenance for each shift.
b) Clean reduction box , and change grease
3. Second-level maintenance (every 800 hours of work):
a) Conduct all items of the maintenance for every 150 hours of work.
b) Check all gears and bearings, if any of them is severely worn, replace it.
c) If any of the tiller’s other parts and components, such as any tilling blade or bolt, is damaged,
please replace it.
4. Technical check and repair (every 1500-2000 hours of work):
a) Disassemble the whole machine at a local authorized service shop to clean and check it, and if
any of the parts and components is severely worn, replace it or repair it if it is appropriate to do so.
5. Repair and maintenance of gasoline engine shall be conducted as per the manual.

17EN
7.3.
Work interval
Content of
maintenance
Every
day
After 8 hours of
work under a
half load
After the rst
month or after
20 hours
After the third
month or after
150 hours
Every year or
1,000 hours
Every 2 years
or 2,000 hours
Check and tighten
bolts and nuts √
Check and add new
engine oil √
Clean and change
engine oil (First time) (Second time) √(third time and
thereafter)
Check if there’s oil
leakage √
Clean dirt, weeds,
and oil stains √
Solve problems √
Adjust operating parts √
Tension belt (*) √
Gears and bearings
(*) √
(*) Interventions that must be carried out by your Dealer or by an Authorised Service Centre
7.4.
If the tiller need be stored for a long time, the following measures should be taken to prevent rust and
erosion.
1. Seal up and store gasoline engine as per requirements in the manual of gasoline engine.
2. Clean dirt and slime on the outer surface.
3. Drain lubricant from the transmission box and ll it with new lubricant.
4. Apply anti-corrosion oil on unpainted part of the non-aluminum-alloy surface.
5. Keep the product in a well ventilated, dry and safe indoor place.
6. Properly keep the tools, quality certicate and operation manual attached to the machine.
7.5. TRANSPORT
A forklift truck should be used to move the machine.The forks should be opened as far as possible and
inserted into the pallet. The weight of the machine is given on the Manufacturer’s data plate together with
the other technical information.
Motor-hoe can be transported to given place by means of transport wheel (Fig 1 part. 3).
Switch o the engine before transporting the machine

18 EN
8. TROUBLE SHOOTING
If the engine can’t be started, please check
1. Whether the engine switch is in the ON position,
2. Whether there is enough lubricant in the machine,
3. Whether fuel valve is in the ON position,
4. Whether there is fuel in the fuel tank,
5. Whether fuel can be delivered into carburetor, to check this, the user can loosen drain bolt of
carburetor and set the fuel valve to the ON position.
Warning!
If any fuel is spilled out, thoroughly remove it and let it dry up before checking
spark plug or starting the engine, because fuel spilled out and its vapor may
Drain bolt
6. Whether the spark plug can spark.
a) Pull o the spark plug cap, remove dirt from it, then detach the spark plug.
b) Fit spark plug cap over the spark plug.
c) Contact the metallic case of spark plug to engine’s cylinder head. Slightly pull the starter to check
if sparks are produced. If so, ret the spark plug and start the engine.
7. If the engine still cannot start, please repair it at an authorized distributor’s shop.
Table of contents
Other Stiga Tiller manuals

Stiga
Stiga SILEX 75-G User manual

Stiga
Stiga TI 48 LI User manual

Stiga
Stiga GGP Silex 360-G User manual

Stiga
Stiga JB 55 User manual

Stiga
Stiga S 400 B User manual

Stiga
Stiga SILEX 75-G User manual

Stiga
Stiga SRC 550 RG User manual

Stiga
Stiga SILEX 82R2-H User manual

Stiga
Stiga SILEX 500-G User manual

Stiga
Stiga JB 20 User manual

Stiga
Stiga TI 48 LI User manual

Stiga
Stiga SILEX 500-G User manual

Stiga
Stiga TI 36 G User manual

Stiga
Stiga TI 36 V User manual

Stiga
Stiga VE30 Recycling User manual

Stiga
Stiga RC 685 User manual

Stiga
Stiga JB 350 User manual

Stiga
Stiga AERATORI VB 40 User manual

Stiga
Stiga JB 55 User manual

Stiga
Stiga TILLER JB 931 User manual