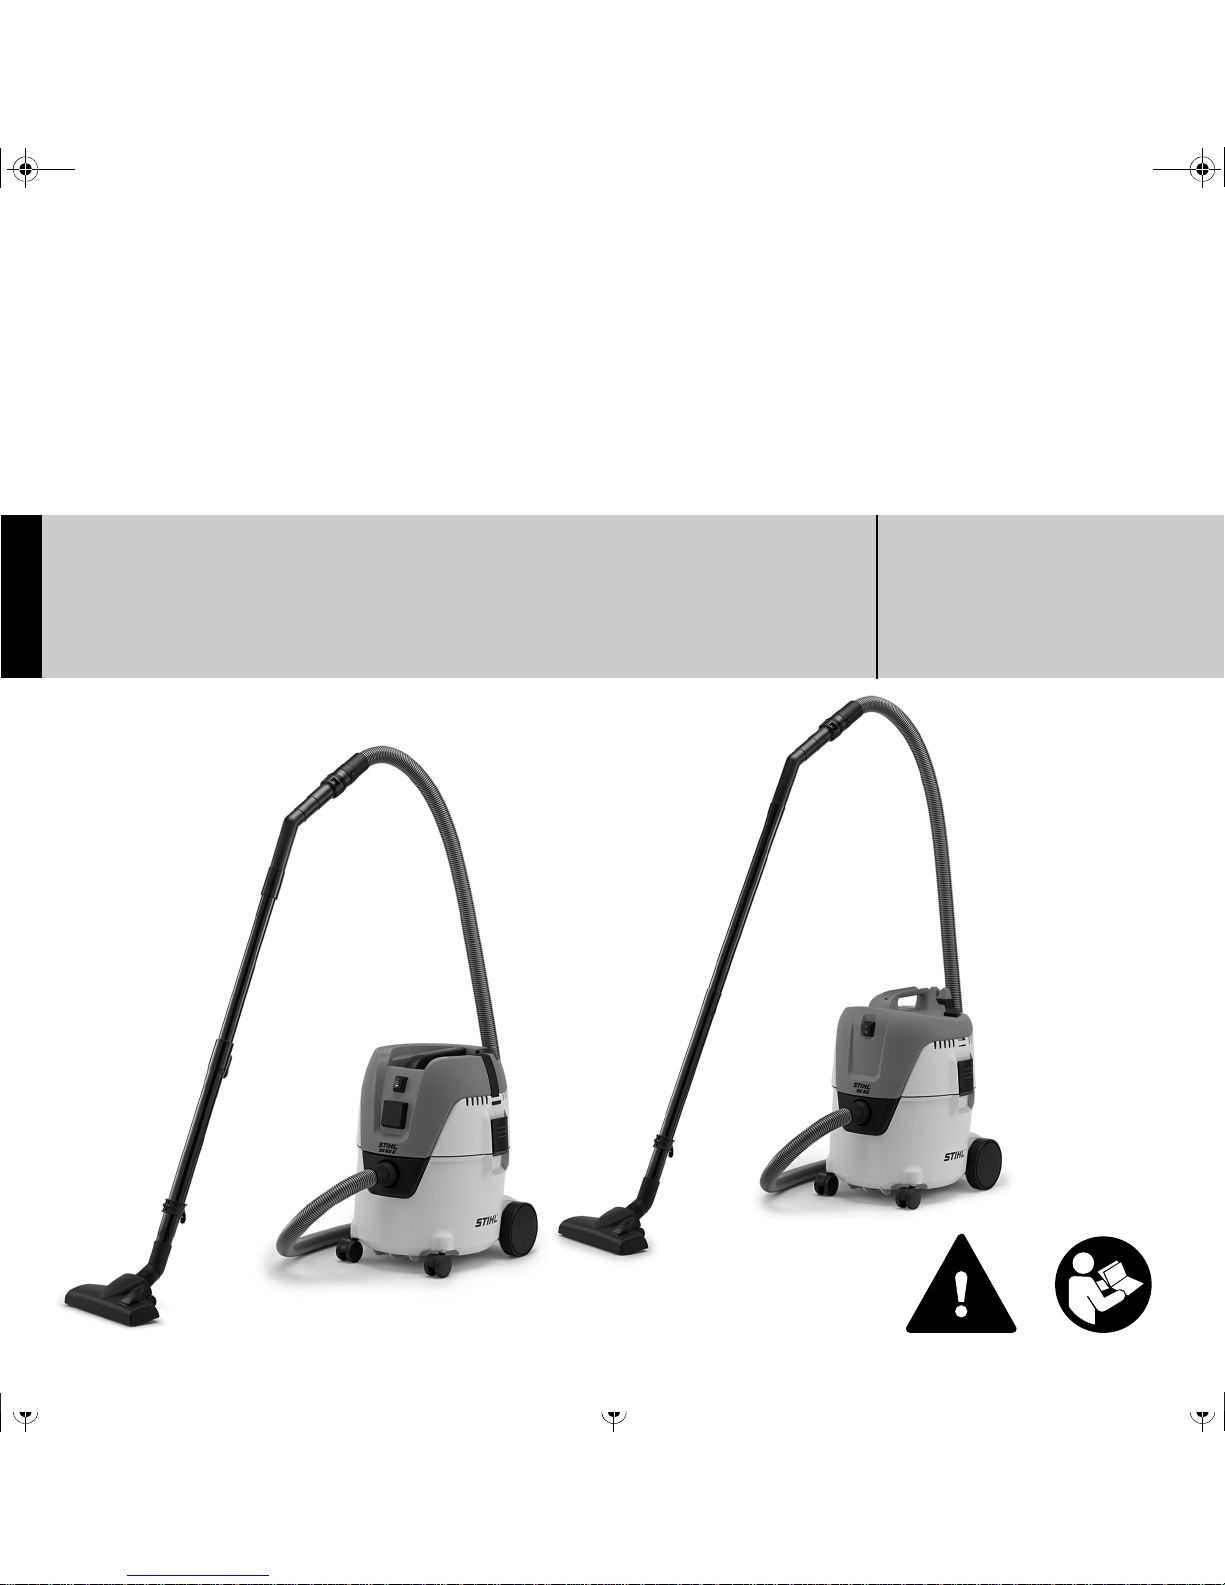
Stihl SE 62 User manual

{
STIHL SE 62 Instruction Manual


Original Instruction ManualPrinted on chlorine-free paper
Printing inks contain vegetable oils, paper can be recycled.
© ANDREAS STIHL AG & Co. KG, 2016
0458-659-0121-A. VA5.F16.
0000006513_005_GB
SE 62, SE 62 E
English
1
{This instruction manual is protected by copyright. All rights reserved, especially the rights to reproduce, translate and process
with electronic systems.
Contents
Dear Customer,
Thank you for choosing a quality
engineered STIHL product.
It has been built using modern
production techniques and
comprehensive quality assurance.
Every effort has been made to ensure
your satisfaction and troublefree use of
the product.
Please contact your dealer or our sales
company if you have any queries
concerning this product.
Your
Dr. Nikolas Stihl
Guide to Using this Manual 2
Safety Precautions and Working
Techniques 2
Packing List 7
Assembling the Unit 7
Connecting to Power Supply 9
Switching On 10
Working 10
Switching Off 12
After Finishing Work 12
Emptying the container 13
Cleaning the filter element 13
Replacing the filter element 14
Maintenance and Care 15
Minimize Wear and Avoid Damage 16
Troubleshooting 16
Main Parts 18
Specifications 19
Maintenance and Repairs 19
Disposal 20
EC Declaration of Conformity 20

SE 62, SE 62 E
English
2
Pictograms
All the pictograms attached to the
machine are shown and explained in this
manual.
Symbols in text
WARNING
Warning where there is a risk of an
accident or personal injury or serious
damage to property.
NOTICE
Caution where there is a risk of
damaging the machine or its individual
components.
Engineering improvements
STIHL's philosophy is to continually
improve all of its products. For this
reason we may modify the design,
engineering and appearance of our
products periodically.
Therefore, some changes, modifications
and improvements may not be covered
in this manual.
WARNING
–Children or youngsters
should never be allowed to
use the machine.
Supervise children to
ensure that they do not
play with the machine.
–The machine should only
be provided or loaned to
people familiar with this
model and its operation.
The instruction manual
should always be handed
over with the machine.
–Before starting any work
on the machine, e. g.,
cleaning, servicing,
replacement of parts –
unplug the power plug!
Comply with national safety
regulations issued, e.g. by
employers' liability insurance
associations, social security
institutions, occupational
safety and health authorities
or other organizations.
When the machine is not in
use, shut it off so that it does
not endanger others. Ensure
that the machine cannot be
used without authorization;
unplug the power plug.
Guide to Using this Manual Safety Precautions and
Working Techniques
Special safety pre-
cautions are
necessary when
using this machine.
The power connec-
tion is a particular
source of danger.
It is important you
read and under-
stand the
Instruction Manual
before first use and
keep the manual in
a safe place for
future reference.
Non-observance of
the Instruction
Manual may result
in serious or even
fatal injury.

SE 62, SE 62 E
English
3
The machine may only be
used by persons who have
been duly trained to use and
handle it or who can
demonstrate that they can
operate the machine safely.
The machine can be used by
persons with limited physical,
sensory or mental capacity or
with little experience and
know-how as long as they are
supervised and have been
instructed on how to handle
the machine safely and
understand the associated
risks.
The user is responsible for
avoiding injury to third parties
or damage to their property.
If you have not used this
machine model before: Have
your STIHL dealer or another
expert show you how to use it
safely.
Always check that the
machine is in good working
order before starting work.
Particular attention must be
devoted to the connecting
cord, the power plug and the
safety parts.
Inspect the connecting cord
regularly for signs of damage
and aging. Never use the
machine if the connecting
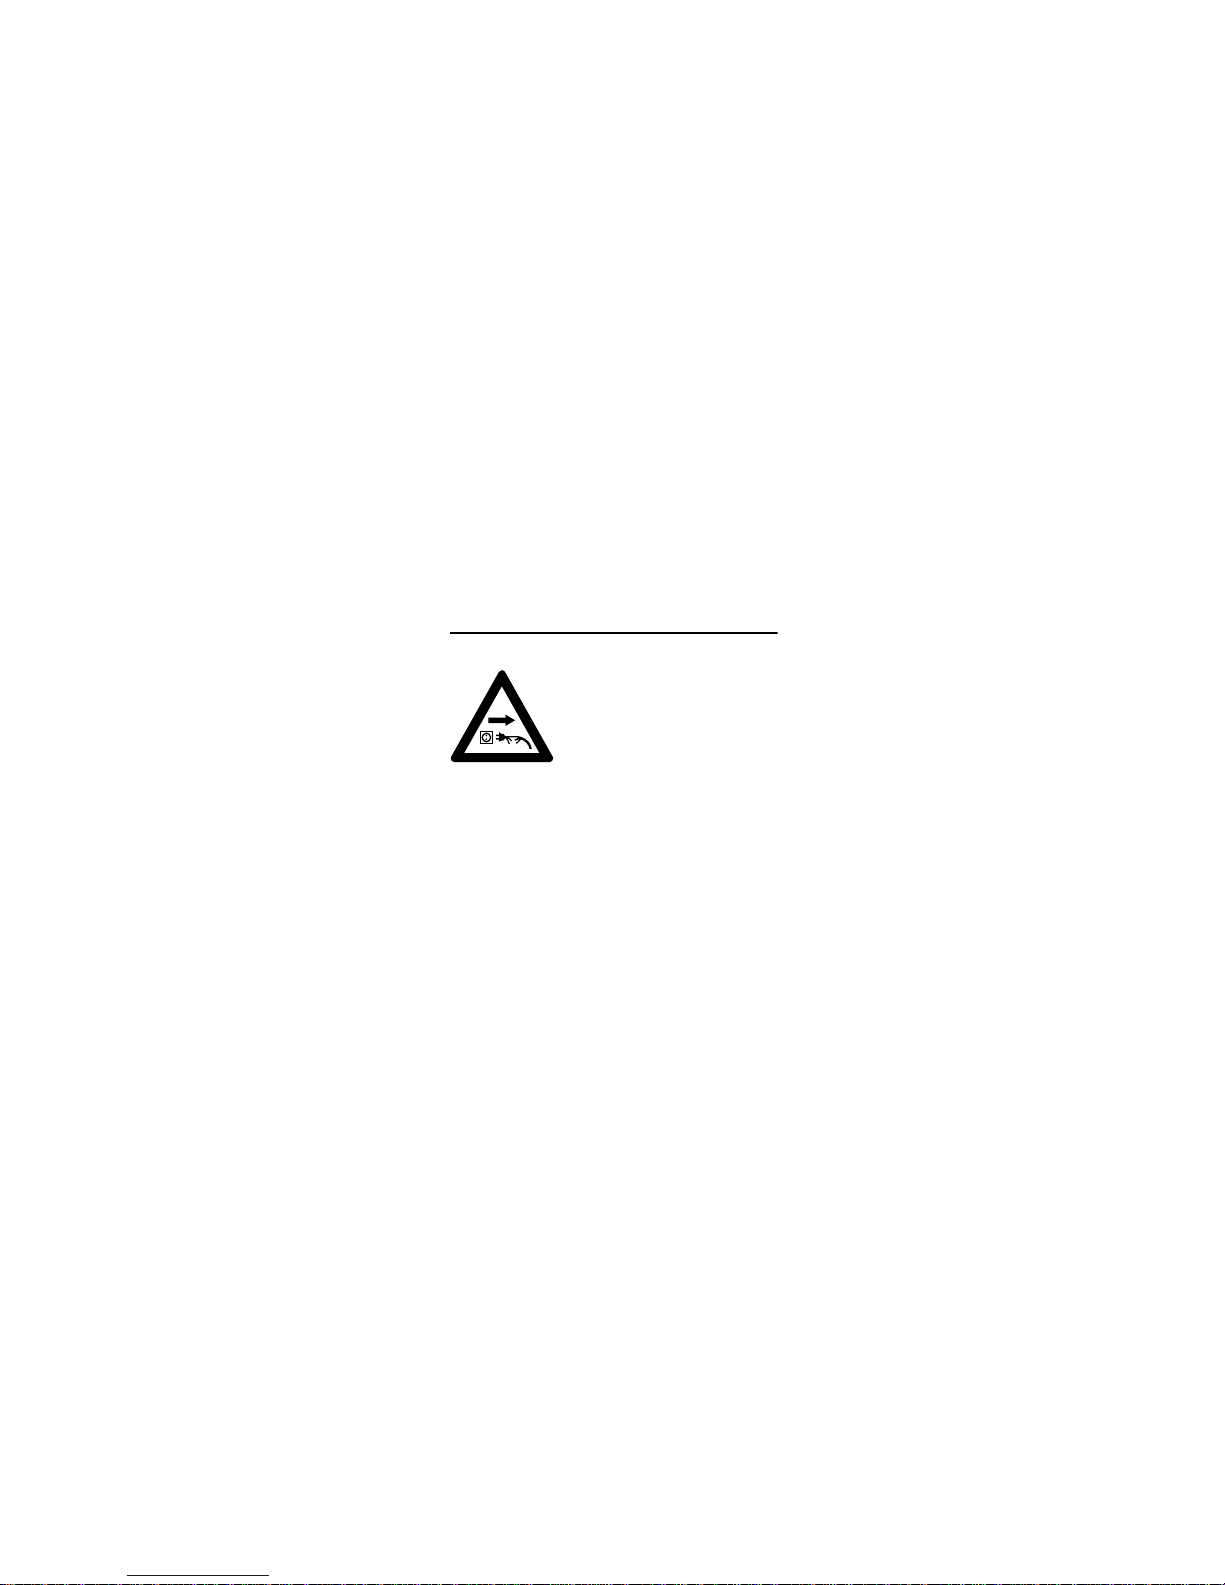
cord is damaged – Danger of
electrocution!
Do not use the connecting
cord to pull or transport the
machine.
Connect only electric power
tools to the socket outlet – see
"Connecting the machine to
the power supply" and
"Switching on the machine".
Do not use high-pressure
cleaners to clean the
machine. The hard water jet
can damage parts of the
machine.
Never spray the upper part of
the vacuum cleaner with water
– Danger of short-circuiting!
Accessories and Spare Parts
Only use parts or accessories
which have been approved by
STIHL for this machine or
which are technically
equivalent. If you have any
questions in this respect,
consult a servicing dealer.
Only use high-quality parts
and attachments. Otherwise,
there may be a risk of
accidents and damage to the
machine.
STIHL recommends the use
of genuine STIHL parts and
accessories. They are
specifically designed to match
your model and meet your
performance requirements.
Do not modify the machine –
otherwise the safety may be
endangered. STIHL excludes
all liability for personal injury
and damage to property
caused while using
unauthorized attachments.
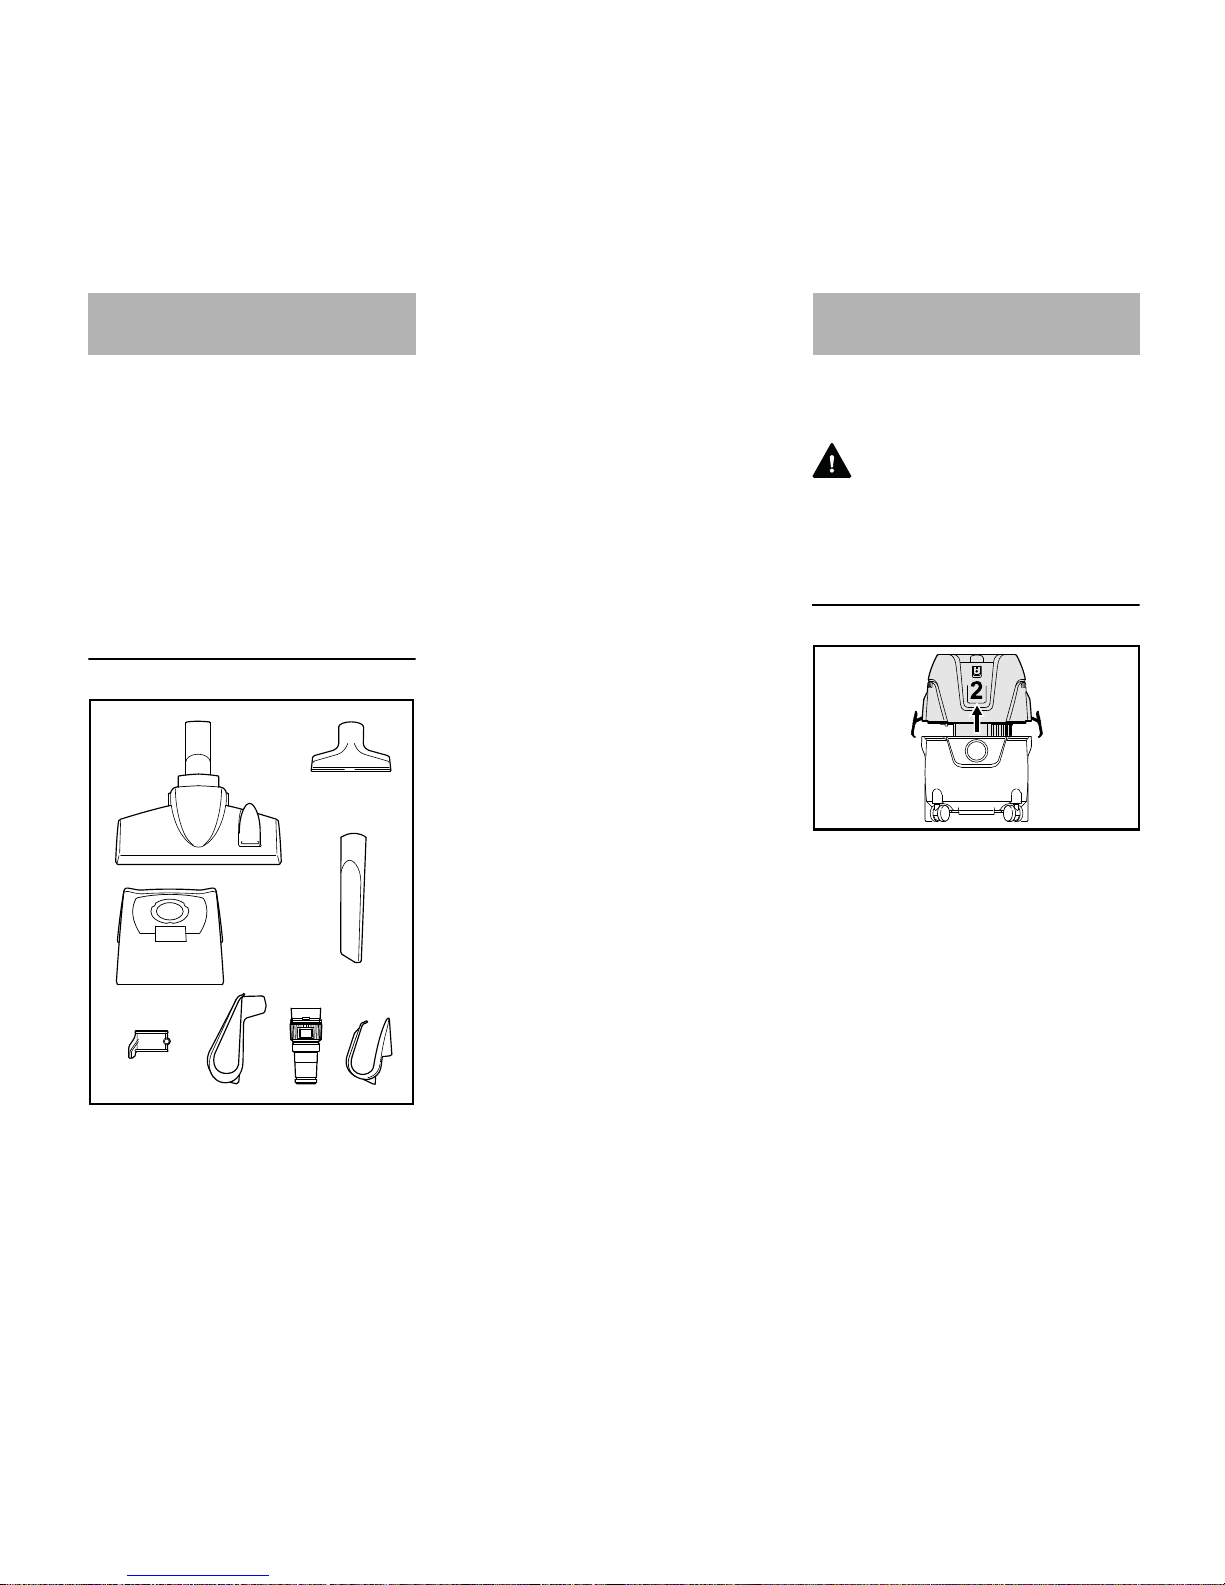
Areas of application
Vacuuming of dry, non-
flammable materials (dust,
dirt, broken glass, wood or
metal shavings, sand, etc.)
and non-flammable liquids
(dirty water, spilled juices,
etc.)

SE 62, SE 62 E
English
4
The machine is not suitable
for vacuuming toxic dust.
Do not use the machine for
any other purpose because of
the increased risk of accidents
and damage to the machine.
The machine must not be
modified in any way – this may
also lead to accidents or
damage to the machine.
Transporting the machine
When transporting the
machine in or on a vehicle, it
must be secured, e.g. with
straps, so that it cannot slip or
tip over.
Do not tilt the machine if there
is liquid in the container.
Close all latches on the
container before transport.
Before starting work
Checking the machine
–It must be possible to
move the switch easily to
the 0 position.
–The switch must be in the
0 position.
Do not operate the machine if
it is not properly assembled
and in good condition – risk of
accident!
The machine may only be
used when all parts are in
perfect working order and are
securely mounted.
Remove the filter bag and
check correct operation of the
float before vacuuming liquids
or wet materials. Never work
without the filter element.
Never attempt to modify the
controls or safety devices
Electrical connection
Minimize the risk of electrical
shock:
–Voltage and frequency of
the machine (see rating
plate) must match the
voltage and frequency of
the mains supply
–Examine the connecting
cord, power plug and
extension cord for
damage. Damaged cords,
couplings and plugs or
connecting cords that do
not comply with the
regulations must not be
used
–Only connect the machine
to a correctly installed
power socket
–Use only extension cords
that comply with the
specifications for the
respective application.
–The insulation on the
connecting cord and any
extension cord, the plug
and the coupling must be
fully intact
Never use the
machine to vac-
uum hot materials
(hot ash, flamma-
ble explosive dust,
glowing cigarette
butts, etc.) or com-
bustible liquids
(gasoline, thinner,
etc.) as well as
aggressive liquids
(acids, lye) – Dan-
ger of fire or
explosion!

SE 62, SE 62 E
English
5
Route the connecting cord
and extension cord properly:
–Observe the minimum
cross-section of the
individual cords – see
"Connecting the machine
to the power supply"
–Route and mark the
connecting cord so that it
cannot become damaged
and no one is endangered
– danger of stumbling!
–Use of unsuitable
extension cords can be
dangerous. Use only
extension cords that are
approved for outdoor use
and are correspondingly
marked and have a
sufficient cross-section
–The connector and
coupling of the extension
cord must be waterproof or
routed in such a way that
they cannot come into
contact with water – the
connector and coupling of
the extension cord must
not lie in water
–don't let the cord rub
against edges or pointed
or sharp objects
–don't squeeze the cord
under doors or windows
–if cords become snarled –
unplug the power plug and
unsnarl the cord
–always unroll the
connecting cord from the
cable reel completely to
avoid risk of fire due to
overheating
During operation
Ensure that the connecting
cord is not damaged by being
driven over, squashed or
pulled, etc.
Never unplug the power plug
by pulling on the connecting
cord: always grip the plug
itself.
Only touch the power plug,
connecting cord and
extension cord and electrical
plug connections with dry
hands.
Never spray electrical devices
with water – Danger of short-
circuiting!
In the event of imminent
danger or in an emergency –
move switch to 0 .
Never let the machine run
unattended.
Do not leave the machine
outdoors in the rain.
The machine may only be
operated in an upright
position. Do not cover the
machine and ensure
adequate motor ventilation.
Ensure that the filter element
is always undamaged.
If foam develops or liquid
escapes, stop work
immediately, unplug the
power plug, and empty the
container.
If the machine is subjected to
unusually high loads for which
it was not designed (e. g.,
heavy impact or a fall), always
check that it is in good
condition before continuing
work - refer also to the chapter
"Before starting work". Also
make certain that the safety
mechanisms are working
properly. Never continue
If the connecting
cord is damaged,
immediately dis-
connect the power
plug from the wall
outlet – risk of
electric shock!

SE 62, SE 62 E
English
6
using a machine that is not in
perfect working order. In case
of doubt, have the unit
checked by your servicing
dealer.
Before leaving the machine
unattended: Switch off the
machine – unplug the power
plug.
After finishing work
Unplug the power plug from
the socket.
Never unplug the power plug
by pulling on the connecting
cord: always grip the plug
itself.
Always clean dust and dirt off
the machine – do not use any
grease solvents for this
purpose.
Maintenance and repairs
WARNING
–Use only high-quality
spare parts. Otherwise,
there may be a risk of
accidents and damage to
the unit. If you have any
questions in this respect,
consult a servicing dealer.
–To avoid risks, work on the
machine (e. g. replacing a
damaged power cord) may
only be carried out by
authorized dealers or
qualified electricians.
Clean plastic parts with a
cloth. Harsh detergents can
damage the plastic.
Clean ventilation slots in
motor housing as needed.
The machine must be
serviced regularly. Do not
attempt any maintenance or
repair work not described in
the Instruction Manual. All
other work should be carried
out by a servicing dealer.
STIHL recommends the use
of genuine STIHL spare parts.
Such parts have been
optimized for the machine and
the user's requirements.
STIHL recommends that
maintenance and repair work
be carried out only by
authorized STIHL dealers.
STIHL dealers receive regular
training and are supplied with
technical information.
Before starting any
work on the
machine: Always
disconnect the
machine from the
mains power
supply.

SE 62, SE 62 E
English
7
SE 62
1x suction hose 2.5 m
1x hand tube
2x insertable suction tube
SE 62 E
1x suction hose 3.5 m
1x hand tube
1x telescoping suction tube
Accessories in container
1x Kombi floor tool (1)
1x all-purpose tool (2)
1x crevice tool (3)
1x filter bag (4)
1x suction tube holder (5)
additionally only for SE 62
1x holder for power cord (6)
additionally only for SE 62 E
1x adapter for electrical power tools (7)
1x holder for power cord (8)
The following accessory parts must be
fitted before using the machine for the
first time.
WARNING
Do not plug the power cord into the
outlet until the machine is completely
assembled.
Opening and closing the container
Opening
NRelease the spring catches (1)
NLift the upper part of the vacuum
cleaner (2) vertically up and off
NRemove accessories and insert
filter bag – see "Inserting filter bag"
Closing
NRefit the upper part of the vacuum
cleaner (2) and close the latches (1)
– ensure that the latches engage
properly
Packing List
6
7
0809BA002 KN
12
3
4
5
8
Assembling the Unit
0809BA003 KN
11 1

SE 62, SE 62 E
English
8
Fit filter bag
NPush filter bag sleeve onto intake
port as far as possible
Mount suction hose and hand tube
NInsert sleeve (1) of suction hose into
the intake port (2)
NSlide clutch (3) of suction hose into
the retainer (4) on the hand tube –
lock (5) must engage
When using the adapter for electric
power tools (supplied with the model SE
62 E):
NSlide clutch (3) of suction hose into
the retainer (6) of the adapter for
electric power tools – lock (5) must
engage
Holders for power cord
SE 62
NConnect holder for power cord via
the support on the upper part of the
vacuum cleaner
SE 62 E
NAttach holder for power cord on the
right tab on the upper part of the
vacuum cleaner
Extension tube
SE 62
NConnect suction tubes (1) and (2)
SE 62 E
NPress button (1)
NRetract or extend suction tube (2)
Mount suction tube holder
NSlide the suction tube holder (1) via
the suction tube (distance A approx.
8 cm / 3.150 in.) and secure it with
the screw (2)
0809BA004 KN
1
0809BA005 KN
3
4
0809BA006 KN
5
6
0809BA026 KN
0809BA027 KN
0809BA007 KN
1 2
0809BA008 KN
12
A
2
0809BA009 KN
1

SE 62, SE 62 E
English
9
Fastening accessories
Fasten accessories on the holders
provided – as shown in picture.
The voltage and frequency of the
machine (see rating plate) must match
the voltage and frequency of the power
connection.
The minimum fuse protection of the
power connection must comply with the
specifications – see "Specifications".
The machine must be connected to the
power supply via an earth-leakage
circuit breaker to disconnect the power
supply if the differential current to earth
exceeds 30 mA.
The power connection must correspond
to IEC 60364 and relevant national
regulations.
Extension cord
The design of the extension cord must at
least fulfill the same features as the
connecting cord on the machine.
Observe the design marking (type
designation) on the connecting cord.
The cores in the cord must have the
following minimum cross-section
depending on the mains voltage and
cord length.
Connection to the power supply socket
Before connection to the power supply,
check that the machine is switched off –
see "Switching off the machine"
NPlug the power cord or extension
cord into a properly installed outlet
0809BA010 KN
Connecting to Power Supply
Cord length Minimum cross-
section
220 V – 240 V:
Up to 20 m 1.5 mm2
20 m to 50 m 2.5 mm2
100 V – 127 V:
Up to 10 m AWG 14 / 2.0 mm2
10 m to 30 m AWG 12 / 3.5 mm2

SE 62, SE 62 E
English
10
SE 62
Switch positions:
NTo switch on, set master switch to I
SE 62 E
Power tools can be plugged into the
machine socket (1). Do not exceed the
maximum connected load of the
machine socket – see "Specifications".
NSwitch off the vacuum cleaner and
the electric power tool that is to be
connected prior to connection to the
machine socket (1).
The power consumption of the vacuum
is adjusted automatically when using
electric power tools with electronic
speed control.
Switch positions
NTo switch on, set master switch to
the corresponding switch position
NDepending on the intended use of
the vacuum cleaner – select the
appropriate accessory and fit to the
suction tube, hand tube or suction
hose (only adapter for electrical
power tool)
Kombi floor tool
NPosition for vacuuming carpets (1)
NPosition for vacuuming hard
floors (2)
All-purpose tool
To clean upholstery or inside of vehicles.
Switching On
vacuum cleaner is switched on
vacuum cleaner is switched off
0809BA011 KN
0809BA012 KN
1
Vacuum switched on, the
socket outlet on the appli-
ance cannot be used.
vacuum cleaner is switched
off
Vacuum ready for operation –
the machine connected to the
socket outlet on the appliance
switches the vacuum on and
off via the automatic switch-
on function
Working
0809BA013 KN
1
2
0809BA014 KN

SE 62, SE 62 E
English
11
Crevice tool
To clean ingrained dirt, e. g. in corners
or joints.
Adapter for electrical power tool
(supplied with the model SE 62 E)
To connect electrical power tools to
suction attachment:
NConnect adapter for electrical
power tool to suction hose instead
of hand tube
NUse the adjusting ring (1) to adjust
the suction power to the relevant
task or to the relevant electrical
power tool
Vacuuming dry materials
WARNING
Flammable materials must not be
vacuumed.
Always make sure that the filter bag has
been fitted in the container before
vacuuming dry materials. The
vacuumed material can then be
disposed of without difficulty. Dry
materials can also be vacuumed without
filter bag.
NOTICE
Never use the vacuum cleaner with a
damaged filter element or without the
filter element.
Vacuuming liquids
WARNING
Flammable liquids must not be
vacuumed.
Always remove the filter bag and check
operation of the float before vacuuming
liquids. The float switches off the air
stream when the container is full. If the
machine is exclusively used for wet-
vacuuming, the filter element should be
replaced by a special insert (special
accessory).
The filter element is damp after
vacuuming liquids. The filter element is
likely to clog up more quickly if dry
material is vacuumed while it is still
damp. For this reason, the filter element
should be dried or replaced by a dry filter
element before vacuuming dry
materials.
Blower mode
For difficult to reach areas and for all
those applications where vacuuming is
not possible or advisable.
NRemove suction hose from intake
port
NConnect suction hose (1) in exhaust
opening (2)
Adjusting the suction power
The suction power can be adjusted with
the adjusting ring if required to avoid
lifting light carpets etc. from the floor:
NTurn adjusting ring (1) and adapt
suction power to the relevant
cleaning task
0809BA015 KN
0809BA016 KN
1
1
0809BA017 KN
0809BA018 KN
1

SE 62, SE 62 E
English
12
NTurn the master switch to O
NUnplug the power plug from the
socket
NEmpty the container and clean the
machine
After vacuuming liquids:
NRemove the upper part of the
vacuum cleaner so that the filter
element can dry
SE 62
NRoll up the power cord and hang it
on the holder
NFasten the extension tube, suction
hose and accessories to the holders
provided for this purpose
NThe vacuum cleaner must be stored
in a dry room and protected against
unauthorized use
SE 62 E
NRoll up the power cord and secure
with the rubber strap
NFasten the extension tube, suction
hose and accessories to the holders
provided for this purpose
NThe vacuum cleaner must be stored
in a dry room and protected against
unauthorized use
Switching Off
1
0809BA019 KN
SE 62
SE 62 E
After Finishing Work
0809BA028 KN
0809BA029 KN

SE 62, SE 62 E
English
13
NSwitch off the vacuum cleaner
NUnplug the power plug from the
socket
NOpen the container – see
“Assembling the machine”
When dry-vacuuming without filter bag
and when wet-vacuuming
NRemove suction hose from intake
port
NEmpty the container and dispose of
its contents in accordance with the
applicable regulations
When dry-vacuuming with filter bag
NPull filter bag sleeve off intake port
and seal filter bag sleeve with slide
NCarefully remove filter bag from
container and dispose of in
accordance with statutory
regulations
NInsert new filter bag (instructions on
filter bag)
NPush filter bag sleeve onto intake
port as far as possible
Close the container
NClean the edge of the container
NFit the upper part of the vacuum
cleaner – see “Assembling the
machine”
Nbefore fitting the suction hose:
Clean the sleeve of the suction hose
and intake port
NClose slide on hand tube
NSwitch on machine
NPress opening of hand tube firmly
against the level surface or close by
hand
NPress the button (1) to clean filter 3x
Dust deposits are removed from the filter
element.
Emptying the container
0809BA022 KN
Cleaning the filter element
1
0809BA023 KN

SE 62, SE 62 E
English
14
NUnplug the power plug from the
socket
NRemove upper part of vacuum
cleaner and turn it over
NTurn the cover (1) in the direction of
the arrow and remove it
NRemove filter element (2) and
dispose of it in accordance with the
statutory regulations
NCheck correct operation of the float:
the float must move easily when the
upper part of the vacuum cleaner is
turned over
NFit new filter element in the reverse
sequence of steps
NRefit upper part of the vacuum
cleaner
NOTICE
Never use the vacuum cleaner with a
damaged filter element or without the
filter element.
Replacing the filter element
1
0809BA024 KN
2

SE 62, SE 62 E
English
15
Maintenance and Care
The following maintenance intervals apply in normal operating conditions. The specified intervals must
be shortened accordingly when working for longer than normal or under difficult and dusty conditions
(extensive dust, etc.).
before starting work
at the end of work and/or
daily
Weekly
monthly
if faulty
if damaged
as required
Complete machine
visual inspection (condition) X
clean X
Power cord
check X
have them replaced by a specialist dealer 1) X
Switch
check operation X
have them replaced by a specialist dealer 1) XX
Ventilation slots in motor housing clean X
Filter bag change X
Filter element
clean X
replace X
Container empty X
All accessible screws, nuts and bolts retighten X
Safety information labels replace X
1) STIHL recommends STIHL servicing dealers

SE 62, SE 62 E
English
16
Observing the instructions in this manual
helps reduce the risk of unnecessary
wear and damage to the power tool.
The power tool must be operated,
maintained and stored with the due care
and attention described in this
instruction manual.
The user is responsible for all damage
caused by non-observance of the safety
precautions, operating and maintenance
instructions in this manual. This includes
in particular:
–Alterations or modifications to the
product not approved by STIHL.
–Using tools or accessories which
are neither approved or suitable for
the product or are of a poor quality.
–Using the product for purposes for
which it was not designed.
–Using the product for sports or
competitive events.
–Consequential damage caused by
continuing to use the product with
defective components.
Maintenance Work
All the operations described in the
"Maintenance Chart" must be performed
on a regular basis. If these maintenance
operations cannot be performed by the
owner, they should be performed by a
servicing dealer.
STIHL recommends that you have
servicing and repair work carried out
exclusively by an authorized STIHL
servicing dealer. STIHL dealers are
regularly given the opportunity to attend
training courses and are supplied with
the necessary technical information.
If these maintenance operations are not
carried out as specified, the user
assumes responsibility for any damage
that may occur. Among other things,
this includes:
–Damage to the motor due to neglect
or deficient maintenance (e.g. not
cleaning cooling air inlets).
–Damage due to incorrect electrical
connection (voltage, inadequately
rated connecting cords).
–Corrosion and other consequential
damage resulting from improper
storage.
–Damage to the product resulting
from the use of poor quality
replacement parts.
Wear Parts
Some parts of the machine are subject
to normal wear and tear even when the
machine is used in conformity with its
intended use. These parts must be
replaced in good time, depending on the
nature and duration of use. Among other
parts, this includes:
–Filter element, filter bag
Fault: Motor does not start
Fault: Motor does not run in automatic
mode
Fault: Poor suction performance
Minimize Wear and Avoid
Damage
Troubleshooting
Cause Remedy
Mains circuit-
breaker has been
tripped
Check and reset
mains circuit
breaker
Cause Remedy
Power tool faulty or
not plugged in
correctly
Check correct
operation of power
tool and insert plug
properly
Cause Remedy
Filter bag is full See "Emptying the
container"
Suction hose / tool
is clogged
Clean suction
hose / tool
Filter element is
fouled
See "Cleaning the
filter element" and
"Replacing the fil-
ter element"
Gasket between
upper part of vac-
uum cleaner and
container is fouled
or faulty
Clean or replace
gasket

SE 62, SE 62 E
English
17
Fault: No suction performance when
wet-vacuuming
Cause Remedy
Container full
(intake port is
sealed by float)
See "Emptying the
container"

SE 62, SE 62 E
English
18
1Suction hose
2Handle tube
3Adapter for electrical power tools1)
4Handle
5Filter cleaning button
6Switch
7Filter
8Suction hose connection in suction
mode
9Exhaust opening and suction hose
connection in blower mode
10 Holders for suction tube
11 Clip
12 Container
13 Holders for power cord
14 Rubber strap – holder for suction
hose1)
15 Socket outlet1)
16 Telescoping suction tube1)
17 Suction tubes
18 Extension tube holder
19 Kombi floor tool
20 Crevice tool
21 All-purpose tool
Main Parts
13
13
7
7
14
9
10
0809BA025 KN
12
3
6
4
18
19
21
20
17
17
4
12
9
10
5
16
11
5
8
11
12
8
15
6
SE 62
SE 62 E
1) Supplied with the model SE 62 E
Other manuals for SE 62
6
Table of contents
Other Stihl Vacuum Cleaner manuals