Product description
Function and use
The awning was designed exclusively as sun pro-
tection.
Improper modications to the awning or, if motor-
driven, to the conguration of the control system
may only be made with the prior agreement of STO-
BAG. Modications to the awning or its components
can create a hazard.
Electrical connections for motor-driven awn-
ings 230V
For awnings operated by a push-button
switch, the switch must be positioned so
that the front rail can be seen and no higher
than 1.3 m above ground level. If there is no vis-
ual contact with the service switch of the awning,
motorised awning must be installed at a height of
> 2.50 m so that the front rail is at least 1.80 m
above ground level when fully extended and at least
0.40 m from anywhere is could jam.
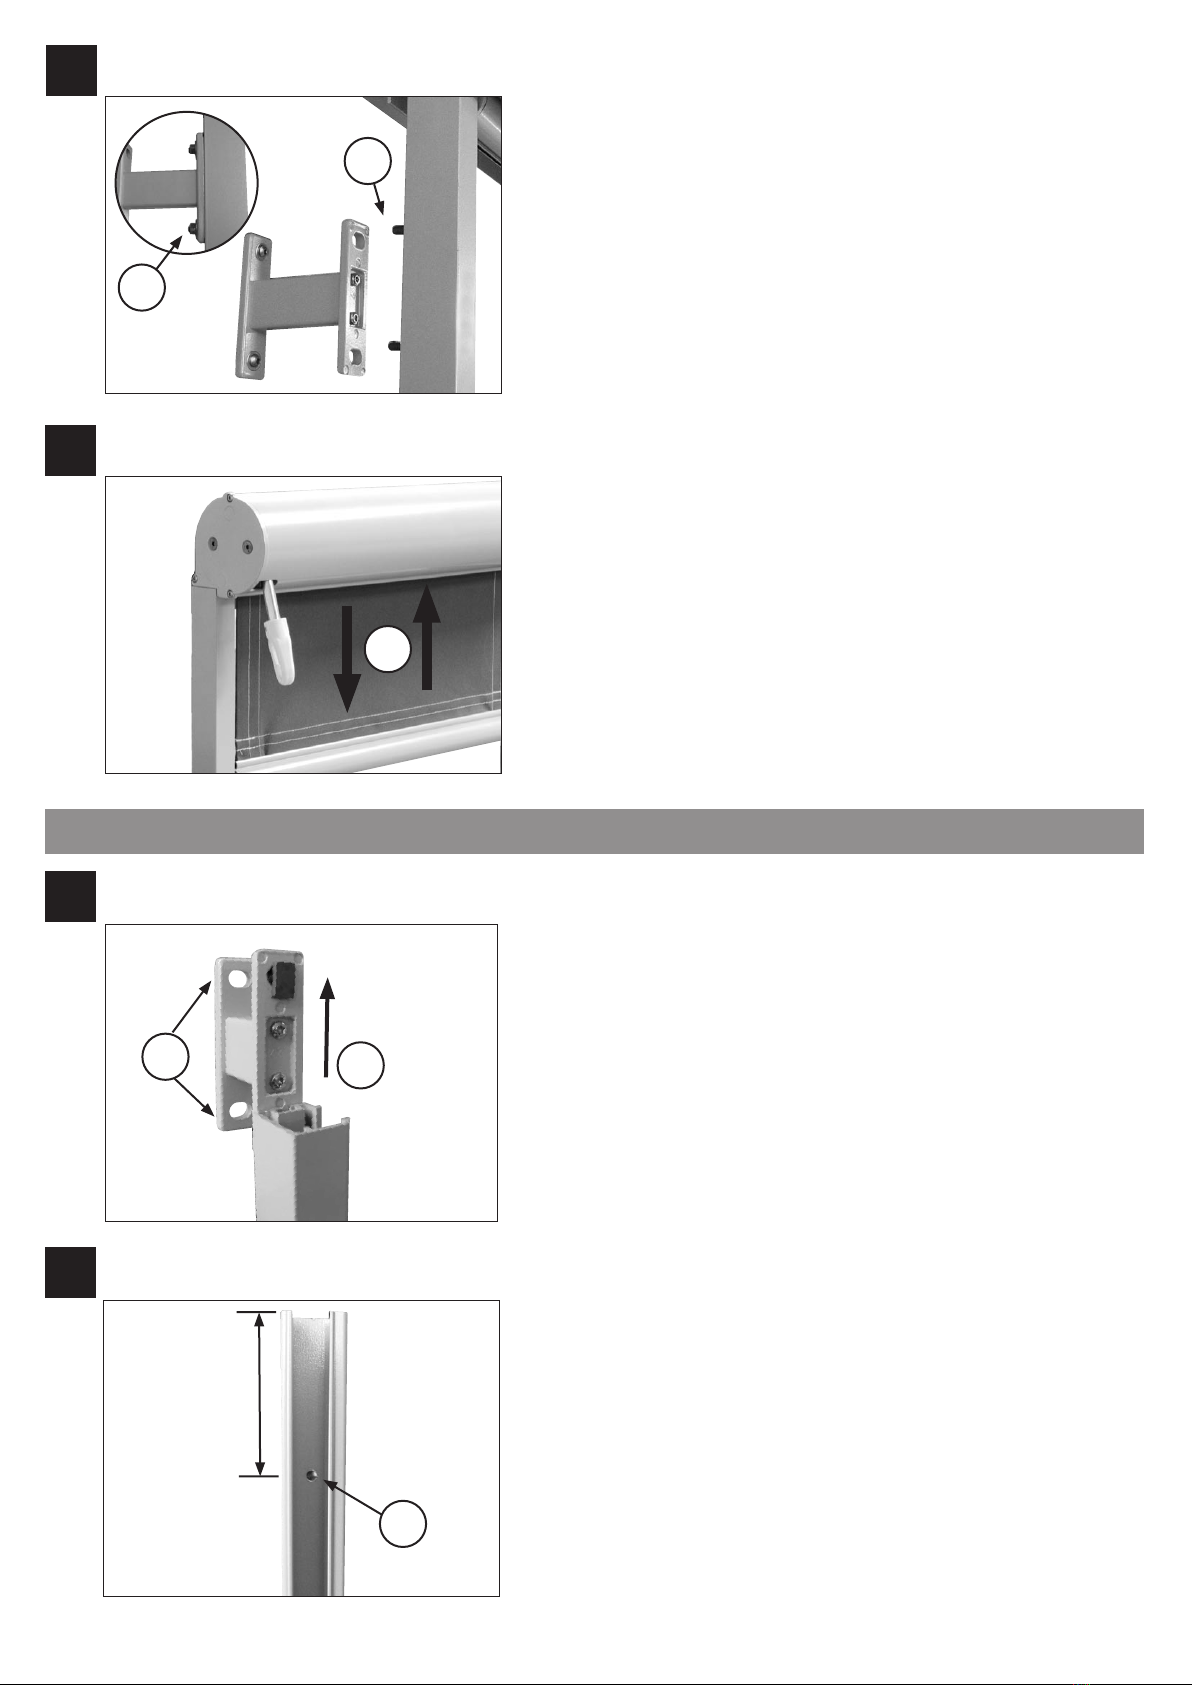
Preparation for installation of the
awning
Transport and storage of the awning
To avoid injuries to people and material,
awnings longer than 300 cm and weigh-
ing more that 50 kg must be carried and
installed by two people.
The awning must be stored in a dry environment,
protected against falling and not in contact with the
ground.
Safety precautions before installation
To prevent accidents, the installation loca-
tion must be securely cordoned-off. Do not
touch the awning’s moving parts during re-
traction and extension.
During the installation of a motor-driven awning, any
electrical connections already installed must be dis-
connected from the power supply.
Motor-driven awnings (230V) may only be connected
by a qualied electrician. Legal requirements must
be observed. Improper connection may put the user
at serious risk.
Fixing material
The xing materials (screws, rawl plugs, etc.) must
be determined by a specialist or agreed with the
manufacturer of the xing material, depending of
the underlying structure (concrete, limestone, etc.).
Descripción del producto
Funcionamiento y ámbito de aplicación
Los toldos STOBAG están diseñados exclusivamente
para la protección solar.
Las modicaciones inadecuadas en el toldo o en la
conguración del mando (sólo en caso de accion-
amiento por motor) sólo se podrán efectuar previa
consulta a STOBAG. La manipulación del toldo o de
sus componentes puede dar lugar a situaciones de
peligro.
Conexión eléctrica de toldos con accionamiento
por motor 230V
En los toldos accionados mediante un pul-
sador, el interruptor debe estar colocado,
mirando al perl de caída, a una altura in-
ferior a 1,3 m. En caso de que desde el mando del
pulsador no se vea el toldo, los toldos accionados
por motor se montarán a una altura > 2,50 m, de
manera que el perl de caída extendido esté, como
mínimo, a 1,80 m sobre el suelo y a una distancia
mínima de 0,40 m de cualquier punto de aplasta-
miento posible.
Preparación del toldo para el montaje
Transporte y almacenamiento del toldo
Para evitar que se produzcan daños perso-
nales o materiales, los toldos con una lon-
gitud superior a 300cm y un peso superior
a 50 kg deben ser transportados e instalados por
dos personas.
El toldo se debe almacenar seco, de manera que no
pueda caerse y sin tocar el suelo.
Medidas de seguridad antes de la instalación
Para prevenir accidentes, se debe cercar el
lugar de montaje de manera bien visible.
Durante los movimientos de desenrollado y
enrollado no se deben tocar las piezas móviles del
toldo.
Durante los trabajos de montaje en un toldo con ac-
cionamiento por motor, se deben desenchufar de la
red las conexiones eléctricas ya instaladas.
Los toldos con accionamiento por motor (230V) so-
lamente pueden ser instalados por personal técnico
autorizado. Debe observarse la normativa legal. Si
se efectúa una conexión inadecuada, el usuario pu-
ede quedar expuesto a peligros importantes.
Material de fijación
El técnico determinará los elementos de sujeción