MHZ Solix Guide

1
Technische Änderungen vorbehalten I
Ausgabe 07.2022
Einstellanleitung für Bi-direktionale Funkmotoren
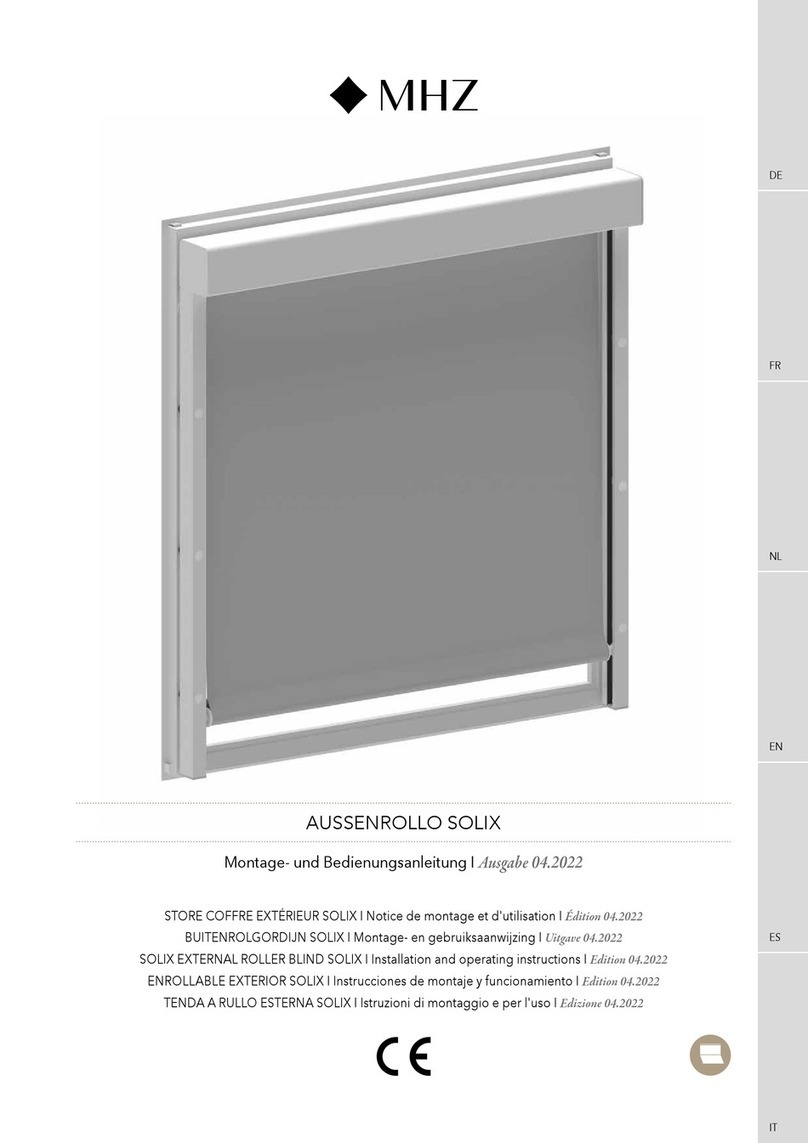
Aussenrollo Solix
Funkwandsender
1-Kanal-Funkwandsender
DD1670H
Wandfunksender
DC1673
Wandfunksender
DC1670
Rückseite
DC1670 / DC1673
9
9
10
10
LCD-Display
AUF-Taste
STOP-Taste
AB-Taste
P1-Tasten +
Reserve
P1-Taste –
P2-Taste*
Batteriefachdeckel
Batterie
DC1673
Tasten 5 + 6 gleichzeitig drücken
entspricht P2-Taste!
*
7
7
8
8
P2
O
P
E
N
C
L
O
S
E
LCD-Display
AUF-Taste
STOP-Taste
AB-Taste
P1-Tasten +
Reserve
P1-Taste –
P2-Taste *
15-Kanal-Funkwandsender
DD1673H
9
Batteriefachdeckel
Batterie
Wandfunksender
DC1673
Wandfunksender
DC1670
Rückseite
DC1670 / DC1673
9
9
10
10
LCD-Display
AUF-Taste
STOP-Taste
AB-Taste
P1-Tasten +
Reserve
P1-Taste –
P2-Taste*
Batteriefachdeckel
Batterie
DC1673
Tasten 5 + 6 gleichzeitig drücken
entspricht P2-Taste!
*
7
7
8
8
P2
O
P
E
N
C
L
O
S
E
*DD1673H
Tasten 5 + 6 gleichzeitig drücken
entspricht P2-Taste!
Rückseite
DD1670H / DD1673H
Wandfunksender
DC1673
Wandfunksender
DC1670
Rückseite
DC1670 / DC1673
9
9
10
10
LCD-Display
AUF-Taste
STOP-Taste
AB-Taste
P1-Tasten +
Reserve
P1-Taste –
P2-Taste*
Batteriefachdeckel
Batterie
DC1673
Tasten 5 + 6 gleichzeitig drücken
entspricht P2-Taste!
*
7
7
8
8
P2
O
P
E
N
C
L
O
S
E
Montage des Funkwandsenders
UP
1.
2.
2 8 mm
D D 16 7 0 H
D D 16 7 3 H
Funkhandsender
1-Kanal-Funkhandsender
DD1600H
LCD-Display
AUF-Taste
STOP-Taste
AB-Taste
P1+/P1--Tasten
P2-Taste
Batterie
Batteriefachdeckel
Handfunksender
DC1600
Handfunksender
DC1602
7
8
Rückseite
DC1600 / DC1602
8
P2 P2
LCD-Display
AUF-Taste
STOP-Taste
AB-Taste
P1+/P1–-Tasten
P2-Taste
Batterie
Batteriefachdeckel
15-Kanal-Funkhandsender
DD1602H
LCD-Display
AUF-Taste
STOP-Taste
AB-Taste
P1+/P1--Tasten
P2-Taste
Batterie
Batteriefachdeckel
Handfunksender
DC1600
Handfunksender
DC1602
7
8
Rückseite
DC1600 / DC1602
8
P2 P2
Rückseite
DD1600H / DD1602H
LCD-Display
AUF-Taste
STOP-Taste
AB-Taste
P1+/P1--Tasten
P2-Taste
Batterie
Batteriefachdeckel
Handfunksender
DC1600
Handfunksender
DC1602
7
8
Rückseite
DC1600 / DC1602
8
P2 P2
Montage des Funkhandsenders
2 8 mm
2 8 mm
D D 16 0 0 H
D D 16 0 2H
Bedien- und Anzeigeelemente
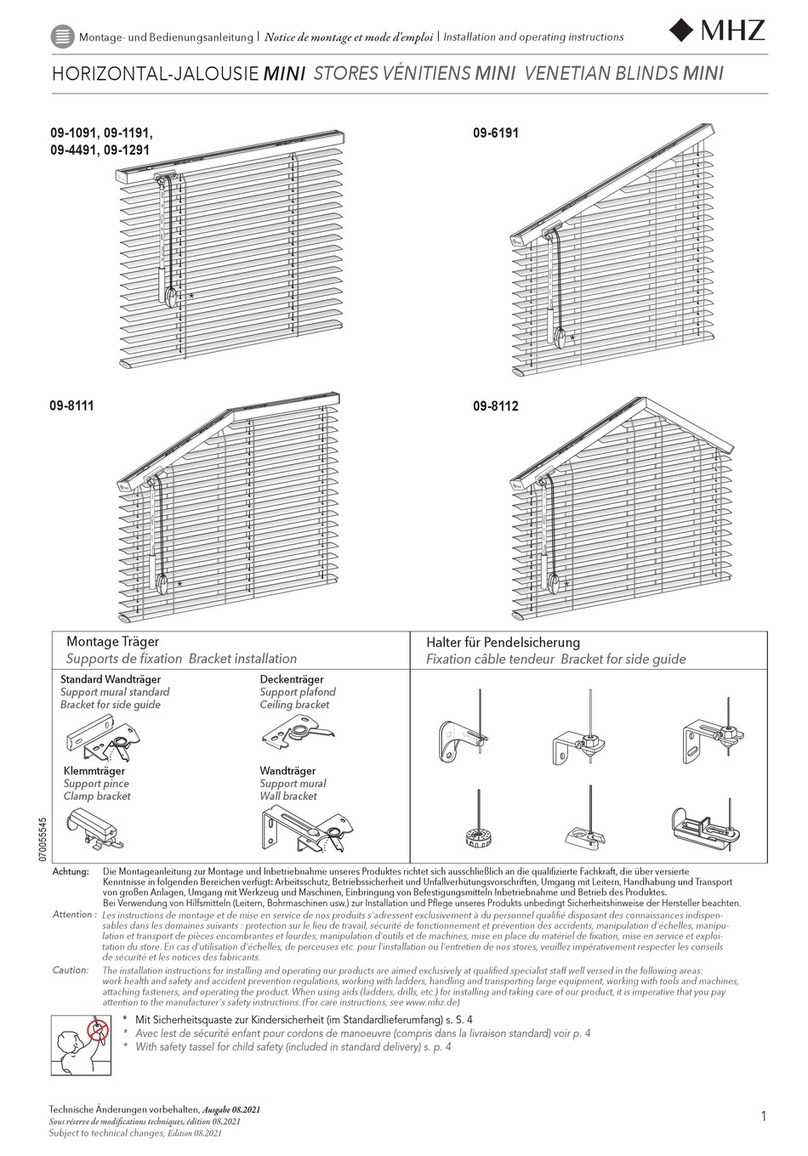
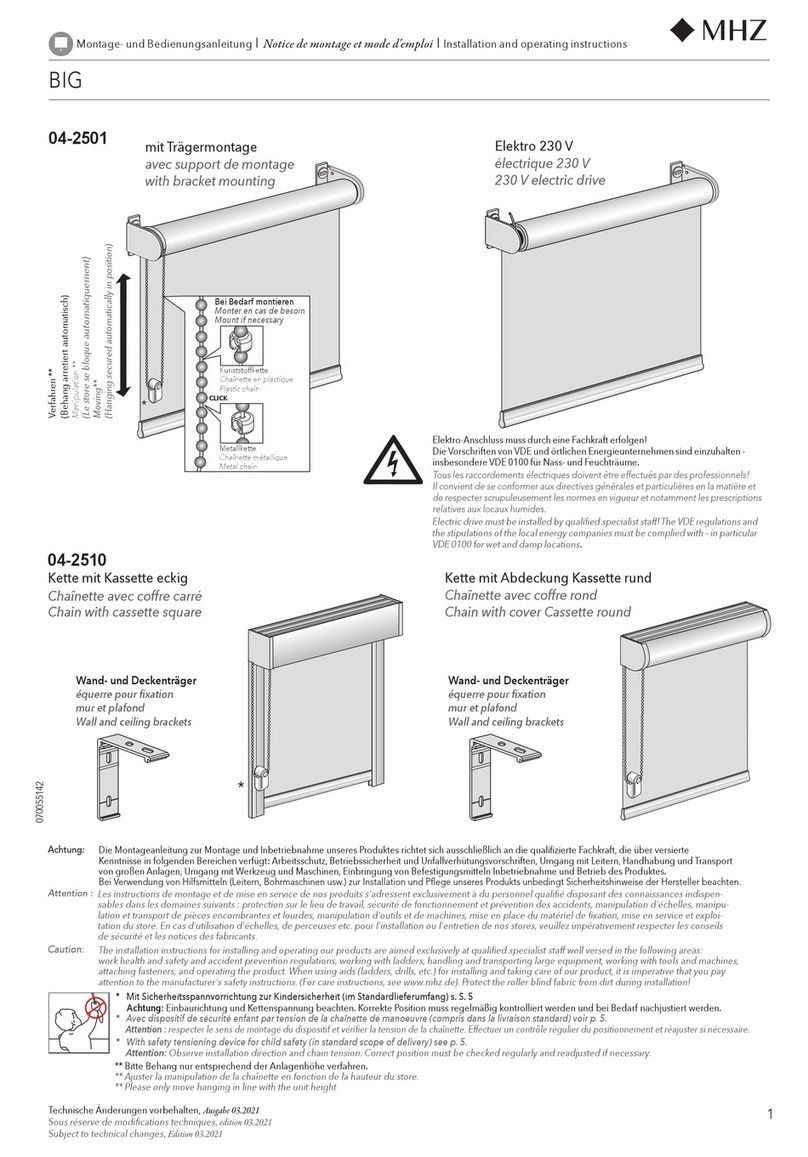
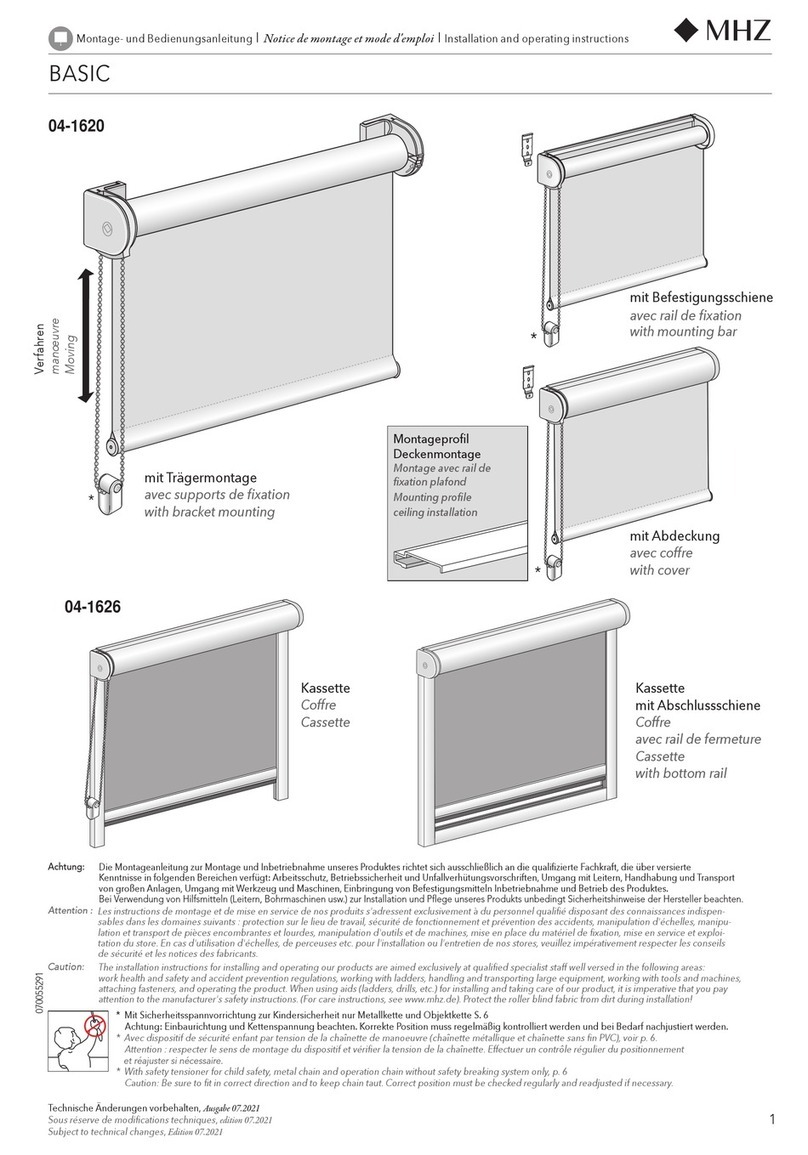
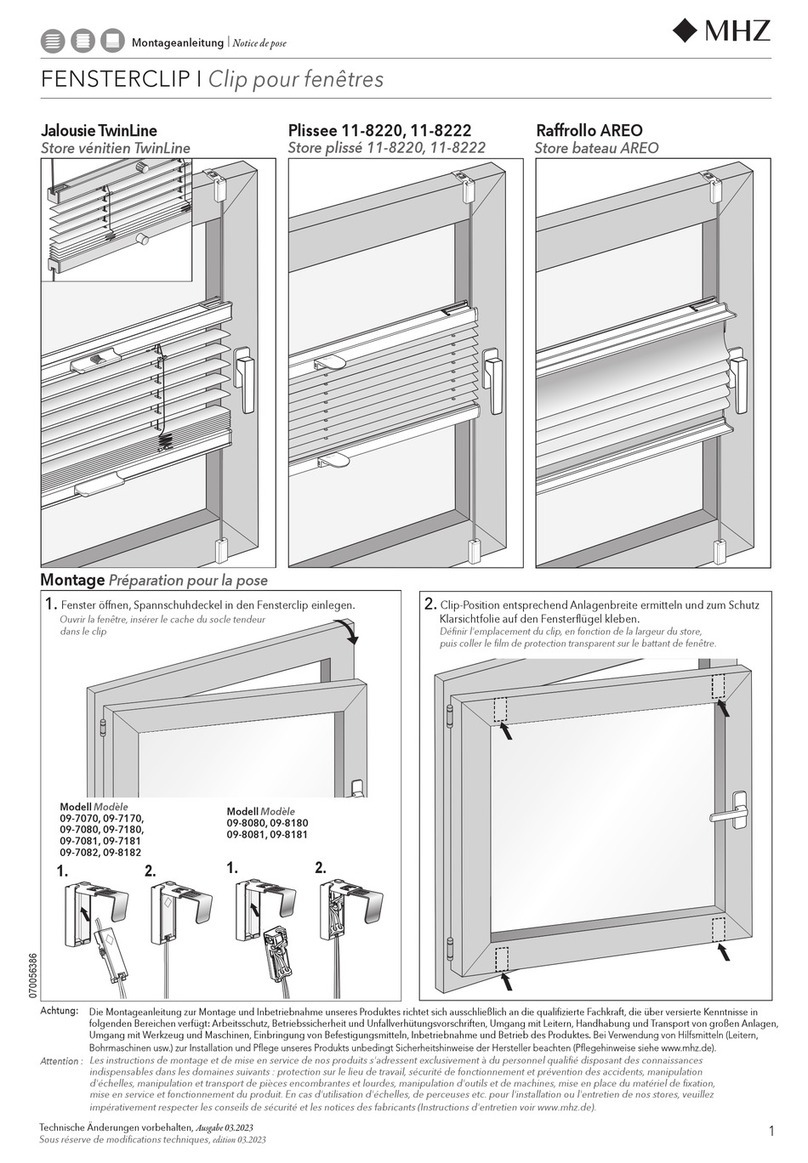
Zur Bedienung des Rollos kommen Funk-Fernbedienungen zum Einsatz.
Bei dem 15-Kanal-Funkhandsender werden mit Kanal "0" grundsätzlich alle Anlagen angesteuert.
DE
EN
ab Produktionsdatum 07/2022

2Technische Änderungen vorbehalten I
Ausgabe 07.2022
Einstellanleitung für Bi-direktionale Funkmotoren
Aussenrollo Solix
1.1 Bedienung
Die Endlagen des Antriebes und der dazugehörige Funksender sind werkseitig
einprogrammiert
1.2 Auf- und Abbewegen des Rollos
Voraussetzung:
Die Endlagen sind ordnungsgemäss eingestellt, der Akku ist geladen
und eine Funk-Fernbedienung ist angemeldet.
Vorgehen:
Nach Drücken der Taste „AUF“ an der Fernbedienung fährt das Rollo bis
zur Endlage nach oben.
Nach Drücken der Taste „AB“ an der Fernbedienung fährt das Rollo bis
zur Endlage nach unten.
Nach drücken der Taste "STOP"an der Fernbedienung kann das Rollo
an einer gewünschten Position gestoppt werden.
Mit der Taste "P1+/P1-" an der 15 Kanal Fernbedienung kann zwischen
den unterschiedlichen Kanälen gewählt werden. Mit Kanal 0 werden
grundsätzlich alle einprogrammierten Anlagen angesteuert.
1.3 Batteriewechsel an der Fernbedienung
1.3.1 Batteriewechsel an Funkhandsendern: Batterietyp CR2450
P2 P2
2
P2 P2
1
1.3.2 Batteriewechsel an Funkwandsendern: Batterietyp CR2430
P2
O
P
E
N
C
L
O
S
E
1
2
P2
O
P
E
N
C
L
O
S
E
ACHTUNG
Batterien dürfen nicht mit dem Hausmüll entsorgt werden!
Batterien und Akkumulatoren werden von dem Handel zurückgenommen,
in dem Sie sie gekauft haben.
1.4 Störungen und Fehlersuche
1.4.1 Fehlerzustandserkennung
Der Betrieb des Rollos ist nicht möglich.
1.4.2 Störungsbeseitigung
• Der Akku ist nicht ausreichend geladen
⇒Au ollstndig auaden.
• Der Antrieb ist überlastet/überhitzt
⇒Vor erneutem Versuch den Antrieb 15 Minuten abkühlen lassen.
• Das Rollo läuft mit zu geringer Geschwindigkeit
⇒Kalte Aussentemperaturen können dazu führen, dass das Rollo mit
reduzierter Geschwindigkeit fährt.
• Das Rollo fährt nicht in Endlage
⇒Die Endlagen löschen und erneut einstellen.
• Das Rollo reagiert nicht auf die Funk-Fernbedienung
⇒Überprüfen Sie die Batterie in der Funk-Fernbedienung.
2.1 Weiteren Funksender anmelden
i
Funksender aist bereits angemeldet. Funksender bsoll angemeldet werden.
Bei einem Mehrkanal-Funksender wählen Sie vorab den Kanal, der zugewiesen
werden soll.
Variante 1
1. Bei Handfunksendern den Deckel auf der Rückseite zum Einstellen abziehen.
Achtung: Batterie leicht angedrückt halten (Kontakt).
Nach dem Einstellen den Deckel wieder aufschieben.
P2
P2
a
a
P2
b
P2
P2
ab
+
ab
P2
P2
a
a
P2
b
P2
P2
ab
+
ab
2. Drücken Sie am Funksender a1 mal die P2-Taste
=> Rollo bestätigt mit 1 mal Signalton + kurzer Bewegung.
3. Drücken Sie am Funksender a1 mal die P2-Taste
=> Rollo bestätigt mit 1 mal Signalton + kurzer Bewegung.
4. Drücken Sie am Funksender b1 mal die P2-Taste
=> Rollo bestätigt mit 2 kurzen Bewegungen + 3 mal
Signalton.
Variante 2
1. Einstelltaste am Antrieb ca. 2 Sek. gedrückt halten.
=> Rollo bestätigt mit kurzer Bewegung und langem Signalton.
2. Drücken Sie am neuen Funksender ca. 2 Sek. die STOP-Taste.
=> Rollo bestätigt mit 2 kurzen Bewegungen + 3 mal
Signalton.
O ber e
E ndla g e U nter e
E ndla g e
2.2 Endlage (oben verändern)
i
Es ist bereits eine obere/untere Endlage eingestellt.
Sollten noch keine Endlagen eingestellt sein, müssen diese zunächst wie unter 3.3
beschrieben, eingestellt werden.
1. Bringen Sie das Rollo in die obere Endlage.
2.
Drücken Sie am Funksender 5 Sek. die AUF- und STOP-Taste
gleichzeitig.
=> Rollo bestätigt mit 1 kurzen Bewegung + langem Signalton.
O ber e
E ndla g e
3. Bringen Sie das Rollo mit den Fahrtasten in die gewünschte
neue Endlage.
Kurzes Drücken der Fahrtaste: Schrittweises Verfahren
Langes Drücken der Fahrtaste: Stufenloses Verfahren
4. Drücken Sie am Funksender 2 Sek. die AUF- und STOP-Taste
gleichzeitig.
=> Rollo bestätigt die neue Endlage mit 2 kurzen Bewegungen
+ 3 mal Signalton.
2.3 Endlage (unten verändern)
i
Es ist bereits eine obere/untere Endlage eingestellt.
Sollten noch keine Endlagen eingestellt sein, müssen diese zunächst wie unter 3.3
beschrieben, eingestellt werden.
1. Bringen Sie das Rollo in die untere Endlage.
2. Drücken Sie am Funksender 5 Sek. die AB- und STOP-Taste
gleichzeitig.
=> Rollo bestätigt mit 1 kurzen Bewegung + langem Signalton.
U nter e
E ndla g e
3. Bringen Sie das Rollo mit den Fahrtasten in die gewünschte
neue Endlage.
Kurzes Drücken der Fahrtaste: Schrittweises Verfahren
Langes Drücken der Fahrtaste: Stufenloses Verfahren
4. Drücken Sie am Funksender 2 Sek. die AB- und STOP-Taste
gleichzeitig.
=> Rollo bestätigt die neue Endlage mit 2 kurzen Bewegungen
+ 3 mal Signalton.
DE
EN

3
Technische Änderungen vorbehalten I
Ausgabe 07.2022
Einstellanleitung für Bi-direktionale Funkmotoren
Aussenrollo Solix
3.4 Drehrichtung des Antriebes bei eingestellten Endlagen ändern
iZur erneuten Änderung der Drehrichtung, wiederholen Sie Punkt 1.
1. Die Einstelltaste am Antrieb gedrückt halten.
=> Rollo bestätigt mit 3 kurzen Bewegungen im Abstand von
jeweils ca. 4 Sek. + 3 mal Signalton nach Entlasten der
Einstelltaste.
3.5 Punktgenauen Bedienmodus einstellen (Option)
1. Drücken Sie am Funksender 5 Sek. die AUF- und AB-Taste
gleichzeitig.
=> Rollo bestätigt mit 1 kurzen Bewegung.
O ber e
E ndl a g e U nter e
E ndl a g e
2. Drücken Sie die STOP-Taste
=> Rollo bestätigt mit 1 kurzen Bewegung + langem Signalton.
iPunktgenaue Bedienung durch kurzes Drücken der AUF/AB-Taste.
Drücken Sie lange auf die AUF/AB-Taste zum stufenlosen Verfahren.
Zum Löschen der Einstellung wiederholen Sie Punkt 3.5.
3.6 Einlernen einer 3. Behangposition (Option)
iSie haben die Möglichkeit, dem Rollo eine zusätzliche Stop-Position zuzuweisen.
Diese Position ist nur zwischen den beiden Endlagen möglich.
1. Bei Handfunksendern den Deckel auf der Rückseite zum Einstellen abziehen.
Achtung: Batterie leicht angedrückt halten (Kontakt).
Nach dem Einstellen den Deckel wieder aufschieben.
2. Bringen Sie das Rollo mit AUF- oder AB-Taste in die
gewünschte Position.
Drücken Sie die STOP-Taste.
P2
STOP
3. Drücken Sie am Funksender 1 mal die P2-Taste
=> Rollo bestätigt mit 1 mal Signalton + kurzer Bewegung.
4. Drücken Sie am Funksender 1 mal die STOP-Taste
=> Rollo bestätigt mit 1 mal Signalton + kurzer Bewegung.
5. Drücken Sie am Funksender 1 mal die STOP-Taste
=> Rollo bestätigt mit 2 kurzen Bewegungen
+ 3 mal Signalton.
iDrücken Sie für 3 Sek. die STOP-Taste, der Behang verfährt in die 3. Behang-
position. Sollte der punktgenaue Modus eingestellt sein fährt der Behang zuerst in
die untere Endlage und dann in die 3. Behangposition.
Zum Löschen der 3. Behangposition wiederholen Sie Punkt 3. bis 5.
O ber e
E ndl a g e U nter e
E ndl a g e
3.1 Antrieb und erste Fernbedienung einlernen
(ist in der Regel bereits werksseitig erfolgt)
iDie Zeit zwischen 2 Eingaben darf nicht länger als 6 Sekunden sein.
Ansonsten werden die Eingaben gelöscht. Die Eingaben müssen dann erneut folgen.
iBeim Einlernen eines Mehrkanal-Funksenders wechseln Sie vor dem nächsten
Schritt mit den P1-Tasten am Funksender auf den Kanal, der für diesen Antrieb
belegt werden soll.
1. Einstelltaste am Antrieb ca. 2 Sek. gedrückt halten.
=> Rollo bestätigt mit 1 kurzen Bewegung + langem Signalton.
2. Drücken Sie am neuen Funksender ca. 2 Sek. die STOP-Taste.
=> Rollo bestätigt mit 2 kurzen Bewegungen + 3 mal
Signalton.
3.2 Ändern der Drehrichtung bei nicht eingestellten Endlagen
1. Drücken Sie am Funksender 2 Sek. die AUF- und AB-
Taste gleichzeitig.
=> Rollo bestätigt mit 1 kurzen Bewegung.
3.3 Endlage (oben/unten)
iKurzes Drücken der Fahrtaste: Schrittweise Verfahren
Langes Drücken der Fahrtaste: Stufenloses Verfahren
1. Bringen Sie das Rollo in die gewünschte obere Endlage.
2. Drücken Sie am Funksender 2 Sek. die AUF- und STOP- Taste
gleichzeitig.
=> Rollo bestätigt mit 2 kurzen Bewegung + 3 mal Signalton.
3. Bringen Sie das Rollo mit den Fahrtasten in die gewünschte
untere Endlage.
4. Drücken Sie am Funksender 2 Sek. die AB- und STOP- Taste
gleichzeitig.
=> Rollo bestätigt mit 2 kurzen Bewegungen
+ 3 mal Signalton.
O ber e
E ndla g e U nter e
E ndla g e
O ber e
E ndl a g e
U nter e
E ndl a g e
O ber e
E ndl a g e U nter e
E ndl a g e
O ber e
E ndl a g e U nter e
E ndl a g e
DE
EN

4Technische Änderungen vorbehalten I
Ausgabe 07.2022
Einstellanleitung für Bi-direktionale Funkmotoren
Aussenrollo Solix
3.7 Einen Funksender abmelden
iNur Funksender b kann abgemeldet werden.
Variante 1
1. Bei Handfunksendern den Deckel auf der Rückseite zum Einstellen abziehen.
Achtung: Batterie leicht angedrückt halten (Kontakt).
Nach dem Einstellen den Deckel wieder aufschieben.
P2
P2
a
a
P2
2. Drücken Sie am Funksender a1 mal die P2-Taste
=> Rollo bestätigt mit 1 mal Signalton + kurzer Bewegung.
3. Drücken Sie am Funksender a1 mal die P2-Taste
=> Rollo bestätigt mit 1 mal Signalton + kurzer Bewegung.
4. Drücken Sie am Funksender b1 mal die P2-Taste
=> Rollo bestätigt mit 2 kurzen Bewegungen + 3 mal
Signalton.
Variante 2
1. Einstelltaste am Antrieb ca. 2 Sek. gedrückt halten.
=> Rollo bestätigt mit kurzer Bewegung und langem Signalton.
2. Drücken Sie am Funksender ca. 2 Sek. die STOP-Taste.
=> Rollo bestätigt mit 2 kurzen Bewegungen + 3 mal
Signalton.
3.8 Rücksetzen auf Werkseinstellungen ohne Handsender
Löschen aller Einstellungen und aller eingelernten Funksender
1. Die Einstelltaste am Antrieb gedrückt halten.
=> Rollo bestätigt mit 4 kurzen Bewegungen im
Abstand von jeweils 4 Sek. + 4 mal Signalton
nach Entlasten der Einstelltaste.
=> erneutes Programmieren, siehe Schritt 3.1
3.9 Kanalanzahl begrenzen (Nur gültig für 15-Kanal-Funksender)
iMit diesen Einstellungen kann der Funksender auf die tatsächlich erforderliche
Anzahl von Kanälen begrenzt werden, die zur Ansteuerung von Antrieben benötigt
wird. Mit Kanal "0" werden grundsätzlich alle Anlagen angesteuert.
1. Drücken Sie am Funksender gleichzeitig die P1–und
P1+-Taste.
=> das LCD-Display zeigt “C” an.
C
C
15
2
15
2
2
2
P1 – P1 +
P1 –
P1 +
P1 – P1 +
2. Halten Sie am Funksender die P1–und
P1+-Taste gedrückt.
=> das LCD-Display zeigt “15” an.
3. Drücken Sie am Funksender die P1- oder P1+-Taste
zur Auswahl der Kanalanzahl. Wenn Sie beispiels-
weise nur zwei Antriebe mit diesem Funksender
ansteuern, wählen Sie “2”.
4. Drücken Sie am Funksender 1 mal die STOP-Taste.
=> das LCD-Display zeigt " " an.
5. Begrenzung auf zwei Kanäle wird nach kurzer Zeit
angezeigt.
iMöchten Sie die Zusatzfunktion „Kanalanzahl begrenzen“ ausser Kraft setzen, dann
wiederholen Sie die Schritte 1. - 5. und erhöhen Sie in Schritt 3. auf “15”.
O ber e
E ndl a g e U nter e
E ndl a g e
MHZ Hachtel GmbH & Co. KG
Sindelfinger Straße 21
D-70771 Leinfelden-Echterdingen
T
elefon +49 800 123 654 779
E-Mail: auftra
g@mhz.de
www.mhz.de
MHZ Hachtel & Co. Ges.m.b.H.
Laxenburger Straße 244
A-1230 Wien
Telefon +43 810 95 10 05
E-Mail: auftrag@mhz.at
www.mhz.at
MHZ Hachtel & Co. AG
Eichstrasse 10
CH-8107 Buchs/Zürich
Telefon +41 848 47 13 13
E-Mail: info@mhz.ch
www.mhz.ch
MHZ Hachtel S.à.r.l.
27, Rue de Steinfort
L-8366 Hagen
Téléphone +352 311 42-1
E-Mail: info@mhz.lu
www.mhz.lu
ATES-Groupe MHZ
1 B, rue Pégase
CS 20163
F 67960 Entzheim
Téléphone +33 388 10 16 20
E-Mail: info@ates-mhz.com
www.ates-mhz.com
P2
P2
a
a
P2
b
P2
P2
ab
+
ab
DE
EN

5
Subject to technical changes I
Edition 07.2022
Adjustment instructions for bi-directional motors
Solix external roller blind
Wall-mounted remote control unit
1-channel wall-mounted remote
control unit
DD1670H
Wandfunksender
DC1673
Wandfunksender
DC1670
Rückseite
DC1670 / DC1673
9
9
10
10
LCD-Display
AUF-Taste
STOP-Taste
AB-Taste
P1-Tasten +
Reserve
P1-Taste –
P2-Taste*
Batteriefachdeckel
Batterie
DC1673
Tasten 5 + 6 gleichzeitig drücken
entspricht P2-Taste!
*
7
7
8
8
P2
O
P
E
N
C
L
O
S
E
LCD display unit
UP button
STOP button
DOWN button
P1 buttons +
Reserve
P1 button –
P2 button *
15-channel wall-mounted remote
control unit
DD1673H
9
Battery compartment cover
Battery
Wandfunksender
DC1673
Wandfunksender
DC1670
Rückseite
DC1670 / DC1673
9
9
10
10
LCD-Display
AUF-Taste
STOP-Taste
AB-Taste
P1-Tasten +
Reserve
P1-Taste –
P2-Taste*
Batteriefachdeckel
Batterie
DC1673
Tasten 5 + 6 gleichzeitig drücken
entspricht P2-Taste!
*
7
7
8
8
P2
O
P
E
N
C
L
O
S
E
*DD1673H
Pressing buttons 5 + 6 simulta-
neously is the same as P2 button!
Back of
DD1670 H/ DC1673H
Wandfunksender
DC1673
Wandfunksender
DC1670
Rückseite
DC1670 / DC1673
9
9
10
10
LCD-Display
AUF-Taste
STOP-Taste
AB-Taste
P1-Tasten +
Reserve
P1-Taste –
P2-Taste*
Batteriefachdeckel
Batterie
DC1673
Tasten 5 + 6 gleichzeitig drücken
entspricht P2-Taste!
*
7
7
8
8
P2
O
P
E
N
C
L
O
S
E
Fitting the wall-mounted remote control unit
UP
1.
2.
2 8 mm
D D 16 7 0 H
D D 16 7 3 H
Hand-held remote control unit
1-channel hand-held
remote control unit
DD1600H
LCD-Display
AUF-Taste
STOP-Taste
AB-Taste
P1+/P1--Tasten
P2-Taste
Batterie
Batteriefachdeckel
Handfunksender
DC1600
Handfunksender
DC1602
7
8
Rückseite
DC1600 / DC1602
8
P2 P2
LCD display unit
UP button
STOP button
DOWN button
P1+/P1–buttons
P2 button
Battery
Battery compartment
cover
15-channel hand-held
remote control unit
DD1602H
LCD-Display
AUF-Taste
STOP-Taste
AB-Taste
P1+/P1--Tasten
P2-Taste
Batterie
Batteriefachdeckel
Handfunksender
DC1600
Handfunksender
DC1602
7
8
Rückseite
DC1600 / DC1602
8
P2 P2
Back of
DD1600H/DD1602H
LCD-Display
AUF-Taste
STOP-Taste
AB-Taste
P1+/P1--Tasten
P2-Taste
Batterie
Batteriefachdeckel
Handfunksender
DC1600
Handfunksender
DC1602
7
8
Rückseite
DC1600 / DC1602
8
P2 P2
Fitting the hand-held remote control unit
2 8 mm
2 8 mm
D D 16 0 0 H
D D 16 0 2H
Operating and indicator elements
Radio remote control units are used to operate the roller blind.
With the 15-channel radio transmitter, using of channel ‘0’ basically controls all units.
DE
EN
from production date 07/2022

6
Subject to technical changes I
Edition 07.2022
Adjustment instructions for bi-directional motors
Solix external roller blind
2.1 Log on further remote control units
i
Remote control unit ais already logged on. Remote control unit bis to be logged on.
With a multi-channel RC unit, select in advance the channel that is to be assigned.
Method one:
1. With hand-held remote control units pull off the back cover to make the setting.
Caution: Keep battery gently pressed down (contact).
After making the setting, push the cover back on.
P2
P2
a
a
P2
b
P2
P2
ab
+
ab
P2
P2
a
a
P2
b
P2
P2
ab
+
ab
2. On remote control unit apress the P2 button once.
Roller blind confirms with 1 beep + short moement.
3. On remote control unit apress the P2 button once.
Roller blind confirms with 1 beep + short moement.
4. On the remote control unit bpress the P2 button once.
Roller blind confirms with 2 short moements + 3 beeps.
Method two:
1. Hold down setting button on the motor for c. 2 seconds.
Roller blind confirms with 1 short moement + long beep.
2. Press the STOP-button on the remote control unit for 2 seconds.
Roller blind confirms with 2 short moements + 3 beeps.
O ber e
E ndla g e U nter e
E ndla g e
2.2 Change (top end position)
i
A top end position has already been set.
If no other end positions have been set, they rst need to be set as described at
3.3 below.
1. Move the roller blind into the (top/bottom) end position to be altered.
2.
Press the UP and STOP buttons on the remote control unit
simultaneously for 5 seconds.
Roller blind confirms with 1 short moement + long
beep
.
top
end
position
3. Using the Move buttons, move the roller blind into the
desired new end position.
Short press of the Move button: incremental movement
Long press of the Move button: continuous movement
4.
Press the
UP and STOP
button on the remote control unit for
2 seconds.
=>
Roller blind confirms the new end position with 2 short
moements + 3 beeps.
2.3 Change (bottom end position)
i
A bottom end position has already been set.
If no other end positions have been set, they rst need to be set as described at
3.3 below.
1. Move the roller blind into the bottom end position to be altered.
2. Press the DOWN and STOP buttons on the remote control
unit simultaneously for 5 seconds.
Roller blind confirms with 1 short moement + long beep.
bottom
end
position
3. Using the Move buttons, move the roller blind into the
desired new end position.
Short press of the Move button: incremental movement
Long press of the Move button: continuous movement
4. Press the DOWN and STOP buttons on the remote control
unit simultaneously for 2 seconds.
Roller blind confirms the new end position with 2 short
moements + 3 beeps.
1.1 Operation
The end positions of the drive system and of the associated radio transmitters are
programmed in at the factory.
1.2 Moving the roller blind up and down
Precondition:
The end positions have been properly set, the battery is charged and a
radio remote control unit is logged on.
Procedure:
When the ‘UP’ button on the remote control unit is pressed, the roller
blind moves up to the end position.
When the ‘DOWN‘ button on the remote control unit is pressed, the
roller blind moves down to the end position.
By pressing the ‘STOP‘button on the remote control unit, the roller blind
can be stopped in any desired position.
Using the ‘P1+/P1-‘ button on the 15-channel remote control unit, it is
possible to choose between the different channels. Using channel 0, all
paired blinds are controlled.
1.3 Changing the remote control unit battery
1.3.1 Hand-held unit battery change: Battery type CR2450
P2 P2
2
P2 P2
1
1.3.2 Wall-mounted unit battery change: Battery type CR2430
P2
O
P
E
N
C
L
O
S
E
1
2
P2
O
P
E
N
C
L
O
S
E
CAUTION
Disposing of batteries with normal household waste is not permitted.
Standard and rechargeable batteries will be taken back by the dealer from
which you bought them.
1.4 Faults and troubleshooting
1.4.1 Fault identication
Operation of the roller blind is not possible.
1.4.2 Fault rectication
•The batter is not sufficientl charged
⇒Fully charge battery.
•The motor is overloaded/overheating
⇒Prior to trying to start the drive unit again, let it cool down for 15 minutes.
• The roller blind moves too slowly
⇒Cold outside temperatures can lead to the roller blind moving at
reduced speed.
• The roller blind is not going to the end position
⇒Delete end positions and set again.
• The roller blind does not respond to the remote control unit
⇒Check the battery in the remote control unit.
DE
EN

7
Subject to technical changes I
Edition 07.2022
Adjustment instructions
Solix external roller blind
3.4 Change rotary direction of the drive system with end
positions set
iTo change the rotary direction again, repeat point 1.
1. Keep the setting button on the drive unit pressed.
Roller blind confirms with 3 short moements about
4 seconds apart + 3 beeps after release of the setting
button.
3.5 Set pin-point operating mode (option)
1. On the remote control unit press the UP and DOWN
button simultaneously.
Roller blind confirms with 1 short moement.
O ber e
E ndl a g e U nter e
E ndl a g e
2. On the remote control unit press the STOP button
=>
Roller blind confirms with 1 short moement + long beep.
i
Pin-point operation through brief, simultaneous pressing of the UP/DOWN button.
Press the UP/DOWN button for a prolonged time for smooth movement.
To delete the setting, repeat step 3.5.
3.6 Programming a third blind position (option)
iIt is possible to assign an additional stop position to the roller blind.
This position can only be between the two end positions.
1. With hand-held remote control units pull off the back cover to make the setting.
Caution: Keep battery gently pressed down (contact).
After making the setting, push the cover back on.
2. Using the UP or DOWN button, move the roller blind into
the desired position.
Press the STOP button.
P2
STOP
3. On the remote control unit press the P2 button once
Roller blind confirms with 1 beep + short moement.
4. On the remote control unit press the STOP button once
Roller blind confirms with 1 beep + short moement.
5. On the remote control unit press the STOP button once
Roller blind confirms with 3 beeps + short moement.
iPress the STOP button for 3 seconds. The blind moves into the third blind
position. If pin-point mode has been set, the blind rst moves to the bottom end
position and then into the third blind position. To delete the third blind position,
repeat points 3 to 5.
O ber e
E ndl a g e U nter e
E ndl a g e
3.1 Pair motor and first remote control unit (has generally already
been done at the factory))
iThe time between two entries must not be longer than 6 seconds.
Otherwise the entries get deleted. The entries then have to be repeated.
iWhen pairing a multi-channel remote control unit, before moving to the next
step use the P1 buttons on the RC unit to switch to the channel
to be assigned for this drive system.
1. Hold down setting button on the motor for c. 2 seconds
Roller blind confirms with 1 beep + short moement.
2. On the remote control unit press the STOP button for 2 seconds
Roller blind confirms with 2 short moements + 3 beeps.
3.2 Setting the rotary direction of the drive system without end
positions set.
1. On the remote control unit press the UP and DOWN
button simultaneously for 2 seconds.
Roller blind confirms with 1 short moement.
3.3 End positions (top bottom)
iShort press of the Move button: incremental movement
Long press of the Move button: continuous movement
1. move the roller blind into the desired TOP end position.
2. On the remote control unit press the UP and STOP
button simultaneously for 5 seconds.
Roller blind confirms with 1 short moement + long beep.
3. Move the roller blind into the desired BOTTOM end position.
4. On the remote control unit press the DOWN and STOP buttons
simultaneously for 2 seconds.
Roller blind confirms with 2 short moements + 3 beeps.
top
end
position bottom
end
position
O ber e
E ndl a g e
U nter e
E ndl a g e
O ber e
E ndl a g e U nter e
E ndl a g e
O ber e
E ndl a g e U nter e
E ndl a g e
DE
EN

8
Subject to technical changes I
Edition 07.2022
Adjustment instructions for bi-directional motors
Solix external roller blind
3.7 Logging a remote control unit off
iOnly remote control bcan be logged off.
Method one:
1. With hand-held remote control units pull off the back cover to make the setting.
Caution: Keep battery gently pressed down (contact).
After making the setting, push the cover back on..
P2
P2
a
a
P2
2. On remote control unit apress the P2 button once
Roller blind confirms with 1 beep + short moement.
3. On remote control unit apress the P2 button once
Roller blind confirms with 1 beep + short moement.
4. On the remote control unit bpress the P2 button once
Roller blind confirms with 2 short moements + 3 beeps.
Method two:
1. Hold down setting button on the motor for 2 seconds.
=> Roller blind confirms with 1 short moement + long beep.
2.
Press the STOP button on the remote control for 2 seconds.
=>
Roller blind confirms with 2 short moements + 3 beeps.
O ber e
E ndla g e U nter e
E ndla g e
MHZ Hachtel GmbH & Co. KG
Sindelfinger Street 21
D-70771 Leinfelden-Echterdingen
Phone +49 800 123 654 779
E-Mail: auftra
g@mhz.de
www.mhz.de
MHZ Hachtel & Co. Ges.m.b.H.
Laxenburger Straße 244
A-1230 Wien
Phone +43 810 95 10 05
E-Mail: auftrag@mhz.at
www.mhz.at
MHZ Hachtel & Co. AG
Eichstrasse 10
CH-8107 Buchs/Zürich
Phone +41 848 47 13 13
E-Mail: info@mhz.ch
www.mhz.ch
MHZ Hachtel S.à.r.l.
27, Rue de Steinfort
L-8366 Hagen
Téléphone +352 311 42-1
E-Mail: info@mhz.lu
www.mhz.lu
ATES-Groupe MHZ
1 B, rue Pégase
CS 20163
F 67960 Entzheim
Téléphone +33 388 10 16 20
E-Mail: info@ates-mhz.com
www.ates-mhz.com
P2
P2
a
a
P2
b
P2
P2
ab
+
ab
3.8 Resetting to factory settings without a hand-held remote
control
Delete all settings and all paired remote control units
1. Keep the setting button on the drive unit pressed.
Roller blind confirms with 4 short moements
4 seconds apart + 4 beeps after release of the
setting button.
=> for programming again, see step 3.1
3.9
Limit number of channels (applies only to 15-channel remote control units)
iUsing these settings, it is possible to limit the remote control unit to the number
of channels that are actually needed for controlling the drive systems. Using
channel ‘0’, all blinds are controlled.
1. On the remote control unit simultaneously press the
P1- and P1+ buttons.
=> the LCD display unit indicates ‘C’.
C
C
15
2
15
2
2
2
P1 – P1 +
P1 –
P1 +
P1 – P1 +
2. On the remote control unit keep the P1- and
P1+ buttons pressed.
=> the LCD display unit indicates ‘15’.
3. On the remote control unit, press the P1- or P1+
button to select the number of channels. If, for
example, you are controlling only two drive units
with this remote control, select ‘2’.
4. On the remote control unit press the STOP button
once.
=> the LCD display unit indicates ‘ ’.
5. After a short time, limitation to two channels gets
indicated.
iIf you want to disable the additional ‘Limit channel numbers’ function, repeat
steps 1 to 5 and at step 3 increase the setting to ‘15’.
DE
EN
08-Solix Einstellanleitung für Bi-direktionale Funkmotoren DE-EN 20220726.pdf
Table of contents
Languages:
Other MHZ Window Blind manuals
Popular Window Blind manuals by other brands

HOME WOHNIDEEN
HOME WOHNIDEEN Saalfeld Assembly instruction

Project Source
Project Source CDLF2342W quick start guide

horiso
horiso SPECIALTY VENETIAN BLINDS Nstallation guide
Windhager
Windhager Window blind PLUS Mounting
Cosiflor
Cosiflor VS 2 Assembly instruction
SOMFY
SOMFY Glydea Control & operating instructions
TOSO
TOSO Mytec 01 instruction manual
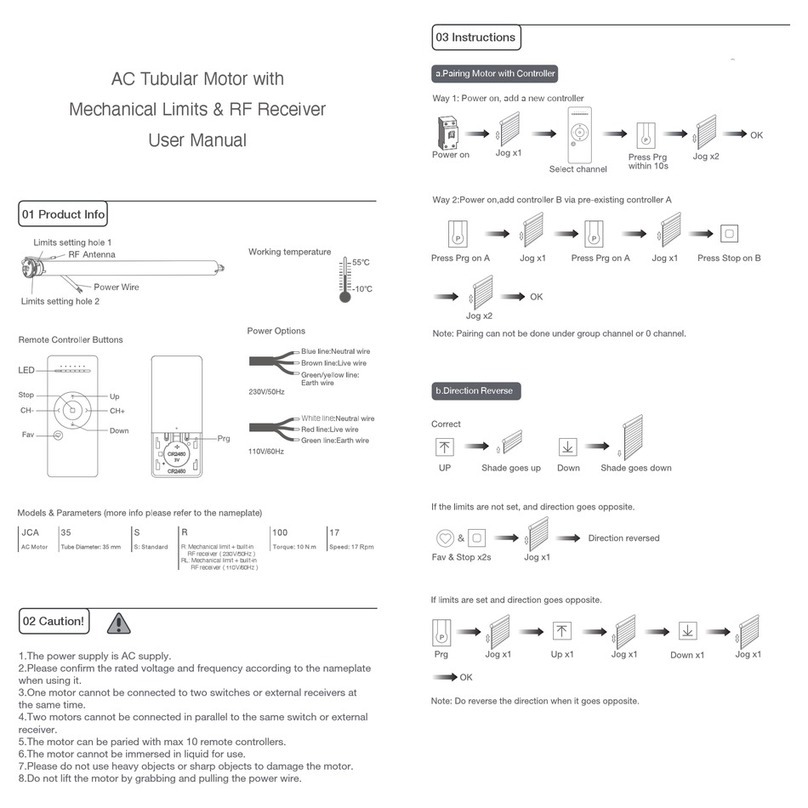
Jiecang
Jiecang SR Series user manual
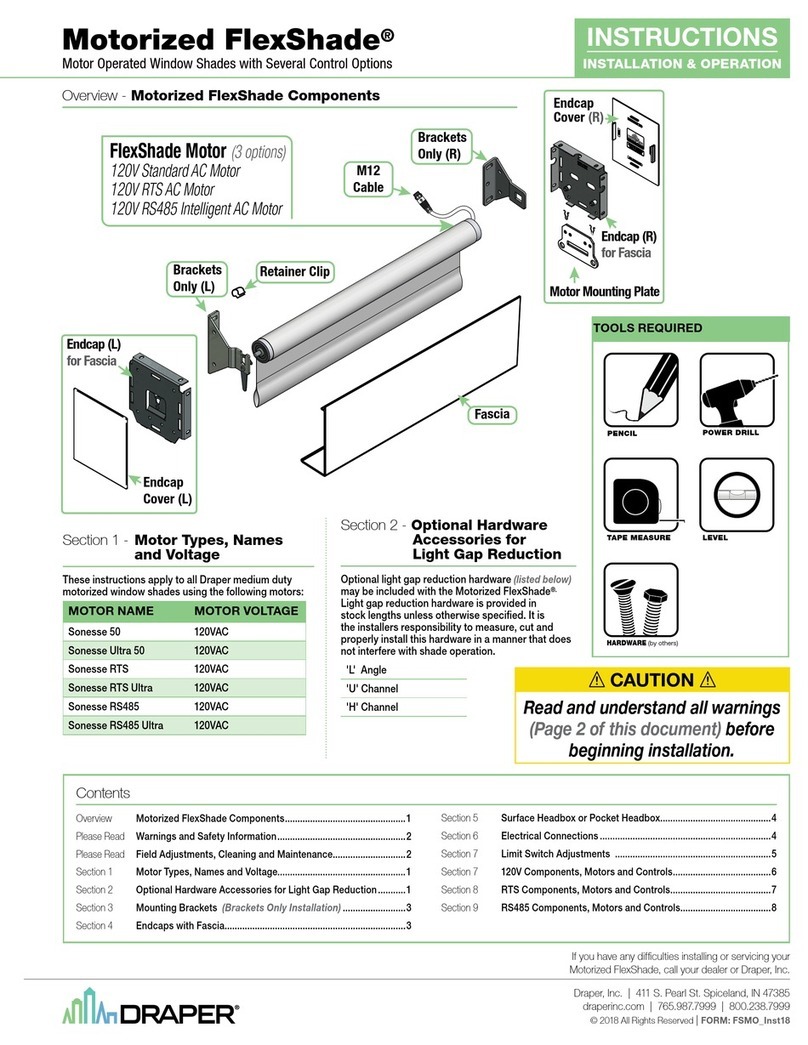
Draper
Draper Motorized FlexShade Installation & operation instructions
TOSO
TOSO Shiori 25 Cord Twin instruction manual
SOMFY
SOMFY Sonesse 40 WF RTS Li-ion instructions
SelectBlinds
SelectBlinds Basswood Horizontal Blind installation instructions
