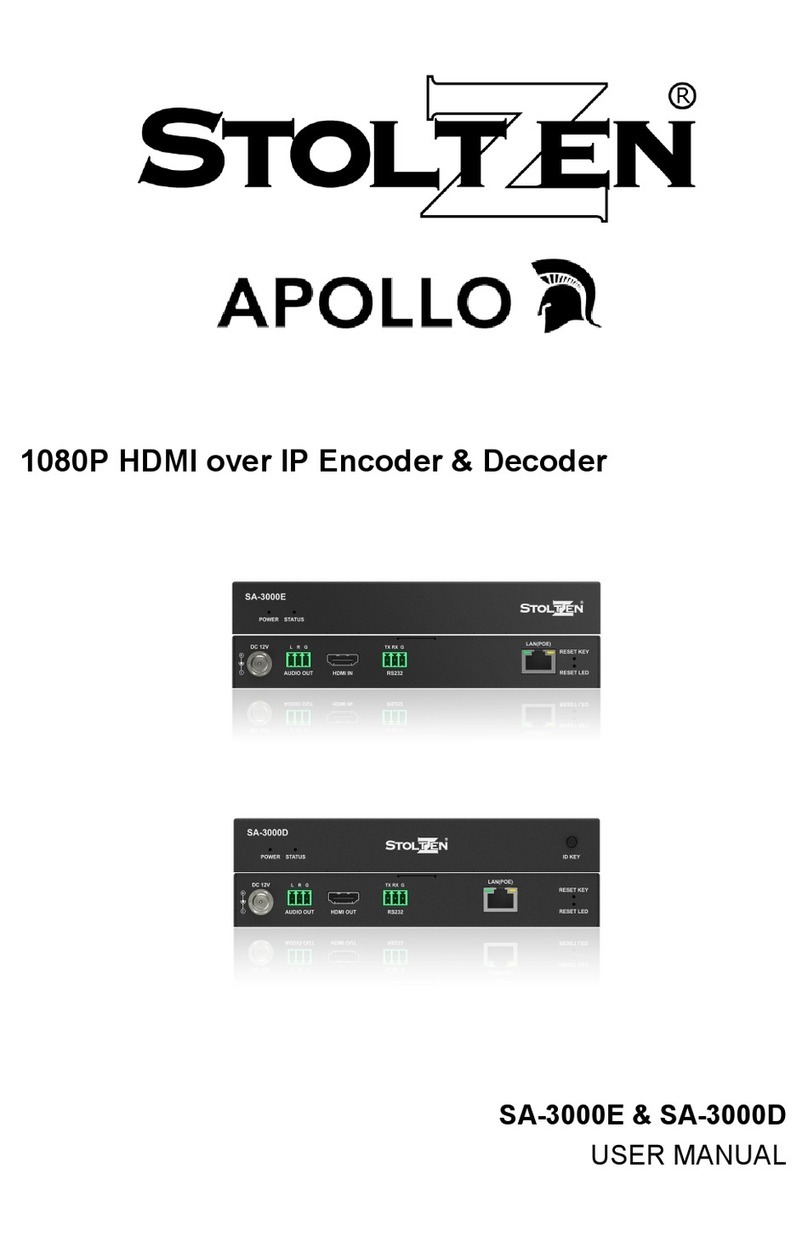
Stoltzen APOLLO SA-6000E User manual

4K HDMI over IP Encoder & Decoder w/ KVM
SA-6000E & SA-6000D
USER MANUAL

1
Important Safety Information
1. Read, follow, and keep these instructions.
2. Heed all warnings.
3. Do not use this product near water. Keep away from wet places, such as: spas, pools,
sinks, laundries, wet basements, etc.
4. When cleaning, unplug the unit and wipe with a dry cloth. Do not use damp cloths,
cleaning fluids, or aerosols which may result in electric shock, fire, or unit damage.
5. Operate this product using only the included power supply and/or power cable. Use of an
unapproved power implement may impair performance, damage the product, or cause
fires.
6. Do not block any ventilation openings. Install in accordance with the manufacturer’s
instructions.
7. Do not install or place this product near any heat sources such as radiators, heat
registers, stoves, or other apparatus (including amplifiers) that produce heat.
8. Protect the power cord from being walked on or pinched particularly at plugs,
convenience receptacles, and the point where they exit from the product.
9. Only use attachments/accessories specified by Stoltzen to avoid fire, shock, or other
hazards.
10. To reduce the risk of electric shock and/or damage to this product, never handle or touch
this unit or power cord if your hands are wet or damp. Do not expose this product to rain
or moisture.
11. Unplug this product during lightning storms or when unused for long periods of time.
12. Never open, remove unit panels, or make any adjustments not described in this manual.
Attempting to do so could result in electric shock, damage to the unit, or other hazards.

2
Contents
Important Safety Information............................................................................ 1
Introduction ...................................................................................................... 3
Features ................................................................................................... 3
Package Contents .................................................................................... 5
Panel Description............................................................................................. 7
Encoder .................................................................................................... 7
Front Panel........................................................................................ 7
Rear Panel ........................................................................................ 8
Decoder.................................................................................................... 9
Front Panel........................................................................................ 9
Rear Panel ...................................................................................... 10
Specifications................................................................................................. 12
Encoder .................................................................................................. 12
Decoder.................................................................................................. 14
Installation...................................................................................................... 15
Typical Application ......................................................................................... 16
Scenario 1 .............................................................................................. 16
Scenario 2 .............................................................................................. 17
Hardware Installation ..................................................................................... 18
Operating the Devices ................................................................................... 19
Introduction to Different Operation Tools ................................................ 19
Using DIP Switch to Perform Routing..................................................... 20
Using PC Configurator to Perform Routing............................................. 20
Using PC Configurator to Perform Fast Switching.................................. 20
Configuring Mouse Roaming ......................................................................... 21
Configuring before HDR10 Signal Input......................................................... 25
Firmware Upgrade ......................................................................................... 26

3
Introduction
SA-6000E encoders and SA-6000D decoders provide the flexible, powerful,
and scalable solution at resolutions up to 3840 x 2160@60Hz 4:2:0, 3840 x
2160@30Hz 4:4:4. They allow 4K UHD media to be switched and distributed
over standard gigabit Ethernet networks, providing complete end-to-end
streaming systems. Audio, video together with IR, and USB signals can be
routed separately or as a whole throughout the matrix system. Encoders can
be used with decoders to function video wall up to the dimensions of 16 x 16.
Both of them have the capacity to handle and output up to 7.1 channel audio,
allowing you to enjoy the finest sound.
HDCP 2.2 specifications are employed. A local area network is covered with
a range up to 330ft (100m) over a single Cat 5e cable or above. Standard
features like bi-directional serial, bi-directional IR, and independent analog
audio input/output are included. The codecs allow USB extension to take
place to control a keyboard and a mouse. They offer integration-friendly
control features -- the front panel link DIP switch, Windows PC configurator
(Apollo Configurator), Apollo Visual Composer Touch on iPad and IP control
box (SA-C), providing simple, flexible control and management options. They
are the perfect solution for any low latency and signal routing applications.
Common applications include homes, classrooms, conference rooms and
broadcasts.
Features
Distributes and switches 4K UHD AV signals via standard gigabit
Ethernet networks, providing complete end-to-end streaming systems.
Encoder supports HDMI input and output resolutions up to 3840 x
2160@60Hz 4:2:0.
Decoder supports HDMI output resolutions up to 3840 x 2160@30Hz

4
4:4:4.
Supports streaming resolutions up to 3840 x 2160@30Hz 4:4:4.
Features video wall up to the dimensions of 16 x 16.
Supports HDR10.
Supports CEC one-touch-play and standby commands to power on/off
the display, as well as CEC Frame.
Supports multi-channel audio up to PCM 7.1, Dolby Atmos and DTS:X.
Supports independent analog audio input and output at 2 channels, 24
bits@48 kHz/channel.
HDCP 2.2 compliant.
Flexible routing policies, allowing audio, video, USB, IR and RS232
signals to be routed separately or as a whole throughout the matrix
system.
Allows AV, USB, IR, RS232 and power signals to be delivered up to
330ft/100m over a single Cat 5e cable or above.
Allows video output to follow input resolution or to convert the input
resolution to 3840 x 2160@30Hz 4:4:4 and 1080p@60Hz.
Supports HDMI input and output transmission distance up to 50ft/15m.
1 ~ 2 fps latency.
Supports bi-directional serial communication, allowing control of remote
RS232 devices between encoders/decoders and IP control box, or
between encoders and decoders.
Supports bi-directional IR pass-through, allowing control of remote
source and display devices between encoders and decoders.
Supports IR generation – send IR codes through API.
Encoder offers a USB type B port to directly connect to a PC and
complies with USB 2.0 standard.
Decoder offers two USB type A ports to directly connect to a keyboard
and a mouse and complies with USB 2.0 standard, providing +5 VDC at
up to 500 mA to connected USB peripherals.

5
Supports Mouse Roaming. (See Configuring Mouse Roaming section for
more information)
Supports point-to-point, point-to-multipoint, multipoint-to-point,
multipoint-to-multipoint applications.
Supports PoE to be remotely powered by compatible power source
equipment such as a PoE-enabled Ethernet switch, eliminating the need
for a nearby power outlet.
Supports user-selectable output HDCP configuration via PC configurator.
Fit in/stretch out video wall, and rotate video management -- Decoded
video can fill a video wall, maintain aspect ratio in a video wall, or can be
rotated 180°and 270°clockwise, presenting imagery that meets
customer expectations.
Supports Auto IP, zero-configuration networking (zeroconf), a set of
special technologies that automatically assign dynamic IP addresses to
the devices on startup and a server-less method of choosing an IP
address.
Works with multiple operation tools, the front panel link DIP switch,
Windows PC configurator, Apollo Visual Composer Touchon iPad and IP
control box for device control and management.
Supports communications protocols used on the Ethernet such as
TCP/IP, ARP, DHCP, ICMP (ping), IGMP, UDP.
Package Contents
Encoder
1 x SA-6000E Unit
1 x Phoenix Male Connector (3.5mm, 3 Pins)
1 x IR Emitter (3.9ft/1.2m)
1 x Broadband IR Receiver (3.9 ft/1.2 m, 30 kHz ~ 50 kHz)
2 x Mounting Brackets

6
Decoder
1 x SA-6000D Unit
1 x Phoenix Male Connector (3.5mm, 3 Pins)
1 x IR Emitter (3.9ft/1.2m)
1 x Broadband IR Receiver (3.9 ft/1.2 m, 30 kHz ~ 50 kHz)
2 x Mounting Brackets

7
Panel Description
Encoder
Front Panel
4
3
2
1
No
Name
Description
1 Power LED On: SA-6000E is powered on.
Off: SA-6000E is powered off.
2 Status LED
Solid on: SA-6000E is connected to both an active
video source and SA-6000D.
Blinking: SA-6000E is disconnected from an active
video source. / SA-6000E is disconnected from
SA-6000D.
Off: SA-6000E is powered off or in the boot process.
/ Network is down.
3 Mode
Use this switch to toggle between normal and debug
modes.
Normal (Default): In this mode, you can connect the
rear panel RS232 port to a RS232 device such as a
computer for bi-directional serial communication
with a RS232 device on the IP control box side.
Debug: In this mode, you can connect the rear
panel RS232 port to a RS232 device such as a
computer for debugging SA-6000E.
4 DIP
This DIP switch consists of four manual switches, which
are used to route audio, video together with IR, and
USB signals between SA-6000E and SA-6000D based
on their positions. By default, each individual switch is in
the up position. For more information, see "Using DIP
Switch to Perform Routing".
Note:
For the DIP switches in both encoder and decoder,
changes to them take effect immediately without
rebooting the system.

8
Rear Panel
1110
9
876
5
43
21
No.
Name
Description
1
DC 12V
Connect this port to a 12 V 1 A power adapter.
2 Reset
Use this button to reset device.
When SA-6000E is powered on, use a pointed stylus to
hold down this button for five or more seconds, and then
release it, it will reboot and restore to its factory defaults.
3 LAN (PoE)
10/100/1000 Base-T port, connect this port to a gigabit
Ethernet switch for IP stream output, device control and
management.
Default Protocol
Default IP Mode
Auto IP
IP Address
169.254.x.x
Subnet mask
255.255.0.0
4 Audio In
Connect this 3.5 mm stereo tip-ring-sleeve port to an
audio source such as a computer for unbalanced stereo
audio signal input.
Note: When this audio port is connected to an audio source,
both encoder and decoder will output the audio signal from the
audio source instead of that from the HDMI video source. If this
audio port is connected via an audio cable but no audio signals
are input, you can get picture but no sound. The situations above
do not apply to the HDMI loop-through port in encoder, which can
still output the AV signals from the video source.
5 Audio Out
Connect this 3.5 mm stereo tip-ring-sleeve port to an
audio receiver such as a speaker or amplifier for
unbalanced, stereo audio signal output.
6 RS232
Use this port to perform bi-directional serial
communication and device debug functions.
When the front panel "MODE" switch is moved to
the "NORMAL" position, connect this port to a
RS232 device such as a computer to bi-directionally
communicate with a RS232 device at the IP control
box side.
When the front panel "MODE" switch is toggled to

9
No.
Name
Description
the "DEBUG" position, connect this port to a RS232
device such as a computer for debugging
SA-6000E.
7 USB Host
Connect a type A male to type B male USB cable
between this port and the USB port of a desktop or
laptop. SA-6000E is USB 2.0 compliant.
8
HDMI IN
Connect this port to an HDMI source device.
9 HDMI OUT Connect this port to a local HDMI display device.
10 IR IN Connect this port to an IR receiver for IR communication
with an IR emitter at the SA-6000D side on the network.
11 IR OUT
Connect this port to an IR emitter for IR communication
with an IR receiver at the SA-6000D side on the
network.
Decoder
Front Panel
5
43
21
No.
Name
Description
1 Power LED On: SA-6000D is powered on.
Off: SA-6000D is powered off.
2 Status LED
On: SA-6000D is connected to SA-6000E and the
video is displayed.
Blinking: SA-6000D is disconnected from
SA-6000E.
Off: SA-6000D is powered off or in the boot process.
/ Network is down.
3 Mode
Use this switch to toggle between normal and debug
modes.
Normal (Default): In this mode, you can connect the
rear panel RS232 port to a RS232 device such as a
computer for bi-directional serial communication
with a RS232 device on the IP control box side.
Debug: In this mode, you can connect the rear
panel RS232 port to a RS232 device such as a
computer for debugging SA-6000D.

10
No.
Name
Description
4 DIP
This DIP switch consists of four manual switches, which
are used to route audio, video together with IR, and
USB signals between SA-6000E and SA-6000D based
on their positions. By default, each individual switch is in
the up position. For more information, see "Using DIP
Switch to Perform Routing".
Note:
For the DIP switches in both encoder and decoder,
changes to them take effect immediately without
rebooting the system.
5 USB Device
Connect the two USB type A ports to a USB keyboard
and mouse. The connections are USB 2.0 compatible,
providing +5 VDC at up to 500 mA to connected USB
peripherals.
Rear Panel
8
7
6
54
3
21
No.
Name
Description
1
DC 12V
Connect this port to a 12 V 1 A power adapter.
2 Reset
Use this button to reset device or quickly remove link
relationship between decoder and encoder.
Device reset:When SA-6000D is powered on, use a
pointed stylus to hold down the Reset button for five
or more seconds, and then release it, it will reboot
and restore to its factory defaults. This function will
disconnect decoder from encoder.
Remove decoder and encoder link relationship
quickly: When encoder is routed to decoder using
PC configurator, Apollo Visual Composer Touch or
IP control box, hold down the Reset button for less
than five seconds, and then release it, it reverts to
the link relationship between encoder and decoder
set via the link DIP switch. This function applies to
decoder only.
3 LAN (POE) 10/100/1000 Base-T port, connect this port to a gigabit
Ethernet switch for IP stream input, device control and

11
No.
Name
Description
management.
Default Protocol
Default IP Mode
Auto IP
IP Address 169.254.x.x
Subnet mask
255.255.0.0
4 Audio Out
Connect this 3.5 mm stereo tip-ring-sleeve port to an
audio receiver such as a speaker or amplifier for
unbalanced, stereo audio signal output.
5 RS232
Use this port to perform bi-directional serial
communication and device debug functions.
When the front panel "MODE" switch is moved to
the "NORMAL" position, connect this port to a
RS232 device such as a computer to bi-directionally
communicate with a RS232 device at the IP control
box side.
When the front panel "MODE" switch is toggled to
the "DEBUG" position, connect this port to a RS232
device such as a computer for debugging
SA-6000D.
6
HDMI OUT
Connect this port to an HDMI display device.
7 IR IN
Connect this 3.5 mm tip-ring-sleeve port to an IR
receiver for IR communication with an IR emitter in the
SA-6000E side on the network.
8 IR OUT
Connect this 3.5 mm tip-sleeve port to an IR emitter for
IR communication with an IR receiver in the SA-6000E
side on the network.

12
Specifications
Encoder
Technical
Input Video Port 1 x female HDMI type A (19 pins)
Input Video Type
HDMI, HDCP 2.2
Input Resolution
3840 x 2160p@24Hz 4:4:4,
3840 x 2160p@30Hz 4:4:4,
3840 x 2160p@50Hz 4:2:0,
3840 x 2160p@60Hz 4:2:0,
640 x 480p@60Hz, 720 x 480p@60Hz
1280 x 720p@60Hz, 1920 x 1080i@60Hz,
1920 x 1080p@60Hz, 720 x 576p@50Hz
1280 x 720p@50Hz, 1920 x 1080i@50Hz
1920 x 1080p@50Hz, 1920 x 1080p@24Hz
1920 x 1080p@25Hz,640 x 480@60Hz,
800 x 600@60Hz
1024 x 768@60Hz, 1280 x 720@60Hz
1280 x 768@60Hz, 1280 x 800@60Hz
1280 x 960@60Hz, 1280 x 1024@60Hz
1360 x 768@60Hz, 1366 x 768@60Hz
1400 x 1050@60Hz, 1440 x 900@60Hz
1600 x 900@60Hz, 1600 x 1200@60Hz
1680 x 1050@60Hz, 1920 x 1080@60Hz
1920 x 1200@60Hz
Input Video Signal 0.5~1.2 V p-p
Input DDC Signal
5 V p-p (TTL)
Average Encoding Data
Rate
3840 x 2160@30Hz: about 250 Mbps
1080p@60Hz: about 150 Mbps
Output Video Port
HDMI loop-through (local output): 1 x female HDMI
type A (19 pins)
Ethernet output: 1 x female RJ-45
Output Video Type HDMI loop-through (local output): HDMI, HDCP 2.2
Ethernet output: IP stream
Output Resolution
HDMI loop-through (local output):
Up to 3840 x 2160@60Hz 4:2:0
Ethernet output:
Up to 3840 x 2160@30Hz 4:4:4
Video Impendence 100 Ω
End-to-End Time
Latency
1 ~ 2 fps

13
Technical
Maximum Pixel Clock
297 MHz
Max Video Data Rate 8.91 Gbps (2.97 Gbps per color)
Input Audio Port HDMI: 1 x female HDMI type A
Audio In: 1 x 3.5 mm stereo jack
Input Audio Format
HDMI: LPCM 2.0/2.1/5.1/ 7.1; Dolby 5.1/7.1/Atmos;
DTS 5.1/7.1/DTS:X
Audio In: stereo
Output Audio Port
HDMI (local output): 1 x female HDMI type A (19 pins)
Ethernet output: 1 x female RJ-45
Audio Out: 1 x 3.5 mm stereo jack
Output Audio Format
HDMI: LPCM 2.0/2.1/5.1/ 7.1; Dolby 5.1/7.1/Atmos;
DTS 5.1/7.1/DTS:X
Ethernet: Dolby 5.1/Dolby True HD/Dolby Digital
Plus, DTS 5.1/DTS HD/DTS True HD, LPCM
2.0/2.1/5.1/ 7.1
Audio Out: Stereo
Control Method
Front panel link DIP switch,
Windows PC configurator (Apollo Configurator),
IP control box, Apollo Visual Composer Touch on iPad
General
Operating Temperature
0°C to 45°C (32°F to 113°F)
Storage Temperature -20°C to 70°C (-4°F to 158°F)
Humidity
10% to 90%, non-condensing
ESD Protection
Human-body Model:
±8kV (Air-gap discharge)/
±4kV (Contact discharge)
Power Supply
12 V 1 A DC
Power Consumption
(Max.) 6W
Device Dimension
(W x H x D)
8.7'' x 1.0'' x 5.1''/220 mm x 25 mm x 130.2 mm
Net Weight
0.74kg/1.63lbs

14
Decoder
Technical
Input Video Port 1 x female RJ-45
Input Video Type IP stream
Input Resolution
Up to 3840 x 2160@30Hz 4:4:4
Output Video Port 1 x female HDMI type A (19 pins)
Output Video Type HDMI, HDCP 2.2
Output Resolution
Up to 3840 x 2160@30Hz 4:4:4
Video Impendence
100 Ω
End-to-End Time
Latency
1 ~ 2 fps
Input Audio Port
1 x female RJ-45
Input Audio Format LPCM 2.0/2.1/5.1/ 7.1; Dolby 5.1/7.1/Atmos;
DTS 5.1/7.1/DTS:X
Output Audio Port HDMI: 1 x female HDMI type A (19 pins)
Audio Out: 1 x 3.5 mm Stereo jack
Output Audio Format
HDMI: LPCM 2.0/2.1/5.1/ 7.1; Dolby 5.1/7.1/Atmos;
DTS 5.1/7.1/DTS:X
Audio Out: Stereo
Control Method
Front panel link DIP switch,
Windows PC configurator (Apollo Configurator),
IP control box, Apollo Visual Composer Touch on iPad
General
Operating Temperature
0°C to 45°C (32°F to 113°F)
Storage Temperature
-20°C to 70°C (-4°F to 158°F)
Humidity
10% to 90%, non-condensing
ESD Protection
Human-body Model:
±8kV (Air-gap discharge)/
±4kV (Contact discharge)
Power Supply
12 V 1 A DC
Power Consumption
4W (Max.)
Device Dimension
(W x H x D)
8.7'' x 1.0'' x 5.1''/220 mm x 25 mm x 130.2 mm
Net Weight
0.74kg/1.63lbs

15
Installation
Note: Before installation, please ensure the device is disconnected from the
power source.
Steps to install the encoder in a suitable location:
1. Remove the four screws from the two side panels.
2. Position and install the mounting brackets on the two side panels using
the mounting screws provided in package.
3. Attach the brackets to the surface you want to hold the unit against using
the screws (provided by others).
4. Repeat the above steps for decoder.

16
Typical Application
Scenario 1
Decoder
Decoder
3 x 3 Video Wall
Serial
HDMI OUT
Encoder
Encoder
Encoder
Encoder
AUDIO OUT
HDMI OUT
4 x 5 Video Wall
Serial
HDMI OUT
HDMI OUT
HDMI OUT
HDMI IN
HDMI IN
HDMI IN
HDMI IN
AUDIO IN
Remote
Remote
Display
Display
KVM
HDMI OUT
HDMI OUT
USB (Keyboard and Mouse)
Amplifier
1 GbE
Ethernet Switch
Apple TV
IP Control Box
Desktop with
PC Configurator
iPad with PF-IP Touch
Wireless Router
Set-top Box
4K MediaPlayer
Workstation/PC
USB (PC)
Decoder
Decoder
Decoder
Decoder
Decoder

17
Scenario 2
Decoder
Decoder
Decoder
Encoder
Encoder
Encoder
Encoder
Encoder
the Third Party Device
Decoder
HDMI IN
HDMI IN
HDMI IN
HDMI IN
AUDIO IN HDMI OUT
Remote
Display
Remote
Remote
Display
HDMI OUT
KVM
HDMI OUT
USB (Keyboard and Mouse)
1 GbE
Ethernet Switch
Apple TV
IP Control Box
Desktop with
PC Configurator
iPad with PF-IP Touch
Wireless Router
Set-top Box
4K MediaPlayer
Workstation/PC
USB(PC)
Serial
Contro lSyste m
HDMI OUT HDMI OUT
Display
7.1 Surround Sound System

18
Hardware Installation
1 GbE Ethernet Switch
Desktop with
PC Configurator
IP Control Box
Amplifier
IP Stream
IP Stream
Control
Control Control
Projector
Remote
Lap to p
Audio In Display
Projector
HDMI
OUT
HDMI OUT HDMI OUT
HDMI
IN
IR
OUT
USB
(PC)
USB
(Keyboard and Mouse)
AUDIO
IN
AUDIO
OUT
Serial
Comm-
unication
Serial
Communication
IR IN Amplifier AUDIO
OUT
Display
Remote
IR
OUT
IR IN
RS23 2Devic e
iPadwithPF -IP Touch
WirelessRouter
Note:
If the Ethernet switch doesn’t support PoE, connect encoders and
decoders to their power adapters.
If the PoE switch is unable to provide enough power, connect encoders
and decoders to their power adapters.

19
Operating the Devices
Introduction to Different Operation Tools
You can use the front panel link DIP switch, Apollo PC Configurator, Apollo
Visual Composer Touch and IP control box to manage and control SA-6000E
and SA-6000D codecs. This section briefly introduces how to route the video
from source to the display using these tools. By default, audio, video together
with IR, and USB signals are routed as a whole. For more information, see
their guides.
The following tables describes how audio, video together with IR, and USB
signals are routed using all the different tools.
Operation Tools Description
Link DIP switch
Route audio, video together with IR, and USB signals
as a whole.
PC configurator
Apollo Visual
Composer Touch
IP Control Box
Both of the following routing policies are available.
Route audio
, video together with IR, and USB
signals as a whole.
Route audio
, video together with IR, and USB
signals separately
via IP controller's API
commands.
Note:
Operation tools PC configurator, Apollo Visual Composer Touch and IP
control box take priority over the link DIP switch. Link relationship
between encoder and decoder performed by the DIP switch can be
changed using any other tools.
When audio, video together with IR, and USB signals are routed via PC
configurator, Apollo Visual Composer Touch and IP control box, press
and hold the rear panel RESET button in decoder for less than five
seconds to remove the current link relationship between encoder and
decoder, reverting to the link relationship set by the link DIP switch.
This manual suits for next models
1
Table of contents
Other Stoltzen Media Converter manuals
Popular Media Converter manuals by other brands
Miranda
Miranda picoLink Series Guide to installation and operation

hecht
hecht 670 Original instructions for use
Wavetek
Wavetek Meterman TC-253A Operator's manual
Audio Authority
Audio Authority Digital Audio Converters 977TPO Specification sheet
Transition Networks
Transition Networks ARCNET AR-CF-01(SC) user guide

ICP DAS USA
ICP DAS USA I-7530 Quick start user guide
