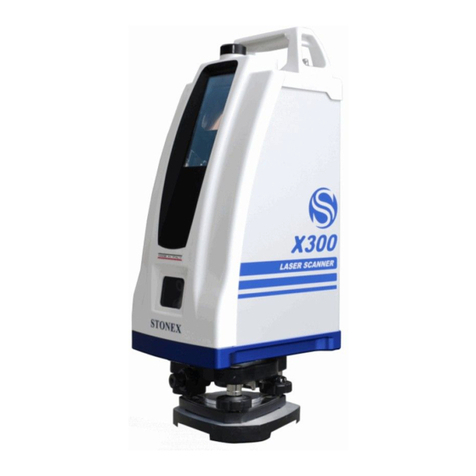
STONEX X120GO User manual

(September 2022)-Ver.1. -Rev.1 www.stonex.it
STONEX®X120GO
SLAM Laser Scanner
User Guide

STONEX®X120GO – User Guide
2
Contents
1. Legal Notice..................................................................................................................................................................................................4
1.1 Copyrights and trademarks......................................................................................................................................................4
2. Standard Limited Warranty ....................................................................................................................................................................4
2.1 Shipping policy ..............................................................................................................................................................................4
2.2 Return policy Dead on Arrival instruments........................................................................................................................4
2.3 Firmware/Software warranty....................................................................................................................................................4
2.4 Over Warranty repair(s) policy.................................................................................................................................................4
2.5 Disclaimer and Limitation of Remedy ..................................................................................................................................4
2.6 Environmental recycling.............................................................................................................................................................5
3. Introduction..................................................................................................................................................................................................6
3.1 General..............................................................................................................................................................................................6
3.2 Description of the system .........................................................................................................................................................6
3.3 Precaution for safety ...................................................................................................................................................................7
3.4 Transport and shipping ..............................................................................................................................................................7
3.5 Storage..............................................................................................................................................................................................8
3.6 Cleaning and drying ....................................................................................................................................................................8
3.7 Definition of indication...............................................................................................................................................................8
3.8 Safety standards for lasers........................................................................................................................................................9
3.9 Battery ...............................................................................................................................................................................................9
3.10 About User.............................................................................................................................................................................. 12
3.11 Exceptions from Responsibility ...................................................................................................................................... 12
4. Setting up the STONEX®X120GO ...................................................................................................................................................... 13
4.1 Battery charging......................................................................................................................................................................... 13
4.2 Led status...................................................................................................................................................................................... 14
4.3 Setting up...................................................................................................................................................................................... 14
5. Operating the STONEX®X120GO ...................................................................................................................................................... 16
5.1 GOapp installation..................................................................................................................................................................... 16
5.2 Device binding............................................................................................................................................................................ 16
5.3 Equipment work......................................................................................................................................................................... 17
5.4 Settings .......................................................................................................................................................................................... 20
5.5 Firmware........................................................................................................................................................................................ 22
5.6 Data download ........................................................................................................................................................................... 23

STONEX®X120GO – User Guide
3
6. GOpost software ...................................................................................................................................................................................... 24
6.1 New project.................................................................................................................................................................................. 25
6.2 Import GCP................................................................................................................................................................................... 26
6.3 One-click processing................................................................................................................................................................ 27
6.4 GCP Edit......................................................................................................................................................................................... 32
6.5 Add result to view...................................................................................................................................................................... 34
6.6 Step-by-step processing......................................................................................................................................................... 35
6.7 Point cloud edit .......................................................................................................................................................................... 39
6.8 Description of the result catalog......................................................................................................................................... 43
6.9 Results browsing ........................................................................................................................................................................ 43
6.10 Trajectory ................................................................................................................................................................................. 44
6.11 Panorama browsing ............................................................................................................................................................ 44
6.12 Tool bar..................................................................................................................................................................................... 45
7. Technical data ........................................................................................................................................................................................... 48
7.1 Bundle components.................................................................................................................................................................. 48
8. Appendix..................................................................................................................................................................................................... 49
8.1 X120GO technical features....................................................................................................................................................... 49
8.2 Data collection guidelines...................................................................................................................................................... 50

STONEX®X120GO – User Guide
4
1. Legal Notice
1.1 Copyrights and trademarks
STONEX®, the STONEX® logo, and X120GO are trademarks of STONEX® S.r.l.
STONEX® GOapp, STONEX® GOpost and STONEX® Reconstructor are trademarks of STONEX® S.r.l.
All other trademarks are the property of their respective owners.
2. Standard Limited Warranty
2.1 Shipping policy
The Customer or the Dealer is required to pay for the charges for shipping of fault parts or instruments to
STONEX® representative office and STONEX® (will provide) the shipping for return. Dealers needs to follow
STONEX® repair/service procedure to achieve a better and prompt service result.
2.2 Return policy Dead on Arrival instruments
All returned products must be shipped to STONEX® representative office.
The original Purchaser has a period of seven (7) days, starting from date (data) of purchasing to signal the existence
of a defect in the instrument for a full refund (less shipping and handling), provided the merchandise is in new,
resalable condition and returned in the original, undamaged packaging. Customer must pay for both the return
and the original freight fees, regardless of the original freight paid by the Company. All warranty books, instruction
manuals, parts and accessories must be included as well as the original box in which the item was shipped. We
recommend placing the original carton inside another box, to avoid any additional damage to the carton itself. In
some cases, returns of special items will require a re-stock fee. Acceptance of returned merchandise is final only
after inspection by STONEX®.
Above terms and (policy shall apply as for hardware.) Dealers needs to follow STONEX® repair/service procedure
to achieve a better and prompt service result.
2.3 Firmware/Software warranty
STONEX® doesn’t warrant that operation of Firmware/Software on any instruments will be uninterrupted or error-
free, or that functions contained in Firmware/Software will operate to meet your requirements.
STONEX® will forward the Software/Firmware Fix to the dealer or customer. Firmware/software Fix means an error
correction or other update created to fix a previous firmware version that substantially doesn’t conform to the
instrument’s specification.
2.4 Over Warranty repair(s) policy
Customer shall pay the standard repair fees for any service (whether part replacement or repairs) and performed
by STONEX® under request and explicit authorization of the customer itself. In this case the customer is charged
for return shipment’s fees as well.
2.5 Disclaimer and Limitation of Remedy
All other express and implied warranties for this product, including the implied warranties of merchantability and
fitness for a particular purpose and/or noninfringement of any third party’s rights, are hereby disclaimed.

STONEX®X120GO – User Guide
5
STONEX® expressly disclaims all warranties not stated in this limited warranty. Any implied warranties that may
be imposed by law are limited in duration to the term of this limited warranty. Some jurisdictions do not allow the
exclusion of implied warranties or limitations on how long an implied warranty lasts, so the above exclusions or
limitations may not apply to customer. Customer must read and follow all set-up and usage instructions in the
applicable user guides and/or manuals enclosed. If customer fails to do so, this product may not function properly
and may be damaged. Customer may lose data or sustain personal injuries. STONEX®, its affiliates and suppliers
do not warrant that operation of this product will be uninterrupted or error free as do all electronics at times. If
this product fails to work as warranted above, customer’s sole and exclusive remedy shall be repair or replacement.
In no event will STONEX®, its affiliates or suppliers be liable to customer or any third party for any damage in
excess of the purchase price of the product. This limitation applies to damages of any kind whatsoever including
(1) damage to, or loss or corruption of, customer’s records, programs, data or removable storage media, or (2)
any direct or indirect damages, lost profits, lost savings or other special, incidental, exemplary or consequential
damages, whether for breach of warranty, contract, tort or otherwise, or whether arising out of the use of or
inability to use the product and/or the enclosed user guides and/or manuals, even if STONEX®, or an authorized
STONEX® representative, authorized service provider or reseller has been advised of the possibility of such
damages or of any claim by any other party. Some jurisdictions do not allow the exclusion or limitation of
incidental or consequential damages for some products, so the exclusions or limitations may not apply to
customer. This limited warranty gives customer specific legal rights, and customer may also have other rights
which vary from country/state/jurisdiction to country/state/jurisdiction.
2.6 Environmental recycling
The cardboard box, the plastic in the package and the various parts of this product have to be recycled and
disposed of in accordance with the current legislation of your Country.
FOR COUNTRIES IN THE EUROPEAN UNION (EU)
The disposal of electric and electronic device as solid urban waste is strictly prohibited: they must be collected
separately.
Contact Local Authorities to obtain practical information about correct handling of the waste, location, and times
of waste collection centers. When you buy a new device of ours, you can give back to our dealer a used similar
device. The dumping of these devices at unequipped or unauthorized places may have hazardous effects on health
and environment.
The crossed dustbin symbol means that the device must be taken to authorized collection centers and must be
handled separately from solid urban waste.
FOR COUNTRIES OUTSIDE EUROPEAN UNION (EU)
The treatment, recycling, collection, and disposal of electric and electronic devices may vary in accordance with
the laws in force in the Country in question.

STONEX®X120GO – User Guide
6
3. Introduction
3.1 General
Thank you for purchasing STONEX® X120GO 3D Laser Scanner.
This manual includes important safety directions and instructions for setting up and using the product.
Please read this manual carefully before using, so that our products can serve you better.
When you begin to use the product, we assume that you are a competent user who has read through and
understood the contents of this manual and is fully aware of the necessary dangers, warnings, and cautions.
In the event of any discrepancy between the information contained in this manual and the actual, the actual
information shall prevail, and the Company reserves the right to make further revisions or changes to this manual
without notice.
X120GO 3D Laser Scanner provides a simple and quick way to obtain 3D point cloud data of objects, outdoor or
indoor, significantly improving work efficiency and speed.
Laser scanning is an automatic process during which real objects are surveyed and sampled almost completely to
determine their location, size, orientation, and shape.
Thanks to its Lidar sensor, X120GO can collect quick, accurate scans in 45 seconds to less than 4 minutes. Its
lightweight makes it perfect for multiple easy scans over the scene.
3.2 Description of the system

STONEX®X120GO – User Guide
7
1. Laser sensor
6. Status light
2. Rotatable Gimbal
7. power button
3. Camera sensor
8. SD card slot
4. Handle
9. Extension interface
5. NFC
10.USB interface
3.3 Precaution for safety
1. Avoid vibrations: when transporting, keep the instrument in the case and try your best to lighten vibrations.
2. Instrument carrying: when carrying, the instrument handle must be hold tight.
3. Check the battery power: before using the instrument, you should check the battery power whether it is
enough.
4. Battery maintenance: if the instrument is not in using for a long time, the battery should be taken out
from the instrument and stored in separate place. Meantime, the battery should be charged every month.
5. Taking out the battery: it is not suggested to take out the battery when the instrument is on. Otherwise,
stored data may be lost. So, it is better to replace the battery after powering off the instrument.
6. High temperature condition: don’t put the instrument in high temperature condition for a long time, it is
bad for the instrument performance, and it can damage the hardware components.
7. Temperature changing sharply: the sharp temperature changing on the instrument will shorten the
distance measurement range. For example, after taking the instrument out from a warm car to a cold
condition, wait for some time: it can be used when it adapts the surrounding condition.
8. Noise from the instrument: when the instrument is working it is normal if you hear noises from instrument
motors. They will not affect the instrument work.
9. Stored data responsibility: STONEX® should not be held liable for the lost data because of wrong
operation.
3.4 Transport and shipping
TRANSPORT IN THE FIELD
1. When transporting the equipment in the field, always make sure that you
a. either carry the product in its original transport container,
b. or carry the tripod with its legs splayed across your shoulder, keeping the attached product
upright.
TRANSPORT IN A ROAD VEHICLE
2. Never carry the product loose in a road vehicle, as it can be affected by shock and vibration.
3. Always carry the product in its transport container and secure it.
SHIPPING
4. When transporting the product by rail, air, or sea, always use the complete original STONEX® packaging,
transport container and cardboard box or its equivalent to protect the instrument against shock and
vibration.
SHIPPING AND TRANSPORT OF BATTERIES
5. When transporting or shipping batteries, the person in charge of the product must ensure that the

STONEX®X120GO – User Guide
8
applicable national and international rules and regulations are observed.
6. Before transportation or shipping, contact your local passenger or freight transport company.
7. Field adjustment
8. After transport, inspect the field adjustment parameters given in this user manual before using the
product.
3.5 Storage
Product
Respect the temperature limits when storing the equipment, particularly in summer if the equipment is inside a
vehicle. Refer to technical datasheet for information about temperature limits.
Field adjustment
After long periods of storage, inspect the field adjustment parameters given in this user manual before using the
product.
3.6 Cleaning and drying
•Never touch the cover glass with your fingers.
•Use only a clean, soft, lint-free cloth for cleaning.
•If necessary, moisten the cloth with water or pure alcohol. Do not use other liquids.
•Keep plugs clean and dry. Blow away any dirt lodged in the plugs of the connecting cables.
3.7 Definition of indication
For the safe of your product and prevention of injury to operators and other persons as well as prevention of
property damage, items which should be observed are indicated by an exclamation point within a triangle used
with WARNING and CAUTION statements in this manual.
The definitions of the indications are listed below.
Be sure you understand them before reading the manual’s main text.
ATTENTION:
Ignoring this indication and making an operation error
could possibly result in death or serious injury to the
operator.
CAUTION:
Ignoring this indication and making an operation error
could possibly result in personal injury or property
damage.
ATTENTION
1. Do not perform disassembly or rebuilding. Fire, electric shock, or burn could result. Only STONEX®
authorized distributors can disassemble or rebuilt.
2. Do not cover the charger. Fire could result.
3. Do not use defection power cable, socket, or plug. Fire, electronic shock could result.

STONEX®X120GO – User Guide
9
4. Do not use wet battery or charger. Fire, electronic shock could result.
5. Do not close the instrument to burning gas or liquid, and do not use the instrument in coal mine. Blast
could result.
6. Do not put the battery in the fire or high temperature condition. Explosion, damage could result.
7. Do not use the battery which is not specified by STONEX®. Fire, electric shock, or burn could result.
8. Do not use the power cable which is not specified by STONEX®. Fire could result.
9. Do not short circuit of the battery. Fire could result.
10. When this product encounters disturbance of severe Electrostatic Discharge, perhaps it will have some
degradation of performance like switching on/off automatically and so on.
CAUTION
1. Do not touch the instrument with wet hand. Electric shock could result.
2. Do not stand or seat on the carrying case, and do not turn over the carrying case arbitrarily, the
instrument could be damaged.
3. Do not drop the instrument or the carrying case.
4. Do not touch liquid leaking from the instrument or battery. Harmful chemicals could cause burn or
blisters.
5. Do not drop the instrument. Series damage could result.
6. Before use it, check the central screw is tight.
3.8 Safety standards for lasers
STONEX® X120GO series adopt the class of Laser Product according to IEC Standard Publication 60825-1 Amd.
2:2001. According to this standard, the device is classified as Class 1 Laser Product.
3.9 Battery
The X120GO scanner is equipped with 8 rechargeable batteries as standard, with a single battery
capacity of 3350mAh and a voltage of 4.2V. The scanner needs to be loaded with 4 standard
rechargeable batteries for normal operation, and the continuous working time of each group (4
batteries) is about 2.5 hours.
Use the battery properly according to the product specification, do not disassemble or short circuit the battery.
Keep away from sources of heat or ignition: over high temperature will make the cell inflate melt the separator,
causing short circuit.
The storage area should be cool, dry, well ventilated, out of direct sunlight, away from metal or
sharp edge, such as keys pins or wires. Store the battery in a charged state and charge it every 6 months.
1. Positive pole
2. Negative pole

STONEX®X120GO – User Guide
10
Precautions for safety
1. The battery should be placed in the battery clip during transportation to avoid contact with liquids or bumps
with hard objects. Do not immerse the battery in water or get it wet. Never use the battery in the rain or a
wet environment. When the inside of the battery comes into contact with water, a decomposition reaction
may occur, causing the battery to spontaneously ignite or even explode.
2. If the battery accidentally falls into the water, immediately remove the battery and place it in a safe open
area away from the battery until it is completely dry. Dried batteries should not be used again and should
be disposed of properly according to the disposal methods in this article.
3. If the battery catches fire, please use water, water mist, sand, fire blanket, dry powder, and carbon dioxide
fire extinguisher to put out the fire immediately. Please select the fire extinguishing method in the above-
recommended order according to the actual situation.
4. It is strictly forbidden to use batteries not officially provided by Stonex®. If you need to replace a new battery,
please buy it through designated channels. Stonex® is not responsible for battery accidents and device
failures caused by the use of batteries not officially provided by Stonex®.
5. The battery storage temperature and humidity requirements are -20°C ~45°C, 45%~90% RH;
6. It is strictly forbidden to use bulging, leaking, damaged batteries and charging them. Do not use it when the
battery emits an odor, heats up, the temperature of the battery itself exceeds 60°C, is deformed, discolored,
or has any other abnormality. If the battery is abnormal, please contact Stonex® or other agents designated
by Stonex® for further processing.
7. Please use the battery in an environment where the temperature is between -10°C and 60°C C. Excessive
temperature (above 60°C) may cause the battery to catch fire or even explode. Too low temperature (below
-10°C) will seriously damage the battery.
8. It is forbidden to use the battery in an environment of strong static electricity or magnetic field. Otherwise,
the battery protection board will fail.
9. Do not disassemble or puncture the battery in any way with sharp objects. Otherwise, battery leakage will
cause fire or even an explosion.
10. Mechanical impact, crushing, or throwing of batteries is prohibited. Do not place heavy objects on the battery
or charger.
11. The electrolyte inside the battery is highly corrosive. If it accidentally comes into contact with the skin or eyes,
please immediately rinse with clean water for at least 15 minutes and seek medical attention immediately.
12. If the battery is dropped or subjected to external impact, please stop using the battery.
13. Do not heat the battery. Do not place batteries in microwave ovens or pressure cookers.
14. Do not place battery cells on conductive surfaces (such as metal tabletops, glasses, watches, jewelry, etc.).
15. Do not use wires or other metal objects to short-circuit the positive and negative electrodes of the battery.
16. If the battery connector is dirty, wipe it with a clean, dry cloth. Failure to do so will result in poor battery
contact, resulting in energy loss or charging failure.
Battery storage
17. Please store the battery out of the reach of children and pets.
18. Do not place the battery near a heat source (stove or heater, etc.) and in a car on a hot day. Never store
batteries in an environment above 60°C. The ideal storage ambient temperature is 22°C - 28°C.
19. Please store the battery in a dry environment.
20. Do not store the battery for a long time after the battery is completely discharged, to avoid damage to the
battery cell caused by the battery entering the over-discharge state, and it will not be able to be restored to

STONEX®X120GO – User Guide
11
use.
Battery care
1. Do not overcharge or over-discharge the battery, otherwise, it will cause damage to the battery.
2. If the battery is left idle for a long time, its performance will be affected.
3. Do not use the battery in an environment where the temperature is too high or too low.
4. Do not store batteries where the ambient temperature exceeds 60°C.
Battery disposal
1. Be sure to completely discharge the battery before disposing of the battery in the designated battery
recycling bin. Batteries are hazardous chemicals and should not be disposed of in ordinary trash cans. For
details, please follow local battery recycling and disposal laws and regulations.
2. If the battery cannot be completely discharged, do not dispose of the battery directly in the battery recycling
box, and contact a professional battery recycling company for further processing.
Battery specifications
Type
Rechargeable 18650 pointed
Lithium Battery With
Protective Plate
Positive pole needs to be pointed
Rated Voltage
3.7V
Battery Capacity
≥3000mAh
Suggested Value
Charging Limit
Full Charge Voltage 4.2V
Recharging Current≥1.5A
If the charging current exceeds 4.2V or the
charging current is lower than 1A, the charger
provided by Stonex®cannot be used
Maximum Discharge
Current
≥3A
Battery Protection
Board
Conventional Protection
Functions Such as
Overcharge, Over-discharge,
Overcurrent, and
Overtemperature
Battery must have its own protective plate,
otherwise there is a safety risk, and relevant
safety certification is required
Battery Outer
Diameter-D
18.0mm≤D≤18.9mm
Battery Height-H
68mm≤H≤71mm

STONEX®X120GO – User Guide
12
3.10 About User
1. The X120GO Scanner must be used by trained operators only. When operating the X120GO, please always
follow basic safety precautions to prevent injury or damage to equipment.
2. The user is required to be a qualified surveyor or have a good knowledge of surveying, in order to
understand the user manual and safety instructions, before operating, inspecting, or adjusting.
3. Do not operate the equipment if it shows obvious defects or damage. Please follow STONEX® service
procedure to repair the equipment.
4. Please use only the components and accessories provided by the manufacturer.
5. Before operating the X120GO for the first time, please read this manual completely.
6. The equipment contains electrical components and mechanical parts, so proper operation is required.
Do not pull or bend the data transmission line forcibly.
7. Do not push any other objects into the data transmission line interface, place the device out of the reach
of children, and do not modify or disassemble the X120GO scanner under any circumstance without the
prior written permission of STONEX. Otherwise, the warranty would not be applied.
3.11 Exceptions from Responsibility
1. The user of this products is expected to follow all operating instructions and make periodic checks of
the product’s performance.
2. The manufacturer assumes no responsibility for results of a faulty or intentional usage or misuse
including any direct, indirect, consequential damage and loss of profits.
3. The manufacturer assumes no responsibility for consequential damage and loss of profits by any disaster,
such as earthquakes, storms, floods etc.
4. The manufacturer assumes no responsibility for any damage and loss of profits, due to a change of data,
loss of data, an interruption of business etc., caused by using the product or an unusable product.
5. The manufacturer assumes no responsibility for any damage and loss of profits, caused by usage except
for explained in the user manual.
6. The manufacturer assumes no responsibility for damage caused by wrong transport or action, due to
connecting with other products.

STONEX®X120GO – User Guide
13
4. Setting up the STONEX®X120GO
4.1 Battery charging
Input: AC 100~240 V /50~60 Hz /600mA (MAX)
DC 12~24V 2000mA (MAX)
Output: DC 4.2V/1000mA (MAX) × 4
The four buttons A/B/C/D on the charger correspond to a charging slot respectively. Short press for 1 second, the
current switches between 500mA and 1000mA; long press for 5 seconds, the two charging modes of lithium-ion
battery and iron-lithium battery are switched. This charger defaults to the lithium-ion charging mode, and no
switching operation is required.
AC Charging
1) Connect the power cord to the charger;
2) Put the battery to be charged into the battery slot of the charger, pay attention to the direction of the positive
and negative electrodes;
3) Connect the power cord to an AC outlet with an output voltage in the range of 100~240V. The battery starts
charging, and the battery is fully charged in about 3 hours.
NOTE:
•The charger operating environment requirements are 0℃~40℃, 45%~90%RH;
•For safety reasons, the maximum time allowed by the charger to charge the rechargeable battery is 12
hours, and the charging will be stopped after 12 hours;
•The battery reverse connection or short-circuit charging protection is activated, the charger stops
charging, and the error indicator "Err" is displayed.
•Please do not use equipment other than Stonex's official charger for charging;
•In case of damage or deformation of the battery skin, please do not continue to use it and dispose of it
in time.
•Please use it in a dry environment, and disconnect the power supply in time after charging.
•Please stay away from flammable materials and charge in the isolation area;
Vehicle-mounted charging
1)Connect the vehicle-mounted charging cable to the charger;
2)Put the battery to be charged into the battery slot of the charger, and pay attention to the orientation of the
positive and negative poles;
3)Connect the power cord to the vehicle power socket, and the battery will start charging. The battery will be
fully charged for about 3 hours.

STONEX®X120GO – User Guide
14
4.2 Led status
X120GO handheld lidar scanner mainly has three-color status lights (red, yellow, green), which are used to indicate
the current scanner working status and battery power information display. Please refer to the following table.
Working Status
Indicator Status
POWER DISPLAY
Voltage>14.0V
Green light (flashing slowly)
14.0V<Voltage<12.3V
Yellow light (flashing slowly)
12.3V<Voltage<11.8V
Red light (flashing slowly)
EQUIPMENT
UPGRADE
Upgrading
On 200ms, cycle 400ms, white light
Successful update
Steady on or flashing slowly (green, yellow, red)
Upgrade failed
On 200ms, cycle 400ms, red light
MCU upgrade
On 100ms, cycle 200ms, white light
WORKING STATUS
Device startup
Light on (green, yellow, red)
Data collection
Light flashing on 800ms, the cycle 1500ms
(green, yellow, red)
Shutdown
Blue light flashing
SYSTEM SETTINGS
Restoration system
Press and hold the power button for 10 seconds,
the status light turns blue, then press and hold
the power button for 2 seconds, the status light
off, and after 4 seconds, the status light changes
to normal battery display mode
Error state
Red light flashing quickly
4.3 Setting up
Move the battery compartment cover lock at the bottom of the scanner handle forward, open the battery
compartment cover, load batteries according to the requirements of positive and negative poles, and lock the
battery lock in the handle.
Move the battery compartment cover lock backward to lock the battery compartment cover.

STONEX®X120GO – User Guide
15
NOTE:
•Please check the battery power before starting each time to ensure that it is fully charged;
•Beware of battery falling damage during disassembly and assembly.
Press the scanner on key for 3 seconds for a long time, and the status indicator light is always green (the battery
is fully charged). Wait for the laser head to start rotating, and then the equipment starts successfully.
Insert the memory card into the SD card slot with the golden finger side facing the back of the scanner.
NOTE: SD card must be inserted or data will not be collected.

STONEX®X120GO – User Guide
16
5. Operating the STONEX®X120GO
5.1 GOapp installation
GOapp is mobile APP for X120GO for Android (8.0 version or above), which allows to perform operations such as
project management, real-time point cloud puzzle display, image preview, firmware upgrade, etc.
1. Download on PC from here: GOapp for Android
2. Copy the *.apk file on the Android controller using an USB connection
3. From Android, locate the *.apk file you just copied and click to start the installation
4. Install it on your devices
5.2 Device binding
The first time you open the GOapp, you will have the following page, where the Add Now button allows to blind
a new device.
X120GO supports two ways of binding to the homepage of APP:
1. Wi-fi connection
2. NFC

STONEX®X120GO – User Guide
17
Wi-fi binding
Open the APP homepage, press and hold power button of X120GO scanner for 3 seconds, wait for about one
minute, and connect the Wi-Fi of your mobile phone.
X120GO scanner equipment will automatically appear on the homepage.
NFC binding
In the pop-up page of adding device boot, slide to the right to switch the second page to display NFC adding
device boot.
Turn on the NFC switch of the mobile phone (the mobile phone needs to support NFC function) and stick the
upper part of the back of the mobile phone (NFC sensing area) against the NFC tag on the key side of X120GO
scanner to connect and bind.
5.3 Equipment work
Connect the X120GO scanner through mobile phone Wi-Fi, click on the online device with the green dot logo in
the upper right corner of the APP page.

STONEX®X120GO – User Guide
18
After successful connection, the equipment will be initialized. Click on Start work to start the scan.
You can also click on the camera icon to take a set of pictures. Swipe left or right in the preview interface
to switch the preview images taken by three cameras.
Device Status-Connection failed
If the device connection fails, please recheck the device connection status and troubleshoot one by one:
1. Check whether the Wi-Fi of X120GO is connected to the mobile phone.
2. Check whether X120GO status indicator keeps green and bright.
3. Exit the work interface, return to the home page, and check whether there is a green cursor in the upper
right corner of the connected device icon.
4. Try to completely close the GOapp, clear the background of GOapp, re-enter GOapp and try to connect
to the X120GO device again.
If the connection fails when you re-enter the equipment interface after the above operation, please contact your
local dealer for more assistance.

STONEX®X120GO – User Guide
19
Device status-out of communication range
When GOapp is disconnected from X120GO, the device status will prompt "Not in communication range". It is
necessary to check whether the mobile phone is connected to the device WiFi of X120GO, or the distance between
the mobile phone and the device is too far, and the WiFi signal is weak or disconnected.
After connecting X120GO through GOapp, the APP enters the standby page, and the system will automatically
enter the working page and start to display the laser scanning data in real time by pressing the power button on
the instrument.
The equipment interface includes equipment name (1), equipment information (2), settings (3), working time (4),
working status (5), switching 2D or 3D display function (6).
Working-real-time 3D scanning display
When the APP is in the standby interface, press the power key of X120GO device briefly to start the operation, and
the page will automatically jump to the 3D scanning display interface.

STONEX®X120GO – User Guide
20
Working-View status information
In the process of X120GO operation, click the "Equipment Information" button at the upper right corner of the
working interface to view the current basic status information, motor status information, error status information
and SD card information of X120GO in real time.
5.4 Settings
Click the "Settings" button in the upper right corner of the working interface to enter the setting interface. Click
Regular Settings to enter the setting interface, where you can set the device name, RTK configuration and Wi-fi
settings.
Click Firmware to check the firmware version (refer to next chapter for more details).
Modify device name
Click on the Device name, enter the content to be modified in the pop-up "Modify Device Name" dialog box, and
click "Confirm" to modify the device name.
Table of contents
Other STONEX Scanner manuals
Popular Scanner manuals by other brands

AbiSee
AbiSee Eye-Pal ROL user manual
Fujitsu
Fujitsu N7100 Consumable replacement and cleaning instructions
Canon
Canon DR-6050C - imageFORMULA - Document Scanner Easy start guide
Pearson
Pearson OpScan iNSIGHT 70 installation guide

Avision
Avision AD240 Getting started guide
Lexmark
Lexmark X4500 Service manual
