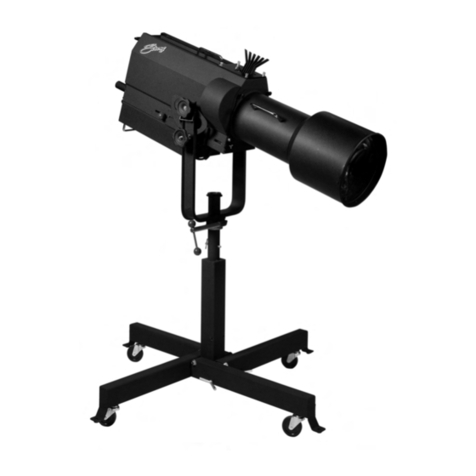
Strong 47070-02 User manual

XENON GLADIATOR IV
Equipment Type 47070-02 • Rev. November 2010
4350 McKinley Street • Omaha, Nebraska 68112 USA
Tel (402) 453-4444 • Fax (402) 453-7238 • www.strong-lighting.com
FOLLOW SPOTLIGHT
INSTRUCTION MANUAL

BULB
WATTAGE
CURRENT
RANGE (DC)
NOMINAL
CURRENT
DO NOT
EXCEED
2000 50-90 A. 75 A. 90 A.
2500 70-100 A. 90 A. 100 A.
3000 60-110 A. 100 A. 110 A.
4000 80-150 A. 125 A. 150 A.

PREFACE
STRONGINTERNATIONAL’SXENONGLADIATORIVModel47070isadirectcurrent
followspotlightsystemcompletewithalamphouse,xenonpowersupply,opticalsystem,colorboomerang,
andbasestandassembly.Thespotlightassemblyconsistsofthearclamp,variablefocuslenssystem,color
boomerang,andbase.Theseparatexenonpowersupplycompletestheinstallation.Onlythesespecialpower
suppliesfurnishedbyStrongEntertainmentLightingcanbeusedwiththeGladiatorIV.Forinstallationand
operationofthepowersupply,seetheinstructionmanualfurnishedseparately.
THEXENONLAMPHOUSEutilizesaxenonbulbdesignedforhorizontaloperation,anda
deepellipsemetalreector,asalightsource.Thereectoroperatesinaxedposition,andisdichroic(“cold”)
coatedtoreduceheatintheprojectedlight.Alensblowerandheatlter,mountedinthespotlightoptical
system,furtherreduceheatattheprojectionlensandcolormedia.
ONLYXENONBULBSspecicallydesignedforhorizontaloperationshouldbeusedinthis
followspot.TheGladiatorIVlamphouseisdesignedtousetheLTIX-4500W-HSwattbulb,andreplacement
bulbs(4000-4500watt,notexceeding4500watts)mustbecertiedas100%interchangeablewiththisbulb.
Lowerwattage(2000-3000wattType“HS”)bulbsmaybeinstalledintheGladiatorIVusinganoptionalanode
supportcolletandcathodeadapterkitsuppliedbyStrong.Allrequiredbulbcablingandcontactclampsare
providedinthexenonlamphouse.
ADJUSTMENTCONTROLforthexenonbulbislocatedattherearofthelamphousebehind
theaccesscover.Theadjustmentscontrolthehorizontal,verticalandfocalmovementofthebulb.
INSTRUMENTATIONofthelamphouseincludesaDCammeterandarunningtimemeter.
Theammetercontinuouslydisplaystheoperatingcurrent(amperage)appliedtothebulb;pressingtheVOLTS/
AMPSswitchbelowtheammetermomentarilyindicatestheDCvoltageatthearc.Therunningtimemeter
recordstheelapsedhoursofthebulb.AsecondrockerswitchcontrolslampON/OFF.
TWOLAMPHOUSECOOLINGBLOWERSareinternallywiredandoperateonACvoltage
derivedfromthexenonpowersupply.Theseblowersarerequiredtomaintainasafeoperatingtemperature
atthebulbseals.Athirdblowercoolstheopticalsystemandthecenter-mountedcolorboomerang.These
blowersoperatecontinuouslyuntilthexenonpowersupplyisde-energized.
THELAMPHOUSEissuppliedwitha13foot(4meter)cablecontainingtheDCleads,the
ACcontrolwires,andthegroundwire.Thecableterminatesinamultiple-pin,quick-disconnectplugkeyed
tomatewiththereceptacleonthepowersupplycabinet.
WHENTRANSPORTINGTHESPOTLIGHT,itisnecessarytoremovethexenonbulband
placeitinitsoriginalshippingcontainertopreventbreakage.SeetheSAFETYPROCEDURESsectionfol-
lowing,andpermitonlytrainedandauthorizedpersonneltohandlethexenonbulb.
IFATANYTIMEyouhaveasuggestion,ordesireaidinsecuringanticipatedresults,write
directlytoSTRONGENTERTAINMENTLIGHTING,4350McKinleyStreet,Omaha,Nebraska68112USA,
oronlineatwww.strong-lighting.com.
XG4/001

Lamphouse Access Cover
Fade-Out/Douser Control Lever
Masking Shutter (Chopper)
Control Lever
Iris Control Lever
Horizontal Pan
Control Lever
Vertical Tilt
Control Lever
Height Setting Pin
Lifting Strap
Spot Size Control Handle
Color Boomerang
Control Levers*
Spot Focus Knob
Leveling Feet not shown;
see Figure 8
Lens System
Access Cover
XENON GLADIATOR IV
* Color Boomerang Type 7200264 shown;
see Figure 6B for Type 7200709 (Front Mount)
XG4/002

INSTALLATION AND SETTING UP SPOTLIGHT
THEXENONGLADIATORIVisshippedinsectionswhichmustbeassembled.Lifting
strapsontheyokeassemblypermitcompletelyassemblingthespotlightontheoorandlaterhoistingittoan
elevatedposition.
ASSEMBLETHEFOURBASELEGStothelowersquaresectionofthebasecolumn,leg
bracketsdownward,andaligntheholes.Secureusingthe(4)T-bolts.Insertalevelingfootwithlocknutsin
eachofthefourlegbracketsandlevelthebasebeforecontinuingtheinstallation.
WHENINSTALLEDinapermanentlocation,thecastersandlevelingfeetmustberemoved,
andtheclearanceholesinthebaselegbracketsusedforhardware(usersupplied)toboltthebasetotheoor
orplatform.Ifitisdesiredtohavetheunitportable,whenoperating,thelevelingfeetmustbeadjusteddown
untiltheweightofthespotlighthasbeenshiftedfromthecasterstothelevelingfeet.
THEINNERTUBEofthesupportyokehasthreeholestopermitadjustingtheheightofthe
spotlight.Thethreeholesareonfour-inchcentersandwillallowanopticalheightofapproximately53inches,
57inches,and61inchesaboveoorleveltotheopticalcenterofthelamphouseandlenssystem.Insertthe
heightlocationpinthroughtheholeintheoutertubeandoneoftheholesintheinnertube.Thelevelingfeet
maybeadjustedthroughanadditionaltwo-inchrange.
THEHORIZONTALSWINGandverticaltiltlockingknobsareontherighthand(operating)
sideoftheyokeassembly.Leveltheyokeandtightenbothoftheselockingdevicessecurelybeforeattempting
toplacethelamphouseandlenssystemonthesupportyoke.
PLACETHELAMPHOUSEandlenssystemontheyokeassembly,withthespotsizecontrol
handletotherighthand(operating)side,thesameasthelockingcontrolsontheyoke.Lineupfourtapped
(5/16-18)mountingholesinthebottomofthebaserailmountingbracketwithmatingholesintheyokesaddle
andsecureusingthefour5/16-18wingscrews,lockwashersandatwashers.Twosetsofholesallowsetting
correctbalanceforunitswithorwithoutthefront-mountedboomerang;themountingholesarealsoslottedto
allowneadjustmentforpreciselybalancingthespotlight.Loosenthetiltlockandtestthespotlightbalance
beforepermanentlytighteningthewingscrews.
ATTACHTHELAMPHOUSECABLECONNECTORtothematingreceptacleonthepower
supply.Thelamphouseandpowersupplyconnectorsarekeyedforcorrectpinalignment;makecertainpins
areseatedbeforetighteningthelockingring.DONOTenergizethexenonpowersupplybeforethexenon
bulbiscorrectlyinstalledintothelamphouse.
XG4/003

LAMPHOUSE - POWER SUPPLY
Interconnection Diagram
LAMPHOUSE
(Connections Pre-wired)
CONNECTOR
Pin Wire No.
11 DC-
12 DC+
2 2
4 4
5 5
6 6
9 7
10 8
14 Grnd
Lamphouse
Cable Assembly
XENON
POWER
SUPPLY
Connector (pre-wired)
DC+
DC-
SYSTEM MUST BE GROUNDED
All wiring must conform to local codes;
shield lamphouse cable in conduit
if required.
Check Slide Switch (below) on Power
Supply for correct “SPOT” position.
Slide to LEFT
XG4/004

SAFETY PROCEDURES
READ CAREFULLY BEFORE INSTALLING XENON BULB
THEXENONBULBishighlypressurized.Whenignited,thenormaloperatingtemperature
ofthebulbincreasesthepressuretoalevelatwhichthebulbmayexplodeifnothandledinstrictaccordance
tothemanufacturer’soperatinginstructions.
THEBULBisstableatroomtemperature,butmaystillexplodeifdroppedorotherwisemis-
handled.Breakageresultingfromtransportandhandlingisnotcoveredbythebulbmanufacturer’swarranty,
anditisstronglyrecommendedtodismountthexenonbulbwhentransportingthespotlight.
REFERbulbreplacementandservicetoQUALIFIEDPERSONNELwithadequateprotec-
tiveclothing(faceshield,cleancottongloves,welder’sjacket).Forroutinelamphouseservice,observethe
followingrules:
1. Allowthebulbtocooltoroomtemperaturebeforeopeningthelamphouse.Putonprotectiveclothing
describedabove.
2. De-energizethexenonpowersupplyattheACsourcebeforeopeningthelamphousecompartment.
3. Whenpossible,encasethebulbinitsprotectivecoverwhencleaningorservicingthe lamphouse
interior.Thebulb,whenoutsidethelamphouse,mustbeencasedinthecover.
4. Cleanthebulbafterithascooledtoroomtemperature.Donottouchthequartzenvelopeofthebulb;
ngerprintswillburninandcreatehotspotswhichmayshortenbulblife.Ifngermarksaremade,
theyshouldbecarefullyremovedwithmethylalcoholandcottonpriortobulboperation.
5. Neverviewanignitedbulbdirectly.BLINDNESSORPERMANENTEYEDAMAGEMAYBE
INCURRED.
6. UseonlyxenonbulbsdesignatedasOZONEFREE.Whenpossible,ventthelamphouseexhaustto
outsideatmosphere.
7. Maintainthelamphouseblowersingoodoperatingcondition.Keeptheblowerinletsandgrillesclean
forunrestrictedairow.
8. Toinsuremaximumbulblife,operatethelamphouseblowersforat leasttenminutesafterextinguish-
ingthebulb.
9. Ifreturningabulbforwarrantyadjustment,packitinitsoriginalshippingcontainer.Completeand
returnallrequiredwarrantyinformation.
XG4/005

10. Disposeofexpiredbulbsthatarebeyondwarrantyinthefollowingmanner:Wrapthebulbtightly
inseverallayersofcanvasorheavycloth.Placeitonahardsurfaceandshattertheenvelopewitha
sharphammerblow.DONOTplaceanunshatteredbulbinanordinaryrefusecontainer.
11. DONOTPERMITUNAUTHORIZEDPERSONNELTOPERFORMORATTEMPTANYPHASE
OFXENONBULBHANDLINGORSERVICE.
Cathode Pin
Cathode
Anode
Anode Pin
Cathode End Cap
Seal
Seal
Envelope
Anode End Cap
XG4/006
For use in a Gladiator IV lamphouse, it is necessary to remove the
anode lead (if attached) from the anode end cap of the xenon bulb.
Observe all bulb safety procedures and leave the bulb in its protective
cover. Grasp the bulb by the anode (+) end cap. Use small channel
locks or slip-joint pliers and grip the bulb lead tting at the crimp joint
nearest the end cap, and unscrew the lead. If the bulb manufacturer
uses a brazed rather than threaded connection, cut the lead from the
end cap, cutting as close as possible to the end cap.
The standard bulb support collet (7200285) measures 4-11/16 inches
(120mm) overall and is designed for a 4000 watt “HS” xenon theater
bulb. When using a smaller, lower wattage bulb, a longer support col-
let (7200638) measuring 6-7/16 inches (164mm) must be installed in
place of the standard collet, and a chromed cathode adapter (7201174)
must be mounted to the bulb’s cathode pin. These components are
included in the optional Bulb Kit 7201175, and both the collet and the
bulb adapter should be mounted prior to installing the bulb.
PRIOR TO INSTALLING BULB, PLEASE NOTE:

BULB INSTALLATION
OBSERVEALLSAFETYPROCEDURESwhenworkingaroundthexenonbulb.Openthe
lamphouseaccesscoverbyreleasingtheclaspsandswingingthecoveruptoitsstop.Loosenthe(5)captive
fastenersandremovethetwobulbcompartmentsidecovers.Verifythatthelamphouseisttedwiththecor-
rectsupportcolletappropriatetothedesiredbulbwattage.Thebulbleadsandcontactclampsaretieddown
forshipping.Freetheclampsandslidetheanodeclampoverthebrasssocketoftherearsupportcollet.
REMOVETHEPLASTICPROTECTIVECOVERfromthexenonbulbonlyifnecessary.
Handlethebulbbythemetalendcapsonly.Dismounttheanodeleadfromthe(+)endcapofthebulbif
attached.Graspthebulbbythemetalanode(+)endcaponly whenunscrewingtheleadfromthebulb;DO
NOTholdthebulbatthecathode(-)endcapwhenremovingtheanodelead.
INSERTTHEBULBintothelamphouse,passingtheanode(+)endcapthroughthecenter
holeofthereector.Takecarenottobumporscratchthesurfaceofthereector.Inserttheanode(+)pininto
therearsupportcolletandcontactclamp.Restthecathode(-)endcapinthefrontbulbsupportyoke.Seat
theanode(+)pinintotherearsupportcolletasfaraspossibleforcorrectfocustravel.Securelytightenthe
socketheadclampingscrewintheanodecontact.
RESTTHECATHODEENDCAPinthe“V”ofthebulbyoke.Dressthebulbleaddirectlyin
frontofthebulbsupportyoketominimizetheprojectedshadow,butdonotallowittotouchgroundedmetal
lamphousecomponents;thebulbyokeandthesupportcastingareinsulatedfromground.Slidethecathode
contactclampoverthecathode(-)pinandsecurelytightentheclampingscrew.
REMOVETHEPLASTICCOVERfromthebulb.Recordthebulbserialnumber,date,and
lamphousehoursontheXenonBulbRecordontheinsidebackcoverofthismanual.Replacethebulbenclo-
surecoversandsecurethecaptivefasteners.Useofthesecoversmaximizesbulbcoolingforlonglife.
XG4/007
Rear Support Collet
Bulb Socket
Anode Contact Clamp
Anode
Clamping Screw
to Igniter Post
Cathode
Front Bulb Support Yoke
Set Screw
Cathode Contact Clamp
to Negative
Binding Post
Cathode Adapter
(as req’d.)*
* Cathode Adapter & longer Rear Support Collet
are included in the optional Bulb Kit 7201175
required for 2 kW, 2.5 kW, and 3 kW bulbs.

ESTABLISHAROUTINEofperiodicallycheckingallelectricalconnectionsfortightness.
Loosecontacts,particularlyintheDCcircuit,willcauseoverheatinganddamagethexenonbulbandother
components.Normalxenonbulbwarrantiesallowno creditforbulbdamagecausedbyoverheating.
REFERTOTHEBULBMANUFACTURER’SINSTRUCTIONSregardingbulbrotation.
Mostbulbmanufacturersrecommendrotatingthebulb180°at50%ofwarrantyhours.Afterrotatingthebulb,
operateatmaximumallowablecurrentforseveralhours,andthenreturntothenominaloperatingcurrent.
INTHEEVENTofabulbwarrantyclaim,thebulbmustbepackagedinitsoriginalshipping
container,andreturnedwithallrequiredwarrantyformscompleted.Contactthedealerthroughwhomthe
bulbwasoriginallypurchasedforcorrectproceduresandReturnAuthorizations.
ITISACOMMONPRACTICEtoreplacethebulbattheexpirationofitswarrantyperiod.
Ifaxenonbulbexplodesinoperation,thereectorandotherlamphousecomponentsarefrequentlydamaged.
Thexenonbulbmanufacturerwillextendno creditforareplacementreectorifthedefectivebulbisbeyond
warranty.Explosion-damagedreectorsaretobereturnedtothebulb supplier,NOTStrongEntertainment
Lighting,unlessthebulbwassuppliedbyStrong.
XG4/008
ARC STABILIZATION MAGNET
THEXENONBULBusedintheGladiatorIVlamphouserequiresuseofanarcstabilization
magnet.Thismagnetislocatedbelowandbehindthereector.Themagnetispresetatthefactoryandshould
notrequireadjustment.Shoulditbecomenecessarytoadjustthemagnet,thefollowingproceduremustbe
followed.Observeallbulbsafetyprocedureswhenworkinginthelamphousecompartment.
ANORMALARCshouldappearasshowninFigure“A,”andrepresentsthecorrectmagnet
position.Figure“B”showsthepositionofthearcwhenthemagnetistoolow;Figure“C”showstheposition
ofthearcwhenthemagnetistoohigh.Condition“B”or“C”willcausearcicker.Ifickerisapparentinthe
projectedspot,raiseorlowerthemagnetonitsslotsasrequiredtopositionthearcasillustratedinFigure“A.”
THEMAGNETmustalwaysbeinstalledwiththelongestportionofthemagnet
uppermost(nearestthebulb),andwiththeNORTH(N)polepointingtowardtheoperatorsideaccess
door.Reversingthemagnetwillcausebulbicker,andmayinhibitbulbignition.Innewequipment,
themagnetisnormallyinthecenteroftheadjustmentrange.Changesinthemagnetpositionarerequired
onlytocorrectanimproperlyburningarc(Figure“B”or“C”).
ANYREPLACEMENTMAGNETshouldrstbeinstalledinthecenterpositionofthe
adjustmentrange.RaiseorlowerthemagnetasrequiredtocenterthearcasillustratedinFigure“A.”

OPERATION
OPENTHEBOOMERANGACCESSCOVER and verify that the round glass heat lter
andringassembly(Figure5,Item17)isinstalledintothebracketmountedtothefadeoutanddousersupport
housing.NOTE:Thefollowspotshouldneverbeoperatedwiththisheatlterremoved.
REMOVETHEPLASTICCOVERfromthexenonbulb.DONOTignitethelampwiththe
coveronthebulb.Storethecoverforfuturere-use.Replaceandsecuretheinnerbulbenclosurecovers.
CLOSETHELAMPHOUSECOVERandsecureusingbothlatches.Turnonthemainline
switchand/orcircuitbreakertoenergizethexenonpowersupply.Thespotlightblowerswillstartandoperate
continuouslyuntilthexenonpowersupplyisde-energized.
PLACETHELAMPSWITCHinthe“ON”positionandthelampwillignite.Checkthe
readingonthelamphouseammeter.Nominalcurrentforthe4000/4500wattxenonbulbis135amperes.If
usingalowerwattagebulb,checkthedocumentationpackagedwiththebulbforitscurrentratings.DONOT,
ATANYTIME,exceedmaximumratedamperage.Outputcurrentisadjustedatthexenonpowersupply;see
powersupplymanualforinstructions.Operationofanewbulbisnormallystartedatthelowerendofits
range,andcurrentisgraduallyincreasedasthebulbagestomaintainlightoutput.Duringtheignitioncycle,
pressingtheVOLTS/AMPSswitchwillbrieyindicatethehigh“noload”(opencircuit)DCvoltageapplied
tothexenonbulbforignition.
OPENTHEREARCOVERabovetheinstrumentpanelbylooseningthe(2)thumbscrews.
Thisexposesthebulbpositioningcontrolsinthelamphousebackcasting.Tofocusthexenonbulbandobtain
thebestlightonthestage,thetwomethodsoutlinedbelowarethemostsuitable.
MOVETHESPOTSIZECONTROLHANDLE(trombone)onthelargelenscarriageallthe
wayforwardtoprojectthesmallestspotpossible;placetheiris,maskingshutters(choppers)andthefadeout
douserbladesintheirfullopenpositions.Projectaspottoawallorsimilaratperpendicularsurfaceopposite
thespotlightposition.
XG4/009
THE CENTER SECTION of the bulb
positioning controls is a threaded member that
focusesthebulbinrelationtothereector.Turning
thisadjustmentmovesthebulbinonlyoneplane,
intoorawayfromthereector.Turningthissection
clockwisemovesthearcawayfromthereector.
Thesmallknurledscrewtotheleftofthissectioncan
betightenedtolockthefocusingmechanismafter
thefollowingprocedureshavebeencompleted.
THE LARGE THUMB SCREWS, on
either side of the focusing control, lock the
horizontal and vertical adjustment mechanism
inposition.

TURNTHECENTERFOCUSINGSECTIONofthebulbpositioningcontrolcounterclock-
wiseuntilasmallblackspotisprojectedontothewall.Itmaybebesttorunthisadjustmentbothdirections
topermitpositiveidenticationofthespot.
LOOSENTHETWOTHUMBSCREWS,oneoneithersideofthecenterfocusingsection,
justenoughtopermitmanualmovementofthecompleteassembly.Thebulbpositioningcontrolwillnow
movearoundthesetwothumbscrews,andasthiscontrolisshifted,thesmoothshadowofthebulbelectrode
canbeseenextendingbeyondtheprojectedcenterholeinthereector.Theshadowoftheelectrode(black
spot)mustbecenteredintheprojectedholeofthereector(shaded,lessdensedarkarea).
MOVETHECONTROLSECTIONaroundthetwoscrewsuntiltheblackspotisasroundas
possibletoproject.Itmaybenecessarytoagainturnthefocuscontroltoprojectasharplydenedblackspot.
AFTERTHEBLACKSPOTisasevenaroundtheoutsideaspossibletoproject,andappears
centeredintheshadedreectorcenterhole(Spot“A”),tightenthetwolargethumbscrewstolocktheposition
ofthemechanism.Turnthecenterfocuscontroltoobtainthebrightestlightwiththebestlightdistribution(Spot
“B”)andcontinuetothedefocusedposition(Spot“C”)toverifythatthebulbiscenteredinthereector.
IFTHECENTERBRIGHTSPOTtracksofftotheleft,right,top,orbottom,itmaybeneces-
sarytorepositionthefrontbulbsupportyoketocompensate.Loosenthesetscrewinthesupportcastingand
resettheyokeasrequired.Thehexnutmaybeusedtolocktheheightoftheyoke.Securetheyokewiththe
setscrewafterthebulbtracksonastraightaxis.ReturnthefocuscontroltothedesiredSpot“B,”androtate
thespotfocuscontrolknob,locatedattheextremefrontofthelensmechanism,toobtainthesharpestedge
possibleontheprojectedspot.
XG4/010
THESECONDMETHODoffocusingthexenonbulbistoprojectthespottothestage,and
workingwiththeabovelamphousecontrols,adjustthesecontrolstoobtaina“hotspot”ontheprojectedspot.
Centerthis“hotspot”ontheprojectedlightbymovingtheentirecontrolsectionaroundthetwothumbscrews.
Oncethis“hotspot”iscenteredintheprojectedlight,lockthecontrolinpositionwiththetwothumbscrews
andturnthecentersectiontoobtainaspotwithanevendistributionoflight.Rotatethelensspotfocuscontrol
knobtoobtainasharpedgeontheprojectedspot.
THESEADJUSTMENTSshouldnotbedisturbeduntilafterreplacingorrotatingthexenon
bulb.Atthattime,theprocedureonobtainingasmooth,roundblackspot,or“hotspot,”mayhavetobere-
peated.Replacethecoverplateoverthebulbpositioningcontrolsandtightenthe(2)thumbscrews.
BECAUSEOFNORMALBULBAGING,andmanufacturingtolerancesbetweenindividual
xenonbulbs,itmaybenecessarytooperatedifferentlampsatslightlyhigherorlowercurrentsettingsto
achievebalanced,uniformlightoutputwhentwoormorespotlightsareusedinoneinstallation.Thisentails
aslightcurrentoutputadjustmentatthexenonpowersupplies.Seethepowersupplymanual.

XG4/011
TOEXTINGUISHthearc,placetheLAMPswitchontheinstrumentpanelto“OFF.”The
lamphouseblowerswillcontinuetooperateuntilthexenonpowersupplyisde-energized.Allowtheblowers
tooperatefortenminutesbeforeturningoffthepowersupply;aforced-airbulbcoolingcycleatshutdownis
requiredbyallbulbmanufacturerstocomplywiththeirwarrantyterms.
BEFOREOPENINGthelamphouseenclosureforservicing,allowtheblowerstooperatefor
twentyminutes,oruntilthebulbhascooledtoroomtemperature.
HANDLING THE SPOTLIGHT
GENERALLYTHEBESTPOSITIONfortheoperatortostandisnearthecenterofthespot-
lightontherightside.Theangleoftilt,thesizeoftheporthole,andthelayoutofthespotlightpositionmay
dictateanotherlocation.
EACHOPERATORwill,afterafewminutesofoperation,generallydevelophisownsystem
andpositionformostconvenientoperation.
THEHORIZONTALSWINGandverticaltiltareindividuallyadjustabletogivethedesired
degreeoffrictiontosuittheoperator.Thelockingclampsarelocatedontherightsideoftheyokeassembly.
ANEXPERIENCEDOPERATORwillusuallykeeponehandonthespotsizecontrolhandle.
Thisallowsbothdirectingthespotandchangingspotsizesimmediatelyuponcue.Compressingthebrake
leverpermitsfreemovementofthelargelensforwardandback,andreleasingtheleverlocksthespotsizeat
thedesiredpointoftravel.
Large Lens
Spot Size Control Handle
Brake Lever

OPERATION OF OPTICAL SYSTEM
THEIRISCONTROListhefrontleverthatprojectsthroughthetopoftheopticalsystem
housing.Whenthisleveristotheleft(asviewedfromtherearoftheunit),thelargestapertureisprovided.
Smalleraperturesareobtainedastheleverismovedtotheleft.
THEMAXIMUMFLOODSPOTisobtainedwiththeiriscontrollevertotheright(neartheop-
eratingside)forthelargestapertureandwiththespotsizecontrolhandlemovedasfartotherearaspossible.
SMALLERSIZEDSPOTSareprojectedasthespotsizecontrolhandleismovedforward.
Mostofthespotsizesneededwillbeproducedwiththeirisinitsmaximumopenposition.
FORA“HEADSPOT,”oranyspotsmallerthancanbeobtainedwiththespotsizecontrol
handleinitsextremeforwardposition,shifttheiriscontrollevertotheleft(awayfromoperatingside)fora
smalleraperture.Theiriscontrollevershouldalwaysbereturnedtoitsextremerightpositionbeforethespot
sizecontrolhandleisagainmovedtoobtainlargerspots.
THEMASKINGSHUTTER(chopper)leveristhemiddleleverprojectingthroughthetopof
theopticalsystemhousing.Themaskingshutterbladesareoperatedbythislevertoshapetheprojectedspot
toarectangle,stripspot,ordousing.
THEDISENGAGEDPOSITIONofthemaskingshutterleveristotheextremeright(toward
operatingside)andvaryingdegreesofmaskingtocompletecutoffareobtainedbymovingthelevertotheleft
(awayfromoperatingside).Ifdousingthespotforaprolongedperiodwiththebulboperating,itishighly
recommendedtousetheFadeoutdousers(below)topreventheatdamagetothemaskingshutterblades.
THEANGLEofthemaskingshutterbladescanbeadjustedtocompensateforthehorizontal
projectionangle.Removethecolorarmcoverplateanddismounttheboomerang.Loosenthe(4)screws
holdingeachofthemaskingshutterbladesenoughtoallowadjustments.Ignitethebulbandadjusttheangle
ofthebottombladebytappingwithascrewdriversoitsprojectededgeliesparalleltothefootlights.Tighten
thescrew.Operatethemaskingshutterlevertoclosetheblades.Adjusttheupperbladetocloseinlinewith
thebottombladeandtightenthescrew.
THE FADEOUT MECHANISMAND DOUSER CONTROL is the rear lever projecting
throughthetopoftheopticalsystemcover.Thislevercontrolstheintensityoflightfromcompletefadeout
whentheleveristotheleft,tofullintensitywhentheleveristotheright.
THESPOTSIZECONTROLHANDLEislocatedontherighthandsideoftheopticalsystem
justabovethebaserail.Avariationofspotsizesfromfulloodtosmallspotcanbeobtainedbymovingthe
spotsizecontrolhandlefromoneextremetotheother.Beamintensityisincreasedbythisopticalsystem
whenreducingfromoodtospot,andmaximumintensityisreachedwhenthespotsizecontrolhandleisin
theextremeforwardposition.Compressingthebrakeleverforwardofthehandlepermitsfreemovement.
THESPOTFOCUSINGCONTROLKNOBislocatedontheoperatingsideoftheoptical
systemattheforwardendabovethebasechannel.Thiscontrolisusedtoadjusttheopticalsystemforthe
lengthofthrow.Whenmakinganadjustment,rotatethespotfocusingcontrolknobuntilthesharpestedgeis
obtainedontheprojectedspot.
XG4/012

OPERATION OF COLOR BOOMERANG
THECOLORBOOMERANGsuppliedwiththeGladiatorIVisselectedwhenrstordering
thespotlightfromthefactory.TheType7200264boomerangismountedwithintheopticalsystemanduses
(6)50mmdichroicdiscsasthecolormedia.Type7200709mountstothefrontofthelensbarrelanduses
conventionalhigh-temperaturecolorgels(i.e.Roscolux®)ascolormedia.
EACHBOOMERANGisequippedwithsixcolorarms.A“starter”setofsix50mmdichroic
colordiscsisincludedwiththe7200264unit.Additionalcolors,includingcolortemperaturereductionlters,
areavailablefrommosttheatricalsupplydealers.
COLORFILTERSarecontrolledbythesixcolorleversoftheboomerang.Toengagean
individualcolorlter,lowerthedesiredlterselectorlever.Arockercatchlocatedinthecolordischousing
holdsthelterinthelightbeam.Toreleaseacolor,lowerthelterreleaseleverorengageanothercolor,thus
releasingthepreviouscolorautomatically.
TOREPLACEACOLORFILTERinthe7200264boomerang(seePartsList,Figure6A),itis
recommendedtodismounttheentireassemblyfromtheopticalsystemandplaceitonaconvenientworking
surface.Loosenthe(2)quarter-turnfastenersandremovethesidecoverplate.Theentireboomerangassembly
canthenbeeasilyremovedbylooseningthesinglecaptivescrewsecuringtheboomerangbrackettothebase
rail,andliftingthebracketoffthe(2)locatingpins.Whenre-installingtheboomerang,aligntheholesinthe
boomerangbaseplateontothesepinsbeforeagainsecuringthecaptivescrew.
TOATTACHACOLORGELtothecolorframeofthefront-mounted7200709boomerang
(seePartsList,Figure6B),detachthecolorframefromtheselectorarmbylooseningthesetscrewontheslide
channelandliftingtheframeoffthearm.Spraytheatsurfaceofthering(withoutthechannelclip)withan
aerosoladhesive.Centertheringoveraprecut13½by13½inch(34x34cm)gel,andpresstheadhesive-
coatedsideontothegel.Allowafewminutesfortheadhesivetodryandtrimtheexcessgelmaterial.Install
theringontotheboomerangcolorarmandtightenthesetscrew.Oldgelscanberemovedfromthecolor
framebyscrapingthegelanddriedadhesivefromtheframeusingasingle-edgerazorblade.
NOTE:WHENINSTALLINGCOLORFILTERSineitherboomerang,thelessdensecolors
(pink,amber)shouldbeplacedintheholderstowardtherearoftheboomerang(closetothearc),andthose
ofgreaterdensity(red,green)shouldbeplacedintheholderstowardthefrontoftheboomerang(awayfrom
thearc).Thismeasurewillprolongtheusefullifeofthelters.
XG4/013

XG4/014
MAINTENANCE
THEXENONGLADIATORIVSPOTLIGHTrequiresverylittlemaintenancetokeepitin
goodworkingorder.
THE REFLECTOR should be cleaned periodically with a soft, clean, lint-free cloth to
removedustfromthereectingsurface.Ifexcessivelysoiled,thereectormaybecleanedwithWindex®or
anequivalentglasscleaner.DONOTuseabrasivecleanersofanykind.Removetheheatlterringandclean
bothsurfacesofthelterglasswithalenscleaningsolutionformulatedforcoatedlenses.
CHECKALL ELECTRICAL CONNECTIONS for tightness on a regular basis
. Loose
connections,particularlyintheDCcircuit,mayoverheatandcauseprematurebulbfailureand/ordamage
otherlamphousecomponents.
LUBRICATEthe(3)squirrelcageblowermotorswithtwoorthreedropsofnon-detergentoil
onceeverysixmonths.Theoilholesarelocatedonthetopsofthemotorsandareaccessedbyremovingthe
motorcoversfromtheoff-operatorside.Aninjectionoilerisrequiredtoreachtheinneroilholes.
THEXENON BULB should bechecked occasionally for thepresence of dust orforeign
materialsonthequartzenvelope.Ifnecessary,cleantheenvelopewithalcohol,andwipedrywithaclean,
lint-freecloth.Observeallsafetyprocedureswhenworkingwiththeexposedbulb.
THEINSIDEOFTHELAMPHOUSEandtheblowersquirrelcagesshouldbecleanedperi-
odically,dependingonthedustconditionsateachinstallation.Keeptheblowerinletandoutletgrillesclean
topermitfreeairow.
THELENSSYSTEMshouldbekeptcleantopreventanylightreductionintheprojected
spot.Tightenthehorizontalswingandverticaltiltlockingclamps.Thefrontsurfaceofthelargelensisac-
cessiblethoroughthefrontopeningoftheopticalsystemhousing.Removetheoperator-sideopticalsystem
accesspaneltocleanthebacksurfaceofthelargelensandaccessthesmallprojectionlenswhichisheldin
placewithalargespring-typeretainerringatthefrontofitslensbarrel.
CLEANTHEPROJECTIONLENSandlargelenswithwithanycleanerapprovedforuse
oncoatedprojectionlenses.Replacetheprojectionlenstubewiththearrowsengravedinthebarrelpointing
towardtheiris.Securewiththeretainerring.
BEFORETRANSPORTINGthespotlight,removethexenonbulbfromthelamphouse.Place
thebulbinitsplasticcoverandoriginalshippingcontainer.
CAUTION: DISCONNECT AC POWER BEFORE SERVICING

LAMPHOUSE WIRING DIAGRAM
Barrier Strip 2162012
(see Figure 3, Item 43)
XG4/015

XG4/016
WIRINGDIAGRAMPARTSLIST
PartNo. Description
7200280 Blower(B1,B2,B3),230V.AC,50/60Hz.
3113289 MolexPlug,(3)Pin
7200255 Capacitor(C1),RFSuppression
81247000 Shunt(R1),200A.50mV.
7201313 CableAssembly,ShunttoControlPanelJ2
3201311 PrintedCircuitBoardAssembly,AnalogControlPanel
2121017 Fuse,3A.Std.(F1on3201311)
24086000 RockerSwitch,VOLTS/AMPS(S102on3201311)
8161028 RockerSwitch,LAMP(S101on3201311)
8132009 Ammeter(M2),0-200A.50mV.
7201317 CableAssembly,AmmetertoControlPanelJ4
7132005 HourMeter(M1),10-80V.DC
7201294 CableAssembly,HourMetertoControlPanelJ6
7200253 StepdownTransformer(X1)
7200252 TerminalBoard&MolexConnector,WiredAssembly
2162012 BarrierStrip,(10)Terminal
2140014 MolexReceptacle,(12)Pin
39862000 IgniterAssembly
25476000 IgniterPrintedCircuitBoardAssembly
39875000 IgniterCase&Coil,PottedAssembly
3130231 XenonBulb,LTIX-4500W-HS
3130223 XenonBulb,LTIX-3000W-HS*
3130219 XenonBulb,LTIX-2500W-HS*
3130213 XenonBulb,LTIX-2000W-HS*
7200251 InterconnectCableAssembly,Lamphouse/PowerSupply(seeFigure9)
*Requiresoptional7201175BulbMountingKit

WIRING DIAGRAM, 3201311 PRINTED CIRCUIT BOARD
XG4/017

XG4/018
TROUBLE CHART
NORMAL OPERATION
WHENTHESWITCHinthemainACsupplylinetothexenonpowersupplyisintheON
position,andthe30A.circuitbreakerontheswitchingpowersupplyisON,theVINlightonthexenon
powersupply,andthelamphouseinstrumentpanelPOWERandAIRlightswillglow.Thecoolingblowers
inthelamphouseandinthepowersupplywilloperate.Whenalllamphousecoversaresecured,themagnetic
interlockswitcheswillcloseandthePANELSlightonthecontrolpanelwillglow.
WHENTHECONTROLPANELLAMPSWITCHisplacedintheONposition, theAC
controlcircuitinthelamphousewillenergizethexenonpowersupplycircuitryprovidingDCcurrenttothe
igniterandbulb.Thegreen“GO”lightonthexenonpowersupplyandtheLAMPlightonthelamphouse
controlpanelindicateacompletedcircuit.
THEREWILLBEadistinctlyaudiblehighvoltagearcpingattheigniterarcgapandacross
thebulbelectrodes.Thebulbshouldigniteimmediatelyafteroneortwoofthesehighvoltagepulses,andthe
lampcurrentwilladjusttotheoutputsettingofthexenonpowersupply.Multipleignitionpulsespriortobulb
ignitionnormallyindicatealowDCoutputsetting.Increaseoutputtothebulb’sinitial(“nominal”)current
setting;seexenonpowersupplymanual.A“warm”oragedxenonbulbmightalsorequiremultiplestrikes.
TROUBLE SHOOTING
IFTHEXENONBULBdoesnotignite,observethefollowingoperationalsequencesfor
assistanceinlocatingandisolatingthetroublearea.
WHENTHEFANSandtheVINindicatorlightonthepowersupplyareon,thecircuitinthe
powersupplyistrouble-freeuptotheterminalblockinthepowersupply.Atthistime,thespotlightblowers
shouldoperate.Ifthisdoesnotoccur,thetroubleisinoneoftheblowermotors,alooseconnection,ora
broken#7or#8lead(220V.AC).
Checkatthistimefor220V.ACblowervoltageatwires7&8,and220
V.ACatthelamphousequick-disconnectpinsI&J.CAUTION:exerciseextremecautionwhentaking
voltagemeasurementsinapower“on”condition.
IFTHEHIGHVOLTAGEPINGortheignitionashisnotapparent,checkvoltagesonthe
terminalboardadjacenttotheshunt.Areadingof120-170V.DC“noload”shouldbemeasuredbetween
wires6and7,and115V.ACbetweenwires9and10.Ifthesevoltagesarenotindicated,theproblemisinthe
leadsbetweenthelamphouseandpowersupply,orinthepowersupplyboostcircuit.Seethetroubleshooting
sectionofthepowersupplymanualforadditionalinstructions.
THESWITCHING-TYPEXENONPOWERSUPPLYfurnishedwiththespotlightsystem
includesthermaloverloadswitchesandprotectioncircuitstopreventdamageresultingfromhighorlowinput
voltage.LossofDCopencircuitvoltage,oraninterruptionofDCsustainingcurrent,maybetracedtothese
circuits.Seethepowersupplymanual.
IFTHEHIGHVOLTAGEARCisaudibleatthelamphouseandthebulbdoes notash,check
foralamphouseDCleadarcingtoground.Ifnogroundfaultisdetected,replacethebulbandattemptignition
withthenewbulb.
This manual suits for next models
1
Table of contents
Other Strong Spotlight manuals
Popular Spotlight manuals by other brands

Larson Electronics
Larson Electronics GL-8130-M quick start guide

Peak
Peak PKC01CB owner's manual

Wagan
Wagan Brite-Nite user manual

WAC Lighting
WAC Lighting MT-130MH installation instructions

Larson Electronics
Larson Electronics Golight Stryker GL-3049-P Instruction guide

Phottix
Phottix Indra500 TTL instruction manual

LIVARNO LUX
LIVARNO LUX LSS 520 A1 User manual and service information

Larson Electronics
Larson Electronics HUL-18-TRP instruction manual

BLACK DECKER
BLACK DECKER LEDLIB instruction manual

Show Tec
Show Tec Phantom 250 Color Wash V2 instructions

Claypaky
Claypaky ALPHA PROFILE 700 instruction manual

Spot-on
Spot-on MB-360 instruction manual