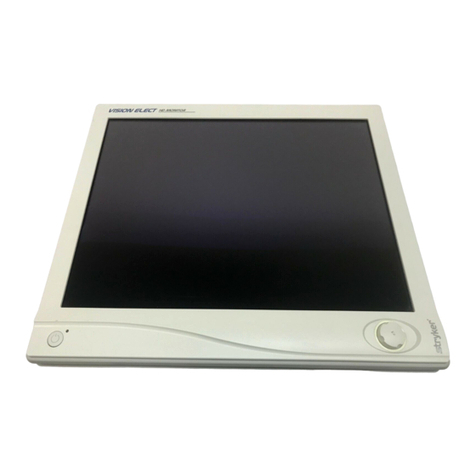
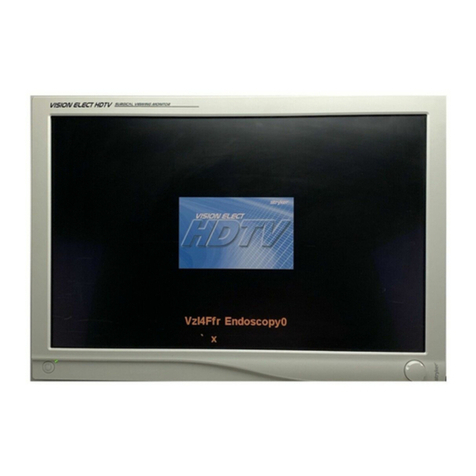
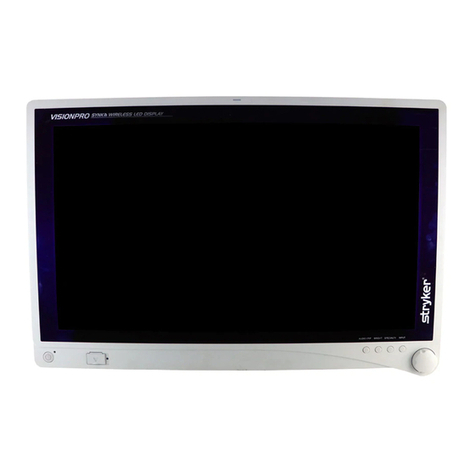
Stryker WiSe 26 inch HDTV User manual

WiSe™26˝ HDTV
Surgical Display
User Guide
REF
Display 0240030970
Transmitter 0240030971
HDTV TRANSMITTER


Contents
Warnings and Cautions .................................................... 3
Symbol Definitions.............................................................. 6
Product Description........................................................... 7
Intended Use...........................................................................7
Indications/Contraindications .................................................8
Package Contents...................................................................8
Setup and Interconnection .......................................... 11
Connection Ports ..................................................................11
Connecting AC Power...........................................................12
Basic Video Setup.................................................................13
Operating the Display ..................................................... 14
Accessing the On-Screen Display ........................................14
Using the On-Screen Display................................................15
On-Screen Display Menus ....................................................16
Using the Optional Fiber Optic Module................ 18
Installing and Activating the Fiber Optic Module ..................18
Using the Optional WiSe™ HDTV Transmitter .. 19
Device Features ....................................................................19
Connecting AC power...........................................................20
Setting Up the Optional WiSe™ HDTV Transmitter ..............21
Linking the Transmitter to an Auxiliary Display .....................22
Cleaning and Maintenance .......................................... 24
Maintenance..........................................................................25
Disposal ................................................................................26
Troubleshooting.................................................................. 27
Technical Specifications ............................................... 28
Electromagnetic Compatibility.................................. 31
Warranty and Return Policy ....................................... 36


3
Warnings and Cautions
Please read this manual and follow its instructions carefully. e words warning,
caution, and note carry special meaning and should be carefully reviewed:
Warning Indicates risks to the safety of the patient or user. Failure
to follow warnings may result in injury to the patient or user.
Caution Indicates risks to the equipment. Failure to follow cautions
may result in product damage.
Note Provides special information to clarify instructions or present
additional useful information.
An exclamation mark within a triangle is intended
to alert the user to the presence of important
operating and maintenance instructions in the manual.
A lightning bolt within a triangle is intended to warn
of the presence of hazardous voltage. Refer all service
to authorized personnel.
Warnings
To avoid potential serious injury to the user and the patient and/or damage to
this device, please note the following warnings:
1. Read the operating manual thoroughly and be familiar with its contents
prior to using this unit.
2. Carefully unpack the unit and check if any damage occurred during
shipment.
3. Test this unit prior to a surgical procedure. is display was fully tested
at the factory before shipment.
4. Do not place the display or any other heavy object on the power cord.
Damage to the cable can cause re or electric shock.
5. is unit is not suitable for use in the presence of a ammable anesthetic
mixture with air, or with oxygen or nitrous oxide.
6. Do not put any liquid or solid object into the panel. If this occurs,
unplug the unit and have it checked by qualied personnel before
operating it any further.
7. Disconnect the transmitter from the electrical outlet when inspecting
the fuses.
8. To avoid electric shock, avoid removing the control unit covers.

4
9. Ensure that the electrical installation of the relevant operating room
complies with NEC and CEC guidelines.
10. Do not attempt internal repairs or adjustments not specically detailed
in this operating manual. Ensure that readjustments, modications, and/
or repairs are carried out by persons authorized by Stryker Endoscopy.
11. Use appropriate caution to prevent contact with uids if the unit is being
used with a power supply in patient environments.
12. Federal law (United States of America) restricts this unit to sale by, or on
the order of, a physician.
Cautions
1. Plug the AC adapter into a grounded power outlet.
2. Use only the proprietary surgical display power supply for the display.
Completely secure the connection between the DC power cord and the
extension cord.
3. Connect the unit to a hospital grade receptacle to achieve grounding
reliability.
4. To connect to an international power supply, use an attachment plug
appropriate for the power outlet.
5. Power o the unit when it is not in use.
6. Remove the power module and connection when transporting the unit.
7. Unplug the unit if it is not to be used for an extended period of time. To
disconnect the cord, unscrew the plug rst, then pull the cord out by the
plug. Never pull the cord itself.
8. Handle the display with care. Do not strike or scratch the screen.
9. Never operate the unit immediately aer transportation from a cold
location to a warm location.
10. Pay close attention to the care and cleaning instructions in this manual.
A deviation may cause damage.
11. Do not expose the display to moisture or apply liquid cleaners directly
to the screen. Spray the cleaning solution into a so cloth and clean
gently.
12. Do not sterilize the display or transmitter console, as the delicate
electronics cannot withstand this procedure.
13. Allow adequate air circulation to prevent internal heat buildup. Do
not place the unit on surfaces (rugs, blankets, etc.) or near materials
(curtains, draperies) that may block the ventilation slots. e display is
cooled by natural convection and has no fan.
14. Do not install the unit near sunlight, excessive dust, mechanical
vibration, or shock.
5
15. Do not operate with the glass display screen facing downward.
16. Keep the unit away from equipment that uses strong magnets (i.e., large
loudspeakers).
17. Do not touch the patient with signal input or output connectors.
Equipment with SIP/SOP connectors should either comply with
IEC 60601-1 and/or IEC 60601-1-1 harmonized national standards or
the combination should be evaluated for safety.
18. Changes or modications not expressly approved by the party
responsible for compliance could void the user’s authority to operate the
unit.
Note is unit has been tested and found to comply with the limit
for a Class B digital device, pursuant to Part 15 of the FCC Rules. ese
limits are designed to provide reasonable protection against harmful
interference in a residential installation. is unit generates, uses, and
can radiate radio frequency energy and, if not installed and used in
accordance with the instructions, may cause harmful interference to
radio communications. ere is no guarantee that interference will
not occur in a particular installation, which can be determined by
turning the unit o and on. e user is encouraged to try to correct the
interference by one or more of the following measures:
•Reorientorrelocatethereceivingunit.
•Increasetheseparationdistancebetweentheunits.
•Connecttheunittoanoutletonacircuitdierentfromthat
to which the other unit(s) are connected.
•Consultthemanufactureroreldservicetechnicianforhelp.
19. To ensure electromagnetic compatibility, refer to the “Electromagnetic
Compatibility” section of this manual. e WiSe 26" HDTV Surgical
Display (model 0240030970) must be installed and operated according
to the EMC information provided in this manual.
e WiSe™ 26" HDTV Surgical Display (model 0240030970 has been tested
under the UL 60601-1 standard and is UL listed for medical application.
e warranty is void if any of these warnings or cautions are disregarded.

6
Symbol Definitions
e following symbols appear on the product, its labeling, or the product
packaging. Each symbol carries a special denition, as dened below:
Dangerous High Voltage For indoor use only
Direct Current DC power control switch
Protective Earth Ground is Side Up
Wireless Transmission Fragile
Equipotentiality Do not get wet
Operating Pressure Ratings
3
Maximum Stacking
Operating Humidity Ratings
Medical Equipment is in
accordance with UL 60601-1
and CAN/CSA C22.2 No. 601.1
in regards to electric shock, re
hazards, and mechanical hazards
Operating Temperature Ratings Tested to comply with FCC
Class B standards
Fuse Rating IPX1 Degrees of protection against
the ingress of water
Denotes compliance to CAN/
CSA C22.2 No 601.1-M90
UL60601-1.
is symbol indicates that the
waste of electrical and electronic
equipment must not be disposed
as unsorted municipal waste
and must be collected separately.
Please contact the manufacturer
or other authorized disposal
company to decommission your
equipment.

7
Product Description
HDTV TRANSMITTER
e WiSe™ 26" HDTV Surgical Display is a high-denition, wide screen LCD
surgical display with a maximum resolution of WUXGA (1920 × 1200 at 60
Hz). e display supports various video inputs, including digital RGB, analog
RGB, serial digital interface (SDI), component video (YPbPr/RGB), S-video, and
C-video.
e display features an optional optical module accessory, which allows it to
receive a high-denition video signal over ber optic cables. It also features an
optional WiSe™ HDTV Transmitter, which allows it to receive a high-denition
video signal over a radio-frequency link.
Intended Use
e display is intended to display video images during the following types of
surgical procedures:
arthroscopy (orthopedic surgery)•
laparoscopy (general and gynecological surgery)•
thoracoscopy•
endoscopy (general, gastroenterological, and ENT surgery)•
general surgery•
e display is a non-sterile, reusable device not intended for use in the sterile
eld.

8
Indications/Contraindications
during general surgery, general laparoscopy, nasopharyngoscopy, ear endoscopy,
sinusocopy, and plastic surgery wherever a laparoscope/endoscope/arthroscope
is indicated for use.
Package Contents
(1) WiSe™ 26" HDTV
Surgical Display
UserGuide
www.stryker.com
(1) User guide
(1) AC adapter
(1) Hospital-grade AC power
cord
(4) M4 × 10 mm VESA screws
(2) Cable-management clamps
Optional Accessories (not shown) Stryker Part Number
WiSe™ HDTV Transmitter 0240030971
0240030951
0240030952
2 – 5 pin DC convertor adapter 0240030953
Fiber optic module 0240030962
(Manufacturer: Bridgepower, Model No: JMW1150KA2400F07
or Manufacturer:FSP Group, Model No:PMP150-14)

9
Device Features
Front panel
Operate the display using the rotary control located on the front panel. A list of
the display controls and their functions is provided below.
HDTV TRANSMITTER
2
1
3
6
4
5
1. Power LED Shines green if the display is powered on; blinks
amber if the display is in standby mode.
2. Power switch (so) Powers the display ON and OFF.
3. Token slot Token insertion site used to establish a wireless
connection with the transmitter.
4. Token LED Provides feedback when linking monitor and
transmitter.
5. Rotary control Accesses the on-screen display and navigates
through its functions.
6. Display Screen Shows video image.

10
Rear panel
1
2
34
5
1. VESA mounting
holes (100mm)
Provide access points for mounting the monitor.
2. Power switch (hard) Powers the input DC power ON and OFF.
3. Power connector Connects to the 24V DC power converter.
4. Cable-management
clamps
Organizes cables.
5. Connector tags Indicate the types of video connectors.

11
Setup and Interconnection
Stryker Endoscopy considers instructional training, or inservice, an integral part
of this device. Your local Stryker Endoscopy sales representative will perform
at least one inservice at your convenience to help set up your equipment and
instruct you and your sta on its operation and maintenance. To schedule
an inservice, contact your local Stryker Endoscopy representative aer your
equipment has arrived.
Connection Ports
Video input signals are connected to the rear of the display, as illustrated below:
1 6 7 85432 131211109 1514
1. Power switch (hard) 9. G/Y
2. Power 24V 10. B/Pb
3. Optical (optional) 11. H-sync
4. DVI 12. V-sync
5. VGA 13. HD/SD SDI IN
6. S-Video 14. HD/SD SDI OUT
7. C-Video SOG 15. RS232
8. R/Pr

12
Connecting AC Power
3
1
2
1. Connect the power supply to the 24V input on the display.
2. Connect the power cord to the power supply.
3. Connect the AC power, using the supplied hospital-grade power cord.
4. (Optional, not shown) Connect an extension cord between the power
supply and the display.
Optional Extension Cord Connection
Hospital-grade
power cord
Power Supply
Manufacturer: Bridgepower
Model : JMW1150KA2400F07
or
Manufacturer: FSP Group
Model: PMP150-14
Extension cord
Manufacturer: Bridgepower
Model : 1501047 (15Ft)
or 1501047001 (75Ft)
or 1501047002 (6Ft)
Converter cord
Manufacturer: Bridgepower
Model : 1501055
Converter cord
Manufacturer: Bridgepower
Model : 1501055001
Connect to
cart chasis
Manufacturer: Nortra Cables
Model : 240-030-722 (15Ft)
or 240-030-932 (75Ft)
or
WiSe™ 26" HDTV Surgical Display
Model 0240030970

13
Basic Video Setup
1
2
3
4
IN OUT
WiSe™ HDTV Surgical Display
VCR or Printer
SDC or SIDNE
Camera
1. Route the video output 1 from the camera to the SDC or SIDNE.
2. Route the video output 1 from SDC or SIDNE to input on the DVI input
on the display.
3. Connect the C-video input on the display to the C-video output on a
VCR or printer.
4. Connect the C-video input on the VCR or printer to the C-video output
on the camera.

14
Operating the Display
Accessing the On-Screen Display
Operate the display using the rotary control located on the front panel. A list of
the display controls and their functions is provided below.
HDTV TRANSMITTER
3 4
2
1
5
1. Power LED Indicates menu current status. Displays
green if display is powered on; blinks
amber if display is in Standby mode.
2. Power Switch (So) Turns the power ON or OFF.
3. Token Slot Insertion site for token to enable wireless
connection.
4. Token LED Provides feedback when linking monitor
and transmitter.
5. Rotary Control a. Turn Right/Le — With the on-screen
display menu activated, increases/decreases
the value of the selected parameter. With
the on-screen display deactivated, activates
the video source selection menu.
b. Push — Accesses/selects on-screen
display menu.
c. Push and Hold — Exits on-screen
display menu.

15
Using the On-Screen Display
e device on-screen display helps navigate through various device menus.
1. Press the Rotary Control to activate the on-screen display (OSD) menu.
2. Rotate the Rotary Control to move up or down through the menu.
e parameter will be highlighted when selected.
3. Press the Rotary Control to enter the next level OSD.
4. Rotate the Rotary Control to increase or decrease the value of the
selected parameter, or to make a selection on dierent options.
5. To exit the OSD menu screen from the second — or third — level OSD
menu, select the Exit option. To completely exit the OSD, press and hold
the Rotary Control. If no keys are pressed, the OSD will automatically
exit.
6. While the OSD menu is deactivated, rotate the Rotary Control to
activate the input signal selection menu. e current input signal will
be indicated by a dot. Rotate the Rotary Control to select the preferred
input signal.
Stryker Camera Preset Modes
Camera Resolution
(H × V)
Horizontal
Frequency
(KHz)
Vertical
Frequency
(Hz)
988 1024 ×768 49.09 59.90
988i 1024 ×768 41.25 50.00
1088/SDC Pro2 1024 ×768 50.03 60.00
1088i/SDC Pro2 1024 ×768 41.10 50.00
1088/1188/SDC HD 1280 ×1024 64.02 60.10
1088i/1188i/SDC HD 1280 ×1024 59.99 50.00
1188w720 1280 × 720 45.00 60.00
1188iw720 1280 × 720 37.50 50.00

16
On-Screen Display Menus
Item Function Description Range
Specialty
Color Temperature * Chooses between color temperatures for Standard,
Arth, Lap, PACS, or Norm
Red Red balance -128 – 128
Green Green balance -128 – 128
Blue Blue balance -128 – 128
Gamma Gamma value 0.1 – 2.5, S0,
S1, S2
Setting
Brightness Increases or decreases the brightness 0 – 100
Contrast Increases or decreases the contrast 0 – 100
Phase** Increases or decreases the Phase
level
0 – 100
Chroma** Increases or decreases the Chroma
level
0 – 100
Image Sharpness Sets image sharpness 1 – 10
Video Sharpness** Increases or decreases the video
sharpness
0 – 100
Image Eect
Scale Mode Chooses scale mode between Fill All, V-Fill, H-Fill,
One-One or Fill-Aspect
Freeze Frame Enables or disables freeze frame
Zoom/Pan Enables zoom-in and pan function
PIP Enables PIP (picture in picture) function
POP Enables POP (picture on picture) function
PBP Enables PBP (picture by picture) function
Advanced
OSD Control Controls OSD Menu Position, Background, and
Time out
Screen Control*** Controls and adjusts Horizontal, Vertical, Frequency,
and Phase
DPMS Chooses DPMS (display power
management signaling)
60min, 90min,
120min

17
Item Function Description Range
Auto Source Select Adjusts Auto Source Select between on and o
Restore Factory
Settings
Sets to factory default
Key Lock Sets to key lock mode
Wireless
Mac ID Unique machine ID of WiSe™ HDTV Transmitter
Status Status message:
Receiver:
RX MAC: XXXXXXXX
RX SW: vXX.XX.XX
Transmitter:
TX MAC: XXXXXXXX
TX SW: vXX.XX.XX
SIGNAL: Excellent, Good, Poor
REGION: US, Europe, Japan
CHANNEL XXXX MHz
Information
User Name Entry Enters custom user name display for boot-up display
Serial Number Displays device serial number
Runtime Displays current device run time
Input Format Displays current input format
Actual on-screen display values may vary with updated versions of the rmware
and user setting.
* Color Temperature RGB adjustment is available only for Standard, Arth,
and Lap settings. PACS and Norm selection only available under SOG input.
** Only available under SDI-, S-, or C-video input.
*** Only available under VGA input.

18
Using the Optional Fiber Optic Module
e display features an optional optical module accessory (0240030962), which
allows it to receive a high-denition video signal over ber optic cables.
Installing and Activating the Fiber Optic Module
Caution Excessive force or misalignment during insertion might damage
the module connector.
1. Power o the display using the hard power switch.
2. Unscrew the two screws from the cover plate, then remove the cover
plate.
1 32
1. Power Switch (hard)
2. Power 24V
3. Optical Module Slot with Cover Plate
3. Insert the Fiber Optic Module into the Fiber Optic Module slot and
screw into place.
4. Power on the display using the hard power switch.
5. Power o the display using the so power switch.
6. Press and hold the so power switch on the display for 10 seconds to
activate the Fiber-Optic input from the Input Selection menu.
Input Selection List
Digital RGB HD/SD-SDI C-Video
Wireless RGB Component (Y/Pb/Pr) SOG
Analog RGB RGBS Exit
Digital Optical* S-Video
*Greyed out if module is not installed
Table of contents
Other Stryker Monitor manuals

Stryker
Stryker 0240-031-000 User manual

Stryker
Stryker 240-031-050 User manual

Stryker
Stryker VisionPro User manual

Stryker
Stryker visionpro 0240-031-020 User manual

Stryker
Stryker 0240-031-050 User manual

Stryker
Stryker 240-030-960 User manual

Stryker
Stryker 0240-030-960 User manual

Stryker
Stryker VisionPro EDAM User manual

Stryker
Stryker VisionElect 240-030-930 User manual