manuals.online logo
Brands
  1. Home
  2. •
  3. Brands
  4. •
  5. Sukkah Center
  6. •
  7. Tent
  8. •
  9. Sukkah Center SNAP User manual

Sukkah Center SNAP User manual

SUKKAH CENTER
SUKKAH
SUKKAH CENTERCENTER
THE
SUKKAH CENTER
SUKKAHSUKKAH CENTERCENTER
®
SUKKAH CENTER
SUKKAH
SUKKAH CENTERCENTER
THE
SUKKAH CENTER
SUKKAHSUKKAH CENTERCENTER
®
BEFORE YOU BEGIN
Please read all the instructions before assembly.
Think about where your Sukkah will be placed. It
needs to stand on fairly level ground. Please keep in
mind on which side you want the door to be. Unless
you ordered a special Sukkah the door will be on the
right of a longer side of the Sukkah.
Unpack your Sukkah from the box and open all the
packages. Take the time to familiarize yourself with all
the parts. Please check the parts list on back page to
make sure you are not missing anything.
If you think something is missing, please call our
customer service department at 1-800-227- UKA
Your sukkah has
been designed for
E-Z installation
A EMBLY IN TRUCTION
Assembling your nap ukkah ystem:
When assembling the frame of your Snap-Sukkah,
we recommend that steps 1–3 be completed
without leaving the frame partially standing for
an extended amount of time. Failure to do so
might cause damage to some of the pieces.
Thank you for purchasing our nap ukkah ystem.
We hope you will enjoy many years of pleasant & enjoyable holidays
with your sukkah. Your feedback is important to us. Please call us at
1-800-227- UKA
www.sukkah.com
THE UKKAH CENTER
3720 14th Avenue • Brooklyn, NY 11218
718-436-6333 • www.sukkah.com
{
{
T
A1 X 1 A2 X 1 A3 X 1 A4 X 1 C X 2
8' B Crossbar X 11 10' B Crossbar X 7
Brass Clip X 12
PART LI T
OPEN ALL PACKAGES BEFORE COUNTING
Nylon X 1
Strap X 6
10’x16’
Actual size
119"x189"
© 2004 Sukkah Center •Brooklyn NY 11218
WHEN YOU FINI H
When using mat or bamboo
Schach, (not included,) lay it
perpendicular to the wooden
supports. You may need extra
supports to hold the weight of
the bamboo.
Do not hang any decorations
from mats. They are not
designed to hold any weight.
Decorations can be hung from
the wooden supports or from
bamboo rod-type Schach.
NOTE: If your Sukkah is
placed in a large open
area or is subject to
strong winds, secure it
using bungee cords
(or other types of
fastening material i.e.
string) and tightening
it to a secure object.
This will help prevent
it from shifting or
blowing over.
IN THE EVENT OF WIND, PLEASE REMOVE NYLON,
TO REDUCE THE RISK OF DAMAGE TO SUKKAH
Sukkah Center - Snap sukkah ALL Insructions 2015 UPDATED_Snap sukkah Insructions 2005.qx 5/19/2015 11:15 AM Page 13
35
2
6
While facing the longer (door) side of the Sukkah
looking in, Start with the corner on your right. Insert
the A1 upright bar onto the crossbar pins. (make sure
the arrow is facing up, and the closed loops, are facing
the back of the Sukkah.)
Lift the corner and tap it lightly, making sure the fitting
of the crossbars and upright bar connect tightly.
The A2 upright bar goes onto the corner to the left of
the door. The A3 & A4 upright bars, go onto the back
corners of the Sukkah. The Cuprights go at the center.
DOOR
Place the middle Bcrossbars into the middle fittings
of the A &Cbars. Then place the top crossbars directly
above them. Use the mallet to tap fittings together.
NOTE: The door area does not get a middle crossbar.
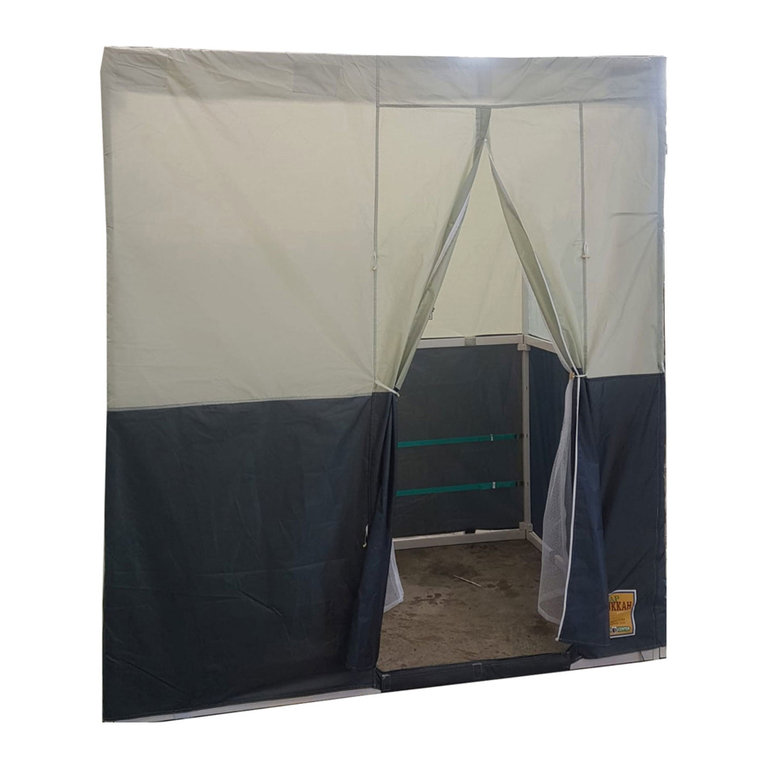
Open the nylon and find the end with the door on it.
The side with the screen faces the inside. The lighter
color goes on top.
Starting with the velcro above the door. Attach the
Velcro over the top of the Bcrossbars, and continue
all the way around the Sukkah, till both ends of the
nylon meet.
Tie the straps from both ends to the A1 corner
upright, and attach Velcro where the two ends meet.
Attach all the middle & bottom Velcro.
Each Sukkah has 3 mehadrin bands (2 sets) which go
around 3 walls of the Sukkah. The door wall remains open.
Starting with the A1 upright to the right of the door,
hook a band into the top loop (diagram 1), and continue
counter clockwise around the Sukkah. Thread the bands
through the guides on each upright, (diagram 2) ending
with the back C upright. Fasten the band properly.*
Continue with a second band, starting with the C
upright of the back wall, ending at the front A2 upright.
Repeat for remaining bands.
*To insure the Kashrus of the Sukkah.
Place wood* crossbeams (1"x2", not included) over
the top crossbars using the brass clips. The wood
beams should be evenly spaced from each other
and from the walls of the Sukkah.
*Necessary for the kashrus of the schach
4
DOOR
DOOR
(2)
(1)
10' (B) bar
DOOR
DOOR
TART
FINI H
1
Lay out the base of your Sukkah using the Bcrossbars.
with the pin facing upwards.
Lock folded B crossbars in the “open” position.
Consider door position when setting the crossbars.
8' (B) bar
8' (B) bar
C
A3 A1
A4
C
A2
Sukkah Center - Snap sukkah ALL Insructions 2015 UPDATED_Snap sukkah Insructions 2005.qx 5/19/2015 11:15 AM Page 14

Other Sukkah Center Tent manuals

Sukkah Center SNAP User manual

Sukkah Center

Sukkah Center SNAP User manual

Sukkah Center EZ PANEL User manual

Sukkah Center

Sukkah Center EZ PANEL User manual

Popular Tent manuals by other brands

Outwell TOMCAT LP quick start guide

Outwell

Outwell TOMCAT LP quick start guide

Dancover PVC 4m Series manual

Dancover

Dancover PVC 4m Series manual

Coleman 2000007828 Setup instructions

Coleman

Coleman 2000007828 Setup instructions

Fit4Home HT-1 user manual

Fit4Home

Fit4Home HT-1 user manual

Décor et Jardin Gamagran 81801S000 Assembly Notice

Décor et Jardin

Décor et Jardin Gamagran 81801S000 Assembly Notice

skandika outdoor GOTLAND 5 Setup Instruction

skandika outdoor

skandika outdoor GOTLAND 5 Setup Instruction

StarCamp Mistral Ripstop Manual instructions

StarCamp

StarCamp Mistral Ripstop Manual instructions

Skandika Helsinki Setup & maintenance

Skandika

Skandika Helsinki Setup & maintenance

Apex Garden 22-YH-20S067HD Assembly instructions

Apex Garden

Apex Garden 22-YH-20S067HD Assembly instructions

Asweets Wonder & Wise EVERYDAY TEEPEE Assembly instructions

Asweets

Asweets Wonder & Wise EVERYDAY TEEPEE Assembly instructions

ShelterLogic Pop-Up 22538 installation manual

ShelterLogic

ShelterLogic Pop-Up 22538 installation manual

Idena 4.0319 Assembly instructions

Idena

Idena 4.0319 Assembly instructions

PahaQue A-Frame Trailer Side Tent Setup instructions

PahaQue

PahaQue A-Frame Trailer Side Tent Setup instructions

Kayoba 008787 operating instructions

Kayoba

Kayoba 008787 operating instructions

bauhaus Special Offer Carport Assembly instructions

bauhaus

bauhaus Special Offer Carport Assembly instructions

Coleman 9271A163 instructions

Coleman

Coleman 9271A163 instructions

skandika outdoor Manhattan 6 AIR-RISE Setup Instruction

skandika outdoor

skandika outdoor Manhattan 6 AIR-RISE Setup Instruction

ShelterLogic 25730 Assembly instructions

ShelterLogic

ShelterLogic 25730 Assembly instructions

manuals.online logo
manuals.online logoBrands
  • About & Mission
  • Contact us
  • Privacy Policy
  • Terms and Conditions

Copyright 2025 Manuals.Online. All Rights Reserved.