DE
Beschreibung des Systems WPB und WPB Stop&Go
a) Einführung
• Das System ist ein Mess- und Kontrollinstrument
für die Streuung des Düngmittelgranulats mit einer
kontinuierlichen Wiegevorrichtung.
• Die Wiegeergebnisse können nicht für Handelsgeschäfte
verwendet werden.
• Das Gerät darf nur für die vorgesehenen Arbeiten
verwendet werden.
Im Schadensfall durch nicht bestimmungsgemäßen Betrieb,
ist der Hersteller von der Haftung gänzlich befreit.
• Das Gerät darf nur von sachkundigem und mit der
Maschine vertrautem Personal verwendet, gewartet und
repariert werden.
b) Beschreibung
1
Konsole ISOBUS oder virtuelles Terminal
2
Steckverbindung ISOBUS
3
Brückenstecker
4
Wiegesensor aus Inox
5
Önungs- / Verschlusssensoren der Schieber
6
Verteilerkasten
7
Elektrische Streumengen-Kontrollzylinder
8
Elektrozylinder Tribord
9
Elektrozylinder Stop & Go
GB
WPB and WPB Stop&Go system overview
a) Introduction
• The System is a measuring and monitoring instrument
for granular fertilizer spreading with continuous
weighing.
• The weight data may not be used for commercial
transactions.
• The machine must only be used for the applications for
which it was designed.
The manufacturer will not be liable for any damage caused
by using the machine for purposes other than those speci-
ed in this instruction manual.
• The machine must be operated, maintained and
repaired only by competent personnel, familiar with the
specications and use of the machine.
b) Presentation
1
ISOBUS console or virtual Terminal
2
ISOBUS connector
3
Bridge
4
Stainless steel weighing sensor
5
Shutter opening / closing sensors
6
Connection box
7
Application rate control electric actuators
8
Tribord electric actuator
9
Stop & Go electric actuator
FR
Présentation du système WPB et WPB Stop&Go
a) Introduction
• Le Système est un instrument de mesure et de contrôle de
l’épandage d’engrais granulés avec pesée continue.
• Les informations de poids ne peuvent pas être utilisées
pour des transactions commerciales.
• La machine ne doit être utilisé que pour les travaux pour
lesquels elle a été conçue.
En cas de dommage lié à l’utilisation hors du cadre des
applications spéciées par le constructeur, la responsabilité
de celui-ci sera entièrement dégagée.
• La machine ne doit être utilisée, entretenue et réparée
que par des personnes compétentes, familiarisées
avec les caractéristiques et le mode d’utilisation de la
machine.
b) Présentation
1
Console ISOBUS ou Terminal virtuel
2
Connecteur ISOBUS
3
Bridge
4
Capteur de pesée en Inox
5
Capteurs ouverture / Fermeture des trappes
6
Boîte de connexion
7
Vérins électriques de contrôle du débit
8
Vérin électrique Tribord
9
Vérin électrique Stop & Go
A
9
1
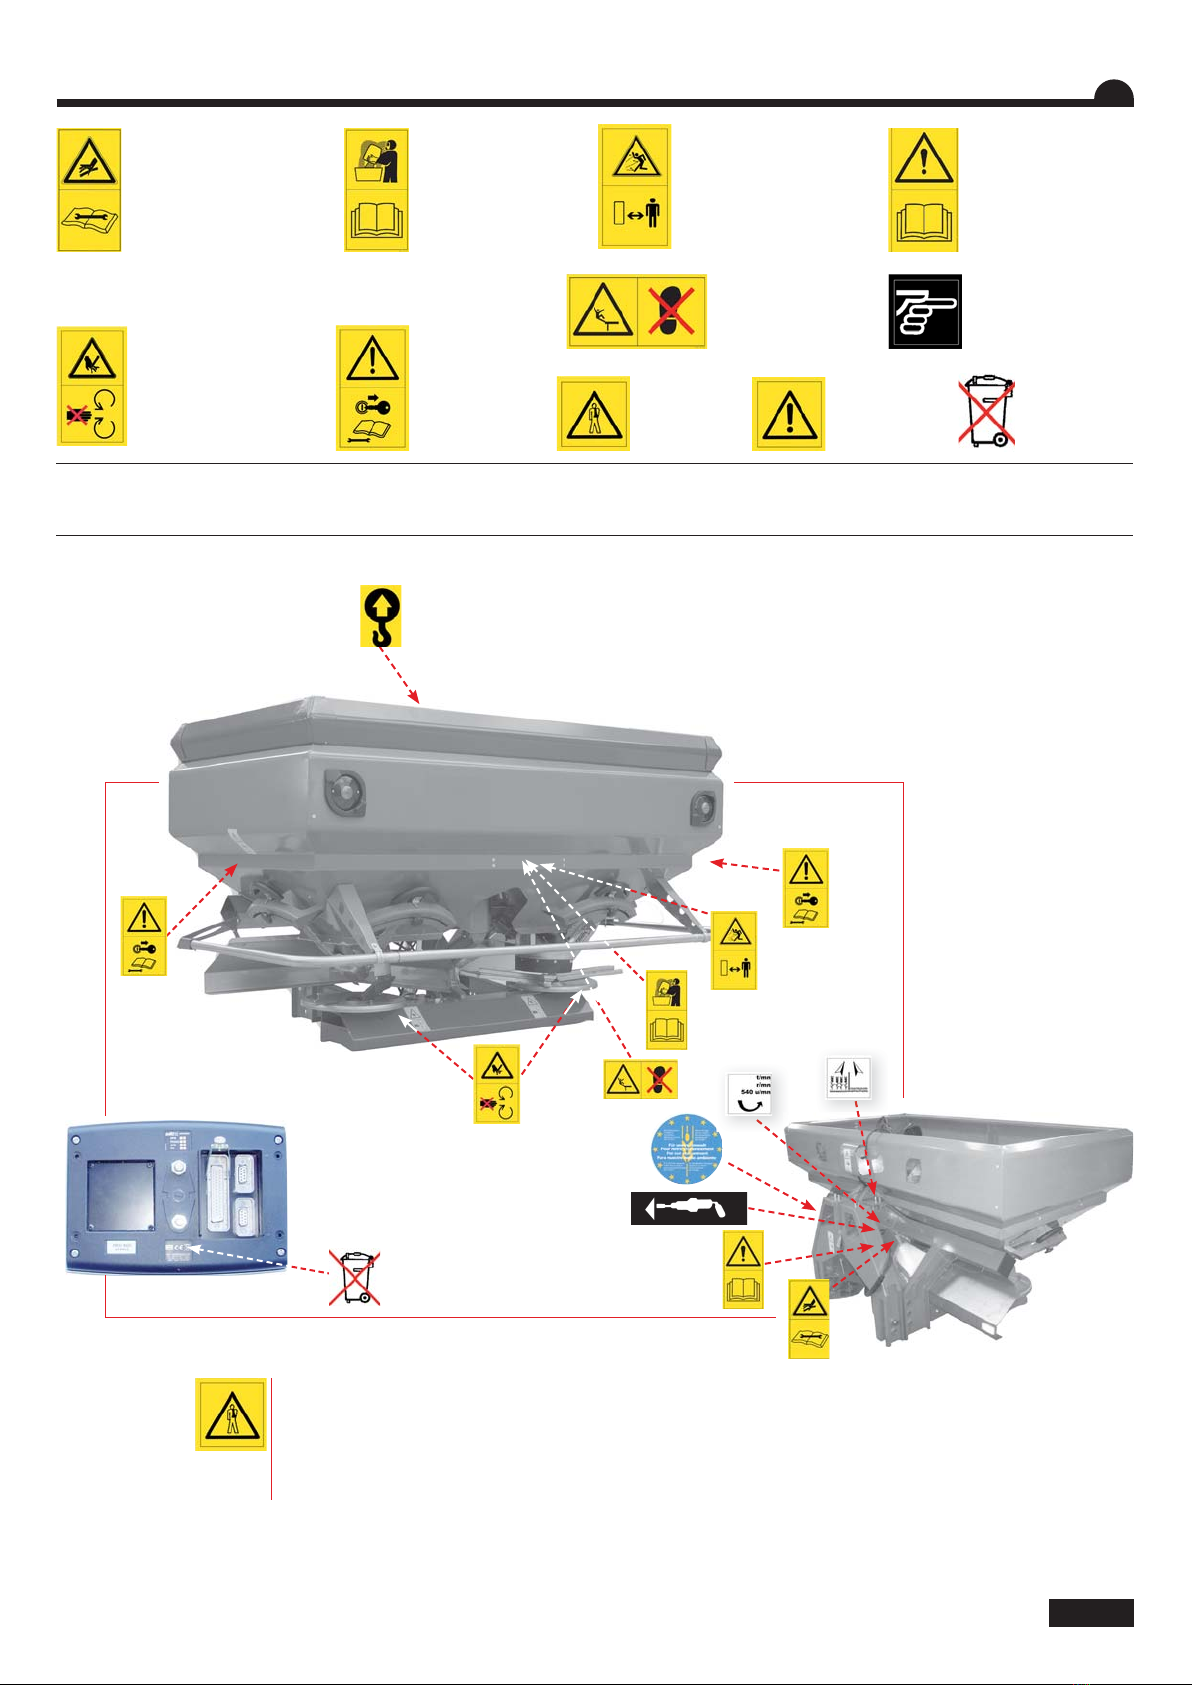
Présentation / Presentation / Beschreibung
A
A