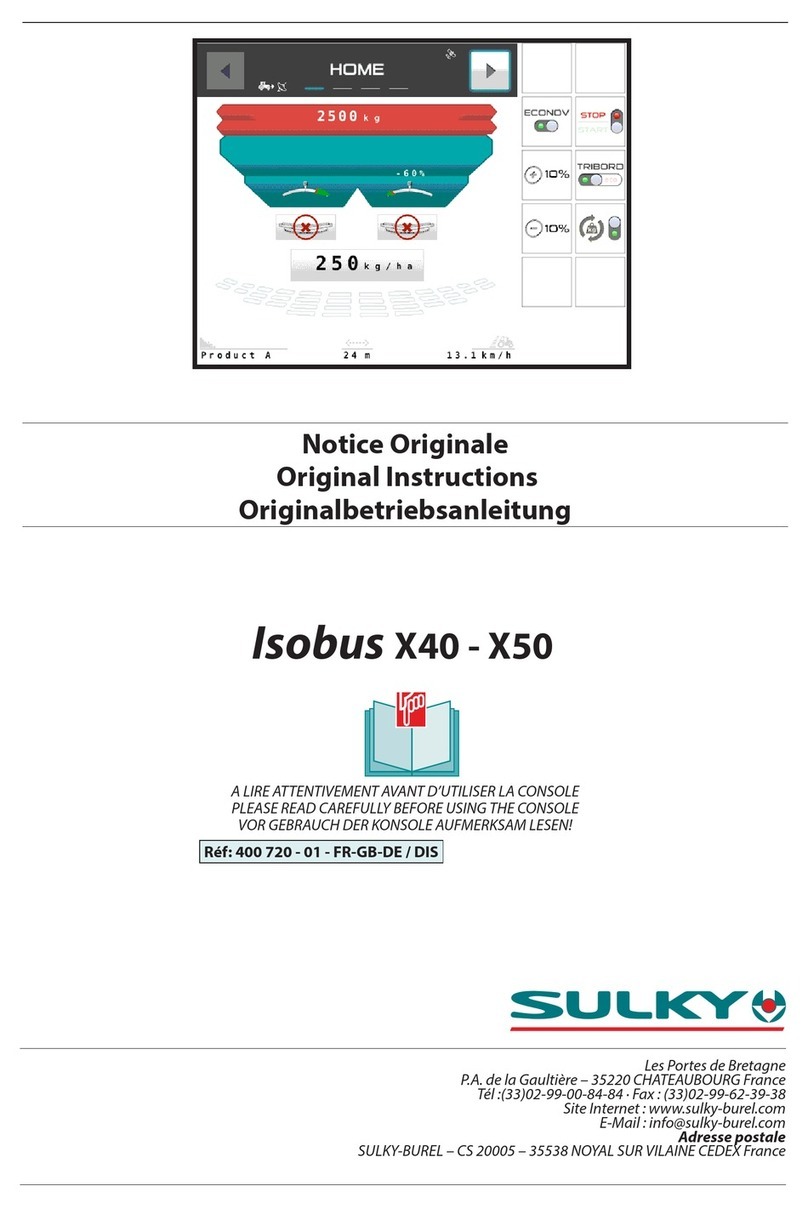
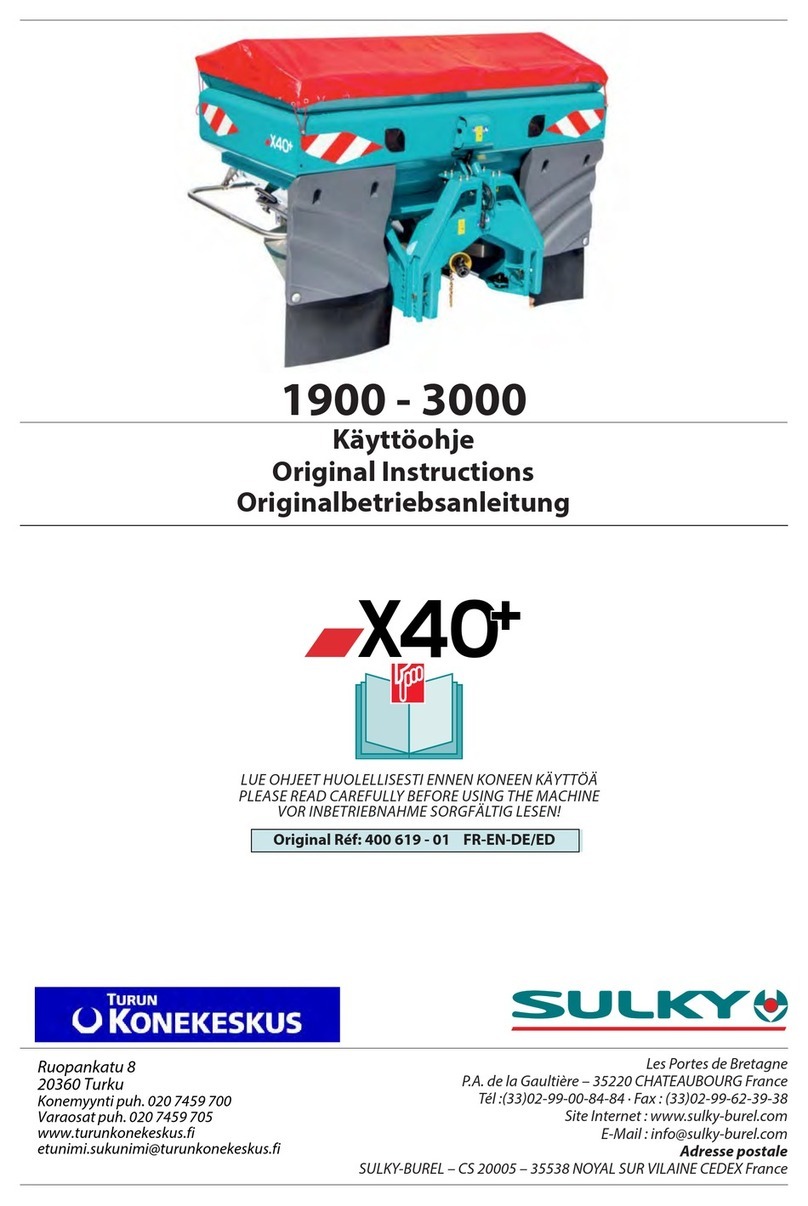
Sulky X50+ 2400 Operation instructions

Orginalinstruktioner
VÄNLIGEN LÄS NOGGRANT INNAN ANVÄNDNING AV MASKINEN
Original Instructions
PLEASE READ CAREFULLY BEFORE USING THE MACHINE
Les Portes de Bretagne
P.A. de la Gaultière – 35220 CHATEAUBOURG France
Tél :(33)02-99-00-84-84 · Fax : (33)02-99-62-39-38
Site Internet : www.sulky-burel.com
Adresse postale
SULKY-BUREL – CS 20005 – 35538 NOYAL SUR VILAINE CEDEX France
Réf: 400957 - 01 EN-SE/ FD
2400 - 3200 - 4000
+
5


1
Kära kund,
Ni har valt vår spridare och vi vill tacka er
för ert förtroende för vårt material.
För att säkerställa korrekt drift och för
att du ska få ut det mesta av din spridare,
rekommenderar vi att du läser dessa
anvisningar noggrant.
Tveka inte på att ge oss dina förslag
och kommentarer på produkten. De är
alltid användbara för att förbättra våra
produkter.
Vi skulle vara tacksamma om du
kunde skicka tillbaka en korrekt ifylld
garantikupong.
Vi hoppas att din gödselspridare kommer
att ge dig en lång och problemfri drift.
Med vänlig hälsning
J. BUREL
Ordförande
Dear Customer,
Thank you for trusting our equipment and choosing the
spreader.
To ensure correct operation, and to get the most out
of your spreader, we recommend that you read these
instructions carefully.
Please do not hesitate to give us your suggestions and
comments based on your experience. They are always
useful for improving our products.
We would be grateful if you could return the duly
completed guarantee coupon.
We hope your fertilizer spreader will provide long and
trouble-free service.
Yours sincerely.
J. BUREL
Chairman
Dear customer / Kära kund
SE

MASKINEN ÖVERENSSTÄMMER MED DE RELEVANTA
VILLKOREN IDET
EUROPEISKA MASKINDIREKTIVET 2006/42/EC
MASKINEN ÖVERENSSTÄMMER OCKSÅ MED
TERMERNA IFÖLJANDE DIREKTIV: DIREKTIVET
EMC 2004/108/EC
THE MACHINE CONFORMS TO THE
RELEVANT TERMS OF THE EUROPEAN
MACHINERY DIRECTIVE 2006/42/EC.
THE MACHINE ALSO CONFORMS TO THE TERMS OF THE
FOLLOWING DIRECTIVES: DIRECTIVE EMC 2004/108/
EC
SULKY-BUREL
PA DE LA GAULTIÈRE
35220 CHATEAUBOURG FRANCE
Julien BUREL
PA DE LA GAULTIÈRE
35220 CHATEAUBOURG FRANCE
SPREADER
SPRIDARE
X 50+
In accordance with Appendix 2, Section 1, Point A of the European Machinery Directive 2006/42/EC.
I enlighet med Bilaga 2, Avsnitt 1, Punkt A i det europeiska maskindirektivet 2006/42/EC
SIGNED:
SIGNERAT:
J. BUREL
CHAIRMAN
ORDFÖRANDE
EN SE
MANUFACTURER’SNAME AND ADDRESS :
TILLVERKARENS NAMN OCH ADRESS:
NAME AND ADDRESS OF THE PERSON AUTHORISED
TO COMPILE THE TECHNICAL SPECIFICATIONS:
NAMN OCH ADRESS TILL DEN PERSON SOM ÄR BEHÖRIG
ATT SAMMANSTÄLLA DE TEKNISKA SPECIFIKATIONERNA:
MACHINE DESCRIPTION :
MASKINBESKRIVNING:
TYPE :
TYP :
SERIAL NUMBER :
SERIENUMMER:
ACCESSORIES:
TILLBEHÖR:
ESTABLISHED IN CHATEAUBOURG: OCTOBER 2015
ETABLERAT ICHATEAUBOURG: OKTOBER 2015
Declaration of Conformity
Försäkran om överensstämmelse
2

Safety regulations EN
ჀThese symbols are used in these instructions every time recommendations are provided concerning your safety, the safety of others or the correct
operation of the machine.
ჀThese recommendations must be given to all users of the machine.
GENERAL SAFETY REGULATIONS
Every time the tractor/machine assembly is to be
started up and used, you should ensure beforehand
that it complies with current legislation on safety at
work and Road Trac regulations.
GENERAL
1 - In addition to the instructions contained in this
manual, legislation relating to safety instructions
and accident prevention should be complied with.
2 - Warnings axed to the machine give indications
regarding safety measures to be observed and help
to avoid accidents.
3 - When travelling on public roads, abide by the
provisions of the Highway Code.
4 - Before starting work, it is essential that the user
familiarizes himself with the control and operating
elements of the machine and their respective
functions. When the machine is running, it may be
too late.
5 - The user should avoid wearing loose clothing
which may be caught up in the moving parts.
6 - We recommend using a tractor with a safety cab
or roll bar conforming to standards in force.
7 - Before starting up the machine and beginning
work, check the immediate surroundings,
particularly for children. Make sure that visibility is
adequate. Clear any persons or animals out of the
danger zone.
8 - It is strictly forbidden to transport any persons
or animals on board the machine whether it is in
operation or not.
9 - The machine should only be coupled up to the
tractor at the specially provided towing points and in
accordance with applicable safety standards.
10 - Extreme care must be taken when coupling or
uncoupling the machine from the tractor.
11 - Before hitching up the machine, ensure that
the front axle of the tractor is suciently weighted.
Ballast weights should be tted to the special
supports in accordance with the instructions of the
tractor manufacturer.
12 - Do not exceed the maximum axle weight or the
gross vehicle weight rating.
13 - Do not exceed the maximum authorized
dimensions for using public roads.
14 - Before entering a public road, ensure that the
protective and signalling devices (lights, reectors,
etc.) required by law are tted and working properly.
Replace burnt out bulbs with the same types and
colours.
15 - All remote controls (cords, cables, rods, hoses,
etc.) must be positioned so that they cannot
accidentally set o any manoeuvre which may cause
an accident or damage.
16 - Before entering a public road, place the machine
in the transport position, in accordance with the
manufacturer’s instructions.
17 - Never leave the driver’s position whilst the
tractor is running.
18 - The speed and the method of operation must
always be adapted to the land, roads and paths.
Avoid sudden changes of direction under all
circumstances.
19 - Precision of the steering, tractor adhesion, road
holding and eectiveness of the braking mechanism
are inuenced by factors such as the weight and
nature of the machine being towed, the front axle
stage and the state of the land or path. It is essential,
therefore, that the appropriate care is taken for each
situation.
20 - Take extra care when cornering, taking account
of the overhang, length, height and weight of the
machine or trailer being towed.
21 - Before using the machine, ensure that
all protective devices are tted and in good
condition. Damaged protectors should be replaced
immediately.
22 - Before using the machine, check that nuts and
screws are tight, particularly those for attaching
tools (discs, ickers, deectors, etc.). Tighten if
necessary.
23 - Do not stand in the operating area of the
machine.
24 - Caution! Be aware of any crushing and shearing
zones on remote-controlled and particularly
hydraulically-controlled parts.
25 - Before climbing down from the tractor, or before
any operation on the machine, turn o the engine,
remove the key from the ignition and wait until all
moving parts have come to a standstill.
26 - Do not stand between the tractor and the
machine until the handbrake has been applied and/
or the wheels have been wedged.
27 - Before any operation on the machine, ensure
that it cannot be started up accidentally.
28 - Do not use the lifting ring to lift the machine
when it is loaded.
29 - When loading, adjusting, using, servicing and
washing the machine, the user should wear personal
protective equipment adapted to the products used
with the machine.
The user should be protected by wearing an overall,
gloves, glasses and safety shoes and a mask. Such
protective equipment should ensure a level of
protection suited to the products used with the
machine; refer to the safety regulations of the
products used.
PROPER USE OF THE MACHINE
The Spreader must only be used for tasks for which it
has been designed.
The manufacturer will not be liable for any damage
caused by using the machine for applications other
than those specied by the manufacturer.
Using the machine for purposes other than those
originally intended will be done so entirely at the
user’s risk.
Proper use of the machine also implies:
- complying with instructions on use, care and
maintenance provided by the manufacturer;
- using only original or manufacturer recommended
spare parts, equipment and accessories.
The Spreader must only be operated, maintained
and repaired by competent persons, familiar with
the specications and methods of operation of the
machine. These persons must also be informed of the
dangers to which they may be exposed.
The user must strictly abide by current legislation
regarding:
- accident prevention;
- safety at work (Health and Safety Regulations);
- transport on public roads (Road Trac
Regulations).
Strict compliance with warnings axed to the
machine is obligatory.
The owner of the equipment shall become liable for
any damage resulting from alterations made to the
machine by the user or any other person, without the
prior written consent of the manufacturer.
- The noise emission value measured at the driving
position with the cab closed (level of acoustic
pressure) is 74 dB(A).
Measuring device: SL 401
Position of the microphone placed in accordance
with Paragraph B 2.6 of Appendix B of NF EN ISO
4254-1.
This level of acoustic pressure essentially depends on
the tractor used.
HITCHING
1 - When hitching or unhitching the machine from
the tractor, place the control lever of the hydraulic lift
in such a position that the lifting mechanism cannot
be activated accidentally.
2 - When hitching the machine to the three-point
lifting mechanism of the tractor, ensure that the
diameters of the pins or gudgeons correspond to the
diameter of the tractor ball joints.
3 - Caution! In the three-point lifting zone, there may
be a danger of crushing and shearing.
4 - Do not stand between the tractor and the
machine whilst operating the external lift control
lever.
5 - When in transport, lifting mechanism stabilizer
bars must be tted to the machine to avoid oating
and side movement.
6 - When transporting the machine in the raised
position, lock the lift control lever.
7 - Never unhitch the machine when the hopper is
full.
DRIVE EQUIPMENT
(Power take-o and universal drive shafts)
1 - Only use universal drive shafts supplied with the
3
Danger
Moving parts,
keep away
Caution Payload should
not be exceeded
Risk of damage
to the machine
Risk of accident Operating tip
Risk of damage
to the machine
Consult the
instruction leaet
Fall hazard. Do not
climb on the machine.

EN
machine or recommended by the manufacturer.
2 - Power take-o and universal drive shaft guards
must always be tted and in good condition.
3 - Ensure that the tubes of the universal drive shafts
are properly guarded, both in the working position
and in the transport position.
4 - Before connecting or disconnecting a universal
drive shaft, disengage the power take-o, turn o
the engine and re-move the key from the ignition.
5 - If the primary universal drive shaft is tted with
a torque limiter or a free wheel, these must be
mounted on the machine power take-o.
6 - Always ensure that universal drive shafts are
tted and locked correctly.
7 - Always ensure that universal drive shaft guards
are immobilized in rotation using the specially
provided chains.
8 - Before engaging power take-o, ensure that
the speed selected and the direction of rotation of
the power take-o comply with the manufacturer’s
instructions.
9 - Before engaging power take-o, ensure that no
persons or animals are close to the machine.
10 - Disengage power take-o when the
universal drive shaft angle limits laid down by the
manufacturer are in danger of being exceeded.
11 - Caution! When power take-o has been
disengaged, moving parts may continue to rotate
for a few moments. Do not approach until they have
reached a complete standstill.
12 - On removal from the machine, rest the universal
drive shafts on the specially provided supports.
13 - After disconnecting the universal drive shafts
from the power take-o, the protective cap should be
tted to the power take-o.
14 - Damaged power take-o and universal drive
shaft guards must be replaced immediately.
HYDRAULIC CIRCUIT
1 - Caution! The hydraulic circuit is pressurized.
2 - When tting hydraulic motors or cylinders,
ensure that the circuits are connected correctly in
accordance with the manufacturer’s guidelines.
3 - Before tting a hose to the tractor’s hydraulic
circuit, ensure that the tractor-side and machine-side
circuits are not pressurized.
4 - The user of the machine is strongly recommended
to identify the hydraulic couplings between the
tractor and the machine in order to avoid wrong
connection. Caution! There is a danger of reversing
the functions (for example: raise/lower).
5 - Check hydraulic hoses once a year:
. Damage to the outer surface
. Porosity of the outer surface
. Deformation with and without pressure
. State of the ttings and seals
The maximum working life for hoses is 6 years.
When replacing them, ensure that only hoses with
the specications and grade recommended by the
machine manufacturer are used.
6 - When a leak is found, all necessary precautions
should be taken to avoid accidents.
7 - Pressurized liquid, particularly hydraulic circuit
oil, may cause serious injury if it comes into contact
with the skin. If the case of injury, consult a doctor
immediately. There is a risk of infection.
8 - Before any operation on the hydraulic circuit,
lower the machine, release the pressure from the
circuit, turn o the engine and remove the key from
the ignition.
MAINTENANCE
1 - Before commencing any maintenance, servicing
or repair work, or before attempting to locate the
source of a breakdown or fault, it is essential that the
power take-o is disengaged, the engine turned o
and the key removed from the ignition.
2 - Check regularly that nuts and screws are not
loose. Tighten if necessary.
3 - Before carrying out maintenance work on a
raised machine, prop it up using appropriate means
of support.
4 - When replacing a working part (fertilizer spreader
blade or seed drill coulter), wear protective gloves
and only use appropriate tools.
5 - To protect the environment, it is forbidden to
throw away oil, grease or lters of any kind. Give
them to specialist recycling rms.
6 - Before operating on the electric circuit, disconnect
the power source.
7 - Protective devices likely to be exposed to wear
and tear should be checked regularly. Replace them
immediately if they are damaged.
8 - Spare parts should comply with the standards
and specications dened by the manufacturer.
Only use the manufacturer’s original parts.
9 - Before commencing any electric welding work
on the tractor or the towed machine, disconnect the
alternator and battery cables.
10 - Repairs aecting parts under stress or pressure
(springs, pressure accumulators, etc.) should be
carried out by suitably qualied engineers with
special tools.
DANGER
1
Rotating agitator
2
Rotating disc
Projection of fertilizer
3
Risk of pinching or crushing
4
1
3
2
2

ALLMÄNA SÄKERHETSFÖRESKRIFTER
Varje gång traktorn/maskinen startas och användas,
bör du försäkra sig om att den överensstämmer med
gällande lagstiftning om säkerhet på arbetsplatsen
och vägtrakbestämmelser.
ALLMÄNT
1 - Förutom instruktionerna i denna manual så
ska lagstiftningen om säkerhetsinstruktioner och
förebyggande av olyckor följas.
2 - Varningar som sitter på maskinen indikerar
säkerhetsåtgärder som skall iakttas och bidra till att
olyckor undviks
3 - När du kör på allmän väg ska du följa trakregler.
4 - Innan arbetet påbörjas är det viktigt att
användaren bekantar sig med styr- och driftelement
för maskinen och dess respektive funktioner. När
maskinen väl är igång kan det vara för sent.
5 - Användaren bör undvika att bära löst sittande
kläder som kan fastna i de rörliga delarna.
6 - Vi rekommenderar att du använder en traktor
med en säkerhetshytt eller störtbågar som
överensstämmer med gällande föreskrifter.
7 - Innan du startar maskinen och arbetet påbörjas,
kontrollera den närmaste omgivningen, särskilt
efter barn. Se till att sikten är tillräcklig. Avvisa alla
personer eller djur ut ur farozonen.
8 - Det är strikt förbjudet att transportera personer
eller djur ombord på maskinen vare sig den är i drift
eller inte.
9 - Maskinen får endast kopplas till traktorn vid
specika bogseringspunkter och i enlighet med
gällande säkerhetsföreskrifter.
10 - Stor försiktighet måste vidtas när maskinen
kopplas eller frånkopplas från traktorn.
11 - Innan påkoppling av maskinen till traktorn,
se till att framaxeln på traktorn är tillräckligt viktad.
Ballastvikter bör anpassas till de särskilda stöden i
enlighet med instruktionerna från traktortillverkaren.
12 - Överskrid inte det maximala axeltrycket eller den
tillåtna totalvikten.
13 - Se till att inte överskrida de högsta tillåtna
dimensionerna för körning på allmän väg.
14 - Innan du kör på en allmän väg, se till att de
skydds- och signalanordningar (lampor, reexer, etc.)
som krävs enligt lag är monterade och fungerar. Byt
ut söndriga lampor med samma typ och färg vid
behov.
15 - Alla kontrollanordningar (sladdar, kablar,
stänger, slangar, osv.) måste placeras så att de inte av
misstag kan leda till en manöver som kan orsaka en
olycka eller skada.
16 - Innan du kör in på en allmän väg, ställ in
maskinen på transportläge i enlighet med
tillverkarens anvisningar.
17 - Lämna aldrig förarsätet medan traktorn ännu
är igång.
18 - Hastigheten och arbetssätt måste alltid
anpassas till mark, vägar och stigar. Undvik alltid
plötsliga svängar/riktningsändringar.
19 - Precision för styrning, traktorns
vidhäftningsförmåga, väghållning och eektivitet
för bromsmekanismen påverkas av faktorer såsom
vikten och karaktären hos maskinen som bogseras,
framaxelns stadie och vad marken eller vägen har
för tillstånd. Det är därför viktigt att lämplig skötsel
vidtas för varje enskild situation.
20 - Var extra försiktig vid kurvor med hänsyn till
utskjutande delar, längd, höjd och vikt på maskinen
eller när släpvagnen bogseras.
21 - Innan du använder maskinen, se till att alla
skyddsanordningar är monterade och i gott skick.
Skadade skydd bör bytas ut omedelbart.
22 - Innan du använder maskinen, kontrollera att
skruvar och muttrar är åtdragna, särskilt de för att
fästa redskap (skivor, imrar, deektorer, etc.). Dra åt
vid behov.
23 - Benn dig inte i maskinens driftområde.
24 - Varning! Var uppmärksam på eventuella zoner
för krossning och/eller strimling på ärrstyrda och i
synnerhet hydrauliskt styrda delar.
25 - Innan du klättrar ner från traktorn eller innan
någon åtgärd utförs på maskinen, stäng av motorn,
ta ur nyckeln ur tändningslåset och vänta tills alla
rörliga delar har stannat.
26 - Benn dig inte mellan traktor och maskinen
innan handbromsen har tillämpats och/eller hjulen
är fastkilade.
27 - Innan någon åtgärd utförs på maskinen, se till
att den inte kan startas av misstag.
28 - Använd inte lyftringen för att lyfta maskinen när
den är lastad.
29 - Vid lastning, inställning, användning
och underhåll och tvättning av maskinen ska
användaren bära personlig skyddsutrustning som är
anpassad för produkter som används tillsammans
med maskinen.
Användaren ska bära heltäckande overall, handskar,
skyddsglasögon, skyddsskor och mask. Denna
utrustning ska garantera en skyddsnivå anpassad
efter de produkter som används tillsammans med
maskinen. Vi hänvisar till säkerhetsföreskrifterna för
de produkter som används.
KORREKT ANVÄNDNING AV MASKINEN
Gödselspridaren får endast användas för de uppgifter
som den har konstruerats för.
Tillverkaren ansvarar inte för skador som orsakats
på grund av användning av maskinen för ändamål
som den inte är avsedd för att göra av tillverkaren.
Användning av maskinen för andra ändamål än det
den är avsedd för kommer att ske helt på egen risk av
användaren.
Korrekt användning av maskinen innebär även:
- att följa instruktioner om användning, skötsel och
underhåll som tillhandahålls av tillverkaren;
- att bara använda originaldelar eller reservdelar,
utrustning och tillbehör som är rekommenderade av
tillverkaren.
Spridaren får endast användas, underhållas och
repareras av kompetenta personer, bekanta med
specikationerna och metoderna för drift av
maskinen. Dessa personer måste också informeras
om de faror som de kan utsättas för.
Användaren måste strikt följa gällande lagstiftning
om:
- olycksförebyggande;
- säkerhet på arbetsplatsen (Hälsa och
säkerhetsföreskrifter);
- transport på allmän väg (trakregler).
Strikt överensstämmelse med varningar fästa på
maskinen är obligatoriskt.
Ägaren av utrustningen är ansvarig för eventuella
skador till följd av ändringar som gjorts på maskinen
av användaren eller någon annan person, utan
skriftligt medgivande från tillverkaren.
- Buller som uppmätts vid förarplatsen med hytten
stängd (akustisk tryck) är 74 dB (A).
Mätanordning: SL 401
Position för mikrofonen placeras i enlighet med punkt
B 2.6 i bilaga B i NF EN ISO 4254-1.
Denna nivå av ljudtryck beror huvudsakligen på den
traktor som används.
PÅKOPPLING
1 - Vid påkoppling eller frånkoppling av maskinen på
traktorn, placera kontrollspaken för den hydrauliska
hissen i ett läge så att lyftanordningen inte kan
aktiveras av misstag.
2 - Vid påkoppling av maskinen till traktorns
trepunkts lyftmekanism, se till att diametern på
stiften eller hållarna motsvarar diametern av
traktorns kulleder.
3 - Varning! I tre-punktslyftområdet kan det nnas en
risk för kläm och skärskador.
4 - Vistas inte mellan traktorn och maskinen
samtidigt som den externa spaken för
lyftanordningen används.
5 - Vid transport, måste lyftmekanismens
stabiliseringsstag monteras på maskinen för att
undvika sidorörelse och att den yter iväg.
6 - Vid transport av maskinen i uppfällt läge, lås
lyftstyrspaken.
7 - Haka aldrig loss maskinen när behållaren är full.
DRIFTUTRUSTNING
(Kraftuttag och universaldrivaxlar)
1 - Använd endast universella drivaxlar som
levererades med maskinen eller rekommenderas av
tillverkaren.
2 - Skydd för kraftuttag och universella drivaxlar ska
alltid vara monterade och vara i gott skick.
3 - Se till att rören för de universella drivaxlarna
är ordentligt skyddade, både i arbetsläge och
transportläge.
4 - Innan du ansluter eller kopplar en universell
drivaxel, koppla ur kraftuttaget, stäng av motorn och
ta ut nyckeln ur tändningslåset.
5 - Om den primära universella drivaxeln är utrustad
med en momentbegränsare eller ett frihjul, måste
dessa monteras på maskinens kraftuttag.
Säkerhetsföreskrifter
Dessa symboler används i dessa anvisningar varje gång rekommendationer är tillgänglig om din säkerhet, säkerheten för andra eller korrekt
användning av maskinen.
Dessa rekommendationer måste ges till alla användare av maskinen.
SE
Fara Rörliga delar,
håll avstånd
Varning Lastförmågan bör inte
överskridas
Risk för skada på
maskinen
Risk för olycka Arbetstips
Risk för skador
på maskinen
Konsultera
bruksanvisningen
Fallrisk. Klättra inte
upp på maskinen.
5

SE
6 - Se alltid till att universella drivaxlar är monterade
och fastlåsta på rätt sätt.
7 - Se alltid till att de universella drivaxlarnas skydd
är immobiliserade i rotation med hjälp av de speciellt
försedda kedjorna.
8 - Innan inledning/användning av kraftuttaget, se
till att den valda hastigheten och rotationsriktning
av kraftuttaget överensstämmer med tillverkarens
anvisningar.
9 - Innan inledning/användning av kraftuttaget, se
till att inga människor eller djur nns i närheten av
maskinen.
10 - Frigör kraftuttaget när vinkeln för den universella
drivaxelns gräns, som fastställts av tillverkaren,
riskerar att överskridas.
11 - Varning! När kraftuttaget är urkopplat, kan
rörliga delar fortsätta att rotera en stund. Närma dig
inte förrän de står helt stilla.
12 - Vid avlägsnande från maskinen, lägg de
universella drivaxlarna på de specikt anordnade
stöden.
13 - Efter frånkoppling av de universella drivaxlarna
från kraftuttaget, bör skyddslocket monteras på
kraftuttaget.
14 - Skadade skydd för kraftuttag och unviresella
drivaxlar måste ersättas omedelbart.
HYDRAULISK KRETS
1 - Varning! Den hydrauliska kretsen är trycksatt.
2 - Vid montering av hydrauliska motorer eller
cylindrar, se till att kretsarna är korrekt anslutna i
enlighet med tillverkarens anvisningar.
3 - Innan du fastmonterar en slang till traktorns
hydrauliska krets, se till att traktorns och maskinens
kretsar inte är trycksatta.
4 - Användaren av maskinen rekommenderas starkt
att fastställa/identiera de hydrauliska kopplingarna
mellan traktorn och maskinen för att undvika
anslutningsfel. Varning! Det nns risk för omvända
funktioner(till exempel: höja/sänka).
5 - Kontrollera de hydrauliska slangarna årligen:
. Skador på den yttre ytan
. Porositeten hos den yttre ytan
. Deformation med och utan tryck
. Skick hos beslag och tätningar
Den maximala livslängden för slangar är 6 år.
Vid byte av dem, se till att endast slangar med
specikationer och kvalitet som rekommenderas av
maskintillverkaren används.
6 - När en läcka har hittats bör alla nödvändiga
åtgärder vidtas för att undvika olyckor.
7 - Trycksatt vätska, särskilt hydraulkretsens olja kan
orsaka allvarliga skador om det kommer i kontakt
med huden. Vid skada, kontakta läkare omedelbart.
Det kan nnas risk för infektion.
8 - Innan någon åtgärd utförs på den hydrauliska
kretsen, sänk ner maskinen, frigör trycket från
kretsen, stäng av motorn och ta ur nyckeln ur
tändningslåset.
UNDERHÅLL
1 - Innan underhåll, service och reparationsarbeten,
eller innan du försöker lokalisera källan till ett haveri
eller fel är det viktigt att kraftuttaget är frånkopplat,
motorn är avstäng och nyckeln är urtagen ur
tändningslåset.
2 - Kontrollera regelbundet att skruvar och muttrar
inte sitter löst. Dra åt vid behov.
3 - Innan du utför underhållsarbete på en upphöjd
maskin, använd lämpliga stöd för försörjning.
4 - Vid byte av en verksam del (gödselspridarens blad
eller delar på såmaskinen), använd skyddshandskar
och bara lämpliga verktyg för uppgiften.
5 - För att skydda miljön är det förbjudet att på
egen hand slänga olja, fett eller lter av något slag.
Låt istället specialiserade återvinningsföretag göra
avfallshanteringen.
6 - Innan du hanterar den elektriska kretsen, koppla
bort strömkällan.
7 - Skyddsanordningar som kan komma att utsättas
för slitage ska kontrolleras regelbundet. Byt ut dem
omedelbart om de är skadade.
8 - Reservdelar ska uppfylla de standarder och
specikationer som fastställts av tillverkaren. Använd
endast tillverkarens originaldelar.
9 - Innan några elektriska svetsarbeten utförs på
traktorn eller den bogserade maskinen, koppla bort
generator och batterikablarna.
10 - Reparationer som påverkar delar under
påfrestning eller tryck (ädrar, tryckackumulatorer
osv) bör utföras av lämpligt kvalicerade ingenjörer
med specialverktyg.
FARA
1
Roterande omrörare
2
Roterande skiva
Projektion av gödselmedel
3
Risk för klämskador eller krossning
6
1
3
3
2
2

English CONTENTS
Pages
Pages
Pages
Pages
Pages
Read the instruction manual carefully before use. The better you understand your
spreader, the better you will be able to use it.
For English instructions follow this symbol EN .
1
2
3
4
5
98
98-99
98-99
• A
• B
• C
Sticker positions
Identication
Technical Specications
SPECIFICATIONS
88-89
90-91
92-93
92-93
92-93
• A
• B
• C
• D
• E
Anti-compaction bae
Hopper cover
W VISION control kit
W ISOBUS control kit
“Télé-space” universal joint
94-95
94-95
94-95
94-95
96-97
• F
• G
• H
• I
• J
Parking wheel
Mud guard
Hopper extension
1000 rpm PTO kit
Fitting the supports
FITTING THE ACCESSORIES
78-79
80-81
82-83
84-87
• A
• B
• C
• D
Washing
Lubrication
Checks
Calibration check
MAINTENANCE
36-43
44-51
52-65
66-71
72-75
• A
• B
• C
• D
• E
Setting the ow rate
Setting the width
Checking the width
Border setting with the tribord
Environmental border
optimisation with the tribord
76-77 • F Border setting
with the ecobord vane
SETTINGS
STARTUP
10-11
10-11
12-13
16-17
18-21
• A
• B
• C
• D
• E
Use
Handling
Tractor control
Hitching gear
Drive assembly
22-33
34-35
34-35
• F
• G
• H
Control connections
Loading
Emptying
7

8

1
2
3
4
5
9
Svenska INNEHÅLL
98
98-99
98-99
• A
• B
• C
Självhäftande etiketter
Identiering
Teknisk specikation
88-89
90-91
92-93
92-93
92-93
• A
• B
• C
• D
• E
Anti-packningsplatta
Presenning
Styrsats W VISION
Styrsats W ISOBUS
Kardankoppling "Télé-space"
94-95
94-95
94-95
94-95
96-97
• F
• G
• H
• I
• J
Parkeringshjul
Stänkskydd
Matartrattsförlängning
PDF 1000 varv/min-kit
Montering av stöden
78-79
80-81
82-83
84-87
• A
• B
• C
• D
Rengöring
Infettning
Kontroller
Kalibreringskontroll
36-43
44-51
52-65
66-71
• A
• B
• C
• D
Flödesinställning
Breddinställning
Kontroll av bredden
Kantinställning med tribord
72-75
76-77
• E
• F
Miljöanpassad kantoptimering
med Tribord
Kantsinställning med ecobord-
blad
10-11
10-11
14-15
16-17
18-21
• A
• B
• C
• D
• E
Användning
Hantering
Traktorkontroll
Påkoppling
Drivaggregat/ Transmission
22-33
34-35
34-35
• F
• G
• H
Anslutningar av kontroller
Påfyllning
Tömning
Sidor
Sidor
Sidor
Sidor
Sidor
Läs manualen noga före användning. Ju mer kunskap du har, desto bättre och
säkrare kan du sprida gödningen. För engelska följ symbolen: SE
SPECIFIKATION
MONTERING AV TILLBEHÖR
UNDERHÅLL
INSTÄLLNINGAR
UPPSTART

Var försiktig när du lyfter
maskinen; Kontrollera
att ingen är i den direkta
omgivningen.
Ta bort alla fästanordningar
eller skydd som varit
nödvändiga vid
maskintransporten.
Take care when lifting the
machine; check that there is
no-one around.
Remove all xtures or
guards installed on the
machine, for transport
purposes.
101010
Start-up / Uppstart
A
B
1

SE
XAnvändning
- Kontrollera att din utrustning är komplett vid leverans.
- Se till att det inte nns några främmande föremål i
matartratten.
• Maskinen får bara användas för arbeten som den har
utformats för.
- Kontrollera att maskinen inte har skadats under
transporten och att inga delar saknas.
• Endast reklamationer som framställs vid mottagande av
maskinen beaktas
- Eventuella skador ska rapporteras till transportföretaget.
Om du är osäker eller i händelse av klagomål, kontakta
din återförsäljare.
Maskinen är utrustad med en hjälpanordning för
lastning
1
.
Användningen av denna anordning måste genomföras :
- med maskinen fastkopplad vid traktorn,
- med maskinen placerad på plant underhåll, till exempel
en betongyta,
- traktorns motor avstängd,
- traktorns parkeringsbroms åtdragen.
Hantering
- Använd särskilt avsedda hål i matartratten. (Tom
matartratt)
B
B
A
1
EN
AUse
- Check that your equipment is complete on delivery.
- Make sure that there are no foreign bodies in the hopper.
• The machine should be used only for tasks for which it has
been designed.
- Check that the machine has not suered any damage
during transport and that no parts are missing.
• Only claims made on taking delivery of the machine will be
considered.
- Any damage should be reported to the carrier.
If in doubt or in the event of any complaint, please
contact your dealer.
The machine is tted with a device to assist loading
1
.
This device should be used as follows:
- With the machine hitched to the tractor.
- The machine should be placed on level ground, for
example a concrete surface.
- The tractor’s engine should be switched o.
- The tractor’s parking brake should be engaged.
Handling
- Use the specially provided ring in the hopper.
111111
Start-up / Uppstart

The weight on the tractor’s
front axle should be at least
20% of the unladen weight
of the tractor.
Start-up
12
ᇗM1mini = M2 x (c + d) - P1 x b + (0,2 x P x b) =..........................Kg
a + b
ᇗP1c =
M1 x (a + b) + P1 x b - M2 x (c + d) =..........................Kg
b
ᇗPc = M1 + P + M2 =..........................Kg
ᇗP2c = Pc - P1c =..........................Kg
12
X
M1
P M2
b c da
P1
P2
C

1
EN
C
ᇗM1 mini = Calculation of the minimum ballast need in front. ᇗP1c = Calculation of the weight on the front axle
ᇗPc = Calculation of the total weight of the unit (tractor + machine) ᇗP2c = Calculation of the weight on the rear axle
PKgUnladen weight of tractor
Consult the tractor’s instruction manual or the regis-
tration documents.
P1 Kg Weight on the front axle when the tractor is empty
P2 Kg Weight on the rear axle when the tractor is empty
M2 Kg Total weight with machine attached to rear Consult the machine’s technical characteristics. (see
section 5“Characteristics”).
M1 Kg Total weight of front ballast Consult the technical characteristics of the tractor
and the front ballast, or measure.
am
Distance between the centre of gravity of the front ballast
and the centre of the front axle
bmWheelbase of tractor Consult the instruction manual or the tractor’s regis-
tration documents, or measure.
cm
Distance between the lower linkage pins and the centre of
the rear axle. Consult the instruction manual or the tractor’s regis-
tration documents, or measure.
dm
Distance between the lower linkage pins and the centre of
gravity of the machine.
Consult the technical characteristics of the machine.
(see section 5“Charactéristics”).
Tractor control
- To be checked :
• The total authorised weight.
• The permitted weight per axle.
• The authorised support weight on the tractor’s linkage.
• The permissible load capacity for the tyres tted to the tractor.
• Is the authorised linkage weight sucient?
All of this information can be found on the registration papers, or on the data plate and in the tractor manual.
FIGURES THAT YOU SHOULD KNOW-
- Complete the table below:
- Check that:
• The values calculated should be < or = to the tractor’s permissible values and the values for
the tyres tted to the tractor.
• It is essential that the minimum load on the front axle is > or = to 20% of the unladen tractor
weight.
THE MACHINE MUST NOT BE HITCHED TO ATRACTOR IF :
ᇗThe total weight calculated is > than the maximum authorised weight.
ᇗThe weight on the front axle is < than the minimum required.
Start-up
Values
calculated Tractor’s
permissible values
Values permissible with
the tyres that are
tted to the tractor
P1c
P2c
Pc
1313

Belastningen på traktorns
främre hjulaxel ska vara lika
med minst 20 % av traktorns
egenvikt.
Uppstart
C
14
ᇗM1mini = M2 x (c + d) - P1 x b + (0,2 x P x b) =..........................Kg
a + b
ᇗP1c =
M1 x (a + b) + P1 x b - M2 x (c + d) =..........................Kg
b
ᇗPc = M1 + P + M2 =..........................Kg
ᇗP2c = Pc - P1c =..........................Kg
14
M1
P M2
b c da
P1
P2

1
SE
Uppstart
ᇗM1 mini = Beräkning av minsta barlastbehovet framtill. ᇗP1c = Beräkning av vikten på främre hjulaxeln
ᇗPc = Beräkning av den totala vikten av enheten (traktor + maskin) ᇗP2c = Beräkning av vikten på bakre hjulaxeln
Uträknade
värden Traktorns
tillåtna värden
Värden tillåtna för
däcken som är
monterad på traktorn
P1c
P2c
Pc
PKgTraktorns egenvikt
Kontrollera traktorns bruksanvisning eller registre-
ringsbevis.
P1 Kg Belastning på främre hjulaxeln när traktorn är tom
P2 Kg Belastning på bakre hjulaxeln när traktorn är tom
M2 Kg Totalvikt med maskinen ansluten baktill Kontrollera maskinens tekniska egenskaper. (se
avsnitt 5“Kännetecken”).
M1 Kg Totalvikt främre barlast Kontrollera de tekniska egenskaperna hos traktorn
och den främre barlasten.
am
Avståndet mellan tyngdpunkten för den främre barlasten
och mitten av den främre hjulaxeln
bmHjulbas på traktor Kontrollera bruksanvisningen eller traktorns registre-
ringsbevis.
cm
Avstånd mellan nedre kopplingstappen och bakre hjulax-
elns mittpunkt Kontrollera bruksanvisningen eller traktorns registre-
ringsbevis.
dm
Avstånd mellan nedre kopplingstappen och maskinens
tyngdpunkt
Kontrollera de tekniska egenskaperna hos maskinen.
(se avsnitt 5“Kännetecken”).
TraktorKontroll
- Att kontrollera :
• Den totala tillåtna vikten.
• Den tillåtna vikten per hjulaxel.
• Den godkända stödvikten på traktorns kopplingspunkt.
• Den tillåtna lastkapaciteten för däcken monterade på traktorn.
• Är tillåten kopplingsbelastning tillräcklig?
All information nns i traktorns registreringsbevis eller på traktorns maskinskylt och i traktormanualen
VAD DU BÖR KÄNNA TILL
- Fyll i tabellen ovan:
- Kontrollera att:
• De beräknade värdena bör vara < eller = i förhållande till traktorns tillåtna värden och värdena för däcken monterade på
traktorn.
• Det är viktigt att den minsta belastningen på främre hjulaxeln är > eller = 20% av traktorns egenvikt.
Maskinen får inte kopplas på en traktor om:
ᇗBeräkningarna för totalvikten är > än den högsta tillåtna vikten.
ᇗBelastningen på främre hjulaxeln är < än det minimum som krävs.
C
1515

Maxbelastning 4000 kg
Koppla endast bort
maskinen om
matartratten är tom
Maximum payload
4000 kg.
Only unhitch the machine if
the hopper is empty
161616
Start-up / Uppstart
D
//
A
1
a
b
c

SE
Påkoppling
Maskinen är utrustad med ett trepunkts gaelfäste kategori
II med undre skikt.
• Arbetspositionen för maskinen är horisontell och (A) 70 cm
ovanför marken
- Använd nivåindikatorn
1
för att justera spridaren
vinkelrätt.
-Överskrid inte spridarens eller traktorns maximala
belastning.
- Använd position
a
eller
b
eller
C
beroende av vilket
som är mest lämpligt för traktorn och arbetsförhållandet
(se avsnitt
2
om “Sen spridning”).
D
1
EN
Hitching gear
The machine is tted with a category II three-point clevis
hitch.
• The working position of the machine is horizontal and (A)
70 cm above the ground.
- Use the level indicator
1
to adjust the spreader
perpendicular.
- Do not exceed the maximum spreader or tractor load.
- Use position
a
or
b
or
c
whichever is most suitable for
the tractor and the working conditions (see section
2
on
“Late spreading”).
D
171717
Start-up / Uppstart

Se till att din
kraftöverföringsenheten
är skyddad, i gott skick
och överensstämmer med
gällande standarder.
Ingen garanti beviljas för
skador orsakade av en
kraftöverföringsaxel vars
längd inte är anpassad till
traktorn.
Ensure that your PTO drive
assembly is guarded, in
good condition and complies
with current standards.
The guarantee will not
cover damage caused to the
central gearbox assembly
by the PTO shaft if its length
has not been adjusted to the
tractor.
181818
Start-up / Uppstart
EL mini
L maxi
X
1/2 X
35°
35°
3cm
1
23
4
54
4
4
2
This manual suits for next models
2
Table of contents
Other Sulky Spreader manuals
Popular Spreader manuals by other brands

WilTec
WilTec 50144 Operation manual

Trynex International
Trynex International TurfEx RS7200E owner's manual

LEHNER
LEHNER SuperVario X Operating instructions with spare parts list

Buyers
Buyers TB150BG Assembly instructions

Egholm
Egholm City Ranger 3070 Operator's manual

Metal-Fach
Metal-Fach N 267 OPERATING INSTRUCTIONS, PARTS CATALOGUE