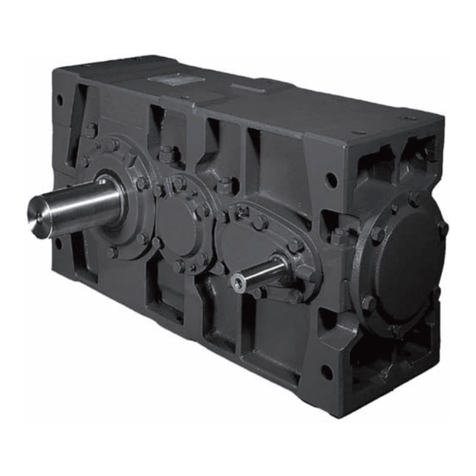
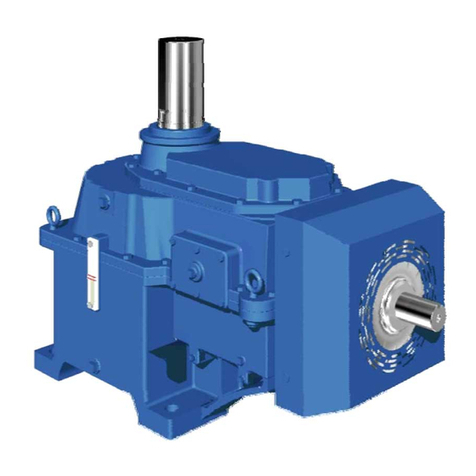
Sumitomo Drive Technologies PARAMAX SPA Series User manual

■ PARAMAX SINGLE STAGE DRIVES SPA Series should be handled, installed and
maintained by trained technicians. Carefully read the maintenance manual before use.
■ Oil is removed from PARAMAX SINGLE STAGE DRIVES SPA Series before shipment.
Supply oil according to the maintenance manual before operation.
■ A copy of this maintenance manual should be sent to the actual user of PARAMAX
SINGLE STAGE DRIVES SPA Series.
■ This maintenance manual should be maintained by the user.
PARAMAX DRIVE
Single Stage Drives SPA Series
Maintenance Manual GM2003E-1

1
Matters described in may lead to serious danger depending on the situation. Be sure to observe
important matters described herein.
DANGER
Transport, installation, plumbing, operation, maintenance, and inspections should be handled by properly
trained technicians ; otherwise, injury or damage to the machine may result.
Do not disassemble PARAMAX SINGLE STAGE DRIVES SPA Series during operation. Even if it is at rest,
do not disassemble any parts other than the oil inlet/outlet when the input/output shafts of the PARAMAX
SINGLE STAGE DRIVES SPA Series
is connected to a motor or other mating machines; otherwise falling or
operation out of control due to disengagement of gears, as well as death, injury, or damage to the machine may result.
Carefully read this maintenance manual and all accompanying documents before use (installation, operation,
maintenance, inspection, etc.). Thoroughly understand the machine, information about safety, and all precautions for
correct operation.
Maintain this manual for future reference.
Pay particular attention to the "DANGER" and "CAUTION" warnings regarding safety and proper use.
DANGER
CAUTION
The unit should be operated only within its design and performance specifications ; otherwise, injury or
damage to a system may occur.
Keep hands and all foreign objects from the internal moving parts of the unit ; otherwise, injury or damage to
a system may occur.
Damaged units should be taken off - line and not put back in operation until properly repaired.
Any modifications or alterations of any kind, to the unit, will void the warranty and all subsequent claims.
Do not remove the rating plate.
CAUTION
CAUTION
CONTENTS
Safety and other precautions.......................1
1. Inspection upon delivery ............................ 2
2. Storage....................................................... 3
3. Transport.....................................................3
4. Installation .................................................. 3
5. Coupling with other machines .................... 4
6. Lubrication.................................................. 5
7. Cooling Coil ............................................... 7
8. Operation ................................................... 8
9. Daily inspection and maintenance ............. 9
10. Troubleshooting ....................................... 10
11. Disassembly/reassembly and disposal .... 10
12. Construction drawing ............................... 11
13. Locations of oil filler and drain plug...........11
14. Warranty................................................... 12
Oil has been removed from PARAMAX
SINGLE STAGE DRIVES SPA Series
before shipment from our factory,
so supply recommended oil before use.
:Improper handling may result in physical damage, serious personal injury and/or
death.
: Improper handling may result in physical damage and/or personal injury.
(Safety and other precautions)
2
Upon delivery of the PARAMAX
SINGLE STAGE DRIVES SPA Series
, check the following :
(1)The descriptions on the rating plate conform to your order.
(2)There were no parts damaged during transport.
(3)All bolts and nuts are firmly tightened.
If there is any doubt that the unit delivered does not conform to the one ordered, contact the nearest agent, distributor or
service office.
1. Inspection upon delivery
.Have the MODEL, RATIO and SERIAL No. information ready when making inquiries.
MODEL
SERIAL NO.
RATIO S.F
kW
r/min
INPUT
R
JAPAN
S
U
4
5
4
4
9
0
5
4
Type of reducer
Reduction ratio
Input power
Service factor
Serial number
Fig. 1 Rating plate
CAUTION
Unpack the unit after verifying that it is positioned right side up ; otherwise, injury may result.
Verify that the unit received is in fact the one ordered. When a different product is installed, injury or damage
to the system may result.
Do not remove nameplate.
1-1) How to check the rating plate
1-2) Types of reducers
Symbols denote the following. Check that the type of reducer conforms to your order.
SPA
Series Size
Gear Stages
Shaft
Arrangement
Accessories Nominal
Ratio
P1
RL
LR
1.25
1.4
1.6
1.8
2
2.24
2.5
2.65
2.8
3
3.15
3.35
3.55
3.75
4
4.5
5
060
070
080
SPA 070 P1 14RL F
Parallel single
reduction
F
C
CF
: With cooling fan
: With cooling coil
: With cooling fan &
cooling coil
(Standard)
321

3
2. Storage
When storing PARAMAX SINGLE STAGE DRIVE SPA Series for any extended periods of time before use, consider
the following important points.
2-1) Temporary storage
(1)Store PARAMAX SINGLE STAGE DRIVE SPA Series in a clean, dry, covered storage area.
2-2) Long-term storage
(1)The oil seal will deteriorate when exposed to high temperatures and UV rays. Inspect and replace the oil seal after
long-term storage if there are any signs of damage or cracking.
(2)
After starting PARAMAX SINGLE STAGE DRIVE SPA Series, check that it is free from abnormal sound, vibration,
or heatbuild-up.
(If any kind of anomaly is observed) contact the nearest agent, dealer, or service office immediately.
.
(3)
Every 2 - 3 months after shipment, operate PARAMAX SINGLE STAGE DRIVE SPA Series with the recommended lubricant
for 5 - 10 minutes. If this is not possible, or when PARAMAX SINGLE STAGE DRIVE SPA Series is to be stored for more
than 6 months, fill the unit with the proper amount of vapor phase inhibitor (JIS NP20 or its equivalent)according to
the inhibitor manufacturers recommendations.
.Do not store PARAMAX SINGLE STAGE DRIVE SPA Series outdoors or in a wet location.
3. Transport
4. Installation
CAUTION
Exercise ample care not to drop PARAMAX
SINGLE STAGE DRIVE SPA Series
during transport. When a hanging bolt
or hole is provided, be sure to use it. After mounting PARAMAX
SINGLE STAGE DRIVE SPA Series
on a system,
however, do not hoist the entire system using the hanging bolt or hole.
Otherwise, personal injury or damage to the equipment and/or lifting device may result.
Before hoisting, check the weight with the rating plate, crate, performance specifications, catalog, etc. Never
hoist a PARAMAX
SINGLE STAGE DRIVE SPA Series
that exceeds the rating of the crane or other mechanism being
used to lift it ; otherwise, injury or damage to the unit and/or lifting device may occur.
DANGER
Never stand directly under a unit suspended by a crane or other lifting mechanism ; otherwise personal injury
or death may result.
CAUTION
Do not place any objects that will hinder ventilation around PARAMAX SINGLE STAGE DRIVE SPA Series; otherwise,
cooling effect is reduced, and may lead to a possible fire hazard due to excessive heat build-up.
Do not step on or hang from PARAMAX
SINGLE STAGE DRIVE SPA Series
; otherwise, injury or damage to the
machine may result.
Do not touch the key way at the shaft end or on the inside of PARAMAX
SINGLE STAGE DRIVE SPA Series
;
otherwise, injury may result.
Do not use PARAMAX
SINGLE STAGE DRIVE SPA Series
for purposes other than those shown on the rating plate or
in the manufacturing specifications; otherwise, electric shock, personal injury or damage to the equipment
may result.
Do not place flammable objects around PARAMAX SINGLE STAGE DRIVE SPA Series; otherwise, fire may result.

4
4-2 Installation angle
The installation angle shall be less than the limits shown in Fig.2.
4-1) Location of installation
Ambient temperature : 0 to +40 (+32 to +104
Ambient humidity : 85% max.
Ambient atmosphere : There shall be no corrosive gas, explosive gas.
The installation space shall be well ventilated, and free from dust.
Location of installation : Indoors or outdoors.
.Special specifications are necessary when installation conditions are other than those mentioned here.
In such cases contact the nearest agent, dealer or service office.
.When a product is made according to special specifications for outdoor use or use in explosive
environments, the product can be safely operated under those specified conditions without problem.
Fig.2 Limits for installation angle
Table1 Torque of the installation bolts
Unit SPA060 SPA070 SPA080
Bolt Size
−
M30 M36
Torque N・m1400 2430
Size
in・lbs 12390 21510
.Install PARAMAX SINGLE STAGE DRIVE SPA Series on a sufficiently rigid base.
.Use installation bolts corresponding to JIS strength class 8.8 or its equivalent. The torque of installation bolts is
shown in table1.
5. Coupling with other machines
CAUTION
Install appropriate guard devices around rotating parts ; otherwise, injury may result.
When coupling PARAMAX
SINGLE STAGE DRIVE SPA Series
with a load, confirm that the alignment error is
within
the specified limits shown in the maintenance manual, drawings, catalog, etc. ; otherwise, damage to
the system may result, due to misalignment.
Correctly tighten respective bolts to the specified torque shown in the drawing, catalog, etc. ; otherwise ;
scattering fragments may damage the system.
Remove the key temporarily attached to the output shaft of PARAMAX
SINGLE STAGE DRIVE SPA Series
when
the
shaft is free-rotating (i. e. not loaded) ; otherwise, injury may result.
IF a backstop is installed in the reducer, verify that the applied motor rotation direction is correct.
Difference in the direction of rotation may cause injury or damage to the system.
CC F)F
+1°
0+0.3°

5
5-1) Installation coupler
.When attaching a coupler, be careful not to apply impact force or excessive
thrust to the shaft ; otherwise, the bearing may be damaged.
.Shrink fit or shaft-end thread is recommended for mounting (Fig. 3)
The dimensions (A, B, and X)illustrated in Fig. 4 shall be within the tolerance
shown in Table 2.
Tolerance for A
dimension
Tolerance for B
dimension
X dimension
0.05mm
0.05mm
0.002in
0.002in
Specified by coupling
manufacturer
Table 2 Aligning tolerance for coupling
Coupler Shaft
Shaft end thread
Fig. 4
Fig. 3
6. Lubrication
6-1) Shipping condition
6-2) Method of lubrication
The oil splash lubrication method is used for PARAMAX
SINGLE STAGE DRIVES SPA Series
.
Under certain conditions, grease or forced lubrication should be used.
(1) Splash lubrication
(2) Forced lubrication
(3) Grease lubrication for bearings
Standard input shaft rotating speed range 450 1800r/min.
Grease lubrication will be required depending on an operating condition. In such case, the location and number of
grease nipples should be confirmed in advance. The bearings are packed with grease at the time of shipment.
Supply grease according to the input speed - every 1500 hours when the revolution is under 750r/min, and every
1000 hours when the revolution is 750-1800r/min.
6-3) Selection of lubricant
Refer to Table 3 to select mineral oil or synthetic oil.
Table 4 shows recommended lubricants.
.PARAMAX
SINGLE STAGE DRIVES SPA Series
units are shipped without oil. Supply recommended oil
before operation.
Table 3 Lubricant table
CAUTION
For a system in which a lubricant motor pump is provided separately, switch on the pump motor prior to
switching on the reducer motor. This will enable proper lubrication of the bearings prior to start up.
Failure to do so may damage the unit.
Use a flow switch and/or sight to verify that lubricant is circulating, and for emergency motor stop if necessary.
XX
A
B
Ambient temperature
100 r/min or more ISO* AGMA
*Kinetic Viscosity (cSt) at ISO 40 C
VG68 2EP VG150 4EP VG220 5EP
100 r/min or less ISO* AGMA VG100 3EP VG220 5EP VG320 6EP
Output speed - 10 C to +15 C +10 C to +50 C0 C to +30 C

6
Table 4 Recommended lubricants
6-4) Oil quantity
6-5) Oil supply
An estimated quantity of oil for standard specifications is shown in Table 5. The oil quantity shown in Table 5 and the
catalog is not exact. Use a dipstick or visible oil gauge to check the oil level.
Size Units
liters
gal(US)
SPA060 SPA070 SPA080
Oil Quantity
75 120 165
20 32 44
Table 5 Approx. quantity of oil
Brand BP SHELL TOTAL
ISO VG68
AGMA 2EP
ENERGOL
GR-XP-68
ALPHA
SP68
OPTIGEAR
BM68
TRIBOL
1100/68
GEAR
COMPOUNDS
EP68
MEROPA
WM68
SPARTAN
EP68
MOBIL-
GEAR
626
OMALA
68
CARTER
EP68
ISO VG100
AGMA 3EP
ENERGOL
GR-XP-100
ALPHA
SP100
OPTIGEAR
BM100
TRIBOL
1100/100
GEAR
COMPOUNDS
EP100
MEROPA
WM100
SPARTAN
EP100
MOBIL-
GEAR
627
OMALA
100
CARTER
EP100
ISO VG150
AGMA 4EP
ENERGOL
GR-XP-150
ALPHA
SP150
OPTIGEAR
BM150
TRIBOL
1100/150
GEAR
COMPOUNDS
EP150
MEROPA
WM150
SPARTAN
EP150
MOBIL-
GEAR
629
OMALA
150
CARTER
EP150
ISO VG220
AGMA 5EP
ENERGOL
GR-XP-220
ALPHA
SP220
OPTIGEAR
BM220
TRIBOL
1100/220
GEAR
COMPOUNDS
EP220
MEROPA
WM220
SPARTAN
EP220
MOBIL-
GEAR
630
OMALA
220
CARTER
EP220
ISO VG320
AGMA 6EP
ENERGOL
GR-XP-320
ALPHA
SP320
OPTIGEAR
BM320
TRIBOL
1100/320
GEAR
COMPOUNDS
EP320
MEROPA
WM320
SPARTAN
EP320
MOBIL-
GEAR
632
OMALA
320
CARTER
EP320
ENER-
GREASE
LS EP2
SPHEEROL
AP3
Olista Long-
time 3EP
TRIBOL
3020/
1000-2
DURALITH
GREASE 68
MULTI-
FAK EP2
BEACON
EP2
MOBILUX
EP2
ALVANIA
EP2
MULTIS
EP2
EXXON MOBIL
Gear Oil
Bearing grease
CASTROL CHEVRON TEXACO
Please remove drain plug located under the unit for oil draining when lubricating oil is still warm.
Removing the air breather makes draining and supplying oil easier.
Supply oil through the filling port on top of the main unit. Check the oil level with a dipstick or visible oil gauge
(Fig.5).
Screw the dipstick to its deepest position to check the oil level; otherwise, the measured oil level will be incorrect
(Fig.6).
Care should be maintained during the oil-filling process to ensure that loose nuts, bolts, washers, dust, water and other
such foreign material do not enter the unit.
If the oil level is lower than the range, the unit will not be lubricated.
If the oil level is higher than the range, deterioration of the oil is accelerated due to oil temperature rising.
The oil level should be
within this range
Fig.5
Fig.6
Dipstick Sight gauge (pipe type)
Sight gauge (window type)

7
7. Cooling coil
7-1) Specifications
· In the Sumitomo standard specifications, the temperature of the cooling water is 20°C and the flow rate is 5 lit./min.
However, the cooling effect is changed depending on the water temperature and flow rate. Please check the
manufacture specifications.
· If you want to use the water including salt or chemical materials as the cooling water, contact us.
· Keep the water pressure 0.8MPa (8 bar) or less for use.
7-2) Installation
· Please prepare a water circulation device by yourself.
· Connect the cooling water inlet and outlet to the reducer according to the manufacture specifications.
7-3) Maintenance and inspection
· When the cooling coil is not used for a long time or when it is stored without flowing water where the air temperature
is 0°C or less, remove water from its inside.
· If something adheres to the inside of the cooling coil, the cooling effect is lowered. Check the cooling coil
periodically. If something adheres, remove it.
· Remove the cooling coil according to the following procedure (refer to Fig. 7).
(1) Drain the oil through the drain plug.
(2) Remove the bolt (a).
(3) Put the removed bolt (a) into the screw hole (b) and remove the cover from the housing.
(4) The cover and cooling coil are regarded as one unit. Pull out the cover to remove the cooling coil.
Before installing the cooling coil, make sure that nothing adheres to the inner wall of the cooling coil.
Mount the gasket between the cover and the reducer’s housing.
Fig. 7 Points to be inspected for cooling coil
COVER
(b)
SCREW HOLE
(M12)
COOLING COIL
(a)
HEX.BOLT
(12-M12x40)
COOLING WATER INLET
COOLING WATER OUTLET
COVER
GASKET
DRAIN PLUG

8
8. Operation
After installation, check the following points prior to operation.
(2)Is the reducer correctly coupled with the mating machine ?
(1)Is the oil filled to the correct oil level ?
(3)Are foundation bolts firmly tightened ?
(4)Does the direction of rotation conform to the one specified and designed for ?
After confirming the above, allow for a no-load break-in period. Then gradually apply the design load.
At this time, confirm the following :
DANGER
Never approach or touch any rotating parts (shaft, etc.)during operation. Loose clothing caught in these
rotating parts may result in severe injury and/or death.
CAUTION
The reducer will get very hot during operation. Do not touch or come in contact in any way with the reducer ;
otherwise, you may suffer burns.
If the reducer is operating in an abnormal way, stop the unit immediatery ; otherwise, electric shock, personal
injury, or fire may result.
Do not operate the reducer in a manner that exceeds its rating criteria ; otherwise, injury or damage to the
system may result.
Do not remove any covers or open the reducer during operation ; otherwise, splashing lubricant may cause
burns.
Do not loosen the oil filler plug during operation ; otherwise, splashing lubricant may cause burns.
When reversing the direction of rotation, first bring the unit to a complete stop, then commence reverse
rotation ; otherwise, the system may be damaged.
Check the oil level with the oil gauge before operation.
When using pole change motors to change from high speed to low speed, control the fan rotation speed so that
regeneration braking torque does not act on the reducer.
If the reducer has a backstop installed and the reducer is not operated for an extended period, operate the unit
a minimum of 5 minutes for every 200 hours of non-operation.
Items to be checked during break-in period/possible causes.
Abnormal sound
and vibration
(1)The housing is deformed because the installation surface is irregular.
(2)Resonance is occurring due to the lack of rigidity of the installation base.
(3)The shaft center is not properly aligned with the motor.
(4)The vibration of the mating machine is transmitted to the reducer.
(1)The motor current has exceeded the rated current shown in the rating plate.
(2)The voltage rise and drop of the motor is too large.
(3)The ambient temperature at which the reducer is operating is too high.
(4) The oil is not at its specified level (too low or too high).
The surface
temperature of the
reducer is
abnormally high.
Table 6
When an anomaly is found, stop operation, and contact the nearest agent, dealer, or service office.

9
9. Daily inspection and maintenance
DANGER
Never approach or touch any rotating parts (shaft, etc.)when maintaining or inspecting the reducer during
operation.
Loose clothing cought in these rotating parts may result in severe injury and/or death.
Be sure to stop both the driving and driven machines before checking any tooth surfaces; otherwise, you may
be caught in the gear engaging section, resulting in severe injury and/or death.
Do not operate any units without all (safety)covers in place. Failure to do so may cause injury and/or death.
CAUTION
The surface of the reducer will get hot, do not touch the reducer ; otherwise, a burn may result.
Do not change the oil during operation or soon after operation has ceased ; otherwise, the hot oil may cause
burns.
Do not remove any covers or open the reducer during operation ; otherwise, splashing hot lubricant may
cause burn.
Change lubricant according to the maintenance manual, and use only those recommended lubricants ;
otherwise, the system may be damaged.
Do not operate damaged PARAMAX SINGLE STAGE DRIVE SPA Series; otherwise, injury, fire, or damage
to the system may result.
We cannot assume any responsibility for damage or injury resulting from an unauthorized modification by a
customer.
9-1) Daily inspection
To ensure proper and contined optimum operation, use the table below to perform daily inspections of the unit.
When any abnomality is found during daily inspection, take appropriate corrective measures based on "10.
Troubleshooting (P.10)"
If normal operation is still not possible, contact the nearest agent, distributor, or service office.
Inspection item
Noise
Vibration
Surface
temperature
Oil level
Oil leakage
Foundation bolt
Details of inspection
Is there abnormal sound or sudden change in the noise characteristics during
operation ?
Is there any abnormal vibration or sudden change in the vibration of the
reducer?
Is the temperature of the surface of the reducer abnormally high ?Or is it
rising rapidly?
The temperature rise during operation differs according to the type of
reducers. A surface temperature of approx. 80 C (176 F)will not cause
any adverse effects as long as it does not rise significantly above this level.
Is the oil level decreasing ?
(Check the oil level with a dipstick or visible oil gauge when the reducer is not
operating)
Is oil leaking from the oil seal or other sections?
Have any bolts come loose ?
Table 7
9-2) Change of lubricant
Table 8 Oil change interval
Please consult lubrication supplier when atmosphere is contains corrosive gas or where ambient temperature
changes dramatically.
Oil feeding
Oil change
Whichever comes sooner, after 500 hours or six months of operation
Whichever comes sooner, after 2,500 hours or six months of operation
Whichever comes sooner, every 5,000 hours or each year
Whichever comes sooner, every 2,500 hours or each year
1st time
2nd time
3rd time
or later
Interval
At purchasing
Usage conditions
When case oil temperature is lower than 70 C
When case oil temperature is 70 C or higher

10
10. Troubleshooting
When any abnomality occurs in the reducer, refer to the following table and take appropriate measures as soon as
possible. If they are not repairable, contact the nearest agent, distributor or service office.
Details of trouble
The input shaft rotates, but the output
shaft will not.
Damage due to overloaded gears or
shafts
The key is out of position
Scorched bearing
Poor adjustment of protective device
Incorrect wiring for the motor
Overload
The ambient temperature is too high
Damage due to overload applied to
gears, bearings, etc.
Reduce the load to the specified value
Improve the ventilation method
Damaged gears, shafts, or bearings Repair at a specialized workshop
Deformation of the housing due to
irregular installation surface Flatten the installation surface or use
liners for adjustment
Repair at a specialized workshop
Damaged oil seal
Scratches or abrasion of the lip contact
section
Loose tightening bolt Tighten the tightening bolts to the proper
torque
Change the oil seal
Repair at a specialized workshop
Place the key in position
Repair at a specialized workshop
Adjust the protective device
Change the connection
The output
shaft turns
when there is
no load.
Excessive temperature rise
Oil leakage
Abnormal sound.
Excessively high vibration.
Oil leaks from the input /
output shaft sections.
Oil leaks from the joint
surface of the housing.
But it seizes up when a
load is applied.
Reverse rotation is possible.
Cause Correction
Scorched bearing Repair at a specialized workshop
Resonance due to insufficient rigidity of
installation base Reinforce the installation base to
improve the rigidity
Incorrect alignment with the mating machine Align the shaft center
Transmission of the vibration of the
mating machine to the reducer
Independently operate the reducer to
check the source of abnormal sound
Table 8
11. Disassembly / reassembly and disposal
11-1) Disassembly and reassembly
11-2) Disposal
CAUTION
Repair, disassembly, and reassembly should be handled by properly trained technicians ; otherwise, the
system may be damaged.
CAUTION
CAUTION
Dispose the reducer and lubricant as general industrial waste.
Promptly identity and correct, according to instructions in this maintenance manual, any abnormalities
observed during operation. Do not operate until abnormality is corrected.

11
12. Construction drawing
POS.NO
Part Name
2501 Slow speed shaft
3601 Helical gear
3602 Helical pinion shaft
4101 Key
4121 Key
4122 Key
4622 Tolerance ring
6001 Spherical roller bearing
6002 Spherical roller bearing
6003 Spherical roller bearing
6004 Spherical roller bearing
6502 Oil seal
6504 Oil seal
Fig.8 SPA Series
41016001 60042501
6002
3601
6502 4121
65044122
60033602
Fig9. Locations of oil filler and drain plug
13. Locations of oil filler and drain plug
Drain plug
Oil gauge
Air breather Oil filler & Oil check cover

12
14. Warranty
Warranty
Period
Warranty
Condition
Exception
for
Warranty
Notwithstanding the above warranty, the warranty as set forth herein shall not be applied to the problems, troubles or
damages on the Products which are caused by:
1. installations, connections, combinations or integration of the Products in or to other equipment or machines, which
are supplied by any person or entity other than the Seller,
2. insufficient maintenance or improper operation by the Buyer or its customers, such that the Product is not
appropriately maintained in accordance with the maintenance manual provided or designated by the Seller,
3. improper use or operation of the Products by the Buyer or its customers which are not informed to the Seller,
including, without limitation, the Buyer's or its customers' operation of the Products not in conformity with the
specifications, or use of the lubrication oil in the Products which is not recommended by the Seller,
4. troubles, problems or damages on any equipment or machines in or to which the Products are installed, connected
or combined or installed, or any specifications particular to the Buyer or its customers, or
5. any changes, modifications, improvements or alterations on the Products or those functions which are rendered on
the Products by any person or entity other than the Seller,
6. any parts in the Products which are supplied or designated by the Buyer or its customers,
7. earthquake, fire, flood, sea-breeze, gas, thunder, acts of God or any other reasons beyond the control of the Seller,
8. waste, exhaustion, normal wear and tear, or deterioration on the parts of the Products, such as bearing, oil-seal.
9. any other troubles, problems or damages on the Products which are not attributable to the Seller.
The warranty period for the Products shall be 18 months after the commencement of delivery or 18 months after the
shipment of the Products from the seller's works or 12 months from the Products coming into operation, whichever comes
first.
In case any problems, troubles or damages on the Products arise due to defects in the Products during the above
"Warranty Period", although the Products are appropriately and properly installed in, connected or combined to the
equipment or machines, or maintained in accordance with the maintenance manual and are properly operated under the
conditions as described in the catalogue or otherwise as agreed upon in writing between the Seller and the Buyer or its
customers, the Seller will Provide, at its sole discretion, appropriate repair or replacement on the Products free of
charge, except as stipulated in the "Exception for Warranty" as described below.
However, in the event that the Products is installed in, connected or combined to or integrated into the equipment or
machines, the Seller shall not reimburse the costs for removal or re-installation of the Products or other incidental costs
related thereto and any lost opportunity, loss of profit or any other incidental or consequential losses or damages
incurred by the Buyer or its customers.
The scope of our warranty for our products is limited to the range of our manufacture.
Warranty (period and contents)

This manual suits for next models
3
Table of contents
Other Sumitomo Drive Technologies DC Drive manuals

Sumitomo Drive Technologies
Sumitomo Drive Technologies IB Series User manual

Sumitomo Drive Technologies
Sumitomo Drive Technologies Invertek Drives Optidrive P2 User manual

Sumitomo Drive Technologies
Sumitomo Drive Technologies PARAMAX SFC Series Operating instructions

Sumitomo Drive Technologies
Sumitomo Drive Technologies eye LM2 Gears CMS User manual

Sumitomo Drive Technologies
Sumitomo Drive Technologies PARAMAX M Series User manual