Sunbeam Ellise SP6000 MASTER SERIES User manual
RESTRICTED CONFIDENTIAL DOCUMENT APPROVED:
DATE:
DESCRIPTION:
COLOURS:
SCALE 1:1 SUNBEAM
IB COVER ARTWORK
13-08-13
Unit 5&6,13 Lord St
Botany 2019,
NSW, AUSTRALIA
Ph: +61 2 9695 9999
CORPORATION LTD.
This drawing and all information shown hereon are the
exclusive property of Sunbeam Corporation Limited, and are
submitted only on a confidential basis. The recipient agrees
not to reproduce the drawing, to return it upon request, and
that no disclosure of the drawing or the information shown
hereon will be made to a third party without prior written
consent from the Sunbeam Corporation Limited.
2829-A-IB
Ellise®
Stainless Steel
Pot & Steamer
User Guide
Need help with your appliance?
Contact our customer service team
or visit our website for information
and tips on getting the most from
your appliance.
Australia |visit www.sunbeam.com.au
phone 1300 881 861
mail Units 5 & 6, 13 Lord Street,
Botany NSW 2019 Australia.
New Zealand |visit www.sunbeam.com.nz
phone 0800 786 232
mail Unit 3, Building D, 26 Vestey Drive,
Mt Wellington Auckland
New Zealand.
Sunbeam Corporation Limited | ABN 45 000 006 771
Sunbeam Corporation is a division of GUD Holdings Limited.
Sunbeam is a registered trademark.
Ellise is a registered trademark of Sunbeam Corporation.
Made in China to Sunbeam’s specification.
Due to minor changes in design or otherwise,
the product you buy may differ slightly from the one shown here.
Approved by the appropriate electrical regulatory authorities.
©Copyright Sunbeam 2015.
3/15
This Sunbeam product is covered by a
12 month replacement or repair warranty,
which is in addition to your rights under the
Australian Consumer Law (if your product
was purchased in Australia) or New Zealand
Consumer Guarantees Act (if your product
was purchased in New Zealand).
Upon receipt of your claim, Sunbeam will
seek to resolve your difficulties or, if the
product is defective, advise you on how to
obtain a replacement or refund.
To assist us in managing warranty claims,
we recommend you register your product
as soon as practicable after purchase by
creating a MySunbeam account on our
website and uploading a copy of your
original receipt.
In order to make a claim under our
warranty, you must have the original proof
of purchase documentation for the
product and present it when requested (if
not already uploaded to our website).
Should your product develop any defect
within 12 months of purchase because of
faulty materials or workmanship, we will
replace or repair it, at our discretion, free
of charge. A product presented for repair
may be replaced by a refurbished product
of the same type rather than being
repaired. Refurbished parts may be used
to repair the product.
Our replacement or repair warranty only
applies where a defect arises as a result
of faulty material or workmanship during
the warranty period. Your warranty does
not cover misuse or negligent handling
(including damage caused by failing to use
the product in accordance with this
instruction booklet), accidental damage,
or normal wear and tear.
Your warranty does not:
• cover freight or any other costs incurred
in making a claim, consumable items,
accessories that by their nature and
limited lifespan require periodic renewal
(such as filters and seals) or any
consequential loss or damage; or
• cover damage caused by:
- power surges, power dips, voltage
supply problems, or use of the product
on incorrect voltage;
Should you experience any
difficulties with your product
during the warranty period,
please contact our customer
service line for advice on 1300
881 861 in Australia, or 0800
786 232 in New Zealand.
Replacement
Guarantee
12
Month
- servicing or modification of the
product other than by Sunbeam or an
authorised Sunbeam service centre;
- use of the product with other
accessories, attachments, product
supplies, parts or devices that do not
conform to Sunbeam specifications; or
- exposure of the product to
abnormally corrosive conditions; or
• extend beyond 3 months if the product
is used in commercial, industrial,
educational or rental applications.
The benefits given to you by our
warranty are in addition to other rights
and remedies under law in relation to
the product.
In Australia our goods come with
guarantees that cannot be excluded
under the Australian Consumer Law. You
are entitled to a replacement or refund
for a major failure and for compensation
for any other foreseeable loss or
damage. You are also entitled to have the
goods repaired or replaced if the goods
fail to be of acceptable quality and the
failure does not amount to a major
failure.
Our goods also come with guarantees
that cannot be excluded under the New
Zealand Consumer Guarantees Act.
If your warranty claim is not accepted, we
will inform you and if requested to do so
by you, repair the product provided you
pay the usual charges for such repair.
You will also be responsible for all freight
and other costs.
Should your product require repair or
service after the warranty period, contact
your nearest Sunbeam service centre.
For a complete list of Sunbeam’s service
centres, visit our website or call our
customer service line for advice on 1300
881 861 in Australia, or 0800 786 232 in
New Zealand.
Australia
www.sunbeam.com.au
1300 881 861
Units 5 & 6,
13 Lord Street,
Botany NSW 2019
Australia
New Zealand
www.sunbeam.com.nz
0800 786 232
Unit 3, Building D,
26 Vestey Drive,
Mt Wellington
Auckland
New Zealand
MASTER
SERIES
SK6450,FP8950 & WW8950
SP6000
Important instructions –
retain for future use.
Contents
Sunbeam’s safety precautions 1
Features of your Sunbeam Ellise Pot & Steamer 2
Temperature settings 4
Using your Ellise cookware 5
Cooking with your Ellise Pot & Steamer 6
Stainless steel cooking surface 7
Care and Cleaning 8
Recipes 9

1
If you have any concerns regarding the performance and use of your appliance,
please visit www.sunbeam.com.au or contact the Sunbeam Consumer Service Line.
Ensure the above safety precautions are understood.
Sunbeam’s Safety Precautions
SAFETY PRECAUTIONS FOR YOUR ELLISE
COOKWARE
• Use your Ellise cookware at least 200mm away
from walls and curtains
• Do not spill or immerse the control probe in
water.
• Use only with the control probe provided.
• If using a plastic spatula do not leave in cooking
vessel when hot.
• Avoid using on metal surfaces eg sink, hotplate.
• Remove the control probe before cleaning the
cooking vessel.
• After cleaning the cooking vessel ensure that the
control probe inlet area is completely dry before
using again.
• The handles on the lid and vessel may become
hot during use – oven mitts may be required.
Sunbeam is very safety conscious when designing
and manufacturing consumer products, but it is
essential that the product user also exercise care
when using an electrical appliance. Listed below are
precautions which are essential for the safe use of
an electrical appliance:
• Read carefully and save all the instructions
provided with an appliance.
• Always turn the power off at the power outlet
before you insert or remove a plug. Remove by
grasping the plug - do not pull on the cord.
• Turn the power off and remove the plug when the
appliance is not in use and before cleaning.
• Do not use your appliance with an extension cord
unless this cord has been checked and tested by
a qualified technician or service person.
• Always use your appliance from a power outlet of
the voltage (A.C. only) marked on the appliance.
• This appliance is not intended for use by persons
(including children) with reduced physical,
sensory or mental capabilities, or lack of
experience and knowledge, unless they have
been given supervision or instruction concerning
use of the appliance by a person responsible for
their safety.
• Children should be supervised to ensure that they
do not play with the appliance.
• The temperature of accessible surfaces may be
high when the appliance is operating and may be
subject to residual heat after use.
• Never leave an appliance unattended while in
use.
• Using this appliance for purpose other than which
it is intended may result in injury from misuse.
• Do not place an appliance on or near a hot gas
flame, electric element or on a heated oven.
• Do not place on top of any other appliance.
• Do not let the power cord of an appliance hang
over the edge of a table or bench top or touch any
hot surface.
• Do not operate any electrical appliance with a
damaged cord or after the appliance has been
damaged in any manner. If damage is suspected,
return the appliance to the nearest Sunbeam
Appointed Service Centre for examination, repair
or adjustment.
• For additional protection, Sunbeam recommend
the use of a residual current device (RCD)
with a tripping current not exceeding 30mA in
the electrical circuit supplying power to your
appliances.
• Do not immerse the appliance in water or any
other liquid unless recommended.
• Appliances are not intended to be operated by
means of an external timer or separate remote
control system.
• This appliance is intended to be used in
household and similar applications such as: staff
kitchen areas in shops, offices and other working
environments; farm houses; by clients in hotels,
motels and other residential type environments;
bed and breakfast type environments.

2
Features of your SP6000
Ellise®Stainless Steel Pot & Steamer
Steam Vent
Fixed steam vent controls the moisture level
during cooking.
Glass lid
Tempered glass lid enables you to monitor
your food while it cooks.
18/10 stainless steel cooking vessel
Long lasting 25 year guaranteed 18/10
Stainless Steel cooking surface.
1600 watt butterfly cast-in element
The 1600 watt butterfly element provides
even heat distribution across the entire
pan surface, preventing cooler spots.
The element is completely cast into the
aluminium base which is adhered onto the
stainless steel pan. This provides faster and
superior heat transfer and heat retention.
Insulating Base
Captures and reflects heat back onto the
cooking surface, concentrating the heat
where it is needed.
Steaming rack
Designed to be used in the
Steamer Tray to create a
2 level steamer.

3
Ergonomic handles
Heavy duty cast, ergonomic-shaped handles
for comfortable use when cooking and when
carrying to the table for serving.
5 Litre Steamer Tray
Sits on top of the pot to steam whilst food
cooks underneath.
6 Litre Pot
Versatile high sided cooking pot used to
sauté, simmer, brown or boil and then serve
to the table.
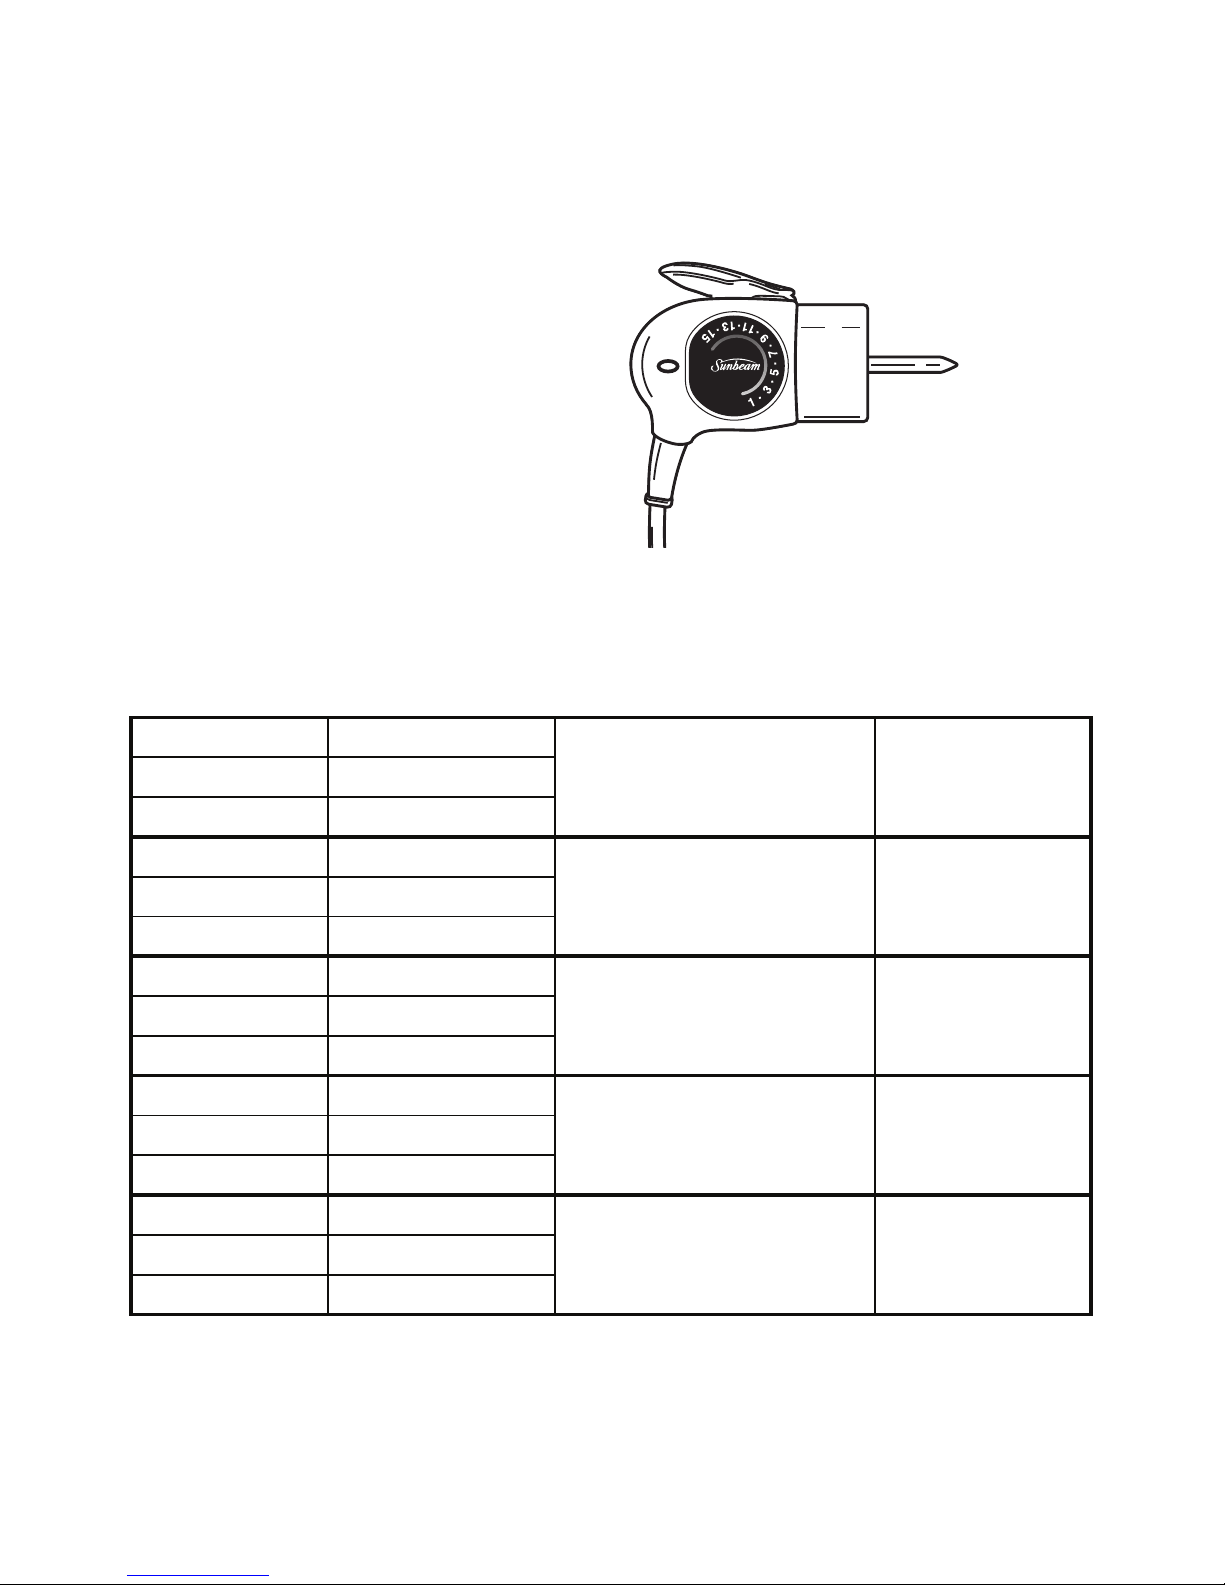
Trigger-release heat control probe with 15 heat
settings
15 heat settings for perfect cooking control.
The probe is thermostatically controlled and
incorporates an indicator light which switches
off automatically when the temperature
selected has been reached and then cycles
on and off to indicate that the selected
temperature is being maintained.
Temperature settings of your
Ellise®Cookware
Trigger Release Control Probe
The probe is thermostatically controlled
and incorporates an indicator light which
switches off automatically when the
temperature selected has been reached
and then cycles on and off to indicate
that the selected temperature is being
maintained. The trigger release makes
removal of the probe easy.
Note: The temperature settings are a guide only and may require adjustment to suit various
foods and individual tastes. When the dial is set to a low setting, it is quite normal for food
to stop and start bubbling, as the thermostat maintains the selected temperature.
The numbers on the dial represent the following temperatures approximately.
Pre-heat your vessel on setting 12-13 then change to your desired setting.
DIAL
SETTING
CELCIUS
(approx)
KEEPING FOOD WARM
SIMMERING TEMPERATURE
1 50°C
Keeping food warm LOW2 60°C
3 70°C
4 80°C
Simmering, slow cooking5 90°C
6 105°C
7 120°C
Boiling and steaming MEDIUM8 130°C
9 140°C
10 150°C Shallow frying,
sauting and browning
11 160°C
12 175°C
13 190°C
Searing HIGH14 200°C
15 210°C
4

Using your Ellise®Cookware
Before the first use: Wash in warm soapy
water, rinse thoroughly and dry your pot,
steamer and lid.
Note: We recommend 'seasoning' the pot
before use. Lightly heat the pot on setting 5
for 1 minute only, without adding oil. Turn off
the heat and remove the probe. Then rub a
small amount of oil into the cooking surface
with paper towelling.
1.Insert the Control Probe into the inlet on
the cookware.
2.Plug the cord into a 230-240V power
outlet and turn the power on.
3.Pre-heat the cookware to setting 12-13.
Then set the Control Probe Dial to the
desired temperature setting. Refer to
page 4 for the temperature guide.
The light on the control probe will illuminate.
This light will remain on until the set
temperature has been reached and then will
cycle on and off throughout cooking, as the
cooking temperature is maintained by the
thermostat.
Hint: On initial heating of the cookware, it
is recommended that the temperature be
allowed to cycle (the light glowing on and
off) several times. This will help the cooking
surface to adjust to a more accurate cooking
temperature.
Note: The cookware must only be used with
the Control Probe provided.
5

6
Cooking with your SP6000 Ellise®
Stainless Steel Pot & Steamer
Cooking
Method
Temp
Setting
Max
Capacity
Portion Method
Rice 15 5 litres water ½ cup rice
per person
to 1 cup
water
1. Bring water to the boil, add rice and
replace lid.
2. Cook for 10-12 mins until tender.
3. Reduce to lower temp if water boils
too rapidly.
Pasta 15 5 litres water 1 cup pasta
per person
to 2 cups
water
1. Bring water to the boil and add pasta.
2. Add 1-2 tbsp oil to stop pasta sticking
together.
3. Cook for 8-12 mins until tender.
4. Reduce to lower temp if water boils
too rapidly.
Boiling 15 5 litres liquid 1. Bring the liquid to the boil.
2. Add ingredients and cook until tender.
Steaming 12 2 litres water 1. Bring the liquid to the boil, reduce
temperature to 12.
2. Add ingredients to steaming basket
and place basket into saucepan.
3. Cover with lid and cook until done.
Sauté 12 - 1. Pour the required amount of oil into
the pot, and heat.
2. Add the food and stir continually with a
wooden spoon until all the food has been
browned to the desired colour.
Simmer 9 5 litres liquid 1. Bring the liquid to the boil on setting 15.
2. Reduce to setting 9 to create large
bubbles which form at a medium pace.
Roasting 12 - 1. Preheat the pot to setting 12.
2. Add the food to be roasted ensuring to
brown all sides.
3. Place lid on and cook to desired result.
Browning 12 - 1. Pre-heat the pot to setting 12.
2. Add the food to be browned to the pot,
ensuring to brown all sides to desired
colour.

7
Stainless steel cooking surface
The Sunbeam stainless steel cooking surface
is manufactured from high quality stainless
steel. Stainless steel is hygienic, easy to
care for and extremely durable. To keep your
stainless steel cooking surface looking good
and to achieve the best results, follow these
simple instructions:
Before the first use
We recommend 'Seasoning' the pot before
use. Lightly heat the pan on setting 5 for 1
minute only, without adding oil. Turn off the
heat and remove the probe. Then rub a small
amount of oil into the cooking surface with
paper towelling.
Use of metal utensils
Continued use of knives, forks or spoons will
eventually start to mark the stainless steel
cooking surface. We recommend using nylon
or wooden utensils to maintain the polished
surface finish.
To clean after each use
Wash in hot soapy water. Rinse and dry
thoroughly. To remove cooked-on food, fill
the wok with hot water and allow to stand
for a few minutes. This will soften the food,
making cleaning easier.
Removing burnt-on food
Fill the pot with sufficient water, cover and
simmer for five minutes or until the burnt-on
food softens and lifts. For stubborn burnt-on
food, leave the wok to soak overnight, after
first simmering as described. Then wash and
dry thoroughly.
Removing stubborn stains
We recommend that stubborn stains on the
cooking surface can be removed by using
nylon abrasive pads in conjunction with any
brand of stainless steel powder cleaner.
Note: Constant use of nylon abrasive pads,
will affect the polished surface finish.
Rubbing a paste of bicarbonate of soda and
water into the stained area is also helpful in
removing stains. Wash thoroughly.
Note: Re-season the cooking surface after
using any of the above methods to remove
stains.
Dishwasher-safe
Your Ellise cookware is completely
dishwasher-safe. The heating element is
totally sealed so it is safe to fully immerse in
water.

8
Care and Cleaning
Heat Control Probe.
If cleaning is necessary, wipe over probe with
a damp cloth.
Do not immerse the Control Probe in water or
any other liquid.
Storage.
Store the probe carefully in a safe place. Do
not knock or drop it as this can damage the
probe.
If damage is suspected, return the control
probe to your nearest Sunbeam Service
Centre for inspection. Refer to the back
of your instruction book for Service Centre
details.
Pot, Steamer and Glass Lid
The pot, steamer and lid are fully immersible
and can be washed in warm soapy water
using a mild household detergent and a soft
washing sponge.
They can also be cleaned in the dishwasher.

Pot & Steamer Recipes
All the recipes have been specifically created
and tested by our Sunbeam Test Kitchen for the
Ellise Pot & Steamer. We hope you enjoy using
your Sunbeam Ellise Stainless Steel Cookware.
Chicken Stock
Makes: 2.5 litres
6 cups water
4 bay leaves
2 chicken carcases*
2 carrots, chopped
2 celery stalks, chopped
2 onions, chopped
2 teaspoons black peppercorns
1 bunch parsley stems
Salt to taste
1.Place all ingredients in the pot. Place on
setting 5 and cover with lid. Simmer for 3
hours.
2.Strain and discard solids. Add salt to taste.
Cool and store in an airtight container in
the fridge or freezer.
*These can be purchased from your local
butcher.
Beef Stock
Makes: 2.5 litres
1 tbsp oil
1.5kg meaty beef bones*
6 cups water
2 bay leaves
1 carrot, chopped
1 celery stalk, chopped
1 onion, chopped
1 teaspoon black peppercorns
Salt to taste
1.Heat oil in pot on setting 15. Cook the
beefbones in batches until browned.
2.Add the remaining ingredients to pot.
3.Reduce heat to setting 5 and cover with
lid. Simmer for 3 hours.
4.Strain and discard solids. Add salt to taste.
Cool and store in an airtight container in
the fridge or freezer.
*These can be purchased from your local
butcher.
9

Quinoa Salad with Asparagus, Beans, Mint
and Feta
2 cups quinoa, rinsed well
4 cups vegetable stock
2 bunches asparagus, trimmed
200g green beans, trimmed, halved
4 long green onions, finely sliced
2 tablespoons lemon juice
2 tablespoons lemon rind
1 tablespoon champagne vinegar
¼ cup olive oil
¼ cup fresh mint, roughly chopped
2 tbsp fresh oregano, roughly chopped
200g feta cheese, roughly crumbled
Salt and freshly ground black pepper, to taste
Fresh herbs, to garnish
1.Place quinoa and water in the pot.
Turn onto setting 7.
2.Allow quinoa to simmer for 10 minutes.
3.Meanwhile place the asparagus and the
beans in the steamer tray.
4.Place the steamer tray into the pot once
most of the liquid has been absorbed.
Cover with lid.
5.Cook for a further 5 minutes or until the
greens are tender and the quinoa is light
and fluffy.
6.In a separate bowl combine onion, lemon
juice, rind, vinegar, oil, mint and oregano.
Season to taste with salt and pepper.
7.Place quinoa and vegetables in a large
bowl. Top with dressing. Toss through
the feta. Top with fresh herbs, if desired.
Serve.
Brown Rice, Marjoram, Pine Nut and
Caramelised Onion Salad
2 cups brown rice, rinsed well
4 cups chicken stock
¼ cup olive oil
3 onions, roughly chopped
½ cup currants
½ cup fresh flat-leaf parsley, roughly
chopped
½ cup fresh mint, roughly chopped
½ cup pine nuts, toasted
¹⁄³cup lemon juice
2 green chillis, seeds removed, finely
chopped
Salt and freshly ground black pepper, to taste
1.Place brown rice and chicken stock in the
pot. Turn onto setting 7.
2.Bring to a simmer and cook for 30 minutes
or until all the liquid has evaporated. Turn
off the heat. Put the rice into a large bowl.
3.Heat half of the oil in the pot of setting
10.
4.Add onions and cook for 10 minutes or
until tender and golden.
5.Add remaining ingredients to the rice.
Stir to combine. Season to taste with salt
and pepper. Serve.
Pot & Steamer Recipes continued
10

Steamed Mussels in Chilli and White Wine
1kg mussels, cleaned
2 tbsp olive oil
3 long green onions, finely chopped
2 cloves garlic, crushed
2 red chillis, seeds removed, finely chopped
1 tbsp tomato paste
2 cups white wine
3 tomatoes, cut into small cubes
½ tsp caster sugar
Salt and freshly ground black pepper, to taste
Fresh basil leaves, chopped chilli and crusty
bread to serve
1.Arrange the mussels in the steamer tray.
2.Heat oil in the pot on setting 8.
3.Add long green onions, garlic and chilli to
the pot and cook for a few minutes or until
softened.
4.Add tomato paste and cook until a dark
golden colour. Add white wine.
5.Place steamer tray in the pot. Cover with
lid.
6.Steam for 5 minutes or until mussels have
opened up. Discard mussels that remain
closed.
7.Place mussels in the sauce and add tomato
and sugar. Season to taste with salt and
pepper. Stir well.
8.Serve with basil, chilli and crusty bread for
dipping.
Lobster Bisque
1 large lobster or 2 small
1½ cups tomato paste
50g butter
4 carrots, roughly chopped
4 celery stalks, roughly chopped
3 onions, roughly chopped
3 sprigs fresh flat-leaf parsley
2 sprigs fresh thyme
1 cup sherry
1 tsp saffron
6 cups cream
¼ cup corn starch
Salt and freshly ground black pepper, to taste
1.Fill the pot with 8 cups of water. Place on
setting 10 and bring to a boil.
2.Place lobster into the steaming tray.
Once the water is simmering place the
steamer tray in the pot. Cover with lid and
cook for 15 minutes. Remove lobster and
keep the cooking water.
3.Remove all the flesh from the lobster and
set aside.
4.Place the lobster shell into the pot with the
cooking water. Add 1 cup of tomato paste.
Place on setting 6 and simmer for 1 hour.
5.Set the stock aside.
6.In the pot melt butter on setting 8. Add
carrots, celery, onions, parsley and thyme.
Cook for about 10 minutes or until a deep
dark golden colour.
7.Add remaining tomato paste to the pot
and cook for a further one minute. Add the
sherry and allow to reduce by half.
8.Add the lobster stock to the pot. Add
saffron. Simmer on setting 8 for 20
minutes.
9.Strain the soup. Place back into the pot.
Add cream and stir.
Pot & Steamer Recipes continued
11

Pot & Steamer Recipes continued
10. Take one cup of soup out and whisk with
the corn starch.
11. Gently pour the corn starch liquid back
into the soup while whisking.
12. Bring to the simmer. Season to taste with
salt and pepper. Serve with the lobster
meat.
Cantonese Steamed Fish
This fish is very light with beautiful delicate
flavours. Great over a large bowl of white rice.
1 bunch long green onions, trimmed, cut in
half
4 ling fillets, or any other delicate white fish
1 tbsp sesame oil
2cm piece ginger, peeled, cut into fine strips
1 small bunch coriander, roughly chopped
Sauce:
¼ cup soy sauce
2 tbsp water
2 tsp oyster sauce
1½ tsp caster sugar
Salt and freshly ground black pepper, to taste
1.Pour 2 cups of water into the pot. Turn on
setting 10.
2.Lay the onions over the base of the
steamer tray. Place fish on top.
3.Once the water is simmering place the
steamer tray in the pot. Cover with lid.
4.Steam for 5 minutes or until long green
onions are tender and the fish is just
cooked.
5.Place fish onto serving dish. Top with
steamed onions.
6.Drain water from pot. Heat oil in pot on
setting 12.
7.Add ginger and cook for 2-3 minutes or
until tender. Add sauce ingredients and
bring to a simmer. Allow to reduce slightly.
8.Pour over fish. Serve with fresh coriander.
Szechuan Chicken
This is steamed chicken with a chilli, garlic,
peanut sauce. The sauce is a bit of work but
it’s a wonderful dish, especially for those who
love Asian cooking.
Oil:
½ cup peanut oil
1 tbsp Sichuan peppercorns
2cm piece ginger, roughly chopped
5 cloves garlic, roughly chopped
1 cinnamon stick
1 red onion, cut into quarters
1 star anise
Sauce:
2 cloves garlic, crushed
3 tbsp roasted peanuts, finely chopped
2 tbsp soy sauce
1 tbsp chicken stock
1 tbsp red chilli flakes
1 tbsp rice wine vinegar
1 tbsp roasted sesame seeds
1 tbsp sesame oil
1 tsp salt
1 tsp sugar
Chicken:
8 chicken thigh fillets, bone removed
2 long green onions, cut into half
4 slices of ginger
Chopped green onion, chilli and white rice,
to serve
Salt and freshly ground black pepper, to taste
1.Place all oil ingredients into the pot.
Heat on setting 6.
2.Allow the aromatics infuse into the oil; this
will take about 8-10 minutes.
3.Strain the oil and discard all the aromatics.
12

Pot & Steamer Recipes continued
4.Pour the oil back into the pot and add
sauce ingredients. Cook on setting 6 for 5
minutes or until the sauce has thickened
slightly. Set aside.
5.Place 4 cups of water into a clean pot.
Heat on setting 10.
6.Place chicken, long green onions and
ginger into the steamer tray.
7.Once the water has reached a simmer
place the steamer tray into the pot. Cover.
8.Steam for about 10 minutes or until
chicken is cooked. Discard onion and
ginger.
9.Roughly slice the chicken and top with the
sauce.
10. Serve with freshly chopped green onion,
extra chilli and white rice.
Stir Fried Korean Beef
This stir fry has a bit of a kick so if you don’t
like lots of chilli, halve the amount.
Sauce:
¾ cup soy sauce
¼ cup brown sugar
2 tbsp chilli paste
1½ tbsp rice vinegar
1 tbsp freshly grated ginger
1 tbsp sesame oil
1 clove garlic, crushed
Stir fry:
2 tbsp sesame oil
2 carrots, peeled, chopped into match sticks
1 red capsicum, seeds removed, cut into thin
slices
1 green capsicum, seeds removed, cut into
thin slices
200g brown mushrooms, sliced
1kg stir fry beef
500g egg noodles, cooked as per back of
pack instructions
Long green onions, sesame seeds and fresh
coriander, to garnish
Salt and freshly ground black pepper, to taste
1.Combine all sauce ingredients. Stir to
combine. Set aside.
2.Add half of the sesame oil and heat on
setting 15. Add the carrots, capsicums and
mushrooms. Cook for about 3 minutes or
until tender.
3.Add 2 tablespoons of the sauce and cook
for a further minute. Remove from pot and
set aside.
4.Add the remaining sesame oil and heat
on setting 15. Add the beef and cook in
batches, for about 2 minutes.
13

Pot & Steamer Recipes continued
5.Add the vegetables back to the pot with
the noodles and the remaining sauce. Cook
for 2-3 minutes or until everything is hot
and starting to caramelise.
6.Serve into bowl and top with green onion,
sesame seeds and fresh coriander.
Chicken, Bok Choy Stir Fry with Maple Soy
Sauce
If you are a vegetarian swap the chicken out
for tofu, just as delicious!
Sauce:
¼ cup maple syrup
¼ cup soy sauce
2 tbsp sesame oil
1 tbsp lime juice
Stir Fry:
2 bunches broccolini, trimmed, cut into bite
sized pieces
1 tbsp vegetable oil
600g chicken thigh fillets, thinly sliced
3 cloves garlic, crushed
2cm piece ginger, peeled, grated
2 bunches bok choy, trimmed, quartered
400g fresh Hokkien noodles, cooked as per
back of pack instructions
Sesame seeds, long green onions and a
wedge of lime, to serve
Salt and freshly ground black pepper, to taste
1.Place 2 cups of water into the pot. Turn on
setting 10.
2.Place broccolini in the steamer tray.
3.Once the water is simmering place the
steamer tray in the pot. Cover with lid.
Cook until broccolini is tender, about 3-5
minutes.
4.Drain water from pot.
5.In a small bowl combine all of the sauce
ingredients.
6.Heat oil in the pot. Add chicken and cook
for a few minutes or until golden brown.
Remove.
7.Add garlic and ginger to the pot. Cook for
1 minute.
8.Add bok choy and sauce. Cook for 3-4
minutes or until the bok choy is tender and
the sauce has reduced slightly.
9.Add broccolini, chicken and noodles.
Cook for 3-4 minutes or until sauce is hot.
10. Serve with sesame seeds, long green
onions and lime.
Pancetta, Ricotta and Mushroom Linguini
500g linguini pasta
2 tbsp olive oil
200g pancetta, finely chopped
3 cloves garlic, crushed
2 onions, finely chopped
2 tbsp fresh thyme leaves
200g brown mushrooms, sliced
200g Portobello mushrooms, sliced
100g shiitake mushrooms
50g butter
¾ cup white wine
4 eggs
200g ricotta cheese
¼ cup fresh flat-leaf parsley, chopped
Grated parmesan cheese and wedge of
lemon, to serve
Salt and freshly ground black pepper, to taste
1.Fill the pot halfway with water. Place on
setting 15. Bring water to the boil. Add a
pinch of salt.
14

Pot & Steamer Recipes continued
2.Add pasta to the water. Cook until done,
about 5-6 minutes. Drain, making sure to
reserve half a cup of the cooking water.
3.Gently toss the pasta in half of the oil. Set
aside.
4.Heat remaining oil in the pot on setting
7. Add pancetta, garlic, onion and thyme.
Cook for about 5 minutes or until golden
brown.
5.Add mushrooms to the pot. Cook for about
10 minutes or until tender.
6.Add butter and wine. Cook for about 2
minutes.
7.Add pasta, water and remaining
ingredients. Stir vigorously until creamy.
Season to taste with salt and pepper.
8.Serve with a wedge of lemon and extra
parmesan.
Super Quick Tomato and Basil Pasta
This recipe is great as it tastes amazing but
only takes 15 minutes to make!
375g dried spaghetti pasta
2 tbsp olive oil
2 onions, finely chopped
3 cloves garlic, crushed
¹⁄³cup tomato paste
1 tbsp balsamic vinegar
2 tsp caster sugar
2 x 400g cans cherry tomatoes
½ bunch fresh basil
Grated parmesan cheese, to garnish
Salt and freshly ground black pepper, to taste
1.Fill the pot halfway with water. Place on
setting 15. Bring water to the boil. Add a
pinch of salt.
2.Add pasta to the water. Cook until done,
about 5-6 minutes. Drain. Gently toss the
pasta in half of the oil. Set aside.
3.Add remaining oil to the pot. Heat oil on
setting 8.
4.Add onions and garlic. Cook for 5 minutes
or until tender.
5.Add tomato paste, vinegar and sugar. Cook
for 1 minute or until golden brown.
6.Add tomatoes. Increase heat to setting 10.
Bring to a simmer. Cook for 5 minutes or
until sauce has thickened slightly.
7.Add pasta to the sauce. Add basil. Season
to taste with salt and pepper.
8.Top with grated parmesan cheese. Serve.
15

Pot & Steamer Recipes continued
Beef Ragu
This ragu can be used in lasagna or as a
pasta sauce.
2 tablespoons olive oil
1kg beef chuck roast
2 bay leaves
2 sprigs fresh thyme
2 sprigs fresh rosemary
2 carrots, finely chopped
2 stalks celery finely chopped
2 onions, finely chopped
200g pancetta, roughly chopped
3 cloves garlic, crushed
¼ cup tomato paste
2 cups red wine
2 x 400g cans cherry tomatoes
1 cup beef stock
Salt and freshly ground black pepper, to taste
1.Heat oil on setting 15.
2.Add beef and cook until a deep golden
colour on all sides. Set aside.
3.Reduce heat to setting 8. Add bay leaves,
thyme, rosemary, carrots, celery, onions
and pancetta. Cook for about 10 minutes
or until golden and tender.
4.Add garlic and cook for 2 more minutes.
5.Add tomato paste and cook for 2 minutes
or until a deep golden colour.
6.Pour in red wine and cook until reduced by
half.
7.Add the beef back to the pot. Add
remaining ingredients. Cover with lid.
8.Reduce heat to setting 6. Cook, stirring for
2 hours or until meat is tender and can be
shredded.
9.Season to taste with salt and pepper. Serve
over pasta, in lasagna or even put in a pie.
Vegetarian Chilli Con Carne
2 tbsp olive oil
4 garlic cloves, crushed
2 onions, finely sliced
1 leek, finely chopped
1 long red chilli, chopped
2 tbsps ground cumin
2 tbsp ground coriander
2 tbsp dried oregano
2 tbsp smoked paprika
1 tsp ground nutmeg
½ cinnamon stick
¼ cup good quality cocoa powder
2 tbsp tomato paste
1 cup dried green lentils
1 cup dried red lentils
2 x 400g tins of red kidney beans, drained
and rinsed
2 x 400g tins of chopped tomatoes
6 cups vegetable stock
Sour cream, fresh coriander and fresh lime,
to serve
Salt and freshly ground black pepper, to taste
1.Heat oil in pot on setting 7.
2.Add garlic, onions, leek and chilli to the
pot. Cook for about 5 minutes or until
tender.
3.Add cumin, coriander, oregano, paprika,
nutmeg and cinnamon to the pot. Cook for
a further minute.
4.Add cocoa powder and tomato paste and
cook until golden brown.
5.Add remaining ingredients and stir to
combine. Reduce heat to setting 4. Cook,
stirring, for about an hour.
6.Season to taste with salt and pepper. Serve
with sour cream, fresh coriander and a
wedge of lime.
16

Smokey Chorizo and Bean Minestrone
1 tbsp olive oil
4 chorizo sausages, finely diced
2 onions, finely chopped
2 carrots, peeled, finely chopped
2 celery stalks, finely chopped
2 cloves garlic, crushed
¹⁄³ cup tomato paste
1 tbsp smoky paprika
400g can chopped tomatoes
6 cups chicken stock
2 cups macaroni pasta
½ cabbage, finely sliced
Basil pesto, to serve
Salt and freshly ground black pepper, to taste
1.Heat oil in pot on setting 12.
2.Add chorizo, onions, carrots, celery and
garlic to the pot. Cook for about 10
minutes or until tender and golden.
3.Add tomato paste and paprika. Cook for
about 1 minute or until a dark golden
colour.
4.Add tomatoes, macaroni and stock. Bring
to a simmer and add macaroni. Cook for
15 minutes or until tender.
5.Add cabbage. Cook for a further minute.
Season to taste with salt and pepper.
6.Top with basil pesto. Serve.
Curried Lentil and Pumpkin Soup
20g butter, softened
2 leeks, finely sliced
2 cloves garlic, crushed
4 tsp curry powder
½ cinnamon stick
3kg butternut pumpkin, seeds and skin
removed
6 cups vegetable stock
3 cups red lentils
Sour cream and curry powder, to serve
Salt and freshly ground black pepper, to taste
1.Melt butter in pot on setting 8.
2.Add leeks and garlic. Cook for 6-8 minutes
or until golden.
3.Add curry powder and cinnamon stick.
Cook for a further 2 minutes.
4.Add remaining ingredients. Bring to a
simmer on setting 6. Cook for 20 minutes
or until the pumpkin is soft and cooked
through.
5.Allow the soup to cool before pureeing.
If you like chunkier soup, puree half and
mash the other half. Season to taste with
salt and pepper.
6.Top with a dollop of sour cream and a
sprinkling of curry powder. Serve.
Pot & Steamer Recipes continued
17

Pandang Chicken Curry
Anyone who loves a butter chicken will love
this curry.
Spice Paste:
1 tbsp ground coriander
1 tbsp ground cumin
1 tsp ground fennel
2 tsp ground nutmeg
2 tsp ground turmeric
1 tsp ground cloves
½ tsp ground cardamom
5 long red chillis
7 cloves garlic
1 small red onion, halved
2cm piece ginger, peeled, roughly chopped
Curry:
2 tbsp vegetables oil
8 kaffir lime leaves
2 cinnamon sticks
2 stalks lemon grass
1 kg chicken thighs, bone in
2 cups coconut milk
2 cups coconut cream
Salt and pepper, to serve
Fresh coriander, wedges of lime and white
rice, to serve
1.Place all the spice paste ingredients into
the bowl of your food processor or chopper.
Process until a fine paste.
2.Rub chicken in the spice paste. Allow to
marinate for at least 1 hour.
3.Heat oil in the pot on setting 10.
4.Add lime leaves, cinnamon and lemon
grass. Cook for 2 minutes or until fragrant.
5.Add chicken and cook in batches until
golden.
6.Add coconut milk and cream to the pot.
Reduce to setting 5. Allow the chicken to
cook for 20 minutes or until tender.
7.Serve chicken over rice with fresh
coriander and lime.
Lamb Korma with Tzatziki
1 tbsp vegetable oil
1kg lamb shoulder, cut into 2cm cubes
2 onions, sliced
¹⁄³ cup korma curry paste
2 cups chicken stock
100g baby spinach
½ cup Greek yoghurt
Tzatziki
1 cup greek yoghurt
1 Lebanese cucumber, small dice
¼ cup fresh mint leaves, finely chopped
1 tbsp lemon juice
½ tsp ground cumin
Salt and freshly ground black pepper, to taste
Basmati rice and poppadoms, to serve
1.Heat oil in pot on setting 10.
2.Add half of the lamb. Cook until golden
brown. Set aside. Brown remaining lamb.
Set aside.
3.Add onions. Cook for 5 minutes or until
golden brown.
4.Add korma paste and cook for a further
2 minutes.
5.Add chicken stock and lamb. Bring to a
simmer on setting 8. Cook for 15 minutes
or until the sauce has slightly reduced and
the lamb is tender.
6.While the lamb is cooking combine all
tzatziki ingredients. Season with salt and
pepper.
Pot & Steamer Recipes continued
18
Table of contents
Other Sunbeam Electric Steamer manuals

Sunbeam
Sunbeam ST6610 User manual

Sunbeam
Sunbeam ST6650 User manual

Sunbeam
Sunbeam 4710 Quick guide

Sunbeam
Sunbeam VitaSteam User manual

Sunbeam
Sunbeam ST6600 Operational manual

Sunbeam
Sunbeam 4713 Quick guide

Sunbeam
Sunbeam VitaSteam Electronic ST6820 User manual

Sunbeam
Sunbeam VitaSteam ST6810 User manual
Popular Electric Steamer manuals by other brands

Cleveland
Cleveland 24CGA6.2S Specification sheet

Elite Gourmet
Elite Gourmet EST250 instruction manual

cecotec
cecotec VAPOVITA 3000 PRO instruction manual

Market Forge Industries
Market Forge Industries ST-6-TGG Installation, operation and maintenance manual

TEFAL
TEFAL VS400170 manual

Cleveland
Cleveland SteamChef 22CET3.1 Specifications


