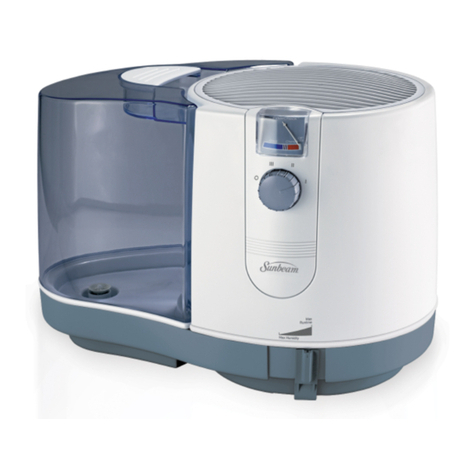
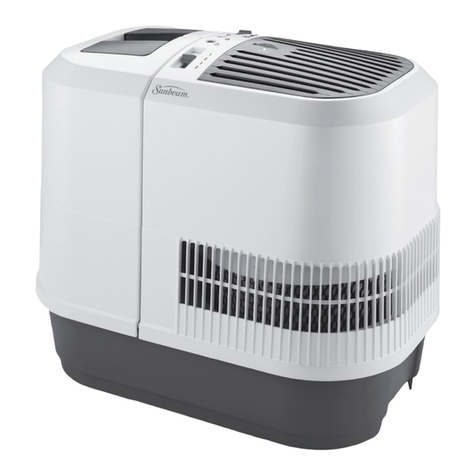
Sunbeam SCM4100-CN Manual

INSTRUCTIONS D’ENTREPOSAGE
Quand l’unité n’est pas utilisée pour une période
prolongée :
1. Jetez le filtre. NE le laissez PAS dans l’unité.
2. Nettoyez, rincez et séchez soigneusement
l’humidificateur selon les directives de l’entretien
hebdomadaire. NE laissez PAS d’eau dans l’unité
durant le remisage. Si de l’eau est laissée dans
l’unité, cette dernière pourrait ne pas fonctionner lors
de la prochaine saison.
3. Placez l’humidificateur dans son emballage original
et remisez-le dans un endroit frais et sec.
4. Commandez un filtre de rechange pour la prochaine
saison.
ACCESSOIRES DE RECHANGE
Pour commander des accessoires de rechange, vous
pouvez choisir l’une des méthodes suivantes:
• Visitervotredétaillantlocal
• Vousrendreàl’adresse
www.sunbeam.ca
• Appelerleserviceàlaclientèleencomposantle
1 888 264-9669
Printed In China
STORAGE INSTRUCTIONS
REPLACEMENT ACCESSORIES TROUBLESHOOTING
FREQUENTLY ASKED QUESTIONS WARRANTY INFORMATION
© 2012 Sunbeam Products, Inc. doing business as Jarden Consumer Solutions. All rights reserved. Imported and
distributed by Sunbeam Corporation (Canada) Limited doing business as Jarden Consumer Solutions, 20B Hereford
Street, Brampton, Ontario L6Y 0M1.
1 YEAR LIMITED WARRANTY
Sunbeam Products, Inc. doing business as Jarden Consumer Solutions or if in Canada, Sunbeam Corporation (Canada)
Limited doing business as Jarden Consumer Solutions (collectively “JCS”) warrants that for a period of one year from
the date of purchase, this product will be free from defects in material and workmanship. JCS, at its option, will repair
or replace this product or any component of the product found to be defective during the warranty period.
Replacement will be made with a new or remanufactured product or component. If the product is no longer available,
replacement may be made with a similar product of equal or greater value. This is your exclusive warranty. Do NOT
attempt to repair or adjust any electrical or mechanical functions on this product. Doing so will void this warranty.
This warranty is valid for the original retail purchaser from the date of initial retail purchase and is not transferable.
Keep the original sales receipt. Proof of purchase is required to obtain warranty performance. JCS dealers, service
centers, or retail stores selling JCS products do not have the right to alter, modify or any way change the terms and
conditions of this warranty.
This warranty does not cover normal wear of parts or damage resulting from any of the following: negligent use or
misuse of the product, use on improper voltage or current, use contrary to the operating instructions, disassembly,
repair or alteration by anyone other than JCS or an authorized JCS service center. Further, the warranty does not
cover: Acts of God, such as fire, flood, hurricanes and tornadoes.
What are the limits on JCS’s Liability?
JCS shall not be liable for any incidental or consequential damages caused by the breach of any express, implied or
statutory warranty or condition.
Except to the extent prohibited by applicable law, any implied warranty or condition of merchantability or fitness for a
particular purpose is limited in duration to the duration of the above warranty.
JCS disclaims all other warranties, conditions or representations, express, implied, statutory or otherwise.
JCS shall not be liable for any damages of any kind resulting from the purchase, use or misuse of, or inability to use
the product including incidental, special, consequential or similar damages or loss of profits, or for any breach of
contract, fundamental or otherwise, or for any claim brought against purchaser by any other party.
Some provinces, states or jurisdictions do not allow the exclusion or limitation of incidental or consequential damages
or limitations on how long an implied warranty lasts, so the above limitations or exclusion may not apply to you.
This warranty gives you specific legal rights, and you may also have other rights that vary from province to province,
state to state or jurisdiction to jurisdiction.
How to Obtain Warranty Service
In the U.S.A.
If you have any questions regarding this warranty or would like to obtain warranty service, please call 1-888-264-9669
and a convenient service center address will be provided to you.
In Canada
If you have any questions regarding this warranty or would like to obtain warranty service, please call 1-888-264-9669
and a convenient service center address will be provided to you.
In the U.S.A., this warranty is offered by Sunbeam Products, Inc. doing business as Jarden Consumer Solutions located
in Boca Raton, Florida 33431. In Canada, this warranty is offered by Sunbeam Corporation (Canada) Limited doing
business as Jarden Consumer Solutions, located at 20 B Hereford Street, Brampton, Ontario L6Y 0M1. If you have any
other problem or claim in connection with this product, please write our Consumer Service Department. PLEASE DO
NOT RETURN THIS PRODUCT TO ANY OF THESE ADDRESSES OR TO THE PLACE OF PURCHASE.
FREQUENTLY ASKED QUESTIONS
Question Answer
• What are the variables that affect
run time? The estimated run time for this humidifier is based on average room
conditions. The actual run time of your humidifier is dependent on
numerous variables such as:
✔ Air exchange in the room where the humidifier is placed.
✔ Room construction of the room where the humidifier is placed.
✔ Temperature of the room where the humidifier is placed.
✔ Humidity levels in the room where the humidifier is placed.
✔ Movement of occupants and the opening and closing of doors in the
room where the humidifier is placed.
✔ Home furnishings in the room where the humidifier is placed.
• How do I remove film on water
tank? ✔ See Daily Maintenance instructions. Regular cleaning is recommended.
• How can I extend the run time? ✔ Run your unit on the lowest setting.
QUESTIONS FRÉQUENTES
Questions Réponse
• Quelles sont les variables affectant
la durée de fonctionnement? La durée de fonctionnement de cet humidificateur se base sur des
conditions d’environnement moyennes. La durée de fonctionnement réelle
de votre humidificateur dépend de plusieurs variables, telles:
✔ L’échange d’air dans la pièce où est installé l’humidificateur.
✔ L’aménagement de la pièce où est installé l’humidificateur.
✔ La température de la pièce où est installé l’humidificateur.
✔ Le niveau d’humidité de la pièce où est installé l’humidificateur.
✔ Le déplacement des habitants et l’ouverture ou la fermeture des
portes de la pièce où est installé l’humidificateur.
✔ Les meubles dans la pièce où est installé l’humidificateur.
• Comment puis-je détartrer le
réservoir? ✔ Référez-vous aux instructions d’entretien quotidien. Un nettoyage
régulier est recommandé.
• Comment puis-je prolonger la
durée de fonctionnement? ✔ Faites fonctionner votre appareil au réglage le plus bas.
TROUBLESHOOTING
TROUBLE PROBABLE CAUSE SOLUTION
• Unitdoesnotturn
on. *Not plugged in.
*Humidistat is set too low.
*Outlet not functioning.
4Plug in unit.
4Turn humidistat to the highest setting ( ).
4Have outlet replaced by a licensed electrician.
• Mistoutputminimal
to none. *Filter has not absorbed water.
*Cool mist is invisible.
*Filter has reached the end of its
life.
4Wait 30 minutes for filter to absorb water.
4Operate in High (2) setting.
4Replace filter.
• Filterturnsbrown. *The filter has absorbed
minerals. 4Replace your filter (SWF62/SF212) by calling
1-888-264-9669, or visiting
www.sunbeam.ca
.
DÉTECTION DE PANNE
PROBLÈME CAUSE PROBABLE SOLUTION
• L’appareilnese
met pas en marche. *L’unité n’est pas branchée.
*L’humidistat est trop bas.
*La prise de courant est
défectueuse.
4Branchez l’unité.
4Mettez l’humidistat au réglage le plus haut ( ).
4 Demandezàunélectricienagrééderemplacerla
prise.
• Ledébitdevapeur
est minimal ou nul. *Le filtre n’a pas encore
absorbé d’eau.
*La vapeur froide est
invisible.
*Lefiltreestàlafindesavie
utile.
4Attendez 30 minutes, le temps que le filtre
absorbe de I’eau.
4Faites fonctionner l’appareil au réglage haut (2).
4Remplacez le filtre.
• Lefiltredevient
brun. *Le filtre a capté des
minéraux. 4Remplacez le filtre (SWF62/SF212) en
composant le 1 888 264-9669, ou visitez
www.sunbeam.ca.
157829 SCM4100-CN_12EFM1 Imprimé en Chine
GCDS-SUN25220-PH
INSTRUCTIONS D’ENTREPOSAGE
ACCESSOIRES DE RECHANGE DÉPANNAGE
QUESTIONS FRÉQUENTES INFORMATION SUR LA GARANTIE
© 2012 Sunbeam Products, Inc. faisant affaires sous le nom de Jarden Consumer Solutions. Tous droits réservés.
Importé et distribué par Sunbeam Corporation (Canada) Limited faisant affaires sous le nom de Jarden Consumer
Solutions, 20B Hereford Street, Brampton (Ontario) L6Y 0M1.
GARANTIE LIMITÉE DE 1 AN
Sunbeam Products, Inc. faisant affaires sous le nom de Jarden Consumer Solutions ou, si au Canada, Sunbeam
Corporation (Canada) Limited faisant affaires sous le nom de Jarden Consumer Solutions (collectivement « JCS »)
garantitquepourunepériodedeunanàpartirdeladated’achat,ceproduitseraexemptdedéfautsdepiècesetde
main-d’œuvre.JCS,àsadiscrétion,répareraouremplaceraceproduitoutoutcomposantduproduitdéclaré
défectueux pendant la période de garantie.
Le produit ou composant de remplacement sera soit neuf soit réusiné. Si le produit n’est plus disponible, il sera
remplacé par un produit similaire de valeur égale ou supérieure. Il s’agit de votre garantie exclusive. N’essayez PAS
de réparer ou d’ajuster toute fonction électrique ou mécanique de ce produit, cela annulera cette garantie.
Cettegarantien’estvalablequepourl’acheteuraudétailoriginalàpartirdeladatedel’achataudétailinitialetelle
n’estpastransférable.Veuillezconserverlereçud’achatoriginal.Lapreuved’achatestexigéepourtoutservice
couvert par la garantie. Les concessionnaires JCS, les centres de service et les détaillants qui vendent des articles JCS
n’ont pas le droit d’altérer, de modifier ou de changer d’une manière quelconque les modalités de cette garantie.
Cettegarantienecouvrepasl’usurenormaledespiècesoul’endommagementattribuableàlanégligence,à
l’utilisation abusive du produit, au branchement sur un circuit de tension ou courant inapproprié, au non-respect du
moded’emploi,audémontageetàlaréparationouàl’altérationparquiconque,saufJCSouuncentredeservice
agréé JCS. Cette garantie ne couvre pas non plus les cas de force majeure comme incendies, inondations, ouragans et
tornades.
Quelles sont les limites de la responsabilité de JCS?
JCS n’assume aucune responsabilité pour les dommages accessoires ou indirects résultant du non-respect de toute
garantie ou condition explicite, implicite ou générale.
Sauf dans la mesure interdite par la législation pertinente, toute garantie implicite de qualité marchande ou
d’applicationàunusageparticulierestlimitéeàladuréedelagarantieouconditionci-dessus.
JCS décline toutes autres garanties, conditions ou représentations expresses, sous-entendues, générales, ou autres.
JCS n’assume aucune responsabilité pour les dommages, quels qu’ils soient, résultant de l’achat, de l’utilisation
normaleouabusiveoudel’inaptitudeàutiliserleproduit,ycomprislesdommagesaccessoires,lesdommages-intérêts
particuliers, les dommages immatériels et les dommages similaires ou pertes de profits; ou bien pour les violations de
contrat, fondamentales, ou autres, ou les réclamations contre l’acheteur par un tiers.
Certaines provinces ou juridictions et certains états interdisent d’exclure ou de limiter les dommages accessoires ou
indirects, ou ne permettent pas la limitation de la durée d’application de la garantie implicite, de sorte que vous
pouveznepasêtreassujettiauxlimitesouexclusionsénoncéesci-dessus.
Cette garantie vous confère des droits juridiques précis et vous pouvez avoir d’autres droits, ces droits variant d’une
province,d’unétatoud’unejuridictionàl’autre.
Comment obtenir le service prévu par la garantie
Aux États-Unis
Si vous avez des questions sur le produit ou la garantie, ou si vous voulez bénéficier d’un service dans le cadre de la
garantie, veuillez appeler le 1 888 264-9669 pour obtenir l’adresse d’un centre de service agréé.
Au Canada
Si vous avez des questions sur le produit ou la garantie, ou si vous voulez bénéficier d’un service dans le cadre de la
garantie, veuillez appeler le 1 888 264-9669 pour obtenir l’adresse d’un centre de service agréé.
Aux États-Unis, cette garantie est offerte par Sunbeam Products Inc. faisant affaires sous le nom de Jarden Consumer
Solutions,situéeàBocaRaton,Floride33431.AuCanada,cettegarantieestofferteparSunbeamCorporation
(Canada), Limited faisant affaires sous le nom de Jarden Consumer Solutions, située au 20 B Rue Hereford, Brampton,
(Ontario)L6YOM1.Sivouséprouveztoutautreproblèmeousivousdésirezeffectuertouteautreréclamationquantà
ceproduit,veuillezécrireànotreserviceàlaclientèle.VEUILLEZ NE RETOURNER CE PRODUIT À AUCUNE DE
CES ADRESSES NI À L’ÉTABLISSEMENT D’ACHAT.
Guide d’utilisation
VEUILLEZ LIRE ET CONSERVER CES DIRECTIVES IMPORTANTES
Instruction Leaflet
PLEASE READ AND SAVE THESE IMPORTANT INSTRUCTIONS
SCM4100-CN
TRUSTED FOR OVER
100 YEARS
INSPIRE CONFIANCE
DEPUIS PLUS DE
100 ANS
Cool Mist
Humidifier
FILTER# : SWF62/SF212
FILTER TYPE : WICK
Humidicateur
à vapeur froide
SCM4100-CN
FILTER# : SWF62/SF212
TYPE DE FILTRE : À MÈCHE
Si vous avez des questions sur le produit ou voulez en
savoir plus sur d’autres produits SunbeamMD, veuillez
vousadresserànotreServiceclientau
1888264-9669.Vouspouvezaussivousrendresur
notresiteWeb,àwww.sunbeam.ca.
If you have any questions regarding your product or
would like to learn more about other Sunbeam®
products, please contact our Consumer Service
Department at 1-888-264-9669 or visit our website at
www.sunbeam.ca.
STORAGE INSTRUCTIONS
When not using your humidifier for an extended period
of time:
1. Dispose of the filters. DO NOT leave in unit.
2. Clean, rinse and thoroughly dry the humidifier as
directed in weekly maintenance. DO NOT leave any
water in the unit when storing. Leaving water in the
unit may render the unit inoperable for the following
season.
3. Place the humidifier in the original carton and store
in a cool, dry place.
4. Order your replacement filter for next year’s use.
REPLACEMENT ACCESSORIES
To order the replacement accessories you can do any of
the following:
• Visityourlocalretailer
• Goto
www.sunbeam.ca
• CallConsumerServiceat1-888-264-9669
FILTRE
DE RECHANGE
SCM4100-CN_12EFM1.indd 1 5/24/12 8:50 AM

PLEASE READ AND SAVE THESE
IMPORTANT SAFETY INSTRUCTIONS
FEATURES - OPERATIONS
CLEANING AND MAINTENANCE
INSTRUCTIONS
Humidifiers provide comfort by adding moisture to dry,
heated indoor air. To benefit most from the humidifier
and avoid product misuse, follow all instructions carefully.
Please note that this is an electrical appliance and
requires attention when in use.
In addition, if you do not follow the recommended care
and maintenance guidelines, micro-organisms may be
able to grow in the water within the water tank. You must
routinely follow the cleaning procedures that follow in
order to ensure proper, efficient operation of your
humidifier. Proper maintenance and cleaning is essential
to the continued performance of your unit and the
avoidance of algae or bacteria build-up.
Daily Maintenance
1. Be sure the unit is OFF and is disconnected from the
electrical outlet.
2. Press the cover release button on the back and
remove the top housing cover from the base (see
Figure 2).
3. Carry the base to the sink, remove the wick, drain
any remaining water and rinse thoroughly to remove
any sediment or dirt. Wipe clean, and dry with a
clean cloth or paper towel.
NOTE: The base is dishwasher safe for easy cleaning.
4. Put filter back in, then refill tank with cool tap water
as instructed earlier in the Filling Instructions. Do not
overfill. Insert the top housing cover back into the
base and close the cover.
5. Follow Operating Instructions.
Weekly Maintenance
Remove scale:
1. Repeat steps 1-4 above.
2. Clean the base by partially filling the base with one
8-oz cups of undiluted white vinegar. Leave this
solution in the base for 20 minutes, while cleaning all
the interior surfaces with a soft brush. Remove base
scale by wiping the base with a cloth dampened with
undiluted white vinegar.
3. Rinse with clean warm water to remove the cleaning
solution before disinfecting the tank.
To Disinfect Humidifier Base and Tank:
1. Fill humidifier tank 1/2 full with water and 1/2
tablespoon of chlorine bleach.
2. Let the solution stand for 20 minutes, swishing every
few minutes. Wet all surfaces.
3. Carefully empty the tank after 20 minutes, and rinse
with warm water until you cannot detect any bleach
smell. Dry with a clean cloth or paper towel.
4. Place filter back into tank and refill the water tank as
directed in FILLING THE WATER TANK section. Insert
the top housing cover back into the base and close
the cover. Turn the unit ON.
mechanical functions on this unit. Doing so will void
your warranty. The inside of the unit contains no user
serviceable parts. All servicing should be performed
by qualified personnel only.
21. Never place housing under water flow or immerse in
liquids.
22. Do not plug in the cord with wet hands: electric shock
could result.
23. Do not pour water in any openings other than the
water tank.
24. To prevent damage to surfaces, do not place
humidifier under overhanging surfaces.
25.NEVERoperateunitwithoutwaterinthetank.
26. Do not move unit after it has been used until unit
cools completely.
27. Use both hands when carrying full tank of water.
PLEASE READ AND SAVE
THESE IMPORTANT SAFETY
INSTRUCTIONS
CONSUMER SAFETY INFORMATION
NOTE: This is an electrical appliance and requires
attention when in use.
NOTE: If moisture forms on the walls or windows of the
room, turn off the humidifier. The room already has
plenty of humidity and additional moisture may cause
damage.
NOTE: DO NOT block air inlet or outlet.
Cord and Plug Installation Safety Instructions:
The length of cord used on this appliance was selected to
reduce the hazards of becoming tangled in, or tripping
over a longer cord. If a longer cord is necessary an
approved extension cord may be used. The electrical
rating of the extension cord must be equal to or greater
than the rating of the humidifier (refer to the rating
information placed on the humidifier). Care must be
taken to arrange the extension cord so that it will not
drape over the countertop or tabletop where it can be
pulled on by children or accidentally tripped over.
HOW COOL MIST WORKS
Your Sunbeam®Cool Mist humidifier draws dry air
through the rear air intake grill area. This air is then
passed through a moisture–laden wick filter, which
retains the minerals and deposits in the water. The
resulting moist air is directed back into the room from the
top air grill.
NOTE: This humidification system provides a cool,
invisible moisture output. It is normal not to see the mist.
NOTE: A humidity level below 20% can be unhealthy
and uncomfortable. The recommended humidity level is
between 40%-50%.
PRE-OPERATING INSTRUCTIONS
1. Be sure the humidifier is switched to OFF (0) and the
unit is disconnected from the electrical outlet.
2. Select a location for your humidifier, on a flat
surface, about 4 inches (10 cm) away from the wall.
DO NOT place the humidifier on a finished floor or
near furniture, which can be damaged by too much
moisture or water. Place on a moisture resistant
surface.
3. Select current month (1-12) on the Filter Reminder
Dial (see Figure 2). The digits 1-12 represent the
corresponding month from January to December. For
example, if the current month is January, scroll to
select 1. This will serve as reference for when filter
replacement is needed.
FILLING THE WATER TANK
1. Open the top housing cover to access the water tank.
2. Push the cover latch to rest onto the latch support,
this would lock the top housing cover in an opened
position (see Figure 1a).
3. Pour in water into the tank. Fill tank with cool, fresh
tap water.
NOTE: DO NOT fill with warm water. Do not overfill
the tank (up to "MAX" line on tank).
4. To close the top housing cover, pull up the top
housing cover to release the latch (see Figure 1b)
and then close the cover.
5. This humidifier holds about 0.66 gallon of water in
When using electrical appliances, basic safety precautions
should always be followed to reduce the risk of fire,
electric shock, and injury to persons, including the
following:
1. Read all instructions before using the appliance.
2. To avoid fire or shock hazard, plug the appliance
directlyintoa120VACelectricaloutlet.
3. Keep the cord out of heavy traffic areas. To avoid
firehazard,NEVERputthecordunderrugsornear
heat registers.
4. DO NOT place humidifier near heat sources such as
stoves, radiators, and heaters. DO locate your
humidifier on an inside wall near an electrical outlet.
The humidifier should be at least 4 inches (10 cm)
away from the wall for best results.
5. NEVERplacehumidifierinanareawhereitis
accessibletochildren.NEVERusehumidifierina
closed room, particularly where a child may be
sleeping, resting, or playing (a closed room may
result in excessive humidity).
6. WARNING: Do not attempt to refill humidifier
without first unplugging the unit from its electrical
outlet. Failure to heed this warning may cause
personal injury. Make sure to open top housing cover
to fill water. Be sure to unplug the unit by pulling on
the plug and not the cord.
7. Never place anything over moisture outlet when the
unit is running.
8. NEVERdroporinsertanyobjectintoanyopenings.
9. DO NOT operate any appliance with a damaged cord
or plug, after the appliance malfunctions, or if it has
been dropped or damaged in any manner. Return
appliance to manufacturer for examination, electrical
or mechanical adjustment, or repair.
10. Use appliance only for intended household use as
described in this manual. Any other use not
recommended by the manufacturer may cause fire,
electric shock, or injury to persons. The use of
attachments not recommended or sold by the
manufacturer may cause hazards.
11. DO NOT use outdoors.
12. Always place humidifier on a firm, flat, level surface.
A waterproof mat or pad is recommended for use
underthehumidifier.NEVERplaceitonarugor
carpet, or on a finished floor that may be damaged
by exposure to water or moisture.
13. DO NOT allow the Moisture Outlet to directly face the
wall. Moisture could cause damage, particularly to
wallpaper.
14. Humidifier should be unplugged when not in use.
15.NEVERtilt,move,orattempttoemptyunitwhileitis
operating. Shut off and unplug before removing the
water tank and moving the unit.
16. This humidifier requires daily and weekly
maintenance to operate appropriately. Refer to daily
and weekly cleaning procedures. Use only cleaners
and additives recommended by the manufacturer.
17.NEVERusedetergents,gasoline,glasscleaner,
furniture polish, paint thinner, or other household
solvents to clean any part of the humidifier.
18. Excessive humidity in a room can cause water
condensation on windows and some furniture. If this
happens, turn the humidifier OFF.
19. Do not use humidifier in an area where humidity
level is in excess of 50%. Use a hygrometer,
available at your local retailer or through the
manufacturer, to measure the humidity.
20. DO NOT attempt to repair or adjust any electrical or
FEATURES - OPERATIONS CLEANING / MAINTENANCE
THIS APPLIANCE HAS A POLARIZED PLUG (one blade is wider than the
other). To reduce the risk of electric shock, this plug is intended to fit in a
polarized outlet only one way. If the plug does not fit fully in the outlet,
reverse the plug. If it still does not fit, contact a qualified electrician to
install the proper outlet.
DO NOT ATTEMPT TO MODIFY THIS PLUG OR DEFEAT THIS
SAFETY FEATURE IN ANY WAY.
the tank and humidifier base. The humidifier will
produce up to 0.66 gallon of water in a 24-hour
period on low setting, depending on the room
humidity and temperature.
6. Plugthepowercordintoa120VACelectricaloutlet.
OPERATING INSTRUCTIONS
1. To turn on your humidifier, switch the Control Knob/
Slider to your desired setting:
0 (Off) - 2 (High) - 1 (Low)
NOTE: High setting will produce the maximum
moisture level and Low setting will produce the
longest run time and quieter performance.
Allow up to 30 minutes for the filter to fully absorb
water and the unit to produce the maximum moisture
output.
2. To turn off the unit, switch the Control Knob/Slider to
the Off (0) position.
3. When the water tank is empty, you need to refill the
tank. The fan will continue to run to help dry the
humidifier. Shut off and unplug the unit. Please
follow the Weekly Cleaning Instructions. Refill the
tank as directed in Pre-Operating Instructions.
If you do not plan to use the humidifier for two or more
days, make sure any residual water is drained from the
water tank, base and wick filter to prevent algae or
bacteria growth.
Adjustable Humidistat
Turn the Humidistat Knob to adjust the humidistat level.
To begin operation, turn the Humidistat Knob to the
highest setting ( ).
REPLACING THE FILTER
Through normal use, waterborne minerals and sediment
become trapped in the wick filter. The harder your water,
the greater the amount of minerals in the water, and the
more often you will need to change your filter.
Use Filter Reminder Dial to keep track on how long a
filter has been in use.
Filter Life – Under normal conditions of continuous use, a
brand new filter will operate efficiently for 1 month. It is
strongly recommended that a new filter be replaced
every 30 days of use.
To replace the filter, follow the steps below.
1. Be sure the humidifier is switched OFF (0) and
disconnected from the electrical outlet.
2. Open the top housing cover to access the filter (see
Figure 1).Remove the top housing cover when
replacing filter by pressing cover release button (see
Figure 2).
3. Discard the old filter and follow weekly cleaning
instructions.
4. Insert a new filter into the filter support in the base.
5. Fill the tank and close the top housing cover (see
FILLING THE WATER TANK section).
6. Reset the Filter Reminder Dial by turning the wheel
to select the current month (1-12).
7. Repeat Operating Instruction steps.
It will take about 30 minutes for the humidifier to reach
maximum output.
NOTE: You can purchase replacement filters (model
SWF62/SF212) at a local retailer, by calling
1-888-264-9669, or by visiting www.sunbeam.ca. It is
recommended that a replacement filter is purchased for
uninterrupted use.
VEUILLEZ LIRE ET CONSERVER CES
DIRECTIVES DE SÉCURITÉ IMPORTANTES
CARACTÉRISTIQUES – UTILISATION
4. Placez un filtre neuf dans le porte-filtre de la base.
5. Remplissez le réservoir et fermez le couvercle du
haut(voyezREMPLISSAGEDURÉSERVOIRÀEAU).
6. Réglez le cadran dateur du filtre en tournant la
molette jusqu’au mois en cours (1-12).
7. Répétez les étapes du mode d’emploi.
L’humidificateur atteindra son rendement maximum
après environ 30 minutes.
REMARQUE :Vouspouvezacheterunfiltrederechange
(modèle SWF62/SF212) chez un détaillant local ou en
composant le 1 888 264-9669, ou bien en visitant www.
sunbeam.ca. On recommande l’achat d’un filtre de
rechange pour l’usage ininterrompu de l’humidificateur.
INSTRUCTIONS DE NETTOYAGE ET
D’ENTRETIEN
Les humidificateurs améliorent le niveau de confort en
réhydratant l’air ambiant trop sec. Pour mieux profiter
de votre humidificateur et pour éviter l’utilisation
inappropriée de l’appareil, suivez attentivement toutes les
instructionsd’entretien.Veuilleznoterqu’ils’agitd’un
appareil électrique qui exige un certain niveau de
supervision lors de l’utilisation.
Si vous ne suivez pas les directives recommandées de
nettoyage et d’entretien, des microorganismes peuvent se
reproduire dans l’eau du réservoir de l’humidificateur. Il
faut suivre régulièrement les procédures de nettoyage
ci-dessous afin d’assurer le bon fonctionnement de votre
humidificateur. Il est essentiel d’entretenir et de nettoyer
votre appareil de manière appropriée pour assurer un
rendement adéquat et pour éviter le développement
d’algues ou de bactéries.
Entretien quotidien
1. Assurez-vousquel’appareilestarrêtéetdébranchéà
la prise de courant.
2. Appuyez sur le bouton de dégagement du couvercle,
àl’arrière,etséparezlecouvercledelabase(voyez
la figure 2).
3. Apportezlabaseàl’évier,enlevezlefiltre-mèche,
videz toute eau restante et rincez soigneusement la
base pour éliminer les sédiments ou la saleté.
Essuyez-laetséchez-laàl’aided’unlingepropreou
d’un papier essuie-tout.
REMARQUE: La base résiste commodément au
lave-vaisselle.
4. Replacez le filtre puis remplissez le réservoir d’eau
froide du robinet, tel que l’indiquent les instructions
deremplissageduréservoiràeau.Neleremplissez
pasàl’excès.Remettezlecouvercleduhautsurla
base et fermez le couvercle.
5. Suivez les consignes d’utilisation.
Entretien hebdomadaire:
Détartrage de l’appareil:
1. Répétezlesétapes1à4ci-dessus.
2. Remplissez partiellement la base en y versant 250
mL / 8 oz de vinaigre blanc non dilué. Laissez
reposer la solution dans la base pendant 20 minutes
tout en nettoyant toutes les surfaces intérieures avec
unebrosseàpoilssouples.Enlevezlesdépôts
calcaires de la base en l’essuyant avec un chiffon
humecté de vinaigre blanc pur.
3. Rincezàl’eautièdepouréliminerlasolutionde
nettoyage avant de désinfecter le réservoir.
Désinfection de la base et du réservoir :
1. Remplissezleréservoiràmoitiéd’eauetajoutez7,5
mL/1/2cuilleréeàtabled’eaudeJavel.
2. Laissez agir la solution pendant 20 minutes et
agitezla fréquemment. Mouillez toutes les surfaces.
3. Vidangezleréservoiraprès20minutesetrincez-leà
l’eaujusqu’àcequel’odeurd’eaudeJavelait
disparu. Essuyez les surfaces avec un chiffon propre
ou un essuie-tout en papier.
4. Replacez le filtre dans le réservoir et remplissez
celuici tel qu’indiqué sous REMPLISSAGE DU
RÉSERVOIRÀEAU.Remettezlecouvercleduhautsur
la base puis fermez le couvercle. ALLUMEZ
l’humidificateur.
mesurer l’humidité, utilisez un hygromètre que vous
pourrez vous procurer chez votre détaillant ou par
l’entremise du fabricant.
20. Ne tentez PAS de réparer ou de mettre au point toute
fonction électrique ou mécanique de l’appareil, sous
peine d’annulation de la garantie. L’intérieur de
l’appareil ne contient aucune pièce que puisse
réparer l’utilisateur. Réparations et entretien doivent
toujoursêtreconfiésaupersonnelqualifié.
21. Ne placez jamais le boîtier sous l’eau courante et ne
l’immergez dans aucun liquide.
22. Ne branchez pas le cordon avec les mains mouillées,
vous risqueriez un choc électrique.
23. Ne versez PAS d’eau dans les ouvertures de
l’humidificateur, sauf le réservoir.
24. Pour prévenir les dommages aux surfaces, ne placez
pas l’humidificateur sous les surfaces en saillie.
25. Ne faites JAMAIS fonctionner l’appareil sans que le
réservoir ne soit rempli d’eau.
26. En fin d’utilisation, ne déplacez pas l’humidificateur
avant qu’il ait refroidi.
27. Lors du transport d’un réservoir plein d’eau, utilisez
vos deux mains.
VEUILLEZ LIRE ET
CONSERVER CES
CONSIGNES DE SÉCURITÉ
IMPORTANTES
RENSEIGNEMENTS SUR LA SÉCURITÉ DU
CONSOMMATEUR
REMARQUE : Cet humidificateur est un appareil
électriqueetdoitêtresurveillélorsqu’ilestenmarche.
REMARQUE : Si de la condensation se développe sur les
mursoulesfenêtresdelapièce,arrêtezl’humidificateur.
Danscecas,l’airdelapièceestdéjàassezhumideet
toute humidité supplémentaire pourrait causer des
dommages.
REMARQUE : Ne bloquez pas les ouvertures d’entrée et
de sortie d’air.
Utilisation sécuritaire du cordon et de la fiche
Le cordon d'alimentation de ce produit est très court afin de
réduire le danger des entortillements et le risque de
trébucher sur un cordon plus long. Si vous avez besoin d'un
cordon plus long, vous pouvez vous servir d'une rallonge
approuvée. La capacité nominale électrique de la rallonge
doitêtreéquivalenteousupérieureàcellede
l’humidificateur (voyez la plaque signalétique apposée sur
l’humidificateur). Assurez-vous de ne pas laisser la rallonge
pendre du rebord d’un comptoir ou d’une table où les
enfants peuvent la tirer et, évitez les endroits où on peut
trébucher dessus.
FONCTIONNEMENT DE
L’HUMIDIFICATEUR À VAPEUR FROIDE
VotrehumidificateuràvapeurfraîcheSunbeamMD aspire
l’air sec par la grille d’admission d’air de la section
arrière.L’airpassealorsàtraversunfiltre-mèche
détrempéquiarrêtelesminérauxetsédimentsdel’eau.
L’air humide qui en résulte est dirigé dans la pièce en
passant par la grille d’air supérieure.
REMARQUE : Ce système d’humidification fournit un
débit d’humidité fraîche et invisible. Il est normal de ne
pas voir la vapeur.
REMARQUE : Un niveau d’humidité de moins de 20 %
peutêtremalsainetinconfortable.Leniveaud’humidité
recommandé se situe entre 40 et 50 %.
INSTRUCTIONS AVANT L’UTILISATION
1. Assurez-vousquel’appareilestarrêtéetqu’ilest
débranchéàlapriseélectrique.
2. Choisissez un endroit approprié pour votre
humidificateur,surunesurfaceplane,àenviron10
cm (4 po) du mur. NE posez PAS l’humidificateur sur
un plancher fini ou près de meubles que l’humidité
ou l’eau risqueraient d’endommager.
Placez-lesurunesurfacerésistanteàl’humidité.
3. Choisissez le mois courant (1-12) sur le cadran
dateur du filtre (voyez la figure 2). Les nombres de 1
à12représententlesmoisdejanvieràdécembre.Si,
par exemple, le mois courant est le mois de janvier
réglezledateurà1.Cepointderéférencevous
aideraàdéciderquandlefiltredoitêtreremplacé.
Lors de l’usage de tout appareil électrique, des
précautionsfondamentalesdoiventêtreobservéespour
réduire le risque d’incendie, de choc électrique, et de
blessure, y compris celles-ci :
1. Lisez toutes les directives avant d’utiliser cet appareil.
2. Pour éviter le risque de choc électrique, branchez
l’humidificateur directement sur une prise de courant
alternatif de 120 volts.
3. Tenez le cordon d’alimentation éloigné des aires
achalandées. Pour éviter tout risque d’incendie,
ÉVITEZdeplacerlecordond’alimentationsousdes
moquettes, ou près de tout appareil de chauffage.
4. Ne placez PAS l’humidificateur près de sources de chaleur
– cuisinière, radiateurs ou chaufferettes, par exemple.
PLACEZ-LEplutôtprèsd’unmurintérieuretd’uneprise
murale. Pour de meilleurs résultats, l’humidificateur doit
êtreplacéàaumoins4po(10cm)dumur.
5. NEplacezJAMAISl’humidificateuràunendroitoùil
serait accessible aux enfants. N'utilisez jamais
l'humidificateur dans une pièce fermée, particulièrement
où un enfant dort, se repose ou joue (une pièce fermée
peutdonnerlieuàunniveauexcessifd'humidité).
6. AVERTISSEMENT: N’essayez pas de nettoyer ou de
remplir l’humidificateur sans d’abord le débrancher.
Ne pas observer cette consigne peut causer des
blessures.Veillezàtoujoursouvrirlecouvercledu
haut pour verser de l’eau. Débranchez le cordon de
l’appareil en tirant sur la fiche et non sur le cordon.
7. Ne placez jamais quoi que ce soit sur les sorties d’air
pendant que l’humidificateur est en marche.
8. N’échappez et n’insérez JAMAIS d’objets dans les
orifices. Ne placez PAS les mains, le visage ou le
corps directement au-dessus de la sortie d’humidité
ou près de celle-ci pendant que l’appareil est en
marche. Ne couvrez PAS la sortie d’humidité pendant
que l’appareil est en marche.
9. N’employez PAS l’appareil si sa fiche ou son cordon
est abîmé, s’il a mal fonctionné, a été échappé ou
endommagédequelquefaçon.Retournezl’appareil
aufabricantàdesfinsd’examen,demiseaupoint
électrique ou mécanique ou de réparation.
10.Ceproduitestconçupouruneutilisationdomestique
SEULEMENT telle que décrite dans ce guide. Tout autre
usage non recommandé par le fabricant peut causer des
risques d’incendie, de choc électrique ou de blessure.
L’usage d’accessoires non recommandés ou non vendus
par le fabricant peut présenter des dangers.
11.N’utilisezPASl’humidificateuràl’extérieur
12. Placez toujours l’humidificateur sur une surface plane,
ferme et d’aplomb. Nous vous recommandons de placer
un napperon ou tapis imperméable sous l’appareil. Ne
placez PAS l’humidificateur sur un tapis ou plancher fini
pouvantêtreendommagéparl’eauoul’humidité.
13. N’orientez PAS la sortie de vapeur vers un mur.
L’humidité peut causer des dommages, surtout au
papier peint.
14.L’humidificateurdoitêtredébranchés’iln’estpasutilisé.
15. Ne tentez JAMAIS d’incliner ou de déplacer l’appareil
pendantqu’ilestenmarche.Arrêtezetdébranchez-le
avant de retirer le réservoir et de le déplacer.
16. Pour fonctionner convenablement, cet appareil exige
des procédures d’entretien quotidiennes et
hebdomadaires – consultez-les. N’utilisez que les
nettoyants et additifs recommandés par le fabricant.
17. N’employez JAMAIS d’essence, de produit pour
vitres, d’encaustique, de diluant ou d’autre solvants
domestiques pour nettoyer l’humidificateur.
18. Une humidité excessive dans une pièce peut causer
delacondensationsurlesfenêtresetlesmeubles.En
ce cas, éteignez l’humidificateur.
19. Ne vous servez pas de l’humidificateur dans un
endroit où le taux d’humidité dépasse 50 %. Pour
CARACTÉRISTIQUES – UTILISATION NETTOYAGE/ENTRETIEN
CET APPAREIL EST DOTÉ D'UN CORDON À FICHE POLARISÉE (une lame est
plus large que l'autre). Afin de réduire les risques d'électrocution, cette
fiche n’enfonce que dans un sens dans la prise électrique. Si la fiche ne
s'insère pas dans la prise, retournez la fiche. Si elle ne s'adapte toujours
pas, contactez un électricien qualifié afin d'installer la prise appropriée.
NE CONTOURNEZ PAS CE DISPOSITIF DE SÉCURITÉ
ET N'ALTÉREZ LA FICHE EN AUCUNE FAÇON.
REMPLISSAGE DU RÉSERVOIR À EAU
1. Ouvrez le couvercle de la carrosserie pour accéder au
réservoir.
2. Poussez le loquet du couvercle afin qu’il repose sur le
porte-loquet, ce qui devrait bloquer le couvercle en
position ouverte (voyez la figure 1a).
3. Remplissez le réservoir d’eau froide du robinet.
REMARQUE: N’EMPLOYEZ PAS d’eau tiède. Ne
dépassez pas le repère «MAX» du réservoir.
4. Pour fermer le couvercle de la carrosserie, tirez le
couvercle vers le haut pour désenclencher le loquet
(voyez la figure 1b) et abaissez le couvercle.
5. Leréservoiràeauetlabasedel’humidificateuront
une contenance d’environ 2,5 litres / 0,66 gallon, le
volume d’eau que transforme l’appareil en vapeur au
réglage bas en 24 heures, selon le taux d’humidité
de la pièce et la température ambiante.
6. Branchez le cordon d’alimentation sur une prise de
courant alternatif de 120 volts.
MODE D’EMPLOI
1. Pour allumer l’humidificateur, mettez le bouton de
commande/curseur au réglage désiré:
0 (arrêt) - 2 (haut) - 1 (bas)
REMARQUE: le réglage haut procure le débit
maximal alors que le réglage bas fournit l’autonomie
la plus longue et le fonctionnement le plus silencieux.
Laissezécoulerjusqu’à30minutesafinquelefiltre
absorbe toute l’eau possible et que l’appareil
commenceàdisperserledébitmaximaldevapeur.
2. Pour éteindre l’appareil, mettez le bouton de
commande/curseurenpositiond’arrêt(0).
3. Vousdevezreremplirleréservoirlorsqu’ilestvide.Le
ventilateurcontinueraàtournerpouraideàassécher
l’humidificateur. Éteignez et débranchez l’appareil
avant d’observer les instructions d’entretien
hebdomadaire. Remplissez le réservoir tel que
préconisé.
Si l’humidificateur ne doit pas servir pendant 2 jours ou
plus, videz toute eau résiduelle du réservoir, de la base et
du filtre-mèche afin d’éviter le développement d’algues
et la croissance bactérienne.
Humidistat réglable
Réglez alors l’humidistat en tournant son bouton. Mettez-
le au réglage le plus haut ( ) pour débuter le
fonctionnement.
REMPLACEMENT DU FILTRE
Lefiltre-mèchearrêtelesminérauxdel’eauainsiqueles
sédiments au cours du fonctionnement normal. Plus l’eau
est dure, plus elle contient de minéraux – et vous devez
donc remplacer le filtre plus souvent.
Servez-vous du cadran dateur du filtre pour savoir depuis
combien de temps le filtre est en service.
Durée de service du filtre – Sous conditions normales
d’emploicontinu,unfiltreneufdevraitêtreefficace
1 mois. Nous conseillons de le changer tous les 30 jours.
Pour remplacer le filtre, observez les étapes
suivantes:
1. Assurez-vous que l’humidificateur soit ÉTEINT (0) et
débranchéàlaprisedecourant.
2. Ouvrez le couvercle du haut pour accéder au filtre
(voyez la figure 1). Enlevez-le pour remplacer le
filtre – appuyez pour ceci sur le bouton de
dégagement du couvercle (voyez la figure 2).
3. Jetez le filtre usé et observez les instructions
d’entretien hebdomadaire.
Filter
Reminder Dial
Cover Release
Button
Figure 2
Cadran dateur
Bouton de
dégagement
du couvercle
Figure 2
Figure 1
A
F
G
H
B
D
E
C
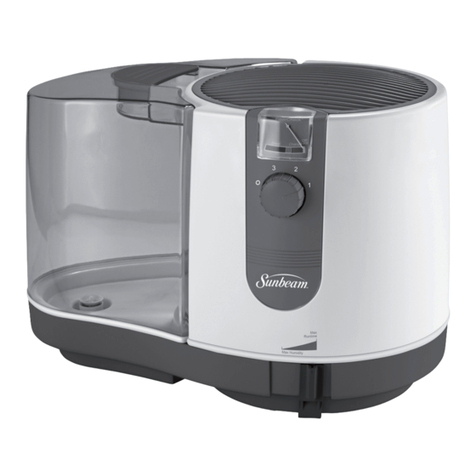
A. Top Housing Cover
B. Humidifier Tank
C. Circular Extended Life
Wick Filter
D. Control Knob/Slider
Switch
E. Humidistat Knob
F. Cover Latch
G. Latch Support
H. Humidifier Base
I. Max Fill Line
b) Latch up to
close cover
a) Latch down
to open cover
I
Figure 1
A
F
G
H
B
D
E
C
b) Loquet haut
pour fermer
a) Loquet bas
pour ouvrir
A. Couvercle du haut
B. Réservoiràeau
C. Filtre-mèche circulaire
D. Bouton de
commande/curseur
E. Humidistat
F. Loquet du couvercle
G. Porte-loquet
H. Base de
l’humidificateur
I. Repère «max» de
remplissage
I
SCM4100-CN_12EFM1.indd 2 5/24/12 8:50 AM
INSTRUCTIONS D’ENTREPOSAGE
Quand l’unité n’est pas utilisée pour une période
prolongée :
1. Jetez le filtre. NE le laissez PAS dans l’unité.
2. Nettoyez, rincez et séchez soigneusement
l’humidificateur selon les directives de l’entretien
hebdomadaire. NE laissez PAS d’eau dans l’unité
durant le remisage. Si de l’eau est laissée dans
l’unité, cette dernière pourrait ne pas fonctionner lors
de la prochaine saison.
3. Placez l’humidificateur dans son emballage original
et remisez-le dans un endroit frais et sec.
4. Commandez un filtre de rechange pour la prochaine
saison.
ACCESSOIRES DE RECHANGE
Pour commander des accessoires de rechange, vous
pouvez choisir l’une des méthodes suivantes:
• Visitervotredétaillantlocal
• Vousrendreàl’adresse
www.sunbeam.ca
• Appelerleserviceàlaclientèleencomposantle
1 888 264-9669
Printed In China
STORAGE INSTRUCTIONS
REPLACEMENT ACCESSORIES TROUBLESHOOTING
FREQUENTLY ASKED QUESTIONS WARRANTY INFORMATION
© 2012 Sunbeam Products, Inc. doing business as Jarden Consumer Solutions. All rights reserved. Imported and
distributed by Sunbeam Corporation (Canada) Limited doing business as Jarden Consumer Solutions, 20B Hereford
Street, Brampton, Ontario L6Y 0M1.
1 YEAR LIMITED WARRANTY
Sunbeam Products, Inc. doing business as Jarden Consumer Solutions or if in Canada, Sunbeam Corporation (Canada)
Limited doing business as Jarden Consumer Solutions (collectively “JCS”) warrants that for a period of one year from
the date of purchase, this product will be free from defects in material and workmanship. JCS, at its option, will repair
or replace this product or any component of the product found to be defective during the warranty period.
Replacement will be made with a new or remanufactured product or component. If the product is no longer available,
replacement may be made with a similar product of equal or greater value. This is your exclusive warranty. Do NOT
attempt to repair or adjust any electrical or mechanical functions on this product. Doing so will void this warranty.
This warranty is valid for the original retail purchaser from the date of initial retail purchase and is not transferable.
Keep the original sales receipt. Proof of purchase is required to obtain warranty performance. JCS dealers, service
centers, or retail stores selling JCS products do not have the right to alter, modify or any way change the terms and
conditions of this warranty.
This warranty does not cover normal wear of parts or damage resulting from any of the following: negligent use or
misuse of the product, use on improper voltage or current, use contrary to the operating instructions, disassembly,
repair or alteration by anyone other than JCS or an authorized JCS service center. Further, the warranty does not
cover: Acts of God, such as fire, flood, hurricanes and tornadoes.
What are the limits on JCS’s Liability?
JCS shall not be liable for any incidental or consequential damages caused by the breach of any express, implied or
statutory warranty or condition.
Except to the extent prohibited by applicable law, any implied warranty or condition of merchantability or fitness for a
particular purpose is limited in duration to the duration of the above warranty.
JCS disclaims all other warranties, conditions or representations, express, implied, statutory or otherwise.
JCS shall not be liable for any damages of any kind resulting from the purchase, use or misuse of, or inability to use
the product including incidental, special, consequential or similar damages or loss of profits, or for any breach of
contract, fundamental or otherwise, or for any claim brought against purchaser by any other party.
Some provinces, states or jurisdictions do not allow the exclusion or limitation of incidental or consequential damages
or limitations on how long an implied warranty lasts, so the above limitations or exclusion may not apply to you.
This warranty gives you specific legal rights, and you may also have other rights that vary from province to province,
state to state or jurisdiction to jurisdiction.
How to Obtain Warranty Service
In the U.S.A.
If you have any questions regarding this warranty or would like to obtain warranty service, please call 1-888-264-9669
and a convenient service center address will be provided to you.
In Canada
If you have any questions regarding this warranty or would like to obtain warranty service, please call 1-888-264-9669
and a convenient service center address will be provided to you.
In the U.S.A., this warranty is offered by Sunbeam Products, Inc. doing business as Jarden Consumer Solutions located
in Boca Raton, Florida 33431. In Canada, this warranty is offered by Sunbeam Corporation (Canada) Limited doing
business as Jarden Consumer Solutions, located at 20 B Hereford Street, Brampton, Ontario L6Y 0M1. If you have any
other problem or claim in connection with this product, please write our Consumer Service Department. PLEASE DO
NOT RETURN THIS PRODUCT TO ANY OF THESE ADDRESSES OR TO THE PLACE OF PURCHASE.
FREQUENTLY ASKED QUESTIONS
Question Answer
• What are the variables that affect
run time? The estimated run time for this humidifier is based on average room
conditions. The actual run time of your humidifier is dependent on
numerous variables such as:
✔ Air exchange in the room where the humidifier is placed.
✔ Room construction of the room where the humidifier is placed.
✔ Temperature of the room where the humidifier is placed.
✔ Humidity levels in the room where the humidifier is placed.
✔ Movement of occupants and the opening and closing of doors in the
room where the humidifier is placed.
✔ Home furnishings in the room where the humidifier is placed.
• How do I remove film on water
tank? ✔ See Daily Maintenance instructions. Regular cleaning is recommended.
• How can I extend the run time? ✔ Run your unit on the lowest setting.
QUESTIONS FRÉQUENTES
Questions Réponse
• Quelles sont les variables affectant
la durée de fonctionnement? La durée de fonctionnement de cet humidificateur se base sur des
conditions d’environnement moyennes. La durée de fonctionnement réelle
de votre humidificateur dépend de plusieurs variables, telles:
✔ L’échange d’air dans la pièce où est installé l’humidificateur.
✔ L’aménagement de la pièce où est installé l’humidificateur.
✔ La température de la pièce où est installé l’humidificateur.
✔ Le niveau d’humidité de la pièce où est installé l’humidificateur.
✔ Le déplacement des habitants et l’ouverture ou la fermeture des
portes de la pièce où est installé l’humidificateur.
✔ Les meubles dans la pièce où est installé l’humidificateur.
• Comment puis-je détartrer le
réservoir? ✔ Référez-vous aux instructions d’entretien quotidien. Un nettoyage
régulier est recommandé.
• Comment puis-je prolonger la
durée de fonctionnement? ✔ Faites fonctionner votre appareil au réglage le plus bas.
TROUBLESHOOTING
TROUBLE PROBABLE CAUSE SOLUTION
• Unitdoesnotturn
on. *Not plugged in.
*Humidistat is set too low.
*Outlet not functioning.
4Plug in unit.
4Turn humidistat to the highest setting ( ).
4Have outlet replaced by a licensed electrician.
• Mistoutputminimal
to none. *Filter has not absorbed water.
*Cool mist is invisible.
*Filter has reached the end of its
life.
4Wait 30 minutes for filter to absorb water.
4Operate in High (2) setting.
4Replace filter.
• Filterturnsbrown. *The filter has absorbed
minerals. 4Replace your filter (SWF62/SF212) by calling
1-888-264-9669, or visiting
www.sunbeam.ca
.
DÉTECTION DE PANNE
PROBLÈME CAUSE PROBABLE SOLUTION
• L’appareilnese
met pas en marche. *L’unité n’est pas branchée.
*L’humidistat est trop bas.
*La prise de courant est
défectueuse.
4Branchez l’unité.
4Mettez l’humidistat au réglage le plus haut ( ).
4 Demandezàunélectricienagrééderemplacerla
prise.
• Ledébitdevapeur
est minimal ou nul. *Le filtre n’a pas encore
absorbé d’eau.
*La vapeur froide est
invisible.
*Lefiltreestàlafindesavie
utile.
4Attendez 30 minutes, le temps que le filtre
absorbe de I’eau.
4Faites fonctionner l’appareil au réglage haut (2).
4Remplacez le filtre.
• Lefiltredevient
brun. *Le filtre a capté des
minéraux. 4Remplacez le filtre (SWF62/SF212) en
composant le 1 888 264-9669, ou visitez
www.sunbeam.ca.
157829 SCM4100-CN_12EFM1 Imprimé en Chine
GCDS-SUN25220-PH
INSTRUCTIONS D’ENTREPOSAGE
ACCESSOIRES DE RECHANGE DÉPANNAGE
QUESTIONS FRÉQUENTES INFORMATION SUR LA GARANTIE
© 2012 Sunbeam Products, Inc. faisant affaires sous le nom de Jarden Consumer Solutions. Tous droits réservés.
Importé et distribué par Sunbeam Corporation (Canada) Limited faisant affaires sous le nom de Jarden Consumer
Solutions, 20B Hereford Street, Brampton (Ontario) L6Y 0M1.
GARANTIE LIMITÉE DE 1 AN
Sunbeam Products, Inc. faisant affaires sous le nom de Jarden Consumer Solutions ou, si au Canada, Sunbeam
Corporation (Canada) Limited faisant affaires sous le nom de Jarden Consumer Solutions (collectivement « JCS »)
garantitquepourunepériodedeunanàpartirdeladated’achat,ceproduitseraexemptdedéfautsdepiècesetde
main-d’œuvre.JCS,àsadiscrétion,répareraouremplaceraceproduitoutoutcomposantduproduitdéclaré
défectueux pendant la période de garantie.
Le produit ou composant de remplacement sera soit neuf soit réusiné. Si le produit n’est plus disponible, il sera
remplacé par un produit similaire de valeur égale ou supérieure. Il s’agit de votre garantie exclusive. N’essayez PAS
de réparer ou d’ajuster toute fonction électrique ou mécanique de ce produit, cela annulera cette garantie.
Cettegarantien’estvalablequepourl’acheteuraudétailoriginalàpartirdeladatedel’achataudétailinitialetelle
n’estpastransférable.Veuillezconserverlereçud’achatoriginal.Lapreuved’achatestexigéepourtoutservice
couvert par la garantie. Les concessionnaires JCS, les centres de service et les détaillants qui vendent des articles JCS
n’ont pas le droit d’altérer, de modifier ou de changer d’une manière quelconque les modalités de cette garantie.
Cettegarantienecouvrepasl’usurenormaledespiècesoul’endommagementattribuableàlanégligence,à
l’utilisation abusive du produit, au branchement sur un circuit de tension ou courant inapproprié, au non-respect du
moded’emploi,audémontageetàlaréparationouàl’altérationparquiconque,saufJCSouuncentredeservice
agréé JCS. Cette garantie ne couvre pas non plus les cas de force majeure comme incendies, inondations, ouragans et
tornades.
Quelles sont les limites de la responsabilité de JCS?
JCS n’assume aucune responsabilité pour les dommages accessoires ou indirects résultant du non-respect de toute
garantie ou condition explicite, implicite ou générale.
Sauf dans la mesure interdite par la législation pertinente, toute garantie implicite de qualité marchande ou
d’applicationàunusageparticulierestlimitéeàladuréedelagarantieouconditionci-dessus.
JCS décline toutes autres garanties, conditions ou représentations expresses, sous-entendues, générales, ou autres.
JCS n’assume aucune responsabilité pour les dommages, quels qu’ils soient, résultant de l’achat, de l’utilisation
normaleouabusiveoudel’inaptitudeàutiliserleproduit,ycomprislesdommagesaccessoires,lesdommages-intérêts
particuliers, les dommages immatériels et les dommages similaires ou pertes de profits; ou bien pour les violations de
contrat, fondamentales, ou autres, ou les réclamations contre l’acheteur par un tiers.
Certaines provinces ou juridictions et certains états interdisent d’exclure ou de limiter les dommages accessoires ou
indirects, ou ne permettent pas la limitation de la durée d’application de la garantie implicite, de sorte que vous
pouveznepasêtreassujettiauxlimitesouexclusionsénoncéesci-dessus.
Cette garantie vous confère des droits juridiques précis et vous pouvez avoir d’autres droits, ces droits variant d’une
province,d’unétatoud’unejuridictionàl’autre.
Comment obtenir le service prévu par la garantie
Aux États-Unis
Si vous avez des questions sur le produit ou la garantie, ou si vous voulez bénéficier d’un service dans le cadre de la
garantie, veuillez appeler le 1 888 264-9669 pour obtenir l’adresse d’un centre de service agréé.
Au Canada
Si vous avez des questions sur le produit ou la garantie, ou si vous voulez bénéficier d’un service dans le cadre de la
garantie, veuillez appeler le 1 888 264-9669 pour obtenir l’adresse d’un centre de service agréé.
Aux États-Unis, cette garantie est offerte par Sunbeam Products Inc. faisant affaires sous le nom de Jarden Consumer
Solutions,situéeàBocaRaton,Floride33431.AuCanada,cettegarantieestofferteparSunbeamCorporation
(Canada), Limited faisant affaires sous le nom de Jarden Consumer Solutions, située au 20 B Rue Hereford, Brampton,
(Ontario)L6YOM1.Sivouséprouveztoutautreproblèmeousivousdésirezeffectuertouteautreréclamationquantà
ceproduit,veuillezécrireànotreserviceàlaclientèle.VEUILLEZ NE RETOURNER CE PRODUIT À AUCUNE DE
CES ADRESSES NI À L’ÉTABLISSEMENT D’ACHAT.
Guide d’utilisation
VEUILLEZ LIRE ET CONSERVER CES DIRECTIVES IMPORTANTES
Instruction Leaflet
PLEASE READ AND SAVE THESE IMPORTANT INSTRUCTIONS
SCM4100-CN
TRUSTED FOR OVER
100 YEARS
INSPIRE CONFIANCE
DEPUIS PLUS DE
100 ANS
Cool Mist
Humidifier
FILTER# : SWF62/SF212
FILTER TYPE : WICK
Humidicateur
à vapeur froide
SCM4100-CN
FILTER# : SWF62/SF212
TYPE DE FILTRE : À MÈCHE
Si vous avez des questions sur le produit ou voulez en
savoir plus sur d’autres produits SunbeamMD, veuillez
vousadresserànotreServiceclientau
1888264-9669.Vouspouvezaussivousrendresur
notresiteWeb,àwww.sunbeam.ca.
If you have any questions regarding your product or
would like to learn more about other Sunbeam®
products, please contact our Consumer Service
Department at 1-888-264-9669 or visit our website at
www.sunbeam.ca.
STORAGE INSTRUCTIONS
When not using your humidifier for an extended period
of time:
1. Dispose of the filters. DO NOT leave in unit.
2. Clean, rinse and thoroughly dry the humidifier as
directed in weekly maintenance. DO NOT leave any
water in the unit when storing. Leaving water in the
unit may render the unit inoperable for the following
season.
3. Place the humidifier in the original carton and store
in a cool, dry place.
4. Order your replacement filter for next year’s use.
REPLACEMENT ACCESSORIES
To order the replacement accessories you can do any of
the following:
• Visityourlocalretailer
• Goto
www.sunbeam.ca
• CallConsumerServiceat1-888-264-9669
FILTRE
DE RECHANGE
SCM4100-CN_12EFM1.indd 1 5/24/12 8:50 AM

INSTRUCTIONS D’ENTREPOSAGE
Quand l’unité n’est pas utilisée pour une période
prolongée :
1. Jetez le filtre. NE le laissez PAS dans l’unité.
2. Nettoyez, rincez et séchez soigneusement
l’humidificateur selon les directives de l’entretien
hebdomadaire. NE laissez PAS d’eau dans l’unité
durant le remisage. Si de l’eau est laissée dans
l’unité, cette dernière pourrait ne pas fonctionner lors
de la prochaine saison.
3. Placez l’humidificateur dans son emballage original
et remisez-le dans un endroit frais et sec.
4. Commandez un filtre de rechange pour la prochaine
saison.
ACCESSOIRES DE RECHANGE
Pour commander des accessoires de rechange, vous
pouvez choisir l’une des méthodes suivantes:
• Visitervotredétaillantlocal
• Vousrendreàl’adresse
www.sunbeam.ca
• Appelerleserviceàlaclientèleencomposantle
1 888 264-9669
Printed In China
STORAGE INSTRUCTIONS
REPLACEMENT ACCESSORIES TROUBLESHOOTING
FREQUENTLY ASKED QUESTIONS
WARRANTY INFORMATION
© 2012 Sunbeam Products, Inc. doing business as Jarden Consumer Solutions. All rights reserved. Imported and
distributed by Sunbeam Corporation (Canada) Limited doing business as Jarden Consumer Solutions, 20B Hereford
Street, Brampton, Ontario L6Y 0M1.
1 YEAR LIMITED WARRANTY
Sunbeam Products, Inc. doing business as Jarden Consumer Solutions or if in Canada, Sunbeam Corporation (Canada)
Limited doing business as Jarden Consumer Solutions (collectively “JCS”) warrants that for a period of one year from
the date of purchase, this product will be free from defects in material and workmanship. JCS, at its option, will repair
or replace this product or any component of the product found to be defective during the warranty period.
Replacement will be made with a new or remanufactured product or component. If the product is no longer available,
replacement may be made with a similar product of equal or greater value. This is your exclusive warranty. Do NOT
attempt to repair or adjust any electrical or mechanical functions on this product. Doing so will void this warranty.
This warranty is valid for the original retail purchaser from the date of initial retail purchase and is not transferable.
Keep the original sales receipt. Proof of purchase is required to obtain warranty performance. JCS dealers, service
centers, or retail stores selling JCS products do not have the right to alter, modify or any way change the terms and
conditions of this warranty.
This warranty does not cover normal wear of parts or damage resulting from any of the following: negligent use or
misuse of the product, use on improper voltage or current, use contrary to the operating instructions, disassembly,
repair or alteration by anyone other than JCS or an authorized JCS service center. Further, the warranty does not
cover: Acts of God, such as fire, flood, hurricanes and tornadoes.
What are the limits on JCS’s Liability?
JCS shall not be liable for any incidental or consequential damages caused by the breach of any express, implied or
statutory warranty or condition.
Except to the extent prohibited by applicable law, any implied warranty or condition of merchantability or fitness for a
particular purpose is limited in duration to the duration of the above warranty.
JCS disclaims all other warranties, conditions or representations, express, implied, statutory or otherwise.
JCS shall not be liable for any damages of any kind resulting from the purchase, use or misuse of, or inability to use
the product including incidental, special, consequential or similar damages or loss of profits, or for any breach of
contract, fundamental or otherwise, or for any claim brought against purchaser by any other party.
Some provinces, states or jurisdictions do not allow the exclusion or limitation of incidental or consequential damages
or limitations on how long an implied warranty lasts, so the above limitations or exclusion may not apply to you.
This warranty gives you specific legal rights, and you may also have other rights that vary from province to province,
state to state or jurisdiction to jurisdiction.
How to Obtain Warranty Service
In the U.S.A.
If you have any questions regarding this warranty or would like to obtain warranty service, please call 1-888-264-9669
and a convenient service center address will be provided to you.
In Canada
If you have any questions regarding this warranty or would like to obtain warranty service, please call 1-888-264-9669
and a convenient service center address will be provided to you.
In the U.S.A., this warranty is offered by Sunbeam Products, Inc. doing business as Jarden Consumer Solutions located
in Boca Raton, Florida 33431. In Canada, this warranty is offered by Sunbeam Corporation (Canada) Limited doing
business as Jarden Consumer Solutions, located at 20 B Hereford Street, Brampton, Ontario L6Y 0M1. If you have any
other problem or claim in connection with this product, please write our Consumer Service Department. PLEASE DO
NOT RETURN THIS PRODUCT TO ANY OF THESE ADDRESSES OR TO THE PLACE OF PURCHASE.
FREQUENTLY ASKED QUESTIONS
Question Answer
• What are the variables that affect
run time? The estimated run time for this humidifier is based on average room
conditions. The actual run time of your humidifier is dependent on
numerous variables such as:
✔ Air exchange in the room where the humidifier is placed.
✔ Room construction of the room where the humidifier is placed.
✔ Temperature of the room where the humidifier is placed.
✔ Humidity levels in the room where the humidifier is placed.
✔ Movement of occupants and the opening and closing of doors in the
room where the humidifier is placed.
✔ Home furnishings in the room where the humidifier is placed.
• How do I remove film on water
tank? ✔ See Daily Maintenance instructions. Regular cleaning is recommended.
• How can I extend the run time? ✔ Run your unit on the lowest setting.
QUESTIONS FRÉQUENTES
Questions Réponse
• Quelles sont les variables affectant
la durée de fonctionnement? La durée de fonctionnement de cet humidificateur se base sur des
conditions d’environnement moyennes. La durée de fonctionnement réelle
de votre humidificateur dépend de plusieurs variables, telles:
✔ L’échange d’air dans la pièce où est installé l’humidificateur.
✔ L’aménagement de la pièce où est installé l’humidificateur.
✔ La température de la pièce où est installé l’humidificateur.
✔ Le niveau d’humidité de la pièce où est installé l’humidificateur.
✔ Le déplacement des habitants et l’ouverture ou la fermeture des
portes de la pièce où est installé l’humidificateur.
✔ Les meubles dans la pièce où est installé l’humidificateur.
• Comment puis-je détartrer le
réservoir? ✔ Référez-vous aux instructions d’entretien quotidien. Un nettoyage
régulier est recommandé.
• Comment puis-je prolonger la
durée de fonctionnement? ✔ Faites fonctionner votre appareil au réglage le plus bas.
TROUBLESHOOTING
TROUBLE PROBABLE CAUSE SOLUTION
• Unitdoesnotturn
on. *Not plugged in.
*Humidistat is set too low.
*Outlet not functioning.
4Plug in unit.
4Turn humidistat to the highest setting ( ).
4Have outlet replaced by a licensed electrician.
• Mistoutputminimal
to none. *Filter has not absorbed water.
*Cool mist is invisible.
*Filter has reached the end of its
life.
4Wait 30 minutes for filter to absorb water.
4Operate in High (2) setting.
4Replace filter.
• Filterturnsbrown. *The filter has absorbed
minerals. 4Replace your filter (SWF62/SF212) by calling
1-888-264-9669, or visiting
www.sunbeam.ca
.
DÉTECTION DE PANNE
PROBLÈME CAUSE PROBABLE SOLUTION
• L’appareilnese
met pas en marche. *L’unité n’est pas branchée.
*L’humidistat est trop bas.
*La prise de courant est
défectueuse.
4Branchez l’unité.
4Mettez l’humidistat au réglage le plus haut ( ).
4 Demandezàunélectricienagrééderemplacerla
prise.
• Ledébitdevapeur
est minimal ou nul. *Le filtre n’a pas encore
absorbé d’eau.
*La vapeur froide est
invisible.
*Lefiltreestàlafindesavie
utile.
4Attendez 30 minutes, le temps que le filtre
absorbe de I’eau.
4Faites fonctionner l’appareil au réglage haut (2).
4Remplacez le filtre.
• Lefiltredevient
brun. *Le filtre a capté des
minéraux. 4Remplacez le filtre (SWF62/SF212) en
composant le 1 888 264-9669, ou visitez
www.sunbeam.ca.
157829 SCM4100-CN_12EFM1 Imprimé en Chine
GCDS-SUN25220-PH
INSTRUCTIONS D’ENTREPOSAGE
ACCESSOIRES DE RECHANGE DÉPANNAGE
QUESTIONS FRÉQUENTES INFORMATION SUR LA GARANTIE
© 2012 Sunbeam Products, Inc. faisant affaires sous le nom de Jarden Consumer Solutions. Tous droits réservés.
Importé et distribué par Sunbeam Corporation (Canada) Limited faisant affaires sous le nom de Jarden Consumer
Solutions, 20B Hereford Street, Brampton (Ontario) L6Y 0M1.
GARANTIE LIMITÉE DE 1 AN
Sunbeam Products, Inc. faisant affaires sous le nom de Jarden Consumer Solutions ou, si au Canada, Sunbeam
Corporation (Canada) Limited faisant affaires sous le nom de Jarden Consumer Solutions (collectivement « JCS »)
garantitquepourunepériodedeunanàpartirdeladated’achat,ceproduitseraexemptdedéfautsdepiècesetde
main-d’œuvre.JCS,àsadiscrétion,répareraouremplaceraceproduitoutoutcomposantduproduitdéclaré
défectueux pendant la période de garantie.
Le produit ou composant de remplacement sera soit neuf soit réusiné. Si le produit n’est plus disponible, il sera
remplacé par un produit similaire de valeur égale ou supérieure. Il s’agit de votre garantie exclusive. N’essayez PAS
de réparer ou d’ajuster toute fonction électrique ou mécanique de ce produit, cela annulera cette garantie.
Cettegarantien’estvalablequepourl’acheteuraudétailoriginalàpartirdeladatedel’achataudétailinitialetelle
n’estpastransférable.Veuillezconserverlereçud’achatoriginal.Lapreuved’achatestexigéepourtoutservice
couvert par la garantie. Les concessionnaires JCS, les centres de service et les détaillants qui vendent des articles JCS
n’ont pas le droit d’altérer, de modifier ou de changer d’une manière quelconque les modalités de cette garantie.
Cettegarantienecouvrepasl’usurenormaledespiècesoul’endommagementattribuableàlanégligence,à
l’utilisation abusive du produit, au branchement sur un circuit de tension ou courant inapproprié, au non-respect du
moded’emploi,audémontageetàlaréparationouàl’altérationparquiconque,saufJCSouuncentredeservice
agréé JCS. Cette garantie ne couvre pas non plus les cas de force majeure comme incendies, inondations, ouragans et
tornades.
Quelles sont les limites de la responsabilité de JCS?
JCS n’assume aucune responsabilité pour les dommages accessoires ou indirects résultant du non-respect de toute
garantie ou condition explicite, implicite ou générale.
Sauf dans la mesure interdite par la législation pertinente, toute garantie implicite de qualité marchande ou
d’applicationàunusageparticulierestlimitéeàladuréedelagarantieouconditionci-dessus.
JCS décline toutes autres garanties, conditions ou représentations expresses, sous-entendues, générales, ou autres.
JCS n’assume aucune responsabilité pour les dommages, quels qu’ils soient, résultant de l’achat, de l’utilisation
normaleouabusiveoudel’inaptitudeàutiliserleproduit,ycomprislesdommagesaccessoires,lesdommages-intérêts
particuliers, les dommages immatériels et les dommages similaires ou pertes de profits; ou bien pour les violations de
contrat, fondamentales, ou autres, ou les réclamations contre l’acheteur par un tiers.
Certaines provinces ou juridictions et certains états interdisent d’exclure ou de limiter les dommages accessoires ou
indirects, ou ne permettent pas la limitation de la durée d’application de la garantie implicite, de sorte que vous
pouveznepasêtreassujettiauxlimitesouexclusionsénoncéesci-dessus.
Cette garantie vous confère des droits juridiques précis et vous pouvez avoir d’autres droits, ces droits variant d’une
province,d’unétatoud’unejuridictionàl’autre.
Comment obtenir le service prévu par la garantie
Aux États-Unis
Si vous avez des questions sur le produit ou la garantie, ou si vous voulez bénéficier d’un service dans le cadre de la
garantie, veuillez appeler le 1 888 264-9669 pour obtenir l’adresse d’un centre de service agréé.
Au Canada
Si vous avez des questions sur le produit ou la garantie, ou si vous voulez bénéficier d’un service dans le cadre de la
garantie, veuillez appeler le 1 888 264-9669 pour obtenir l’adresse d’un centre de service agréé.
Aux États-Unis, cette garantie est offerte par Sunbeam Products Inc. faisant affaires sous le nom de Jarden Consumer
Solutions,situéeàBocaRaton,Floride33431.AuCanada,cettegarantieestofferteparSunbeamCorporation
(Canada), Limited faisant affaires sous le nom de Jarden Consumer Solutions, située au 20 B Rue Hereford, Brampton,
(Ontario)L6YOM1.Sivouséprouveztoutautreproblèmeousivousdésirezeffectuertouteautreréclamationquantà
ceproduit,veuillezécrireànotreserviceàlaclientèle.VEUILLEZ NE RETOURNER CE PRODUIT À AUCUNE DE
CES ADRESSES NI À L’ÉTABLISSEMENT D’ACHAT.
Guide d’utilisation
VEUILLEZ LIRE ET CONSERVER CES DIRECTIVES IMPORTANTES
Instruction Leaflet
PLEASE READ AND SAVE THESE IMPORTANT INSTRUCTIONS
SCM4100-CN
TRUSTED FOR OVER
100 YEARS
INSPIRE CONFIANCE
DEPUIS PLUS DE
100 ANS
Cool Mist
Humidifier
FILTER# : SWF62/SF212
FILTER TYPE : WICK
Humidicateur
à vapeur froide
SCM4100-CN
FILTER# : SWF62/SF212
TYPE DE FILTRE : À MÈCHE
Si vous avez des questions sur le produit ou voulez en
savoir plus sur d’autres produits SunbeamMD, veuillez
vousadresserànotreServiceclientau
1888264-9669.Vouspouvezaussivousrendresur
notresiteWeb,àwww.sunbeam.ca.
If you have any questions regarding your product or
would like to learn more about other Sunbeam®
products, please contact our Consumer Service
Department at 1-888-264-9669 or visit our website at
www.sunbeam.ca.
STORAGE INSTRUCTIONS
When not using your humidifier for an extended period
of time:
1. Dispose of the filters. DO NOT leave in unit.
2. Clean, rinse and thoroughly dry the humidifier as
directed in weekly maintenance. DO NOT leave any
water in the unit when storing. Leaving water in the
unit may render the unit inoperable for the following
season.
3. Place the humidifier in the original carton and store
in a cool, dry place.
4. Order your replacement filter for next year’s use.
REPLACEMENT ACCESSORIES
To order the replacement accessories you can do any of
the following:
• Visityourlocalretailer
• Goto
www.sunbeam.ca
• CallConsumerServiceat1-888-264-9669
FILTRE
DE RECHANGE
SCM4100-CN_12EFM1.indd 1 5/24/12 8:50 AM
INSTRUCTIONS D’ENTREPOSAGE
Quand l’unité n’est pas utilisée pour une période
prolongée :
1. Jetez le filtre. NE le laissez PAS dans l’unité.
2. Nettoyez, rincez et séchez soigneusement
l’humidificateur selon les directives de l’entretien
hebdomadaire. NE laissez PAS d’eau dans l’unité
durant le remisage. Si de l’eau est laissée dans
l’unité, cette dernière pourrait ne pas fonctionner lors
de la prochaine saison.
3. Placez l’humidificateur dans son emballage original
et remisez-le dans un endroit frais et sec.
4. Commandez un filtre de rechange pour la prochaine
saison.
ACCESSOIRES DE RECHANGE
Pour commander des accessoires de rechange, vous
pouvez choisir l’une des méthodes suivantes:
• Visitervotredétaillantlocal
• Vousrendreàl’adresse
www.sunbeam.ca
• Appelerleserviceàlaclientèleencomposantle
1 888 264-9669
Printed In China
STORAGE INSTRUCTIONS
REPLACEMENT ACCESSORIES TROUBLESHOOTING
FREQUENTLY ASKED QUESTIONS WARRANTY INFORMATION
© 2012 Sunbeam Products, Inc. doing business as Jarden Consumer Solutions. All rights reserved. Imported and
distributed by Sunbeam Corporation (Canada) Limited doing business as Jarden Consumer Solutions, 20B Hereford
Street, Brampton, Ontario L6Y 0M1.
1 YEAR LIMITED WARRANTY
Sunbeam Products, Inc. doing business as Jarden Consumer Solutions or if in Canada, Sunbeam Corporation (Canada)
Limited doing business as Jarden Consumer Solutions (collectively “JCS”) warrants that for a period of one year from
the date of purchase, this product will be free from defects in material and workmanship. JCS, at its option, will repair
or replace this product or any component of the product found to be defective during the warranty period.
Replacement will be made with a new or remanufactured product or component. If the product is no longer available,
replacement may be made with a similar product of equal or greater value. This is your exclusive warranty. Do NOT
attempt to repair or adjust any electrical or mechanical functions on this product. Doing so will void this warranty.
This warranty is valid for the original retail purchaser from the date of initial retail purchase and is not transferable.
Keep the original sales receipt. Proof of purchase is required to obtain warranty performance. JCS dealers, service
centers, or retail stores selling JCS products do not have the right to alter, modify or any way change the terms and
conditions of this warranty.
This warranty does not cover normal wear of parts or damage resulting from any of the following: negligent use or
misuse of the product, use on improper voltage or current, use contrary to the operating instructions, disassembly,
repair or alteration by anyone other than JCS or an authorized JCS service center. Further, the warranty does not
cover: Acts of God, such as fire, flood, hurricanes and tornadoes.
What are the limits on JCS’s Liability?
JCS shall not be liable for any incidental or consequential damages caused by the breach of any express, implied or
statutory warranty or condition.
Except to the extent prohibited by applicable law, any implied warranty or condition of merchantability or fitness for a
particular purpose is limited in duration to the duration of the above warranty.
JCS disclaims all other warranties, conditions or representations, express, implied, statutory or otherwise.
JCS shall not be liable for any damages of any kind resulting from the purchase, use or misuse of, or inability to use
the product including incidental, special, consequential or similar damages or loss of profits, or for any breach of
contract, fundamental or otherwise, or for any claim brought against purchaser by any other party.
Some provinces, states or jurisdictions do not allow the exclusion or limitation of incidental or consequential damages
or limitations on how long an implied warranty lasts, so the above limitations or exclusion may not apply to you.
This warranty gives you specific legal rights, and you may also have other rights that vary from province to province,
state to state or jurisdiction to jurisdiction.
How to Obtain Warranty Service
In the U.S.A.
If you have any questions regarding this warranty or would like to obtain warranty service, please call 1-888-264-9669
and a convenient service center address will be provided to you.
In Canada
If you have any questions regarding this warranty or would like to obtain warranty service, please call 1-888-264-9669
and a convenient service center address will be provided to you.
In the U.S.A., this warranty is offered by Sunbeam Products, Inc. doing business as Jarden Consumer Solutions located
in Boca Raton, Florida 33431. In Canada, this warranty is offered by Sunbeam Corporation (Canada) Limited doing
business as Jarden Consumer Solutions, located at 20 B Hereford Street, Brampton, Ontario L6Y 0M1. If you have any
other problem or claim in connection with this product, please write our Consumer Service Department. PLEASE DO
NOT RETURN THIS PRODUCT TO ANY OF THESE ADDRESSES OR TO THE PLACE OF PURCHASE.
FREQUENTLY ASKED QUESTIONS
Question Answer
• What are the variables that affect
run time? The estimated run time for this humidifier is based on average room
conditions. The actual run time of your humidifier is dependent on
numerous variables such as:
✔ Air exchange in the room where the humidifier is placed.
✔ Room construction of the room where the humidifier is placed.
✔ Temperature of the room where the humidifier is placed.
✔ Humidity levels in the room where the humidifier is placed.
✔ Movement of occupants and the opening and closing of doors in the
room where the humidifier is placed.
✔ Home furnishings in the room where the humidifier is placed.
• How do I remove film on water
tank? ✔ See Daily Maintenance instructions. Regular cleaning is recommended.
• How can I extend the run time? ✔ Run your unit on the lowest setting.
QUESTIONS FRÉQUENTES
Questions Réponse
• Quelles sont les variables affectant
la durée de fonctionnement? La durée de fonctionnement de cet humidificateur se base sur des
conditions d’environnement moyennes. La durée de fonctionnement réelle
de votre humidificateur dépend de plusieurs variables, telles:
✔ L’échange d’air dans la pièce où est installé l’humidificateur.
✔ L’aménagement de la pièce où est installé l’humidificateur.
✔ La température de la pièce où est installé l’humidificateur.
✔ Le niveau d’humidité de la pièce où est installé l’humidificateur.
✔ Le déplacement des habitants et l’ouverture ou la fermeture des
portes de la pièce où est installé l’humidificateur.
✔ Les meubles dans la pièce où est installé l’humidificateur.
• Comment puis-je détartrer le
réservoir? ✔ Référez-vous aux instructions d’entretien quotidien. Un nettoyage
régulier est recommandé.
• Comment puis-je prolonger la
durée de fonctionnement? ✔ Faites fonctionner votre appareil au réglage le plus bas.
TROUBLESHOOTING
TROUBLE PROBABLE CAUSE SOLUTION
• Unitdoesnotturn
on. *Not plugged in.
*Humidistat is set too low.
*Outlet not functioning.
4Plug in unit.
4Turn humidistat to the highest setting ( ).
4Have outlet replaced by a licensed electrician.
• Mistoutputminimal
to none. *Filter has not absorbed water.
*Cool mist is invisible.
*Filter has reached the end of its
life.
4Wait 30 minutes for filter to absorb water.
4Operate in High (2) setting.
4Replace filter.
• Filterturnsbrown. *The filter has absorbed
minerals. 4Replace your filter (SWF62/SF212) by calling
1-888-264-9669, or visiting
www.sunbeam.ca
.
DÉTECTION DE PANNE
PROBLÈME CAUSE PROBABLE SOLUTION
• L’appareilnese
met pas en marche. *L’unité n’est pas branchée.
*L’humidistat est trop bas.
*La prise de courant est
défectueuse.
4Branchez l’unité.
4Mettez l’humidistat au réglage le plus haut ( ).
4 Demandezàunélectricienagrééderemplacerla
prise.
• Ledébitdevapeur
est minimal ou nul. *Le filtre n’a pas encore
absorbé d’eau.
*La vapeur froide est
invisible.
*Lefiltreestàlafindesavie
utile.
4Attendez 30 minutes, le temps que le filtre
absorbe de I’eau.
4Faites fonctionner l’appareil au réglage haut (2).
4Remplacez le filtre.
• Lefiltredevient
brun. *Le filtre a capté des
minéraux. 4Remplacez le filtre (SWF62/SF212) en
composant le 1 888 264-9669, ou visitez
www.sunbeam.ca.
157829 SCM4100-CN_12EFM1 Imprimé en Chine
GCDS-SUN25220-PH
INSTRUCTIONS D’ENTREPOSAGE
ACCESSOIRES DE RECHANGE DÉPANNAGE
QUESTIONS FRÉQUENTES INFORMATION SUR LA GARANTIE
© 2012 Sunbeam Products, Inc. faisant affaires sous le nom de Jarden Consumer Solutions. Tous droits réservés.
Importé et distribué par Sunbeam Corporation (Canada) Limited faisant affaires sous le nom de Jarden Consumer
Solutions, 20B Hereford Street, Brampton (Ontario) L6Y 0M1.
GARANTIE LIMITÉE DE 1 AN
Sunbeam Products, Inc. faisant affaires sous le nom de Jarden Consumer Solutions ou, si au Canada, Sunbeam
Corporation (Canada) Limited faisant affaires sous le nom de Jarden Consumer Solutions (collectivement « JCS »)
garantitquepourunepériodedeunanàpartirdeladated’achat,ceproduitseraexemptdedéfautsdepiècesetde
main-d’œuvre.JCS,àsadiscrétion,répareraouremplaceraceproduitoutoutcomposantduproduitdéclaré
défectueux pendant la période de garantie.
Le produit ou composant de remplacement sera soit neuf soit réusiné. Si le produit n’est plus disponible, il sera
remplacé par un produit similaire de valeur égale ou supérieure. Il s’agit de votre garantie exclusive. N’essayez PAS
de réparer ou d’ajuster toute fonction électrique ou mécanique de ce produit, cela annulera cette garantie.
Cettegarantien’estvalablequepourl’acheteuraudétailoriginalàpartirdeladatedel’achataudétailinitialetelle
n’estpastransférable.Veuillezconserverlereçud’achatoriginal.Lapreuved’achatestexigéepourtoutservice
couvert par la garantie. Les concessionnaires JCS, les centres de service et les détaillants qui vendent des articles JCS
n’ont pas le droit d’altérer, de modifier ou de changer d’une manière quelconque les modalités de cette garantie.
Cettegarantienecouvrepasl’usurenormaledespiècesoul’endommagementattribuableàlanégligence,à
l’utilisation abusive du produit, au branchement sur un circuit de tension ou courant inapproprié, au non-respect du
moded’emploi,audémontageetàlaréparationouàl’altérationparquiconque,saufJCSouuncentredeservice
agréé JCS. Cette garantie ne couvre pas non plus les cas de force majeure comme incendies, inondations, ouragans et
tornades.
Quelles sont les limites de la responsabilité de JCS?
JCS n’assume aucune responsabilité pour les dommages accessoires ou indirects résultant du non-respect de toute
garantie ou condition explicite, implicite ou générale.
Sauf dans la mesure interdite par la législation pertinente, toute garantie implicite de qualité marchande ou
d’applicationàunusageparticulierestlimitéeàladuréedelagarantieouconditionci-dessus.
JCS décline toutes autres garanties, conditions ou représentations expresses, sous-entendues, générales, ou autres.
JCS n’assume aucune responsabilité pour les dommages, quels qu’ils soient, résultant de l’achat, de l’utilisation
normaleouabusiveoudel’inaptitudeàutiliserleproduit,ycomprislesdommagesaccessoires,lesdommages-intérêts
particuliers, les dommages immatériels et les dommages similaires ou pertes de profits; ou bien pour les violations de
contrat, fondamentales, ou autres, ou les réclamations contre l’acheteur par un tiers.
Certaines provinces ou juridictions et certains états interdisent d’exclure ou de limiter les dommages accessoires ou
indirects, ou ne permettent pas la limitation de la durée d’application de la garantie implicite, de sorte que vous
pouveznepasêtreassujettiauxlimitesouexclusionsénoncéesci-dessus.
Cette garantie vous confère des droits juridiques précis et vous pouvez avoir d’autres droits, ces droits variant d’une
province,d’unétatoud’unejuridictionàl’autre.
Comment obtenir le service prévu par la garantie
Aux États-Unis
Si vous avez des questions sur le produit ou la garantie, ou si vous voulez bénéficier d’un service dans le cadre de la
garantie, veuillez appeler le 1 888 264-9669 pour obtenir l’adresse d’un centre de service agréé.
Au Canada
Si vous avez des questions sur le produit ou la garantie, ou si vous voulez bénéficier d’un service dans le cadre de la
garantie, veuillez appeler le 1 888 264-9669 pour obtenir l’adresse d’un centre de service agréé.
Aux États-Unis, cette garantie est offerte par Sunbeam Products Inc. faisant affaires sous le nom de Jarden Consumer
Solutions,situéeàBocaRaton,Floride33431.AuCanada,cettegarantieestofferteparSunbeamCorporation
(Canada), Limited faisant affaires sous le nom de Jarden Consumer Solutions, située au 20 B Rue Hereford, Brampton,
(Ontario)L6YOM1.Sivouséprouveztoutautreproblèmeousivousdésirezeffectuertouteautreréclamationquantà
ceproduit,veuillezécrireànotreserviceàlaclientèle.VEUILLEZ NE RETOURNER CE PRODUIT À AUCUNE DE
CES ADRESSES NI À L’ÉTABLISSEMENT D’ACHAT.
Guide d’utilisation
VEUILLEZ LIRE ET CONSERVER CES DIRECTIVES IMPORTANTES
Instruction Leaflet
PLEASE READ AND SAVE THESE IMPORTANT INSTRUCTIONS
SCM4100-CN
TRUSTED FOR OVER
100 YEARS
INSPIRE CONFIANCE
DEPUIS PLUS DE
100 ANS
Cool Mist
Humidifier
FILTER# : SWF62/SF212
FILTER TYPE : WICK
Humidicateur
à vapeur froide
SCM4100-CN
FILTER# : SWF62/SF212
TYPE DE FILTRE : À MÈCHE
Si vous avez des questions sur le produit ou voulez en
savoir plus sur d’autres produits SunbeamMD, veuillez
vousadresserànotreServiceclientau
1888264-9669.Vouspouvezaussivousrendresur
notresiteWeb,àwww.sunbeam.ca.
If you have any questions regarding your product or
would like to learn more about other Sunbeam®
products, please contact our Consumer Service
Department at 1-888-264-9669 or visit our website at
www.sunbeam.ca.
STORAGE INSTRUCTIONS
When not using your humidifier for an extended period
of time:
1. Dispose of the filters. DO NOT leave in unit.
2. Clean, rinse and thoroughly dry the humidifier as
directed in weekly maintenance. DO NOT leave any
water in the unit when storing. Leaving water in the
unit may render the unit inoperable for the following
season.
3. Place the humidifier in the original carton and store
in a cool, dry place.
4. Order your replacement filter for next year’s use.
REPLACEMENT ACCESSORIES
To order the replacement accessories you can do any of
the following:
• Visityourlocalretailer
• Goto
www.sunbeam.ca
• CallConsumerServiceat1-888-264-9669
FILTRE
DE RECHANGE
SCM4100-CN_12EFM1.indd 1 5/24/12 8:50 AM
Table of contents
Other Sunbeam Humidifier manuals

Sunbeam
Sunbeam 631 User manual

Sunbeam
Sunbeam 129857 User manual

Sunbeam
Sunbeam SUL001W-CN Series Manual

Sunbeam
Sunbeam SCM1300-CN Manual

Sunbeam
Sunbeam SCM630 User manual

Sunbeam
Sunbeam 631-705 Manual

Sunbeam
Sunbeam SWM6000-CN Manual

Sunbeam
Sunbeam HUMIDIFIERCool User manual

Sunbeam
Sunbeam SCM1747-CN Manual

Sunbeam
Sunbeam SWM5250 User manual

Sunbeam
Sunbeam SUL495 Manual

Sunbeam
Sunbeam SUL2610-CN Manual

Sunbeam
Sunbeam SCM3502-CN Manual

Sunbeam
Sunbeam SWM6000 Manual

Sunbeam
Sunbeam SWM6000 User manual

Sunbeam
Sunbeam SWM5251-CN Manual

Sunbeam
Sunbeam SCM3502-CN Manual

Sunbeam
Sunbeam 1124 User manual

Sunbeam
Sunbeam SCM630 User manual

Sunbeam
Sunbeam 697 User manual