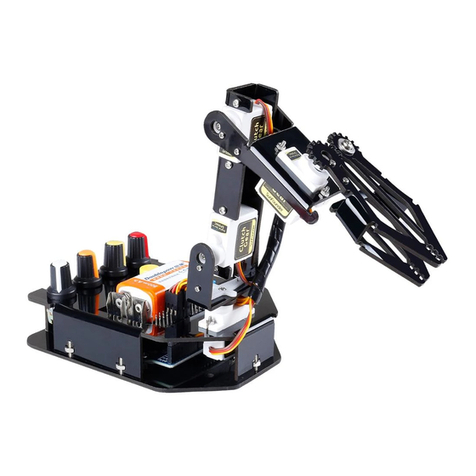
SunFounder RollbotMicro User manual

Preface
About SunFounder
SunFounder is a technology company focused on Raspberry Pi and Arduino open source
community development. Committed to the promotion of open source culture, we strive to
bring the fun of electronics making to people all around the world and enable everyone to be a
maker. Our products include learning kits, development boards, robots, sensor modules and
development tools. In addition to high quality products, SunFounder also offers video tutorials to
help your own project. If you have interest in open source or making something cool, welcome
to join us! Visit www.sunfounder.com for more!
About the Kit
The RollbotMicro kit is a very interesting and suitable learning tool for Arduino and robot
hobbyists. It has a simple structure and adopts PCB as the main structure. Based on the Arduino
platform, we can learn programming from easy to difficult so as to control the robot. With the
help of the mobile APP, we can play different games! It can follow lines on a maze map by
programming and you can also control it through an Android APP Rollman. In addition, you can
play games similar to the Chinese aeroplane chess and Ludo with your friends!
You will enjoy learning how all this work. You may visit our website www.sunfounder.com to
download the related code and view the user manual on LEARN -> Get Tutorials and watch
related videos under VIDEO, or clone the code on our page of github.com at
https://github.com/sunfounder/SunFounder_Rollbot
You are welcome to pull requests and issue posts on our page on Github.
Free Support
If you have any TECHNICAL questions, add a topic under FORUM section on our website
and we'll reply as soon as possible.
For NON-TECH questions like order and shipment issues, please send an email to
service@sunfounder.com. You're also welcomed to share your projects on FORUM.
SunFounder

Contents
Introduction..................................................................................................................................................1
1.1Overview ........................................................................................................................................1
Components list...........................................................................................................................................2
2.1 Mechanical Fasteners .................................................................................................................2
2.2 Electronic Components ..............................................................................................................3
2.3 Tools ...............................................................................................................................................5
Software Operation ....................................................................................................................................6
3.1 Get the Code...............................................................................................................................6
3.1.1 Install Arduino IDE ............................................................................................................6
3.1.2 Connecting RollbotMicro to Your Computer ..............................................................6
3.2 Add libraries..................................................................................................................................7
Assembling ...................................................................................................................................................9
4.1 Main Board+ N20 Gear Motors ................................................................................................10
4.2 N20 Gear Motor + Wheels ........................................................................................................11
4.3 Main Board + Universal Wheel .................................................................................................12
4.4 Main Board + Battery.................................................................................................................13
4.5 Main Board +Screen..................................................................................................................14
4.6 Main Board+ Infrared Sensor ....................................................................................................14
4.7 Rollbot + Covers .........................................................................................................................15
4.8 DIY Covers...................................................................................................................................15
Gameplay ..................................................................................................................................................17
5.1 Display the Sensor Signal Intensity on OLED...........................................................................17
5.2 Motor Testing ..............................................................................................................................20
5.3 Line Following ...........................................................................................................................20
5.3.1 Magic Forest...................................................................................................................21
5.3.2 DIY Map ..........................................................................................................................22
Hardware Introduction .............................................................................................................................24
6.1 Overview.....................................................................................................................................24
6.2 Main Control...............................................................................................................................24
6.3 USB interface module................................................................................................................26
6.4 LED display module ...................................................................................................................26
Program Explanation ................................................................................................................................28
7.1 Smiling Face with LEDs...............................................................................................................28
7.2 The OLED display screen displays the sensor signal of the car program ...........................28
7.3 Line Following .............................................................................................................................29
Appendix: FAQ ..........................................................................................................................................32
Afterword....................................................................................................................................................33
SunFounder

Kids can seek help from their parents or teacher if there're
difficulties.
Kind Reminder
SunFounder

ROLLBOTMICRO
1
Introduction
1.1Overview
RollbotMicro kit is a very interesting and suitable learning tool for Arduino and robot hobbyist. It
has simple structure and runs PCB as the main structure of the robot. As it is based on the Arduino
platform, we can learn programming from easy to difficult so as to achieve the control of the
robot.
This funny mini robot is composed of an integrated PCB, two driving wheels and a universal
wheel. It is charged by the rechargeable Li-ion battery and compatible with the Arduino board.
Accessories including an OLED screen and an infrared sensor module. In addition, the
integrated board contains the control of the N20 gear motor and the OLED screen. This kit is also
equipped with a battery charger and a simple but delicate map for you to play the game via
the line following function.
SunFounder

ROLLBOTMICRO
2
Components list
2.1 Mechanical Fasteners
Component
Name
Quantity
M2*10 Screw
4
M2 Nut
4
M2.5*12 Screw
2
M2.5 Nut
2
3*4-6 Spacer
2
SunFounder

ROLLBOTMICRO
3
2.2 Electronic Components
Component
Name
Quantity
N20 Gear Motor
2
N20 Motor Mount
2
Main Board
1
OLED Screen
1
Infrared Sensor
1
Universal Wheel
1
SunFounder

ROLLBOTMICRO
4
Wheel
2
Battery
1
3.7V USB Charger for
Li-Po Battery
1
USB Type-C Cable
1
Double-sided Tape
1
OLED Cover
1
SunFounder

ROLLBOTMICRO
5
Test card
1
Black Tape
1
Marker Pen
1
Guide Card
3
Map
1
2.3 Tools
Accessory
Name
Quantity
Screw driver
1
SunFounder

ROLLBOTMICRO
6
Software Operation
3.1 Get the Code
Go to our website www.sunfounder.com, click LEARN -> Get Tutorials, under Robot Kit find Rollbot,
click it and on the page click the package Rollbot.zip to download,and unzip it.
3.1.1 Install Arduino IDE
The code in this kit is written based on Arduino, so you need to install the IDE first. Skip it if you
have done this.
Now go to the arduino.cc website and click DOWNLOAD. On the page, check the software list
on the right side under Download the Arduino Software.
Find the one that suits your operation system and click to download. There are two versions of
Arduino for Windows: Installer or ZIP file. You're recommended to download the former. Just
download the package, and run the executable file to start installation. It will download the
driver needed to run Arduino IDE. After downloading, follow the prompts to install.
For details of the installing steps, you can go to WIKI on our website www.sunfounder.com/wiki.
Install Arduino Software
After installing, you will see Arduino icon on your desk and double click to open it.
3.1.2 Connecting RollbotMicro to Your Computer
Use a USB Type-C cable (equipped in the kit) to connect the RollbotMicro to the computer.
Once you’ve plugged in, the LEDs on the board will light, the computer will install the necessary
driver automatically. Windows users can view the port in the device manager: USB Serial Port
(COM55); your port must be different from mine.
SunFounder

ROLLBOTMICRO
7
3.2 Add libraries
1) Libraries are a collection of code that makes it easy for you to connect to a sensor, display,
module, etc. In this kit ,you will need to add two libraries to the Arduino libraries folder:
FlexiTimer2 and RollbotMicro
2) Select Sketch -> Import Library -> Add Library. Find the MsTimer2 library under the Library
folder. Click Open.
SunFounder

ROLLBOTMICRO
8
3) Here you should see the Library has been added to your libraries. Check it by Sketch ->
Include Library
4) Import the Rollbot library from the libraries folder in the same way.
5) Here you should see Library added to your libraries. Check Include Library and the libraries
just imported have appeared on the list.
For more information about Arduino, visit: http://arduino.cc/ and http://www.sunfounder.com/.
SunFounder

ROLLBOTMICRO
9
Assembling
You can see the general assembling procedures through the exploded view. On a whole, the
assembling is easy.
SunFounder

ROLLBOTMICRO
10
4.1 Main Board+ N20 Gear Motors
1. Align the N20 gear motor with the areas
in the lines of the mainboard (the car
body).
2. Put the gear motor to the corresponding
area of the main board and align the
outside edge with the edge of the main
board.
3. Align two M2 nuts with the holes of the
motor mount.
4. Place the nuts in the holes, and be
careful about not falling out.
5. As shown in the figure, the bulgy parts of
the motor mount should be placed
towards the outside of the main board.
Align the holes.
6. Put the motor mount on the board and
align the holes. Then plug 2 M2*10 screws
through and fasten them lightly (not too
tight for now).
SunFounder

ROLLBOTMICRO
11
7. Similarly, plug another screw into the nut
on the mount and fasten it.
8. Now back to the first screw and tighten
it.
9. Fasten the other motor in the same way.
10. Connect the anti-reverse cable of the
N20 motor on the left to the J1 port (just
beside it) and the right one to J3
respectively.
4.2 N20 Gear Motor + Wheels
1. Insert the wheel into the shaft of the
motor. Note: Press the motor on the board
tightly with fingers before inserting, in case
of any movement.
2. As shown below, don’t put the wheel too
close to the board edge as the wheel
movement will be impeded.
SunFounder

ROLLBOTMICRO
12
3. Insert the other wheel in the same way.
4. The completed assembly should be as
shown below.
4.3 Main Board + Universal Wheel
1. Align two M2.5*12 screws with the holes
of the board.
2. Insert the screw across the board and
prop them with fingers.
3. Put two 3*4-6 spacers into the two
screws.
4. It would be shown as below.
SunFounder

ROLLBOTMICRO
13
5. Align the fixed holes of the universal
wheel with the screws.
6. Put the universal wheel onto the spacers.
So the screws go through the holes of the
board, gaskets, and holes of the universal
wheel.
7. Put two M2.5 nuts into the screws. Screw
a little and then let the screw sink a bit till
the nuts are fixed in the hole of the
universal wheel.
8. Fasten the screws with fingers pressing
the nuts. Then the universal wheel is fixed.
4.4 Main Board + Battery
1. Align the battery with the pin headers in
the triangle region, as shows below.
4. Paste and press it tightly. Then connect
the power cord.
SunFounder

ROLLBOTMICRO
14
4.5 Main Board +Screen
1. Align the pins of the screen with the
headers of the main board.
2. Insert the pins and press them tightly.
4.6 Main Board+ Infrared Sensor
1. Align the pins on the infrared sensor with
the headers of the main board.
2. Insert the pins into headers and press
them tightly.
SunFounder

ROLLBOTMICRO
15
4.7 RollbotMicro + Covers
The covers in the kit are provided for decoration. You can choose to assemble them or not. Here
we will show you how to assemble.
1. The OLED screen covers provided are to
make the RollbotMicro more adorable and
harmonious on the map.
2. Make the OLED covers.
3. Stick two pieces of double-sided tape on
the upper and lower part of the OLED
cover.
4. There are four OLED covers in the kit.
Choose your favorite and stick it on.
4.8 DIY Covers
You can use the double-sided tape to stick the fruit and flower covers on the OLED screen of the
RollbotMicro. It'll just feel like the cute bot is carrying an apple, a watermelon (hmm, seems too
heavy, LOL…), or a blossoming flower. The robot wearing the covers would seem most fit when
running on the forest map included in the kit. Just give it a try!
SunFounder

ROLLBOTMICRO
17
Gameplay
After assembling the robot successfully, let’s start the most exciting journey: games!
With the basic operation of the Arduino IDE and the circuit theory of the car previously, you
should already have a general understanding of the robot car. Next, let's move on to the
specific applications and the corresponding actions of the robot.
In subsequent operations, you need to know some basic buttons on the main board:
Power switch: Switch on and off the robot.
Start button: To start the program, especially in the line following function.
Reset button: To reset the master board.
Open the RollbotMicro folder downloaded and unzipped previously in Chapter 3 Software
Operation. You can see the following folders inside:
5.1 Display the Sensor Signal Intensity on OLED
This experiment is to display the collected sensor data on the OLED screen. Here it is just applied
for simple display. Later in the line following experiment, we will use the intensity to control the
direction of the car.
1) Find RollbotMicroOLED.ino under Rollbot\Arduino Code\RollbotMicro\RollbotMicroOLED,
open it and upload to the RollbotMicro.
2) Click Tools -> Board, select Arduino/Genuino Uno
Reset
Start button
Power switch
SunFounder
Table of contents
Other SunFounder Robotics manuals

SunFounder
SunFounder PiCar-4WD User manual

SunFounder
SunFounder 3in1 Kit User manual

SunFounder
SunFounder PiArm User manual

SunFounder
SunFounder RollFlash User manual

SunFounder
SunFounder Pico-4wd car User manual

SunFounder
SunFounder Rollarm User manual

SunFounder
SunFounder PiDog User manual

SunFounder
SunFounder PiDog User manual

SunFounder
SunFounder Sloth Learning Kit User manual

SunFounder
SunFounder PiSloth User manual