Thames & Kosmos WindBots 6-IN-1 WIND-POWERED MACHINE KIT User manual

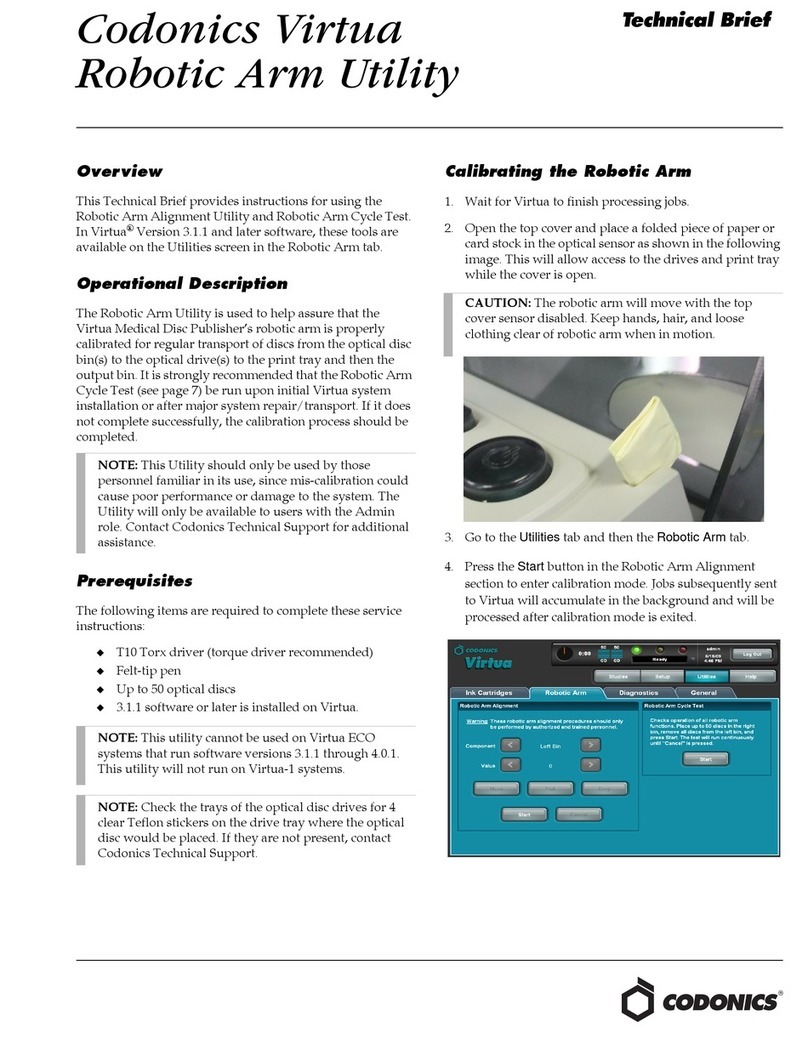
EXPERIMENT MANUAL
No motor or batteries
required!
Feel the Wind!
B
u
i
l
d
6
a
w
e
s
o
m
e
m
o
d
e
l
s
T
h
a
t
m
o
v
e
w
i
t
h
t
h
e
w
i
n
d
Franckh-Kosmos Verlags-GmbH & Co. KG, Pfizerstr. 5-7, 70184 Stuttgart, Germany | +49 (0) 711 2191-0 | www.kosmos.de
Thames & Kosmos, 89 Ship St., Providence, RI, 02903, USA | 1-800-587-2872 | www.thamesandkosmos.com

Gut ZZu wissen!
180°
180°
P12 Foam Pad
D18
D14
P12
P12
A22
D14
A23
P12 Foam Pad
If you are missing any parts,
please contact Thames &
Kosmos customer service
(see back cover).
What’s inside your experiment kit:
A
P1
P2
P3
P4
P8
P12
P14
P9
P10
P15
P11
P5
P6
P7
C
D
B
P13
No. Description Quantity Part No.
A White plastic frame (parts A1 – A26) 1 725765
B White plastic frame (parts B1 – B21) 1 725766
C Blue plastic frame (parts C1 – C26) 1 725768
D Grey plastic frame (parts D1 – D33) 1 725770
P1 Screw 12 725771
P2 Small gear, white 4 725771
P3 Worm gear, white 2 725771
P4 Gear, orange 1 725771
P5 Large gear, white 1 725771
You will also need:
Diagonal cutters or scissors,
nail file, small Phillips-head
screwdriver (size PH1),
hammer, tissue paper,
cotton swab, cup
Checklist:
2
Cut the plastic parts when they are required.
Do not cut them in advance.
Plastic Parts
DC
P11 P12 P15
4 pcs
2 pcs 1 pc
Round Shaft Sponge
P13 Fan Blade P14
1 pc
1 pc
Sponge
1:1
1
1
1
1
1
1
2 2
2
3
3
3
3
3
3
3
3
3
3
4
4
4
4
4
5
5
5
5
5
5
Spare Parts
Oil Bag
B
78
6
9
MADE IN TAIWAN
12
B
10
13
15 16
19
20
21
17
18
14
12
11
34
5
Spare Parts
7
8
6
9
MADE IN TAIWAN
12
C
10
13
15
16 19
20
24
21
22 23
25
26
17
18
14
12
11
3
4
5
Please ignore C24. It will not be used.
Spare Parts
A
7
8
69
MADE IN TAIWAN
1
2
A
10
13
15
16 19
20
24
21
22
23
25
26
17 18
14
12
11
3 4 5
Spare Parts
7
8
6
9
MADE IN TAIWAN
1
2
D
10
13
15
16
19
20 24
21
22
23 25
26
272727272727
28
29 30
31
32
33
17
18
14
12
11
3
4
5
Spare Parts
Please note A9, B20, B21, C1 & D27 are spare parts.
Please oil ONLY the
parts as instructed,
but not others.
KIT CONTENTS Good to know!

Part
D2
8
is a
Useful
tool
.
You will find more information
about where and how to use
it on page 7 and
in the assembly instructions.
D28
Some spare parts are
included, so there may
be unused parts at the
end of assembly.
T
Modern wind tur bines use generators to produce electricity.
The blades of the wind turbi ne are set in motion by the wind
and drive the generator. This pr inciple has been used in
windmi lls for centuries. T he only difference is that the
windmil ls do not drive elec tric generators, but rather
millstones, whic h tu rn grain into our. The basic mode of
operation was the same then as now: the blades ext ract part
of the energy contained i n the wi nd and convert it into
rotational energ y. In this way, wind energ y is converted to
do work that humans need.
Strandbeests
—
the real life role models of the windBots
Dutch artist Th eo Jansen is the inventor and
designer of the Strandbeests, which is Dutch fo r
beach animals . These are complex art ob jects that
can walk or craw l. Their movement makes the
Strandbees ts look almost like liv ing creatures.
They are usually dr iven by wind or compressed air.
Some of these beach ani mals are as big as a horse,
others are enorm ous and larger than a house!
Jansen has copied a lot fr om nature in the
development of the Str andbeests. He se es his art
objects as crea tures that die, evolve, and even
reproduce — for examp le, by having other people
replicate his cre ations or print out miniature
versions using a 3D pr inter.
The Strandbee sts have been around sinc e 1990,
and Jansen continue s to develop them. He has
divided the deve lopment into 12 period of evolutio n
— similar to dinosaur s.
When the wind is blow ing strongly, you can clearly feel that there is a
lot of energy in the wi nd. In a storm, you can barely keep both feet
on the ground! Th is immense power can be converted to power cars
and other vehicles. Wind t urbines can generate electricity, which in
turn can be use d to cha rge electric cars. Electr icity can also be used
to produce hydrogen, which can power fuel cell ca rs. These two
methods work very well to power cars i n cities, which can reduce
urban air pollut ion. Because these methods use the wind — ins tead
of fossil fuels — to generate energ y they are much more
climate-fr iendly.
Energy from
Wind Power
Learning From Nature
Humans aren’t the only ones who have bee n using the wind
for transport ation — plants and animals have used wi nd
power to get around for millions of yea rs.
Think of birds t hat can glide through the ai r for hour s on
end, barely apping the ir wings to stay in ight. They ’re not
the only ones! Some spiders enga ge in a process called ballooning, in
which they use the wi nd and earth’s electric elds to travel many mi les.
Plants and fun gi have also developed sophisticated ways to reproduce
and scatter their see ds with the wind. This pri nciple is called
ane moch ory, and t he seeds of the plants are called ying see ds or
winged seeds. Pa rticularly well known are t he seeds of the dandelion,
and the seeds of the maple tree. R arer, but quite impressive
are the yin g seeds of Alsomitra macrocar pa, a tropical
cucumber plant. Its see ds look like small gliders, with a
wingspan re aching up to 14 cm (5.5 inches). These mar vels
of nature have inspir ed aviation pioneers in their inventions
of airplanes and ot her ying machines for humans.
Alsomitra
macrocarpa
Dandelion
Using wind energy for transportation
Continued on the next page
Millstone
Check It Out
?
CHECK IT OU T
52
1
WindBots
Kit Contents ..................................... Inside front cover
Table of Contents ........................................................ 1
Safety Information ....................................................... 2
Important Information ................................................ 3
ASSEMBLY STARTS ON PAGE 4
Introducing the WindBots ....................................... 4
Assembly Tips ........................................................... 6
Assembling the Wind Machine ............................... 8
Assembling the Modules ......................................... 12
Check It Out: Locomotion with Wind Power ........ 21
Assembling the Surf Bot ......................................... 23
Assembling the Walker Bot ..................................... 26
Assembling the Drill Dozer ................................... 29
Assembling the Quadruped .................................... 33
Assembling the Flying Machine ............................. 37
Assembling the Big Wheel Tricycle ....................... 45
Check It Out: Harnessing Nature’s Power ............ 52
T
Additional information
can be found in the
check it out sections on
pages 21 and 52.
1
CONTENTS
No. Description Quantity Part No.
P6 Gear, gray 1 725771
P7 Gear, yellow 1 725771
P8 Hexagonal axle, short 1 725771
P9 Hexagonal axle, medium 1 725771
P10 Hexagonal axle, long 4 725771
P11 Round axle 4 725771
P12 Foam pad 1 725774
P13 Fan blade 2 725775
P14 Oil packet 1 550047-A
P15 Foam sticker sheet 1 725772

IOrNt:
ROv Th pTs Fm e aMe Oy En He ArE
nDed. ROv ExSs AtI befE SeLy
wH E Lp F DgOl TtE O A Il Il
T
S
2
SAFETY INFORMATION
Using the right tool can make assembling your
models easier and it can also make your models
work better in the end. It is best to cut the plastic
parts out of their frames with a small diagonal
cutter (such as those used for electronics work) or
model pliers. Using these tools, the parts can be
precisely cut so that no burrs remain on the parts
and there is no need to file them down.
If you don’t have these plers at home, you can
use scssors and a nal fle Normal scssors
do not cut as precsely as a dagonal cutter,
so you may have to fle some of the rough
edges down wth the nal fle
THE RIGHT TOOL
!
!
WARNING
Burr Burr
Burr
Not suitable for children
under 3 years. Choking
hazard — small parts may be
swallowed or inhaled.
WARNING. This kit contains
functional sharp edges or
points. Do not injure yourself!
Keep the packaging and
instructions as they contain
important information.
Warning. Only to be
used in water in which
the child is within its
depth and under adult
supervision.
Make sure that
all burrs are removed
from the plastc parts
before assembly so
that your WndBots
functon properly

3
IMPORTANT INFORMATION
WindBots
Before building and experimenting, read the
instructions together with your child and
discuss the safety instructions.
Support your child with advice and a helping
hand, especially during tricky assembly steps
or experiments.
To prevent damage to the work surface on
which your child is building and experimenting,
provide them with a mat or other surface
protection. When experimenting with water, it

is a good idea to have some paper towels ready
to wipe up spills.
When cutting the plastic parts out of the
frames with the diagonal cutter or scissors,
special care must be taken, not just because of
the sharp edges on the tools, but also because
the plastic parts can yield sharp edges or
burrs. These can be removed with the help of
the diagonal cutter or a nail file. Supervise your
child when they are using the sharp tools until
you trust that they can handle the tools
independently.
ASSEMBLY AND DISASSEMBLY
Some components are needed for all of the
models, but some are only needed for one or
two models. If your child wants to build a new
model, help ensure that no parts get lost
during disassembly by providing a container to
collect parts.
When disassembling, most parts can be easily
taken apart by hand.
However, some parts may be too tight to pull
out by hand. Help your child by inserting the
special part D28 as described on page 7.
We hope you and your child have a lot of fun
building and playing with the WindBots.
Children want to explore, understand, and create new things.
They want to try things and do it by themselves. They want to gain knowledge!
They can do all of this with Thames & Kosmos experiment kits.
With every single experiment, they grow smarter and more knowledgeable.
Dear Parents and Supervising Adults,
THE RIGHT TOOL

4
INTRODUCING THE WINDBOTS
Hello! My name is Luca and
I live in Storm City. There
is always a stiff breeze
blowing here. That’s why
we can use the wind for all
of the energy we need in
our city.
I love to design new devices
and bring them to life.
I would like to share MY
newest inventions
with you!
Surf Bot
This buoyant machine lets me
explore the sea. The wind drives
a fin that lets me swim like a fish.
Quadruped
This vehicle moves on four legs and is my
first choice when I am taking a trip onto
rough terrain.
p. 23
p. 33

5
Introducing the WindBots
Big Wheel Tricycle
This tricycle is special because the
extra-large rear wheel houses a fan.
It’s perfect for cruising in crosswinds.
Flying Machine
This machine can’t really fly, but it
imitates the flapping of a bird’s wings.
I like to sit up here and dream of flying.
Drill Dozer
The wind powers the drill and drives the
dozer forward at the same time. It’s a big
help on the construction site.
Walker Bot
This two-footed robot uses wind energy
to walk. The more headwind blows
against me, the more progress I make.
p. 26
p. 29
p. 45
p. 37

6
THE MODULES
Before you start building the models, you will assemble the
wind machine with hand crank and the various modules.
These modules make it easier for you to build the models
later, and they are useful when you want to convert one
model into another because the modules do not have to be
disassembled.
DISASSEMBLY
If you have built a model and then want to build another model, you will likely need to disassemble
the first model, as parts you have used may be needed for the new model. For disassembly, you can
simply follow the assembly steps in reverse order. The special part D28 can be helpful. Learn how
to use it on the following page.
SCREWS
There are screws included in the set for assembling the
modules. To tighten them, you will need a small Phillips-head
screwdriver (preferably size PH1). Make sure that you tighten
the screws all the way down. Loose screws may lead to
malfunctions.
WIND
The most important thing your models need to move is wind. You have different options to
generate wind. A wonderful option is to bring your models outside and let them be
powered by naturally occuring wind. For this to work, the wind must not be too
strong or too weak.
You can also use the included wind machine. Just aim the fan
of the wind machine at the fan in your model and
turn the crank.
Of course, you can also blow air from
your lungs, but be careful because
this can make you dizzy.
ASSEMBLY
USEFUL TIPS

D27
PUSH
D28
D27
D17
D31
PULL
PULL
D28
P13
D28
D28
D31
12
D27
D17
D31
PULL
PULL
D28
P13
D28
D28
D31
12
D27
D17
D31
PULL
PULL
D28
P13
D28
D28
D31
12
7
HOW TO USE PART D28
LOOSENING D27 (UPPER PART):
LOOSENING D27:
LOOSENING P13:
LOOSENING D27 (BOTTOM PART):
Pull
Pull
Press
Assembly Tips

8
A
s
s
e
m
b
l
i
n
g
t
h
e
m
o
d
u
l
e
Before you start building the models, you will build various modules.
These modules make it easier for you to build the models later, and
they are very useful when you want to convert one model into
another, as the modules will not have to be taken apart again.
Yay!
Let’s start building!

D28 (Tool)
PUSH
P11
P11
D9
P7
(Yellow)
P5
(White)
P6 (Gray)
P11
(round axle)
Actual size
x3
D5
Actual size
P11
P2
(White)
P11
B13
B13
D28 (Tool)
PUSH
P11
P11
D9
P7
(Yellow)
P5
(White)
P6 (Gray)
P11
(round axle) Actual size
x3
D5
Actual size
P11
P2
(White)
P11
B13
B13
Remove all burrs
before assemblng
— Rubriktitel Blindtext
9
ASSEMBLING THE WIND MACHINE
A
s
s
e
m
b
l
i
n
g
t
h
e
m
o
d
u
l
e
1
2
Actual size
Actual size
Actual
size
Assembling the Wind Machine
Press or lightly tap with the handle of the
screwdriver.

6
Tissue Paper
P14
Oil the two
areas as shown.
Then place
into D9.
Oil the two areas as shown.
Do not put oil on any other parts.
Cup
Cotton Swab
D5
P7
(Yellow)
B13
P5 (White)
P2 (White)
P6 (Gray)
11
222
D8
P1x3
6
10
4
3
ASSEMBLING THE WIND MACHINE
When you see ths symbol, ol the parts as shown
Do not put ol on other parts
Place a cup on top of a pece of tssue paper Pour the contents of the ol
packet nto the cup Use a cotton swab to apply ol to the ndcated parts
= Apply ol

A26
P1 A25
C7
D8
P1x3
D5
P7
(Yellow)
P5 (White)
P2 (White)
B13
P6 (Gray)
P1
P13
P1
P13
P1
P13
P1
P13
P1
Hold the blades of the fan
wth your fngers whle
you tghten the screw
— Rubriktitel Blindtext
11
6
5
7
8
Turn the handle clockwise to
create wind.
Wind Machine
Done!
Assembling the Wind Machine
P1
To avod nures, never allow the fan
blades to come nto contact wth people
or obects when turnng the crank
Please note that holdng the fan blades
whle crankng the handle can cause
the wnd machne to malfuncton

P13
C4
C8
A5
B11
P1
P13
C4
C8
A5
B11
P1
P13
C4
C8
A5
B11
P1
P13
C4
C8
A5
B11
P1
A
P13
C4
C8
A5
B11
P1
B
Do not cut off
ths part
After the test, use D28 to
loosen P13, as shown on
page 7
12
3
1
2
ASSEMBLING THE MODULES
GEAR MODULE A
TEST GEAR MODULE A
Gear module A
Side view
Done!

P13
C4
C8
A5
B11
P1
PUSH
C20
C1
P10
P3
(White)
D28
(Tool)
C1
P10
P3
(White)
A9x2
P10
A9
PUSH
C20
C1
P10
P3
(White)
D28
(Tool)
C1
P10
P3
(White)
A9x2
P10
A9
Remove all burrs
before assemblng
— Rubriktitel Blindtext
13
GEAR MODULE B
Press
Top view
Actual size
Actual size
Actual size
Actual
size
1
2
Assembling the Modules

PUSH
C1
P9
C1
P2
(White)
P2
(White)
P9
D28
(Tool)
C1
PUSH
C1
P9
C1
P2
(White)
P2
(White)
P9
D28
(Tool)
C1
PUSH
C1
P9
C1
P2
(White)
P2
(White)
P9
D28
(Tool)
C1
14
Press
Actual
size
Actual size
Top view
3
5
4
Actual
size
ASSEMBLING THE MODULES

C21
P13
P1
C21
P13
P1
C21
P13
P1
A
B
C21
P13
P1
Gear
module B
After the test, use D28 to
loosen P13, as shown on
page 7
— Rubriktitel Blindtext
15
6
TEST GEAR MODULE B
Done!
Assembling the Modules

PUSH
PUSH
P2
(White)
P8
A9
A9
A9
P10
P10
P3
(White)
P3
(White)
P4
(Orange)
D28
(Tool)
P2
(White)
P8
A9
P4
(Orange)
D28
(Tool)
2
1
A9
PUSH
PUSH
P2
(White)
P8
A9
A9
A9
P10
P10
P3
(White)
P3
(White)
P4
(Orange)
D28
(Tool)
P2
(White)
P8
A9
P4
(Orange)
D28
(Tool)
2
1
A9
Remove A9 and save it for
the next step.
Remove all burrs
before assemblng
16
GEAR MODULE C
Actual
size
Actual
size
Actual
size
Press
Press
Actual
size
1
2
ASSEMBLING THE MODULES

PUSH
90°
C1
P10
P2
(White)
C1
P10
P2
(White)
C26
C25
A11
PUSH
90°
C1
P10
P2
(White)
C1
P10
P2
(White)
C26
C25
A11
PUSH
90°
C1
P10
P2
(White)
C1
P10
P2
(White)
C26
C25
A11
— Rubriktitel Blindtext
17
Top view
Press
5
4
3
6
Assembling the Modules
Actual
size
Actual
size

P13
P1
C17
C18
C1
P13
P1
C17
C18
C1
P13
P1
C17
C18
C1
P13
P1
C17
C18
C1
P13
P1
C17
C18
C1
P13
P1
C17
C18
C1
Gear module C
After the test, use D28 to
loosen P13, as shown on
page 7
A B
18
7
9
8
TEST GEAR MODULE C
Done!
ASSEMBLING THE MODULES
This manual suits for next models
1
Table of contents
Other Thames & Kosmos Robotics manuals

Thames & Kosmos
Thames & Kosmos SIDEKICK User manual

Thames & Kosmos
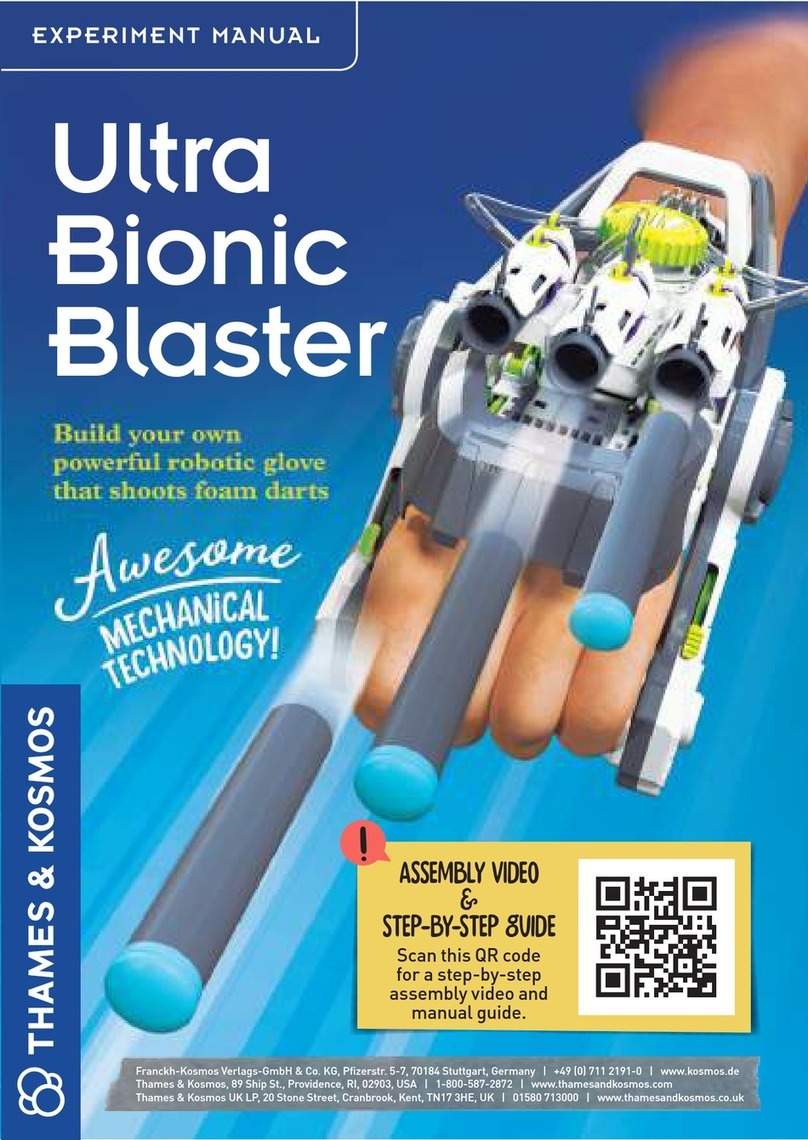
Thames & Kosmos Ultra Bionic Blaster User manual

Thames & Kosmos
Thames & Kosmos SpringBots User manual

Thames & Kosmos
Thames & Kosmos SolarBots User manual

Thames & Kosmos
Thames & Kosmos Robotics Smart Machines User manual

Thames & Kosmos
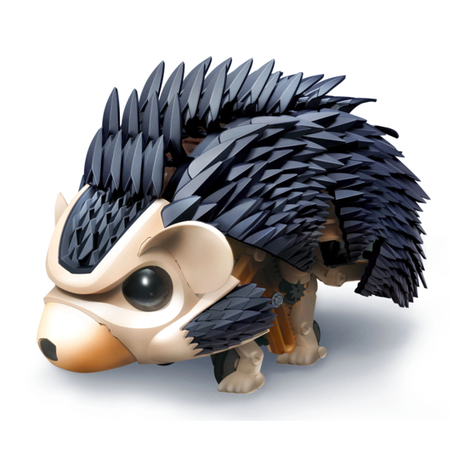
Thames & Kosmos TUMBLING HEDGEHOG User manual

Thames & Kosmos
Thames & Kosmos SUPERSPHERE User manual