1. Đc k hưng dn này trưc khi s dn thit b và ct gi tin tham kho sau này.
2. Trưc khi kt ni thit b vi ngun in, cn kim tra xem in áp ngun có tương thích
vi in áp ghi trên thit b hay không (220V~/50Hz).
3. Không tr em hay ngưi khuyt tt chơi ùa vi thit b.
4. Đm bo các b phn như lưi dao, ci cha thc ăn, chân ng cơ ã ưc lp ăn
khp hoàn toàn vi nhau, không b kênh/h (nu không có th gây ra rò r hoc làm hng
lưi dao).
5. Không s dng thit b khi không có thc phm trong ci xay hay thc phm quá
nhiu/vưt vch MAX ánh du trên thân ci.
6. Đi vi nguyên liu nóng, cn ch ngui (dưi 60 C) ri mi ưc vào xay.
7. Lưi dao xay có các cnh rt sc bén nên cn chú ý cao khi v sinh, tránh b t tay.
8. Không s dng thit b nu dây in, phích cm hoc các b phn khác b hng.
9. Nu dây in b hng, nó phi ưc thay th bi nhà sn xut, i lý bo hành y quyn
hoc nhng ngưi có trình tương ương tránh nguy him.
10. Khi v sinh, không nhúng b phn chân ng cơ vào nưc hoc cht lng khác, hoc
ra dưi vòi nưc. B phn này ch cn s dng mt ming vi m lau chùi là ưc.
11. Sn phm có công tc t ngt khi có s c quá ti v nhit và in. Khi ó, nên tt máy và
ch b phn ng cơ ngui xung, sau ó có th tip tc s dng. Lưu ý: Không xay thc
phm liên tc quá 30s, iu ó s nh hưng n tui th ca sn phm.
Trưc khi s dng, cn m bo in áp ngun tương thích vi in áp ghi trên sn phm
(220V~/50Hz). Sn phm cn ưc t trên mt phng vng chi, bng phng, không t
rìa mép bàn hay các khu vc quá nóng như gn bp, lò nưng…
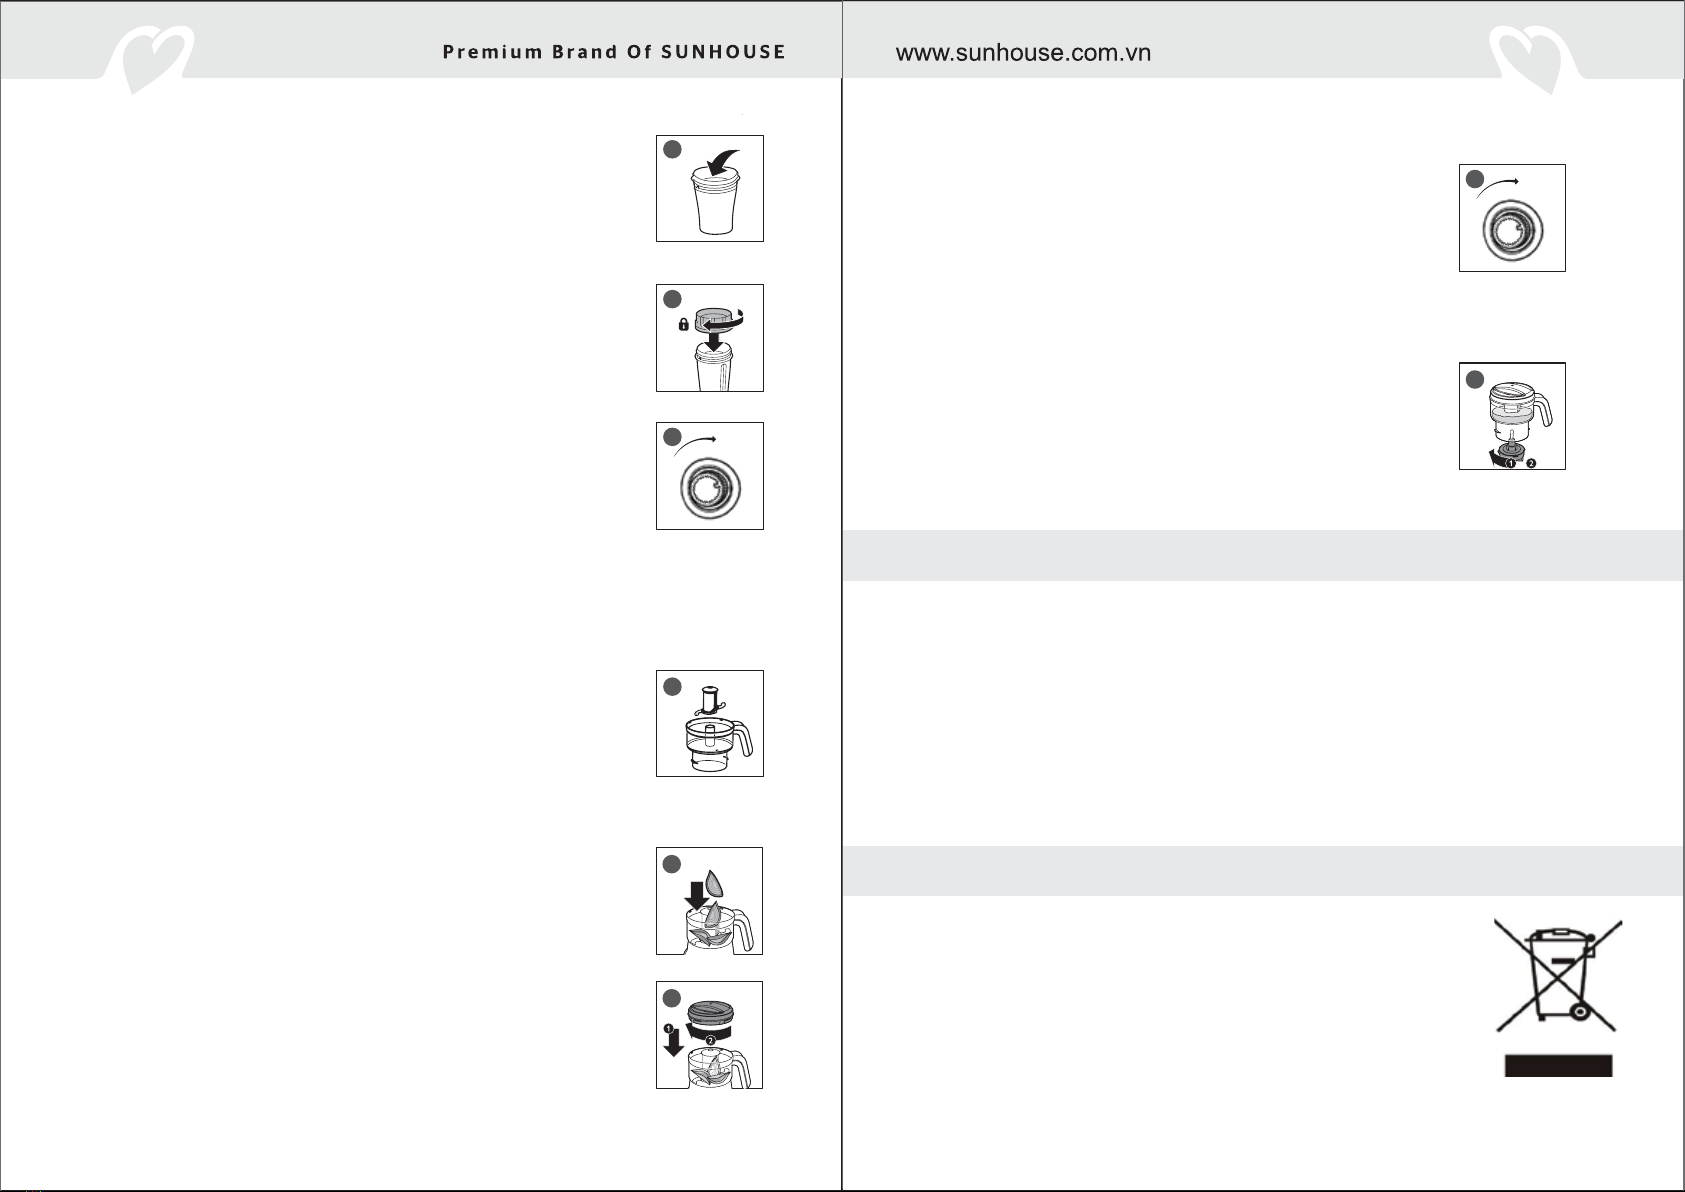
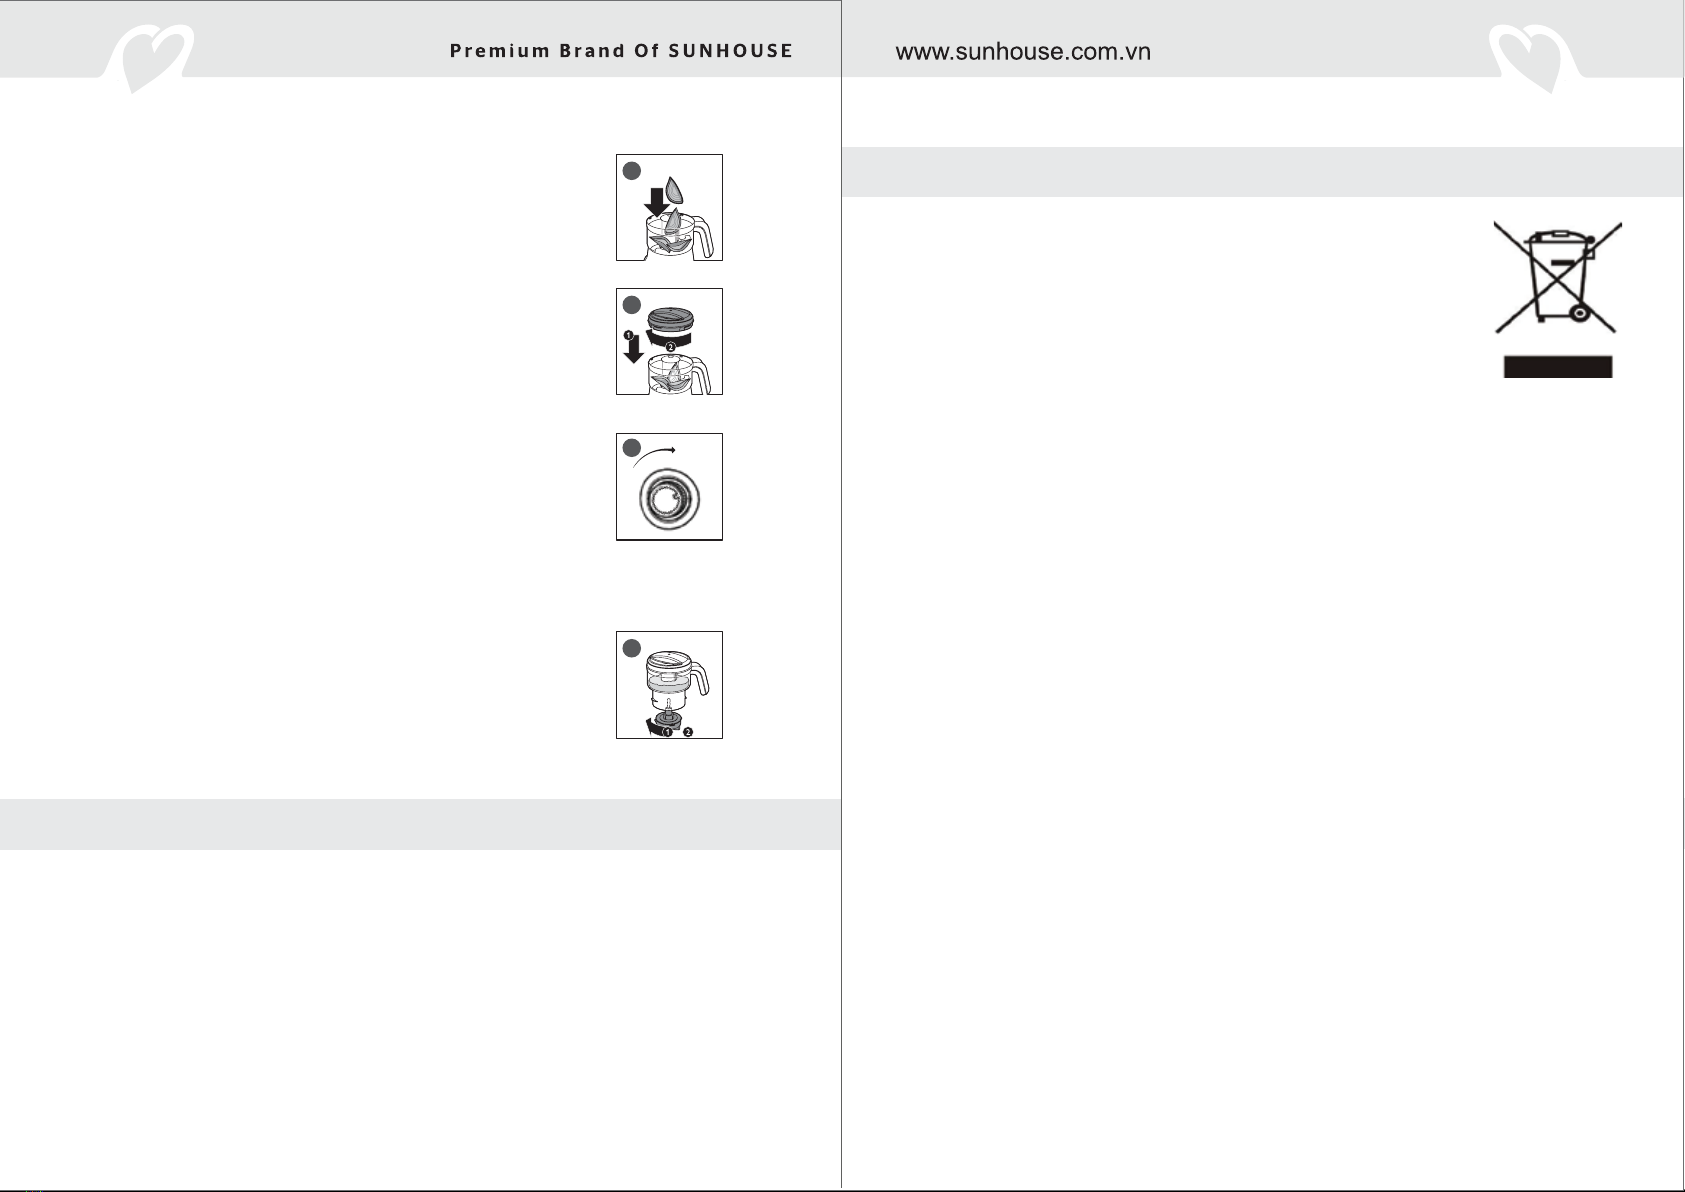
Bước 1: Lp lưi dao vào áy ci xay sinh t theo chiu kim ng
h.
Bước 2: Cho nguyên liu vào ci xay ri y np. Nu nguyên liu
cng, bn có th cho thêm mt lưng nưc thích hp.
Chú ý: Đi vi các nguyên liu ln, cn ct thành các ming/khúc
nh khong 2cm ri mi cho vào ci. Lưng nguyên liu không nên
vưt quá vch MAX ánh du trên thân ci (không quá 1500ml).
Bước 3: Lp ci xay vào phn chân ng cơ theo chiu kim ng
h.
Chú ý: Trên thân ca sn phm có ánh du các mũi tên cho thy
các b phn ã ưc lp úng khp hay chưa. Khi vn úng v trí,
s có mt ting “cch”. Thit b s không hot ng nu không
ưc lp t úng cách.
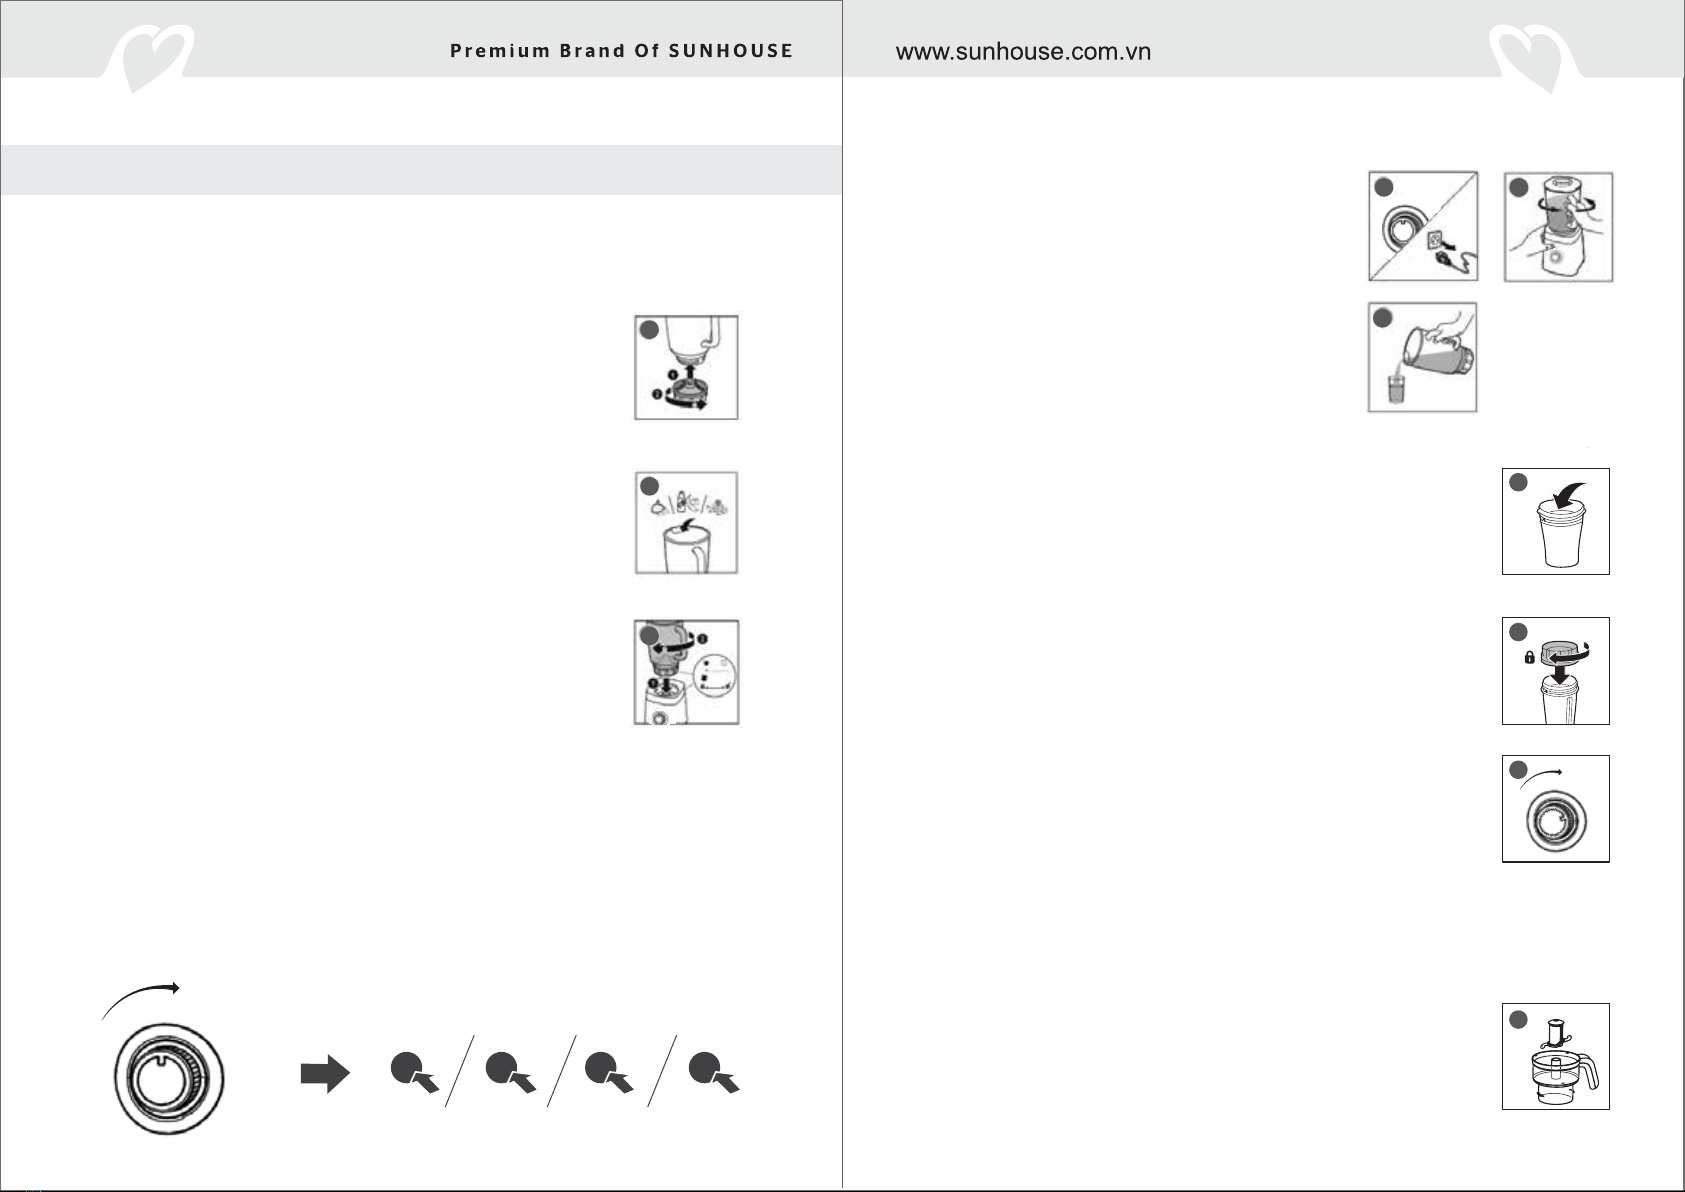
Bước 4: Chn ch xay
Tùy tng loi nguyên liu mà bn chn tc xay phù hp. Đi vi các nguyên liu mm, nhiu nưc, có
th xay tc I. Đi vi nguyên liu cng, vui lòng chn tc II. Thông thưng, thành phm s ưc
hoàn thành trong vòng 1 phút (không xay liên tc 1 phút mà xay 20 -30s mi ln).
Có th chn ch nhi o nguyên liu m bo ưc xay nhuyn.
Bước 5: Tt máy và thưng thc
Khi ã xay nguyên liu t nhu cu, xoay núm vn v v trí
0 ri rút in. Sau ó, tháo ci xay ra khi chân theo
chiu ngưc kim ng h, m np và rót sinh t ra thưng
thc.
Bn có th s dng cc xay-ung 2in1 thay cho ci xay ln.
Sau khi xay xong, ch cn tháo dao xay ra và thay th
bng np ci là ã có th ung lin hoc em i.
CẢNH BÁO AN TOÀN TRƯỚC KHI SỬ DỤNG
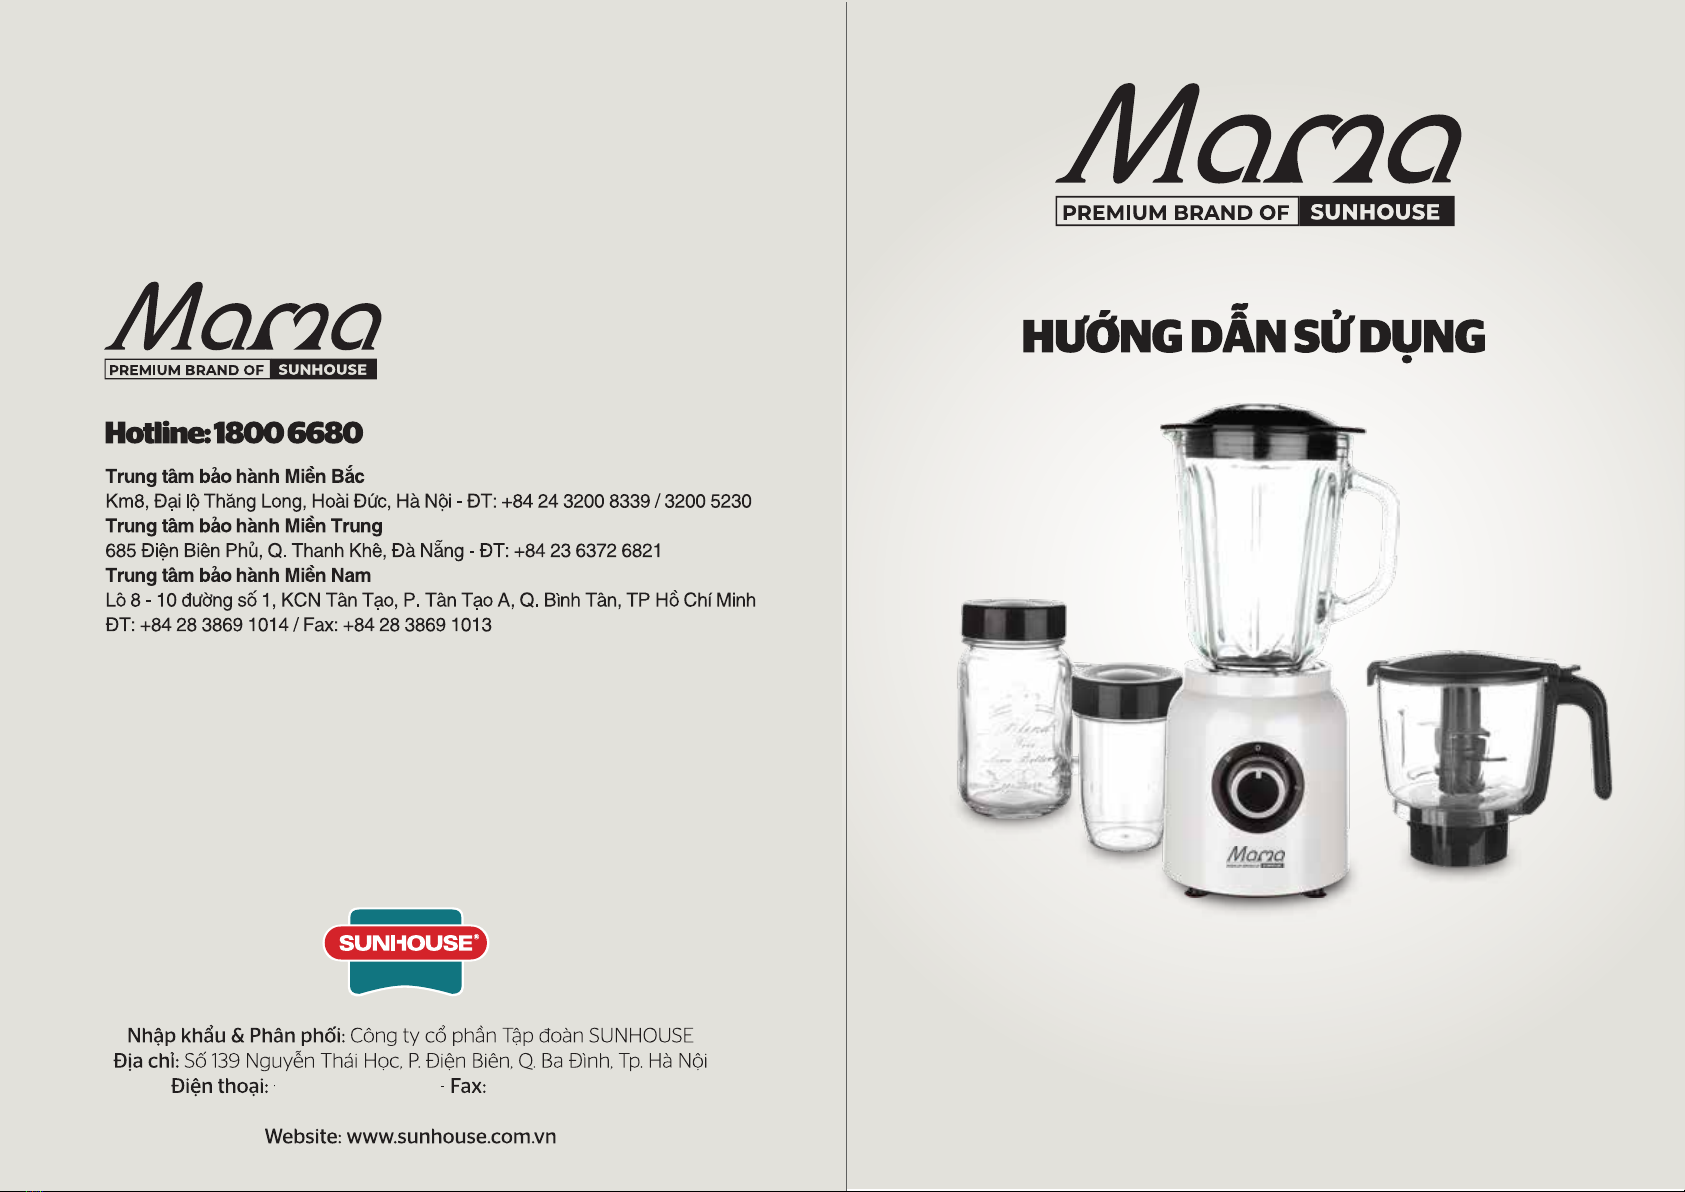
HƯỚNG DẪN SỬ DỤNG
CHẾ ĐỘ XAY SINH TỐ 1
2
3
0
1
2
P
P 0 12
6
4
5
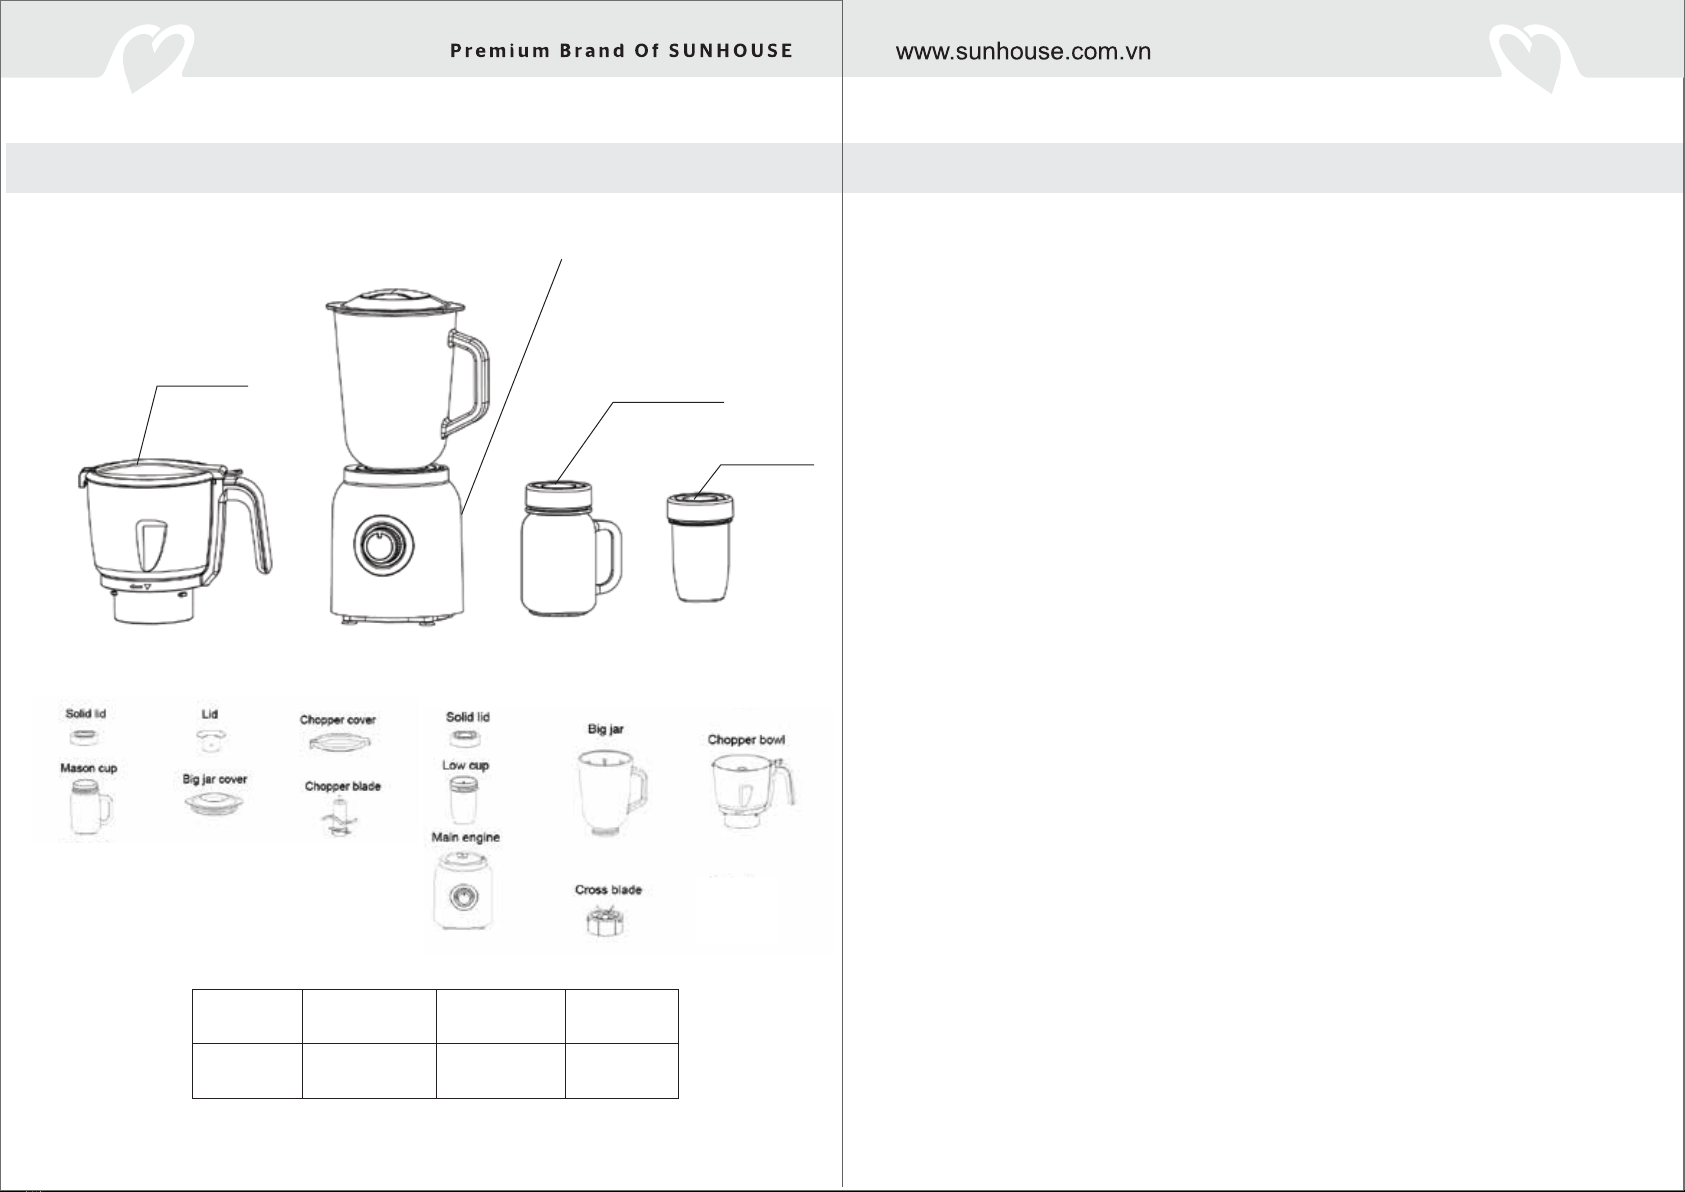
04 05