MPM MBL-26 User manual

PRZED PIERWSZYM UŻYCIEM ZAPOZNAJ SIĘ ZINSTRUKCJĄ OBSŁUGI
INSTRUKCJA OBSŁUGI
BLENDER PRÓŻNIOWY, WYSOKOOBROTOWY MBL-26
High-Speed Vacuum Blender/Высокоскоростной вакуумный
блендер/Vakuum-Hochgeschwindigkeitsblender

INSTRUKCJA OBSŁUGI.......................................................................... 3
USER MANUAL ...................................................................................12
ИНСТРУКЦИЯ ПО ОБСЛУЖИВАНИЮ.................................................21
BEDIENUNGSANLEITUNG................................................................... 30
GB
RU
DE
PL

3
PL
WSKAZÓWKI DOTYCZĄCE BEZPIECZEŃSTWA UŻYTKOWANIA
Przed użyciem przeczytaj dokładnie instrukcję obsługi.
Nie trzymaj urządzenia wilgotnymi rękoma.
Nie zanurzaj urządzenia, przewodu i wtyczki w wodzie lub innych płynach.
Nie wolno zanurzać urządzenia, przewodu i wtyczki w wodzie lub w innych płynach.
Zachowaj szczególną ostrożność gdy w pobliżu urządzenia znajdują się dzieci.
Nie wieszaj przewodu zasilającego na ostrych krawędziach i nie pozwól aby stykał się
z gorącymi powierzchniami.
Przed przystąpieniem do pracy upewnij się, czy w dzbanku blendera lub w butelce
nie pozostawiłeś przez pomyłkę twardego narzędzia (np. łyżka, łopatka), gdyż
może to doprowadzić do trwałego uszkodzenia urządzenia lub obrażeń ciała.
Przed uruchomieniem upewnij się, że dzbanek jest prawidłowo zamocowany
na obudowie blendera.
Przed przystąpieniem do demontażu odczekaj do momentu kiedy silnik całkowicie
się zatrzyma.
Przed rozpoczęciem czyszczenia urządzenia należy je najpierw odłączyć od zasilania.
Zachowaj szczególną ostrożność przy kontakcie z ostrzami tnącymi, szczególnie
przy ich wyjmowaniu oraz podczas mycia.
Nie zanurzaj obudowy blendera w wodzie oraz innych płynach.
Nie przekraczaj maksymalnej pojemności wskazanej na pojemniku blendera.
Odczekaj aż gorące składniki ostygną zanim poddasz je obróbce.
Przed pierwszym użyciem umyj dokładnie dzbanek blendera.
Nie używaj uszkodzonego urządzenia również wtedy gdy uszkodzony jest prze-
wód sieciowy lub wtyczka – w takim wypadku oddaj urządzenia do naprawy
w autoryzowanym punkcie serwisowym.
Zawsze przed przystąpieniem do pracy upewnij się, czy wszystkie elementy
urządzenia są prawidłowo zamontowane.
Użycie akcesoriów nie polecanych przez producenta może spowodować uszko-
dzenie urządzenia, pożar lub obrażenia ciała.
Zawsze wyjmuj wtyczkę z gniazdka sieciowego, zaraz po zakończeniu używania
urządzenia oraz przed rozpoczęciem czyszczenia.
Nigdy nie zostawiaj włączonego urządzenia bez nadzoru.
Nie stawiaj urządzenia na gorących powierzchniach.
Nie wolno korzystać z urządzenia na wolnym powietrzu.
Urządzenie należy stawiać na suchej, płaskiej i stabilnej powierzchni.
Urządzenie jest przeznaczone tylko do użytku domowego.

4
PL
Podczas pracy urządzenia trzymaj ręce z daleka od ruchomych części.
Nie wykorzystuj urządzenia do celów innych niż zostało przeznaczone.
Nie wolno stawiać urządzenia w pobliżu innych urządzeń elektrycznych, palników,
kuchenek, piekarników itp.
Należy zwracać uwagę na dzieci, aby nie bawiły się sprzętem/urządzeniem.
Nie wyciągaj wtyczki z gniazdka sieci pociągając za przewód.
Nie podłączaj wtyczki do gniazdka sieci mokrymi rękami.
Nie zdejmować dzbanka blendera podczas pracy urządzenia.
Przechowuj urządzenie i jego przewód w miejscu niedostępnym dla dzieci poniżej
8 lat.
Niniejszy sprzęt może być użytkowany przez dzieci w wieku co najmniej 8 lat
i przez osoby o obniżonych możliwościach fizycznych, umysłowych i osoby
o braku doświadczenia i znajomości sprzętu, jeżeli zapewniony zostanie nadzór
lub instruktaż odnośnie do użytkowania sprzętu w bezpieczny sposób, tak aby
związane z tym zagrożenia były zrozumiałe. Dzieci bez nadzoru nie powinny
wykonywać czyszczenia i konserwacji sprzętu.
Przed pierwszym użyciem należy umyć wszystkie przystawki i pojemniki.
Dla bezpieczeństwa dzieci proszę nie zostawiać swobodnie dostępnych części
opakowania (torby plastikowe, kartony, styropian itp.).
OSTRZEŻENIE! Nie pozwalaj dzieciom bawić się folią. Niebezpieczeń-
stwo uduszenia!
UWAGA! Ostrza tnące są bardzo ostre, unikaj fizycznego kontaktu
podczas opróżniania i czyszczenia urządzenia – możesz się poważ-
nie zranić.
UWAGA! Nie używaj blendera bez poprawnie zamontowanej po-
krywy dzbanka.
OPIS URZĄDZENIA
Blendowanie próżniowe to przełomowa technologia, która polega na odessaniu z dzbanka blen-
dera tlenu i utrzymaniu w nim próżni. Sok, koktajl czy zupa zrobione próżniowo nie mają kontaktu
z tlenem dlatego dłużej zachowują witalna energię. Próżnia eliminuje efekt utleniania czyli po-
zbawiania produktów witamin i enzymów oraz nie ma utraty wartości odżywczych, smaku i ko-
loru. Soki i koktajle przygotowane w blenderze próżniowym nie utleniają się, nie kwaśnieją, nie
rozwarstwiają i mogą być przechowywane w lodówce przez kilka dni. Nie tracą przy tym swoich
właściwości odżywczych, walorów smakowych i wizualnych. Blender próżniowy, wysokoobroto-
wy nie tylko blenduje składniki w próżni, ale pozwala je przechowywać bez dostępu powietrza,
dzięki czemu dłużej zachowują świeżość i swoje wartości odżywcze. Można zrobić zapas smoothie

5
PL
na cały dzień, przelać do przenośnego kielicha, dzięki funkcji próżni usunąć powietrze a następnie
zabrać do pracy, czy na trening.
13
7
2
1
4
3
17
13
12
8
3
4
13
f e
a
d
c db
b
g c a
16
10
15
14
6
5
10
9
11
1. Obudowa blendera
2. Uchylna pokrywa górna
3. Dotykowy panel sterowania
a. przycisk START/STOP
b. przycisk wyboru programu (MENU)
c. przycisk wyboru próżni (VACUUM)
d. przycisk wyboru prędkości mikso-
wania (SPEED)
e. przycisk wyboru czasu miksowania
(TIME)
f. przycisk funkcji „PULSE”
g. przyciski zmiany wartości czasu/
prędkości miksowania „+”, „-‘’
4. Podświetlany wyświetlacz LCD
a. ikony automatycznych programów
blendera
b. wyświetlacz czasu miksowania
c. wyświetlacz prędkości miksowania
d. kontrolka wyboru próżni w trybie
ręcznym
5. Zespół noża
6. Uszczelka zespołu noża
7. Dzbanek blendera o pojemności
1500 ml
8. Uchwyt dzbanka
9. Uszczelka pokrywy dzbanka
10. Filtr zaworu (2 szt.)
11. Uszczelka płaska pokrywy dzbanka
12. Pokrywa dzbanka
13. Gumowy zaworek (3 szt.)
14. Przenośny pojemnik o pojemności
800 ml
15. Uszczelka pokrywy pojemnika
16. Pokrywa pojemnika
17. Antypoślizgowe nóżki

6
PL
PRZED PIERWSZYM UŻYCIEM
1. Wypakuj urządzenie z kartonu, usuń wszelkie foliowe torebki, wypełniacze i etykiety.
2. Sprawdź czy wyposażenie produktu odpowiada opisowi urządzenia a także skontroluj urzą-
dzenie pod kątem uszkodzeń mogących powstać podczas transportu. W przypadku wątpli-
wości skontaktuj się ze sprzedawcą.
3. Sprawdź czy parametry Twojej sieci zasilającej odpowiadają danym na tabliczce znamiono-
wej urządzenia.
4. Umyj wszystkie części mające kontakt z żywnością kierując się wskazówkami zawartymi
w rozdziale „CZYSZCZENIE I KONSERWACJA”
MONTAŻ URZĄDZENIA
Z uwagi na podciśnienie uzyskiwane w dzbanku i pojemniku, olbrzymie prędkości obrotowe
podczas miksowania (ponad 20000 obr./min.) prawidłowy montaż wszystkich podzespołów
i ich czystość mają olbrzymi wpływ na uzyskiwane rezultaty podczas eksploatacji blendera
a także na Twoje bezpieczeństwo.
MONTAŻ DZBANKA BLENDERA
1. Do dolnego otworu dzbanka
włóż zespół noża ❺ostrzami
do wnętrza dzbanka i obróć go
przeciwnie do wskazówek zega-
ra do momentu zablokowania
(rys.1). Zwróć uwagę na prawi-
dłowe osadzenie uszczelki ❻
na zespole noża ❺. Demontaż
zespołu noża odbywa się po
przekręceniu go zgodnie z ruchem wskazówek zegara do zwolnienia blokady (rys.2).
2. W górnej części pokrywy dzban-
ka ⓬zainstaluj gumowy zawo-
rek ⓭. Stopka zaworu po mon-
tażu powinna być widoczna
całym swoim obwodem z dru-
giej strony pokrywy. Od dołu
pokrywy załóż płaską uszczelkę
pokrywy ⓫. Zwróć uwagę aby
dwa wycięcia w uszczelce za-
jęły swoje miejsca w pokrywie
(rys.3).
3. Załóż uszczelkę pokrywę dzbanka ❾na zewnętrzną, okrągłą krawędź pokrywy (rys.4).
4. Do dolnej części pokrywy
dzbanka ⓬przykręć dokładnie
filtr zaworu ❿– (rys.5).
5. Załóż pokrywę dzbanka ⓬na
dzbanek blendera ❼. Zwróć
rys. 1 rys. 2
rys. 3 rys. 4
rys. 5 rys. 6

7
PL
uwagę aby strzałki na pokrywie dzbanka po zamontowaniu wskazywały uchwyt dzbanka
oraz dziubek do nalewania (rys.6).
6. Jedną ręka chwyć za obudowę blendera a drugą podnieś uchylną pokrywę ❷do pozycji
z rys. 7.
7. Umieść dzbanek ❼w obudowie blendera ❶rękojeścią skierowaną na symbol otwartej
kłódki, następnie delikatnie obróć dzbanek tak aby rękojeść wskazała symbol zamkniętej
kłódki (rys.8). Po zamontowaniu dzbanka opuść i zatrzaśnij pokrywę (rys.9).
8. Demontaż dzbanka odbywa się w sposób odwrotny
do montażu tzn. podnieś pokrywę blendera ❷, obróć
dzbanek tak aby rękojeść wskazywała symbol otwartej
kłódki i zdejmij go z podstawy blendera (rys.10). Zde-
montuj pokrywę dzbanka oraz zespół noża.
MONTAŻ PRZENOŚNEGO POJEMNIKA
1. W górnej części pokrywy pojemnika ⓰zainstaluj gu-
mowy zaworek ⓭. Stopka zaworu po montażu po-
winna być widoczna całym swoim obwodem z drugiej
strony pokrywy. Od dołu pokrywy załóż uszczelkę po-
krywy ⓯. Zwróć uwagę aby dwa wycięcia w uszczelce zajęły swoje miejsca w pokrywie.
2. Do dolnej części pokrywy pojemnika ⓰przykręć dokładnie filtr zaworu ❿.
3. Załóż pokrywę pojemnika ⓰na pojemnik ⓮.
4. Uchyl pokrywę blendera ❷, umieść w blenderze pojemnik ⓰i zamknij pokrywę ❷. Po
zamontowaniu pojemnika w blenderze możliwe jest tylko odessanie powietrza. Funkcje
związane z pracą silnika zostają zablokowane a próba ich uruchomienia sygnalizowana
jest błędem E1.
rys. 7 rys. 8 rys. 9
rys. 10

8
PL
OPIS PROGRAMÓW IFUNKCJI BLENDERA
Urządzenie wyposażone jest w cztery automatyczne programy pracy. Opis programów i ich
parametry zawiera poniższa tabela:
Program: Przeznaczenie: Czas
trwania:
Odsysanie
powietrza:
Prędkości miksowania:
kruszenie kostek lodu 45 sek. NIE na przemian 10 i 0
mycie dzbanka 1 min. 20 sek. NIE na przemian duże prędkości i 0
sosy, kaszki, zupy 2 min. NIE prędkości 6 i 8 i 10 z przerwami
soki w próżni 2 min. 20 sek. TAK 10 z przerwami
DODATKOWO MOŻESZ SKORZYSTAĆ Z NASTĘPUJĄCYCH FUNKCJI BLENDERA:
„PULSE” – funkcja chwilowego zwiększenia obrotów miksowania do największej wartości.
Zwiększenie obrotów następuje po naciśnięciu i przytrzymaniu przycisku „PULSE”. Maksymal-
ny czas jednorazowego działania funkcji wynosi 60 sekund – po tym czasie funkcja zostanie
wyłączona pomimo przytrzymywania przycisku „PULSE”
„VACUUM” – funkcja odsysania powietrza z dzbanka lub przenośnego pojemnika bez mik-
sowania ich zawartości. Czas trwania czynności odsysania wynosi 45 sekund. Uruchomienie
funkcji po przyciśnięciu przycisku „VACUUM” i potwierdzeniu przyciskiem „START/STOP”.
Sygnalizacja funkcji na wyświetlaczu pulsacją kontrolki „VACUUM” (4d). Zakończenie działania
funkcji zasygnalizowane zostaje 10-krotnym sygnałem dźwiękowym. Możliwe jest przerwanie
funkcji w dowolnym momencie poprzez ponowne naciśnięcie przycisku „START/STOP”
„SPEED” – funkcja ręcznego wyboru prędkości miksowania. Dostępnych jest 10 prędkości
miksowania gdzie „1” oznacza najmniejszą prędkość a „10” prędkość największą. Wybrana
prędkość wyświetlana jest w części (c) wyświetlacza LCD w formie pionowych kresek oraz
cyframi. Zmianę zakresu dokonywana przyciskami zmiany zakresu (3g).
„TIME” – funkcja ręcznego wyboru czasu miksowania. Dostępny jest czas pomiędzy 1 sek. a 2min
30sek. – początkowo co 1 sekundę a następnie co 5 sekund. Wybrany czas wyświetlany jest
w części „b” wyświetlacza LCD. Zmianę zakresu dokonywana przyciskami zmiany zakresu (3g).
Po 5 minutach od podłączenia do sieci następuje wygaszenie wyświetlacza blendera. Na-
ciśniecię dowolnego przycisku ponownie go uaktywnia.
UŻYCIE URZĄDZENIA
1. Ustaw urządzenie na twardej, stabilnej, suchej i równej powierzchni.
2. Sprawdź, czy w uchylnej pokrywie blendera ❷, w jej górnej części zamontowany jest gumo-
wy zaworek ⓭. Stopka prawidłowo zamontowanego zaworu powinna być widoczna całym
swoim obwodem z drugiej strony pokrywy.

9
PL
3. Zamontuj w dzbanku zespół noża, powkładaj produkty przewidziane do miksowania do
dzbanka i załóż pokrywę dzbanka.
UWAGA! Gorące składniki wystudź przed włożeniem do dzbanka blendera!
UWAGA! Nie napełniaj dzbanka blendera powyżej 1500 ml.
4. Zamontuj dzbanek w blenderze.
5. Podłącz urządzenie do sieci zasilającej.
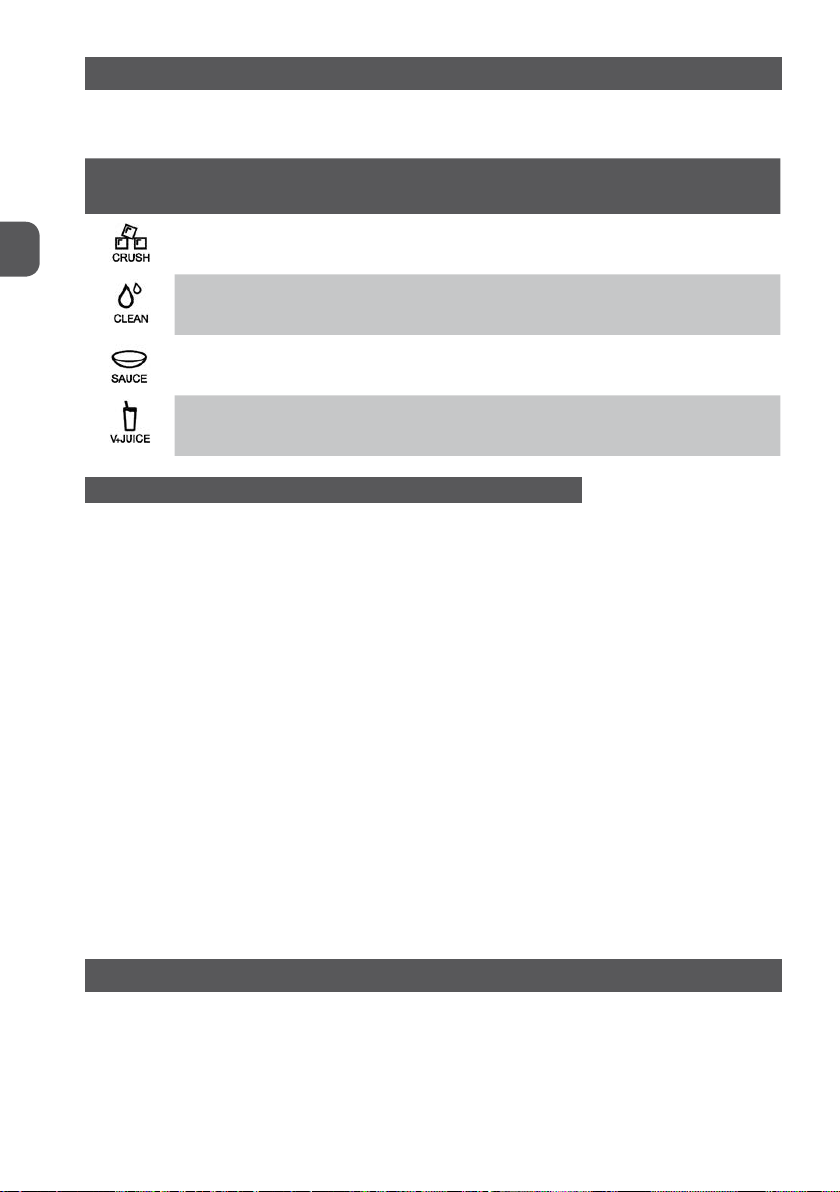
6. W zależności od potrzeb użyj właściwego, automatycznego programu. Wybór programu na-
stępuje po użyciu przycisku „MENU” a uruchomienie programu przyciskiem „START/STOP”.
Wybór stosownego programu jest sygnalizowany stosowną ikoną (4a). Zakończenie progra-
mu po upływie czasu zostanie zasygnalizowane 10-krotnym sygnałem dźwiękowym. W każ-
dej chwili możesz przerwać trwanie programu ponownie używając przycisku „START/STOP”.
7. Możesz także uruchomić urządzenie wg swoich indywidualnych ustawień prędkości i czasu
miksowania, z odessaniem powietrza lub bez. Zadeklaruj prędkość i czas korzystając z funk-
cji „SPEED” i „TIME” a następnie uruchom proces przyciskiem „START/STOP”. Ewentualnie
odessij powietrze funkcją „VACUUM” jeżeli chcesz zmiksować produkty w próżni.
UWAGA! Nie pozwól aby blender pracował dłużej niż 3 minuty. Po tym czasie odczekaj około 30 minut do całko-
witego ostygnięcia urządzenia.
UWAGA! Nie uruchamiaj blendera z pustym dzbankiem.
8. Po zakończonym procesie odłącz urządzenie od sieci, uchyl pokrywę blendera, zdemontuj
dzbanek. Jeżeli korzystałeś z funkcji odsysania powietrza lub automatyczny program doko-
nywał tej funkcji to przed podniesieniem uchylnej pokrywy ❷chwyć za języczek zaworu ⓭
znajdującego się na uchylnej pokrywie i delikatnie uchyl go w celu wyrównania ciśnień we-
wnątrz uchylnej pokrywy blendera. Jest to konieczne aby swobodnie unieść pokrywę blen-
dera ❷.
9. Zdejmij pokrywę dzbanka ⓬i rozdysponuj zmiksowane produkty. Jeżeli korzystałeś z funk-
cji odsysania powietrza lub automatyczny program dokonywał tej funkcji to przed podnie-
sieniem pokrywy dzbanka ⓬chwyć za języczek zaworu ⓭znajdującego się na pokrywie
i delikatnie uchyl go w celu wyrównania ciśnień wewnątrz dzbanka. Jest to konieczne aby
swobodnie unieść pokrywę dzbanka.
UWAGA! Przed wylaniem zawartości z dzbanka, poczekaj, aż nóż zatrzyma się!
10.Konstrukcja przenośnego pojemnika ⓮umożliwia odessanie z niego powietrza. Po jego za-
montowaniu w blenderze funkcję miksowania zostają zablokowane. Po odessaniu powietrza
funkcją „VACUUM” z pojemnika ⓮możesz zabrać go ze sobą. Pamiętaj aby przed zdjęciem
jego pokrywy, wyrównać ciśnienia zaworkiem ⓭.
UWAGA! Nie napełniaj przenośnego pojemnika powyżej 800ml.
11. Po zakończonej pracy dokładnie wyczyść urządzenie według wskazówek zawartych w roz-
dziale „CZYSZCZENIE I KONSERWACJA”
PRAKTYCZNE PORADY IUWAGI
1. Pamiętaj o wyrównywaniu ciśnień podczas zdejmowania pokryw dzbanka i przenośnego
pojemnika jeżeli panuje tam próżnia. Wyrównanie ciśnienia polega na lekkim uchyleniu ję-

10
PL
zyczka gumowego zaworku ⓭. Wyrównania ciśnienia wymaga także uchylna pokrywa ❷
przed jej uchyleniem.
2. Jeśli przygotowujesz pokarm dla niemowląt lub młodszych dzieci, zawsze sprawdź przed
karmieniem czy składniki są dokładnie wymieszane.
3. Jeżeli podczas miksowania obroty blendera wyraźnie spadają to podziel miksowaną zawar-
tość dzbanka na mniejsze porcje i zmiksuj ponownie.
4. Twarde produkty takie jak ziarna kawy, soja, czekolada lub lód powodują szybsze zużycie
noża miksującego. Nóż podlega zużyciu i wraz z biegiem czasu może wymagać wymiany.
5. Uzyskana próżnia w przenośnym pojemniku lub dzbanku na skutek parcia atmosfery ziem-
skiej będzie stopniowo zanikać.
6. Lód w kostkach rozdrabniaj używając wielokrotnie funkcji PULSE lub programu „CRUSH”.
W celu poprawy rozdrabniania kostek lodu wlej niewielką ilość wody do dzbanka.
7. Próba uruchomienia miksowania bez prawidłowo zamontowanego dzbanka lub bez za-
mkniętej pokrywy ❷sygnalizowana będzie błędem „E1” na wyświetlaczu oraz 3-krotnym
sygnałem dźwiękowym.
8. Duże kawałki miksowanych produktów przed włożeniem do dzbanka pokrój na mniejsze
kawałki.
9. Blender nie służy do wykonywania następujących czynności:
ścieranie ziemniaków
ubijanie jajek lub produktów zastępujących nabiał
mielenie surowego mięsa
ubijanie lub mieszanie ciężkich ciast (niebezpieczeństwo zbicia się ciasta w kule co może
doprowadzić do uszkodzenia urządzenia)
CZYSZCZENIE IKONSERWACJA
UWAGA! Przed przystąpieniem do czyszczenia odłącz urządzenie z sieci i odczekaj aż całkowicie ostygnie.
UWAGA! Nie zanurzaj w wodzie ani innych płynach obudowy blendera ani jego uchylnej pokrywy.
UWAGA! Ostrza noża są bardzo ostre. Uważaj aby się nie zranić.
1. Obudowę blendera i jego uchylną pokrywę przetrzyj wilgotną szmatką a następnie wytrzyj
do sucha.
2. Pozostałe części blendera umyj w ciepłej wodzie z dodatkiem detergentu po czym dokład-
nie je opłucz i wysusz.
3. Dzbanek blendera i przenośny pojemnik możesz myć także w zmywarkach do naczyń.
4. Zwróć szczególne uwagę podczas mycia gumowych uszczelek i zaworków. Od dokładności
ich wyczyszczenia zależy wielkość uzyskiwanego podciśnienia w dzbanku i pojemnika.
5. Okresowo sprawdzaj wszystkie części czynne urządzenia przed ich złożeniem. Jeżeli ostrza
blendera zacięły się lub obracają się z trudnością nie używać blendera. Sprawdź ich działanie
obracając w kierunku zgodnym do ruchu wskazówek zegara uważając przy tym żeby się nie
zranić. Ostrza powinny obracać się swobodnie.
6. Jeżeli dzbanek blendera ulegnie uszkodzeniu, zacznie przeciekać lub pojawią się na nim pęk-
nięcia, ubytki lub rysy to nie używaj urządzenia. Dalsze użytkowanie mogłoby spowodować
jego pękniecie w czasie pracy.
7. Silnik blendera nie wymaga żadnych dodatkowych czynności konserwujących. Nigdy nie
używaj szorstkich ani żrących środków czyszczących, przedmiotów do szorowania ani wełny
stalowej, które mogą uszkodzić urządzenie.

11
PL
8. Przy silnych zabrudzeniach dzbanka blendera i noża możesz skorzystać z programu „CLEAN”
który spowoduje powstanie w dzbanku wiru wodnego ułatwiającego czyszczenie. Aby do-
konać czyszczenia w programie „CLEAN” wykonaj następujące czynności:
do kompletnie zmontowanego dzbanka wlej ok. 300ml letniej wody
zamontuj dzbanek w blenderze
podłącz urządzenie do sieci i uruchom program „CLEAN”, ewentualnie powtórz go
odłącz urządzenie z sieci, zdemontuj dzbanek i wylej wodę
DANE TECHNICZNE
Parametry techniczne podane są na tabliczce znamionowej produktu.
Maksymalny czas pracy: KB Max = 3 min.
Poziom hałasu: LWA= 85 dB
Długość przewodu sieciowego: 1,0 m
UWAGA! Firma MPM agd S.A. zastrzega sobie możliwość zmian technicznych.
PRAWIDŁOWE USUWANIE PRODUKTU (zużyty sprzęt elektryczny ielektroniczny)
Oznaczenie umieszczane na produkcie wskazuje, że produktu po upływie okresu użytkowania
nie należy usuwać zinnymi odpadami pochodzącymiz gospodarstw domowych. Aby uniknąć szkodliwego
wpływu na środowisko naturalne i zdrowie ludzi wskutek niekontrolowanego usuwania odpadów, zużyte
urządzenie należy dostarczyć do punktu odbioru zużytego sprzętu AGD lub zgłosić jego odbiór z domu.
W celu uzyskania szczegółowych informacji na temat miejsca i sposobu bezpiecznego usuwania odpadów
elektrycznych i elektronicznych użytkownik powinien skontaktować się z punktem sprzedaży detalicznej, lub z lokalnym
Wydziałem Ochrony Środowiska. Produktu nie należy usuwać razem z innymi odpadami komunalnymi.
Polska

12
GB
SAFETY INSTRUCTIONS
Read carefully this manual before using the appliance.
Do not touch the appliance with wet hands.
Do not immerse the appliance, its cord and plug in water or any other liquids.
Close supervision is necessary when using the appliance near children.
Do not place the cord over sharp edges and keep it away from hot surfaces.
Before use always make sure that no tool (e.g. spoon, spatula) is left in the jug or
bottle, because it may cause damage to the appliance or body injury.
Before starting the appliance make sure the jug is properly mounted on the base.
Before disassembly wait until the motor stops completely.
Before cleaning the appliance, unplug it from the power outlet!
Take extreme care when touching cutting blades, especially when removing
them for cleaning.
Do not immerse the blender in water or any other liquids.
Do not exceed the maximum capacity indicated on the blender container.
Wait until hot ingredients cool down before processing them.
Wash the jug before using the appliance for the first time.
Do not use the appliance if it is damaged, also if the power cord or plug is dam-
aged - return the appliance for repair to an authorized service centre.
Before use always make sure that all parts of the appliance are properly installed.
To avoid the risk of damage, fire or injury, always use the attachments recom-
mended by the manufacturer.
Always unplug the appliance immediately after using it and before cleaning.
Do not leave the operating appliance unattended.
Do not place the appliance on hot surfaces.
Do not use the device outdoors.
Place the appliance on a dry, flat and stable surface.
This appliance has been designed for domestic use only.
During operation keep your hands away from moving parts.
Do not use the appliance for the purposes different than it was designed for.
Do not place the appliance in vicinity of electric and gas cookers, burners, ovens, etc.
Children should be supervised to ensure that they do not play with the appliance.
Do not pull the plug by holding the power cord.
Do not connect the power plug with wet hands.
Do not remove the jug when the appliance is running.

13
GB
Store the appliance and its cord out of reach of children under 8 years of age.
This appliance is not intended for use by children under 8 years of age and individu-
als with reduced physical, sensory or mental capabilities, or lack of experience and
knowledge, unless they have been given supervision or instruction concerning use
of the appliance in a safe way and if they understand the hazards involved. Cleaning
and user maintenance shall not be carried out by children without supervision.
Clean all attachments and containers before using the appliance for the first time.
Keep your children safe: do not leave any parts of the packaging readily accessible
(i.e. plastic bags, cardboard boxes, polystyrene inserts, etc.).
WARNING! Never let children play with plastic film or bags. Choking/
asphyxiation hazard!
NOTE: The cutting blades are very sharp, avoid touching them while
emptying or cleaning the appliance - it may result in serious injury.
WARNING! Do not operate the blender if the lid are not in place.
HIGHSPEED VACUUM BLENDER OVERVIEW
Vacuum blending is a breakthrough in food processing: it evacuates all oxygen with air from the
blender’s jug or pitcher and keeps it at vacuum. This way your smoothie, juice or soup is deprived
of oxygen to keep its nutritive value and energy for longer. Vacuum eliminates oxidation, a process
which inevitably reduces the enzymes and vitamins in food; the blended and vacuum-sealed prod-
ucts do not lose their nutritional value, taste or colour. The juices and smoothies made with the
high-speed vacuum blender are not oxidized, do not turn sour, and do not decant; you can keep
them safely in a fridge for several days without losing nutrients, taste or an appealing appearance.
The high-speed vacuum blender processes food in vacuum and helps storing the food as processed
and without air to keep it fresh and full of nutrients for longer. Now you can stock yourself up with
smoothies for the whole day or move some of them to the portable pitcher, extract the air from it,
and enjoy your drink on the go, be it at work or at your gym.

14
GB
13
7
2
1
4
3
17
13
12
8
3
4
13
f e
a
d
c db
b
g c a
16
10
15
14
6
5
10
9
11
1. Blender housing
2. Swivel blender top
3. Touch control panel
a. START/STOP button
b. Program selector button (MENU)
c. Vacuum level selector button
(VACUUM)
d. Blending speed selector button
(SPEED)
e. Blending time selector button
(TIME)
f. PULSE button
g. Blending time / speed adjustment
buttons (+ / –)
4. Backlit LCD display
a. Automatic processing program
icons
b. Blending time display
c. Blending speed display
d. Manual vacuum level selection
display
5. Blade rotor
6. Blade rotor gasket
7. 1500 ml blender jug
8. Jug handle
9. Jug lid gasket
10. Valve filter (2 pcs.)
11. Jug lid flat gasket
12. Jug lid
13. Rubber valve (3 pcs.)
14. 800 ml portable pitcher
15. Portable pitcher lid gasket
16. Portable pitcher lid
17. Non-slip feet

15
GB
BEFORE FIRST USE
1. Remove the high-speed vacuum blender from the cardboard box. Remove all stickers, plastic
bags and filling materials.
2. Check that the high-speed vacuum blender accessories have been delivered as specified
for the product. Inspect the high-speed vacuum blender for transport damage. Consult the
seller when in doubt.
3. Verify that your power mains match the nameplate ratings of the high-speed vacuum blend-
er.
4. Clean all parts in contact with food according to the instructions in Section “CLEANING AND
MAINTENANCE”.
ASSEMBLING THE HIGHSPEED VACUUM BLENDER
The vacuum levels generated in the blender jug or pitcher and the extremely high blending
speed (at over 20,000 rpm) require proper assembly of all components, which must be kept
perfectly clean, to achieve good performance of the high-speed vacuum blender and make
its operation safe for you.
INSTALLING THE BLENDER JUG
1. Insert the blade rotor ❺ in the
boom hole of the blender
jug, with the blades inward.
Twist the blade rotor counter-
clockwise to lock it in place
(Fig. 1). Make sure that the
gasket ❻ sits well within the
blade rotor ❺. The blade rotor
is detached by twisng it
clockwise to release the lock (Fig. 2).
2. Install the rubber valve ⓭ in
the jug lid top ⓬. The rub-
ber valve stem end must pass
clear all around through the
underside of the lid. Place the
jug lid at gasket ⓫ under-
neath the jug lid. Align the at
gasket notches with the re-
specve bosses under the jug
lid (Fig. 3).
3. Place the jug lid gasket ❾ over the outer round edge of the jug lid (Fig. 4).
4. Twist on the valve lter ❿
snugly to the boom of the
jug lid ⓬ (Fig. 5).
5. Close the blender jug ❼ with
the jug lid ⓬. The arrow marks
Fig. 1 Fig. 2
Fig. 3 Fig. 4
Fig. 5 Fig. 6

16
GB
on the jug lid aached to the blender jug must point toward the jug handle and the jug
spout, respecvely (Fig. 6).
6. Grasp the blender housing with one hand. Li the swivel blender top ❷ with the other
hand into the posion shown in Fig. 7.
7. Put the blender jug ❼ in the blender housing ❶ with the jug handle aligned with the
open padlock mark. Now, twist the blender jug gently to align the jug handle with the
closed padlock mark (Fig. 8). With the blender jug installed, lower and press the swivel
blender top to lock it in place (Fig. 9).
8. The blender jug is removed from the blender hous-
ing in the reverse order of assembly: li the swivel
blender top ❷, twist the blender jug to align the jug
handle with the open padlock mark, and remove the
blender jug from the blender housing (Fig. 10). Re-
move the blender jug lid and the blade rotor.
INSTALLING THE PORTABLE PITCHER
1. Install the rubber valve ⓭ in the portable pitcher lid
top ⓰. The rubber valve stem end must pass clear
all around through the underside of the lid. Place
the portable pitcher lid gasket ⓯ underneath the portable pitcher lid. Align the gasket
notches with the respecve bosses under the portable pitcher lid.
2. Twist on the valve lter ❿ snugly to the boom of the portable pitcher lid ⓰.
3. Close the portable pitcher ⓮ with the lid ⓰.
4. Open the swivel blender top ❷, place the portable pitcher ⓰ in the blender housing
and close the swivel blender top ❷. You can only vacuum the portable pitcher. You
cannot blend the contents. The blender motor funcons are locked out; if you aempt
to operate any blending-related control, Error E1 will be displayed.
Fig. 7 Fig. 8 Fig. 9
Fig. 10

17
GB
BLENDER PROGRAMS AND FEATURES
The high-speed vacuum blender has four automatic processing programs. See the table be-
low for details of the programs and settings:
Program: Use: Duration: Vacuum: Blending speed level:
Ice cube crushing 45 s NO 0 and 10, alternately
Jug cleaning 1 min 20 s NO 0 and high, alternately
Sauce / porridge / soup 2 min NO 6, 8 and 10, intermittently
Juice vacuuming 2 min 20 s YES 10, intermittently
OTHER HIGHSPEED VACUUM BLENDER FEATURES:
PULSE: increases the blending speed to maximum when held depressed. Each time it is activated,
the feature works up to 60 seconds only, even if the PULSE button is held depressed further.
VACUUM: evacuate the air from the blender jug or the portable pitcher. The contents are not
blended during this process. The vacuum feature takes 45 seconds to evacuate the air. The
vacuum feature is activated by pressing the VACUUM button and confirming the activation by
pressing the START/STOP button. When active, VACUUM (4d) flashes on the display. When the
feature finishes running, the high-speed vacuum blender beeps 10 times. You can interrupt
the feature at any time by pressing the START/STOP button again.
SPEED: manually set the blending speed. There are 10 different speed levels to choose from,
with 1 being the lowest speed and 10 being the highest speed. The set speed level is shown
in (c) of the LCD display with upright bars and a corresponding speed level number. You can
modify the value with the +/– button.
TIME: manually set the blending time. You can set the blending time from 1 second to 2 min-
utes and 30 seconds. You can modify the setting in 1-second increments. Keep the button
depressed to increase the increment to 5 seconds. The blending time setting is shown in (b)
of the LCD display. You can modify the value with the +/– button (3g).
The LCD display will go dark in 5 minutes from powering on the high-speed vacuum blend-
er. The LCD display is turned on with any button.
USING THE HIGHSPEED VACUUM BLENDER
1. Place the high-speed vacuum blender on a firm, stable, dry and level surface.
2. Make sure that the rubber valve ⓭is installed in the swivel blender top ❷. The rubber valve
stem end must pass clear all around through the underside of the swivel blender top.
3. Attach the blade rotor to the blender jug, place the products to be blended in the blender
jug, and close the blender jug with its lid.
CAUTION! Hot products must cool down before placing them in the blender jug!

18
GB
CAUTION! Fill the blender jug up to the 1,500 ml mark only.
4. Place the blender jug in the blender housing.
5. Plug in the high-speed vacuum blender to the mains.
6. Select the automatic processing program you need. Do this by pressing the MENU button
repeatedly. Start the selected program by pressing the START/STOP button. The selected au-
tomatic processing program is indicated with its icon on (4a). When the automatic process-
ing program is done, the high-speed vacuum blender will beep 10 times. You can always
interrupt the activated program by pressing the START/STOP button again.
7. You can also adjust the blending speed and time and/or turn the vacuum on or off as you
need. Set the desired blending speed and time with the SPEED and TIME buttons, and start
processing with these settings by pressing START/STOP. If you want to vacuum blend, first
evacuate the air by pressing the VACUUM button.
CAUTION! Do not run the high-speed vacuum blender for more than 3 minutes. When done processing, wait
approx. 30 minutes for the high-speed vacuum blender to cool down before processing more products.
CAUTION! Do not start the high-speed vacuum blender if the blender jug is empty.
8. When done processing, unplug the high-speed vacuum blender from the mains, open the
swivel blender top and remove the blender jug. If you were processing with vacuum (or an
automatic processing program used vacuum), grasp and gently pull on the boss of the rub-
ber valve ⓭on the swivel blender top ❷before opening it. This will depressurize the swivel
blender top. Otherwise it will be very difficult to open the swivel blender top ❷.
9. Open the blender jug lid ⓬and move the blended contents as required. If you were process-
ing with vacuum (or an automatic processing program used vacuum), grasp and gently pull
on the boss of the rubber valve ⓭ on the blender jug lid ⓬before opening it. This will depres-
surize the blender jug. Otherwise it will be very difficult to open the blender jug.
CAUTION! Wait for the blade rotor to stop before pouring out the jug contents!
10.The portable pitcher ⓮can be brought to vacuum. When the portable pitcher is in the
blender housing, all blending features are locked out. Evacuate air from the portable pitcher
⓮with the VACUUM feature. Now you can take the portable pitcher with the contents with
you. Remember to pull on the boss of the rubber valve ⓭first, if you want to open the lid of
the portable pitcher.
CAUTION! Fill the portable pitcher up to the 800 ml mark only.
11. When done processing, clean the high-speed vacuum blender as explained in Section
“CLEANING AND MAINTENANCE”.
PRACTICAL HINTS & TIPS
1. If at vacuum, remember to depressurize the blender jug / portable pitcher before re-
moving the lid. Depressurize by gently pulling on the boss of the rubber valve ⓭. De-
pressurize the swivel blender top ❷ in the same way before you open it.
2. When blending products for babies or young children, always make sure that all ingre-
dients have been blended thoroughly before serving.
3. If the speed is noceably reduced during blending, you need to break up the products
into smaller chunks before blending.

19
GB
4. Hard products, including coee beans, soy beans, chocolate and ice will wear out the
blade rotor faster. It is natural for the blade rotor to become dull and require replace-
ment during the operang life of the blender.
5. The vacuum generated in the blender jug / portable pitcher will be slowly lost due to
the atmospheric pressure.
6. Crush ice cubes by operang PULSE repeatedly, or use the CRUSH program. Add a lit-
tle water to the blender jug to crush ice cubes easier.
7. If the blender jug is improperly installed (locked) or with the blender jug lid ❷ not
closed, Error E1 will be displayed with 3 beeps if you aempt to start blending.
8. Cut large porons of products into smaller ones before placing them in the blender jug
and blending.
9. The blender is not designed for the following:
grating potatoes
beating eggs or dairy substitutes
mincing raw meat
beating or mixing thick dough (as these products tend to form heavy lumps that can
damage the blender)
CLEANING AND MAINTENANCE
CAUTION! Beforecleaning,alwaysunplug thehigh-speed vacuum blenderfromthemainsoutlet andwait until
it has completely cooled down.
CAUTION! Do not immerse the blender housing or the swivel blender top in water or other liquids.
CAUTION! The blades are very sharp. Handle with care to avoid injury.
1. Clean the blender housing and the swivel blender top with a soft, damp cloth; next, wipe
them dry.
2. Wash other parts of the high-speed vacuum blender with warm water and a detergent. Next,
rinse clean and leave to dry.
3. The blender jug and the portable pitcher are dishwasher safe.
4. Always clean the rubber gaskets and valves carefully. They need to be perfectly clean before
use to achieve a correct vacuum level.
5. Periodically inspect all parts of the high-speed vacuum blender for wear and tear before
assembly. If the blender blade rotor stalls or does not rotate smoothly, do not use the high-
speed vacuum blender. Make sure that blender blade rotor runs smoothly by rotating it
clockwise. Do this carefully, as you may cut yourself. The blade rotor should rotate freely.
6. If the blender jug is damaged, leaks, or shows cracks, chipping or scratches, do not use the
high-speed vacuum blender. Otherwise the blender jug will burst during blending.
7. The motor of the high-speed vacuum blender is maintenance-free. Never use abrasive or
corrosive cleaning agents, scrubbing utensils or steel wool (pot scourers) to clean the high-
speed vacuum blender; otherwise the high-speed vacuum blender will be damaged.
8. You can use the CLEAN program to help remove persistent dirt from the blender jug and the
blade rotor with water. The program generates a very strong water vortex in the blender jug
to facilitate cleaning. Cleaning with the CLEAN program:
Assemble the blender jug and pour about 300 ml of lukewarm water inside.
Place the blender jug in the blender housing.

20
GB
Plug in the high-speed vacuum blender to the mains and start the CLEAN program. Repeat
CLEAN processing as required.
Unplug the high-speed vacuum blender from the mains, remove the blender jug, and
pour the swill out.
TECHNICAL SPECIFICATIONS
See the product’s nameplate for technical specifications.
Max. operating time: KB Max = 3 min.
Noise: LWA = 85 dB
Power cord length: 1.0 m
CAUTION! MPM agd S.A. may change the technical features of the product without notice.
PROPER DISPOSAL OF THE PRODUCT (waste electrical and electronic equipment)
This symbol on the product indicates that the product, after its lifetime, should not be disposed with other
household wastes. To avoid harmful influence on the environment and human health due to uncontrolled
waste disposal, dispose the waste device to the service point of waste household appliances or report
collecting it from home. In order to obtain detailed information about the location and how to dispose
the waste electrical and electronic equipment in a safe way, contact your retailer or local Department
of Environmental Protection. Do not dispose the device with other municipal waste.
Poland
Table of contents
Languages:
Other MPM Blender manuals
Popular Blender manuals by other brands

Kenwood
Kenwood Blend-X PRO BLM80 instruction manual

Imetec
Imetec D1104 Instructions for use

Morphy Richards
Morphy Richards 48821 SOUP MAKER manual

inventum
inventum Aluminous NB 800 instruction manual

SQ Professional
SQ Professional gems LUMINATE instruction manual

Hamilton Beach
Hamilton Beach HMI Series Operation manual