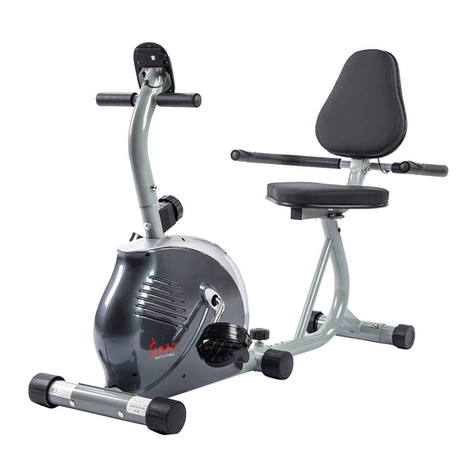
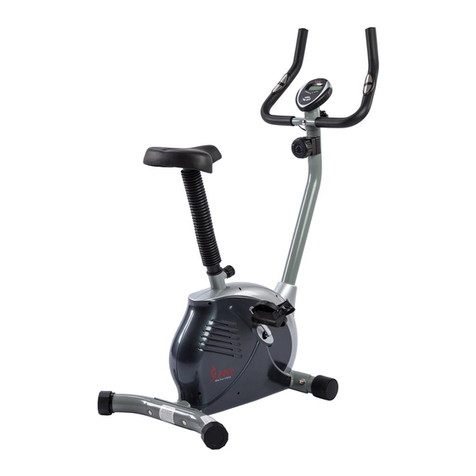
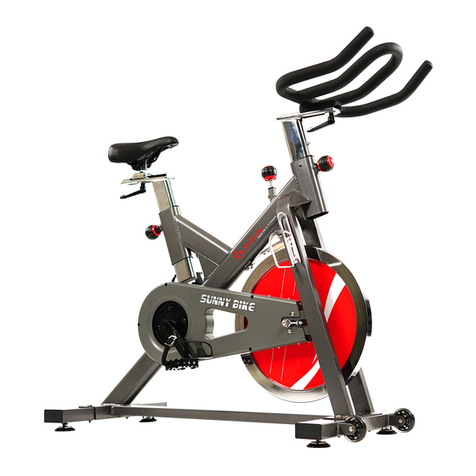
Sunny SF-B1001 User manual

INDOOR CYCLING BIKE
SF-B1001
USER MANUAL
IMPORTANT! Read all instructions carefully before using this product. Please
retain owner’s manual for adjustment and maintenance instructions. For customer

We
t
corr
e
and
It is
pre
c
1.
B
a
f
r
m
2.
B
e
i
r
d
y
3.
K
4.
U
e
5.
E
t
h
6.
A
c
e
b
7.
W
e
8.
D
9.
T
10.
T
11.
U
a
12.
Y
h
13.
T
t
hank you
e
ctly. It is
i
effective
u
your res
p
c
autions.
B
efore sta
r
a
ny medic
a
r
om usin
g
m
edication
B
e aware
o
e
xercising
r
regular h
e
d
o experie
n
y
our exerci
K
eep child
r
U
se the eq
e
nsure saf
e
E
nsure th
a
h
e equip
m
A
lways us
e
c
hecking t
h
e
xercise,
d
b
een rectifi
W
ear suita
e
ntangled i
D
o not pla
c
T
he maxi
m
T
he equip
m
U
se cautio
n
a
ssistance
Y
our prod
u
h
ot or dam
T
his equip
m
WA
R
Stat
e
infor
m
IMP
O
for choosi
i
mportant
t
u
se can on
p
onsibility
t
r
ting any e
a
l or phys
i
g
the equ
that affec
t
o
f your bo
d
if you e
x
e
artbeat,
s
n
ce any o
f
se progra
m
r
en and p
e
uipment o
e
ty, the eq
a
t all nuts
a
m
ent can o
n
e
the equi
p
h
e equip
m
d
iscontinu
e
ed.
ble clothin
g
n the equi
c
e fingers
o
m
um weigh
t
m
ent is no
t
n
when lift
if necess
a
u
ct is inten
d
p areas a
s
m
ent is de
s
R
NING: Th
e
of Califor
m
ation go
t
O
RT
A
ng our pro
t
o read thi
s
ly be achi
e
t
o ensure
xercise pr
o
i
cal condit
ipment p
r
t
s your he
a
d
y’s signa
x
perience
s
hortness
o
f
these co
n
m
.
e
ts away fr
o
n a solid,
f
uipment s
h
a
nd bolts
a
n
ly be mai
n
p
ment as i
n
m
ent, or if
y
e
use of t
h
g
while us
i
pment.
o
r objects
t
capacity
o
t
suitable f
o
ing and m
o
a
ry.
d
ed for us
e
s
this may
l
s
igned for
is product
nia to cau
s
t
o www.P
6
A
NT S
A
duct. To e
s
entire m
a
e
ved if the
that all u
s
o
gram yo
u
ions that
c
r
operly. Y
o
a
rt rate, bl
o
ls. Incorre
any of th
o
f breath,
l
n
ditions, y
o
o
m the eq
u
f
lat level s
u
h
ould hav
e
a
re secur
e
n
tained if i
t
n
dicated. I
f
y
ou hear
a
h
e equipm
i
ng the eq
u
into the m
o
o
f this unit
o
r therape
u
o
ving the
e
e
in cool,
d
l
ead to co
r
indoor an
d
can expo
s
s
e cancer
a
6
5Warning
A
FET
Y
nsure you
a
nual bef
o
equipme
n
s
ers of the
u
should c
o
c
ould put
y
o
ur physi
c
o
od press
u
ct or exce
e followin
l
ightheade
o
u should
u
ipment.
T
u
rface wit
h
e
at least
2
e
ly tighten
e
t
is regula
r
f
you find
a
a
ny unus
u
ent imme
d
u
ipment.
A
o
ving part
s
is 220 po
u
u
tic use.
e
quipment
d
ry conditi
o
r
rosion an
d
d
home us
s
e you to
o
a
nd birth
d
s.ca.gov.
1
Y
INF
O
r
safety a
n
o
re assem
b
n
t is asse
m
equipme
n
o
nsult you
r
y
our healt
h
c
ian’s ad
v
u
re or chol
ssive exe
r
g
sympto
m
dness, di
z
consult y
o
T
he equip
m
h
a protect
2
feet (60
C
e
d before
r
ly examin
e
a
ny defecti
u
al noises
d
iately an
d
A
void wear
s
of the eq
u
nds (100
. Always u
o
ns. You
s
d
other rel
a
e only! It i
s
o
ne or mor
e
d
efects or
r
O
RMA
T
n
d health,
p
b
ling and
u
m
bled, mai
n
n
t are info
r
physicia
n
h
and saf
e
v
ice is es
s
esterol le
v
r
cise can
d
m
s: pain,
z
ziness or
o
ur physic
i
m
ent is de
s
ive cover
f
C
M) of fre
e
using the
e
d for da
m
ve compo
n
coming fr
o
d
do not
u
ing loose
c
uipment
KG).
se proper
s
hould avo
a
ted probl
e
s
not inten
d
e
chemica
r
eproducti
v
T
ION
p
lease us
e
u
sing the
e
n
tained an
rmed of a
n
to deter
m
e
ty at risk,
s
ential if
v
el.
d
amage y
o
tightness
feelings o
f
i
an before
s
igned for
a
f
or your fl
o
e
space all
equipmen
m
age and/
o
n
ents whil
e
o
m the e
q
u
se until t
h
c
lothing th
a
lifting tec
h
id storage
e
ms.
d
ed for co
m
ls known t
o
v
e harm.
F
e
this equi
p
e
quipment
.
d used pr
o
ll warning
s
m
ine if you
or preve
n
you are
t
o
ur health.
in your
c
f
nausea.
continuin
g
a
dult use
o
o
or or carp
e
around it.
t. The saf
e
o
r wear an
d
e
assembl
q
uipment
d
h
e proble
m
a
t may be
c
h
nique and
in extrem
e
m
mercial
u
o
the
F
or more
p
ment
.
Safe
o
perly.
s
and
have
n
t you
t
aking
Stop
c
hest,
If you
g
with
o
nly.
e
t. To
e
ty of
d
tear.
ing or
d
uring
m
has
c
ome
seek
e
cold,
u
se!

EXPLODED DRAWING
2

EXPLODED DRAWING
HARDWARE TOOLS
A Allen Wrench S6 1pc
B Spanner S 13, 14, 15 1pc
3

PARTS LIST
Part No. Description Qty Part
No. Description Qty
1 Main Frame 1 33 Protective Cover 1
2 Front Stabilizer 1 34 Brake Knob 1
3 Rear Stabilizer 1 35 Hex Nut M8 2
4 Handlebar 1 36 Hex Nut 1
5 Seat Post 1 37 SpacerΦ12XΦ9X15 1
6 Seat Slider 1 38 Square Nut M8 1
7 Seat 1 39 Spring 1
8 Pop-Pin Knob 3 40 Mat Cover 1
9L/R Pedal 1 pr. 41 Block 1
10L/R Crank 1 pr. 42 Hex Nut M6 1
11 Leveler Feet 4 43 Nylon Nut M6 1
12 Square Cap 4 44
Phillips Tapping Screw
M5X15 2
13 Flat Washer Φ8X1.5X
Φ16 10 45 Spring Clamp 1
14 Allen Bolt M8X20XΦ15 4 46 Rubber Pad 2
15 Plastic Bushing 3 47 Nylon Nut M5 2
16 Square Cap 1 48 Flat Washer D5 4
17 Phillips Tapping Screw
M5XL12 2 49 Fixed Bracket 1
18 Hex Nut M10 4 50 Conical Spring 1
19 Water Bottle Holder 1 51 Brake Block 1
20 Nylon Nut M8 2 52 Wool Felt 1
21 Foam Grip 2 53 Phillips Screw M5X30 2
22 Cap 2 54 Chain 1
23 Allen Bolt M8X16XΦ15 4 55
Phillips Tapping Screw
M8X45 2
24 Spring Washer D8 4 56 Cap Nut M12 2
25 A/B Handlebar Cover 1 pr. 57 Flat Washer Φ25XΦ13X2 2
26 Handlebar Post 1 58 Hex Thin Nut M12X1 2
27 Phillips Screw ST4X8 4 59 Spacer Φ18XΦ12.2X9 2
28 Allen Bolt M8X40XL12 2 60 Conical Thin Nut M12X1 2
29 Roller 2 61 Bearing 2
30L/R Chain Cover 1pr. 62 Flywheel 1
31 Chain Plate 1 63 Flywheel Axle 1
32 Centre Axle 1 64 Wheel Inner Sleeve 1
4

65 Small Chain Wheel 1 74 Stop Washer 1
66 Nut 2 75 Two-Slot Nut 1
67 Flat WasherΦ5.5X1.0X
Φ12 2 76 Ball Bearing 2
68 Cross Pan Head
Tapping Screw
ST4.2X25 2 77 Centre Bowl 2
69 Cross Pan Head
Tapping screw ST5X10 5 78 Three Slot Nut 1
70 Flat Washer Φ
5.5X0.5XΦ10 5 79 Big Flat Washer 1
71 Long Spacer Φ16XΦ
12X41 1 A Allen Wrench S6 1
72 Crank Cover 2 B Spanner S 13, 14, 15 1
73 Flange Nut M10X1.25 2
NOTE:
Most of the listed assembly parts have been packaged separately, but
some hardware items
have been preinstalled. In
these instances, simply remove and reinstall the hardware
assembly as
required.
Please reference the individual assembly steps and make note of all preinstalled
hardware.
Prior to assembly of this product, remove all components from the
package and verify all
the listed parts are supplied
5

ASSEMBLY INSTRUCTIONS
STEP 1:
Remove the preassembled 4 Bolts (No. 14) and 4
Flat Washers (No. 13) from the Front Stabilizer
(No. 2) and Rear Stabilizer (No. 3).
Attach the Front Stabilizer (No. 2) and Rear
Stabilizer (No. 3) to the Main Frame (No. 1) with 4
Bolts (No. 14) and 4 Flat Washers (No. 13).
Tighten and secure with Allen Wrench (A). Make
sure the Foot Levelers (No. 11) are on the bottom
and the transportation wheels facing up at the front
of the bike.
6
STEP 2:
Remove the preassembled 4 Allen Bolts (No. 23),
4 Flat Washers (No. 13) and 4 Spring Washers
(No. 24) from Handlebar Post (No. 26). Attach the
Handlebar (No. 4) to the Handlebar Post (No. 26)
using 4 Allen Bolts (No. 23), 4 Flat Washers (No.
13) and 4 Spring Washers (No. 24). Tighten and
secure with Allen Wrench (A).
Remove the preassembled 4 Phillip Screws (No.
27) from Top Cover (No. 25A). Insert Handlebar
Post (No. 26) through Lower Handlebar Cover
(No. 25B). Slide the Lower Handlebar Cover (No.
25B) to the top of the Handlebar Post (No. 26).
Use Phillip Screws (No. 27) to attach the Top
Cover (No. 25A) to the Lower Handlebar Cover
(No. 25B) so the Handlebar (No. 4) and
Handlebar Post (No. 26) are in between the
Covers (No. 25A and No. 25B).
Loosen Pop-Pin Knob (No. 8), pull the pin, and then
insert the handlebar assembly into the Main Frame
(No. 1). Make sure the pin settles into the desired
hole and secure the Knob (No. 8).

STEP 3:
Lock the
Seat (No. 7)
onto the
Seat Slider (No.
6)
tightly
.
Adjust the seat to the desired position
by sliding it on
Seat Slider (No. 6)
then lock the
Seat Slider (No. 6)
on the
Seat Post (No. 5)
with
Pop-pin Knob (No. 8)
.
Insert the
Seat Post (No.
5)
to the rear upright tube of
Main frame (No. 1)
then adjust the height and secure with
Pop-pin
Knob (No. 8).
Note: Both the fore/aft and up/down
adjustments of the Seat (No. 7) need
to be secured with Pop-Pin Knob (No.
8). Ensure the Seat (No. 7) is locked
onto the Seat Slider (No. 6) before
adjusting the height.
STEP 4:
Attach the Left & Right Pedals (No. 9L/R) to their
corresponding Crank (No. 10 L/R). Before you
begin, immobilize the crank arms by turning the
brake knob all way to the right.
Left Pedal: The left pedal is marked L for left side.
Align the Left Pedal (No. 9L) to the Left Crank
Arm (No. 10L) at 90 degrees and insert the pedal.
Turn counter-clockwise as tightly as you can with
your hand then secure with Spanner (B).
Right Pedal: The right pedal is marked R for right
side. Align the Right Pedal (No. 9R) to the Right
Crank Arm (No. 10R) at 90 degrees and insert the
pedal. Turn clockwise as tightly as you can with
your hand then secure with Spanner (B).
Assembly is complete!
7

ADJUSTMENT GUIDE
8
LEVELING THE BIKE
This bike can beleveled to
compensate for uneven grounding.
To
levelthe bike, please raiseor
lowerthe
Foot Levelers (No.
11)
located under
the Front and Rear
Stabilizers (No. 2 & No. 3)
.
HANDLEBAR ADJUSTMENT
Loosen and pull the
Pop-Pin (No. 8) out,
then raise or lower
the Handlebar (No.
4)
to the desired
position. Make
sure
the pop-pin settles
into the desired hole
and secure firmly.
SEAT ADJUSTMENT
Appropriate seat height helps to ensure an efficient workout,
reduces the risk of injury, and makes your ride more
comfortable. Adjusting the seat forward or backward helps
targetdifferent body muscle groups.
1. Place one pedal in the upward position.Place your foot in the
toeclips,thengetinthebike.
2. If your leg is bent too much, you should move the seat up. If
your foot can not touch the pedal or your leg istoo straight, you
should movethe seat down.
3. Dismount the bike. Loosen and pull the
Pop-pin Knob (No. 8)
then
raise or lower the seat post to the desired position. Make
sure
the pop-pin settles into the desired hole then secure
firmly.
4. Loosen and pull the
Pop-pin Knob (No. 8)
out then move the
Seat Slider (No. 6)
forward or backward to the desired
position. When the seat
slider is in the desired position then
secure the pop-pin.
PEDAL STRAP ADJUSTMENT
Place the ball of each foot in the toe clip until the front of the shoe fits
Into the toe clip cage. Rotate one foot within arm's reach, then pull up
the strap until the toe clip cage fits the shoe snuggly and insert the strap
end back into the hoop of the toe clip. Repeat for the other foot.
Once you’re positioned comfortably, begin pedaling slowly with your hands
resting comfortably on the handlebar. After you feel secure, you can
change seat positions, hand positions, and resistance levels.

RESISTANCE ADJUSTMENT
The pedal resistance is
controlled by the tension
control knob.
To
increase resistance, turn
the tension control knob
clockwise
(+)
.
To
decrease resistance,
turn the tension control
knob
counter-clockwise
(-)
. Resistance
adjustment can be made
easily at
any time. To
stop the bike
completely during use,
use the Emergency
Brake by simply
pushing down on the
tension control knob.
MOVING THE BIKE
Carefully lift the Rear Stabilizer
(No. 3) to move the bike. Always
move with caution as any
sudden impact may affect the
operation of the machine as well
as your safety.
DISMOUNTING THE BIKE
Increase the resistance by turning the tension control knob clockwise until the flywheel stops or
pedal slower untilyou come to a complete stop.
WARNING!
Do not dismount the bike or remove your feet from the pedals until the pedals have stopped
completely!
9

MAINTENANCE INSTRUCTIONS
DAILY MAINTENANCE
After each exercise session, wipe down all
the equipment: seat, frame, handlebars. Pay
special attention to the seat post, handlebar
post and belt guard. Sweat is very corrosive
and may cause problems that require parts
replacement later.
1. Get on the bike and engage the drive
train.
2. Pay attention to any vibrations felt
through the pedals. If you feel any
vibrations, you may need to tighten the
pedals, bottom bracket, or adjust the drive
chain tension.
3. Use a wrench to tighten the pedals until
they are secure.
MONTHLY MAINTENANCE
1. Check all hardware is secure, such as: water
bottle holder, flywheel nuts, belt guard bolts,
brake caliper lock nuts and brake caliper
tension rod nuts.
2. Inspect the brake tension rod for signs of
wear such as missing threads. Clean and
lubricate the brake tension rod.
3. Clean and lubricate the seat post, handlebar
post and seat slider. Remove any build up of
foreign material.
WEEKLY MAINTENANCE
1. Inspect moving parts and tighten the
hardware.
2. Inspect pull pin frame fittings, making
sure the fittings are snug. Loose frame
fittings may strip out threads over time
and cause extensive damage.
3. Clean and lubricate pop pin assemblies.
Pull on the pin and spray a small amount
of lubricant onto the shaft.
4. Tighten the seat hardware, making sure
the seat is level and centered.
5. Brush and treat the resistance pads.
Remove any foreign material that may
have collected on the pads. Spray the
pads with silicone lubricant. This helps to
reduce noise from friction between the
pads and the flywheel.
6. Visually inspect the bottom bracket, toe
clips and toe straps. If any of them are
loose or disconnected, attach and tighten.
Version 1.3
10
Table of contents
Other Sunny Exercise Bike manuals

Sunny
Sunny SF-B1002 User manual

Sunny
Sunny sf-b1203 User manual

Sunny
Sunny SF-RB4601 User manual

Sunny
Sunny SF-B1002 User manual

Sunny
Sunny SF-B1876 User manual

Sunny
Sunny SF-RB4953 User manual

Sunny
Sunny SF-RB1117 Manual

Sunny
Sunny SF-RB921 User manual

Sunny
Sunny p8100 User manual
Sunny
Sunny SF-B1712 User manual

Sunny
Sunny SF-BH620062 User manual

Sunny
Sunny SF-B1001S User manual

Sunny
Sunny SF-RW5940 User manual

Sunny
Sunny SF-RB4876 User manual

Sunny
Sunny TORNADO LX AIR BIKE User manual

Sunny
Sunny ESSENTIAL INTERACTIVE Series User manual

Sunny
Sunny SF-B2621 User manual

Sunny
Sunny SF-RB420031 User manual

Sunny
Sunny SF-B901B User manual

Sunny
Sunny p8100 User manual