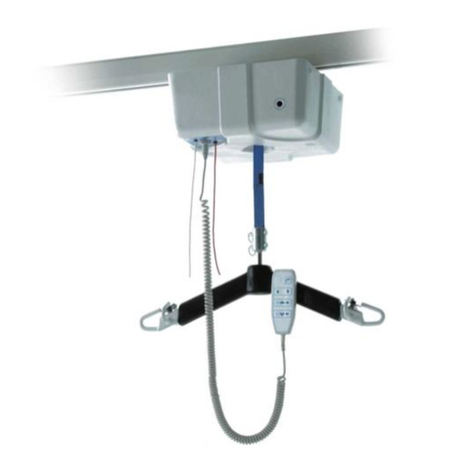
Sunrise Medical Oxford STOWAWAY 140 Operator's manual

ELECTRIC AND HYDRAULIC MODELS
FOR SPECIFIC MODEL INFORMATION PLEASE REFER OVERLEAF
English
User Instruction Manual
For The Oxford Range
of Mobile Hoists
OXFORD

Oxford Range of Mobile Hoists
2
Contents
Oxford Electric/Hydraulic Lift illustrations.................................page 3
Introduction..................................................................................page 6
Assembly and commissioning instructions..................................page 8
Assembly of mast to base illustration ..........................................page 9
Safety precautions......................................................................page 10
Mobile hoist controls illustration ...............................................page 11
Stowaway Assembly Instructions ..............................................page 12
Operating instructions................................................................page 17
Charging instructions .................................................................page 19
Maintenance schedule & Daily check list..................................page 20
Technical Specications.............................................................page 23
Slings for use with the Oxford Major .......................................page 26
User guide for the Quickt Sling ...............................................page 27
User guide for the Full Back Sling.............................................page 31
User guide for the Quickt Deluxe Sling...................................page 35
User guide for the St. Ebbas/Longseat Sling .............................page 39
User guide for the Oxford Access Sling.....................................page 43
Servicing, Repairs, Inspections & Testing .................................page 47
This User Manual Covers the following Models
STOWAWAY 140 - Electric and Hydraulic
MINI 140 - Electric and Hydraulic
MIDI 170 - Electric and Hydraulic
MAJOR 190 - Electric and Hydraulic
MAXI 170 - Electric

Oxford Range of Mobile Hoists
3
STOWAWAY 140kg
MINI 140kg

Oxford Range of Mobile Hoists
4
MIDI 170kg
MAJOR 190kg

Oxford Range of Mobile Hoists
5
MAXI 170kg

Oxford Range of Mobile Hoists
6
About Y o ur Lift
The Oxford Mobile Hoists are available in two versions, hydraulically operated and
electrically operated. This manual covers both versions. (This is with the exception of the
Maxi 170 which is electric only)
Each lift is fully assembled, load tested and certied before being partially dismantled for
packing. The packing consists of a strong, purpose built carton and is used for both export
and domestic markets to ensure the safe arrival of the lift.
A number of documents are supplied in a wallet packed with each lift and should be kept
safely for future reference.
• Test Certicate
• User Manual
• Dealer Guarantee Card
• Customer Satisfaction Card
The TEST CERTIFICATE is an important document and will be required for your insurance
records. It is valid for six months and after it has expired the lift should be inspected and
serviced for the following six months. Servicing and periodic testing can be carried out by
your supplier. Please ensure your lift is included in their maintenance schedule.
Oxford Mobile Hoists are suitable for the following CATEGORIES of lift within the
working parameters of the lifts specied in the TECHNICAL SPECIFICATIONS.
• Category A - Wheelchair
• Category B - Bed
• Category C - Bath
• Category D - Toilet/Shower Chair
• Category E - Floor
• Category F - 90 degree Rotation
The Oxford Mobile Hoists are suitable for patients in the SITTING, SITTING/
RECUMBENT and RECUMBENT positions.
The CE mark
Oxford Mobile Hoists carries the CE mark and complies with the following EC directives:
Medical Device Directive (93/42/EEC)
EMC Directive (89/336/EEC) (Electrics only)
Low Voltage Directive (73/23/EEC) (Electrics only)

Oxford Range of Mobile Hoists
7
Assembly and Commissioning Instructions
Place the carton in a clear working area and open carefully. The carton contains:-
• Main Wheeled Chassis
• Mast and Boom Assembly
• Leg Adjusting Handle
• Wallet Containing Documents
•Handcontol (electric only)
• Battery Charger (electric only)
• Battery Pack
1. Remove all the parts from the carton and place on the oor, taking care to protect the
nish from damage.
SAFETY NOTE: Some of the parts are heavy and will need to be lifted with care. You
may need assistance with the heavier assemblies.
2. Apply the brakes on the rear castors of the chassis.
3. Fit the mast assembly to the chassis. The mast is located into the rectangular socket on
the top centre of the chassis.
SAFETY NOTE: Avoid trapping ngers. Keep ngers away from the end of the mast
when inserting into the socket.
4. When the mast is fully engaged with the socket, turn the mast locking knob clockwise
until fully tightened.
SAFETY NOTE: Full engagement of the mast is indicated by the label on the side of
the mast.
5. Remove the screw from the leg adjusting lever located at the rear of the chassis. Fit the
leg adjusting handle through the gate on the mast and push the open end over the leg
adjusting lever. Align the notch in the handle with the cross pin in the lever. The
handle is retained by a screw through the clearance hole in the handle into a threaded
hole in the lever. Insert screw and fully tighten.
• For Stowaway please refer to page 11 for assembly instructions

Oxford Range of Mobile Hoists
8
ASSEMBLY OF MAST TO BASE

Oxford Range of Mobile Hoists
9
Assembly and Commissioning Instructions (cont.)
6. Check the legs of the lift open and close satisfactorily.
Electric model only
7. Check the red emergency stop button, located on the Controller is in the out
(off position).
8. Fit the handcontrol to the handcontrol socket located at the base of the
Controller.
Important
The handcontrol plug is indexed and can only be tted one way. Do not force, but
make sure the plug of the handcontrol is rmly pushed into the socket.
9. Plug the actuator jack plug into the (left socket) actuator socket located at the base
of the Controller.
10. Push the up and down buttons on the handcontrol and conrm the boom rises and
lowers. The lift is now ready for use.
Hydraulic model only
7. Close the hydraulic unit release valve by turning the knurled black knob on the unit
fully clockwise.
Note: The release valve requires only minimal tightening to operate and should only
be closed nger tight. DO NOT apply excessive force to the valve knob as this will
result in damage to the valve.
8. Pump the handle of the hydraulic unit and conrm the ram raises the boom.
9. Open the release valve fully anticlockwise and check the boom descends. An
unloaded boom will not come down under its own weight, it will be necessary to
apply some pressure to the boom before it will descend.
Note: The release valve is fully open and encounters a positive end stop in less than
two full turns of the knob. DO NOT force the valve past the end stop as this will
result in damage to the valve.
10. Close the release valve. The lift is now ready for use.

Oxford Range of Mobile Hoists
10
Safety Precautions
Please read and follow the safety precautions listed below. The operation and use of
Oxford patient lifts is simple and straightforward. Following these few basic safety
precautions will make lifting operations easy and trouble free.
• ALWAYS plan your lifting operations before commencing.
• ALWAYS carry out the DAILY CHECK LIST before using the lift.
• ALWAYS familiarise yourself with the operating control and safety features of a lift
before lifting a patient.
• DO NOT use a sling unless it is recommended for use with the lift.
• ALWAYS check the sling is suitable for the particular patient and is of the correct size
and capacity.
• NEVER use a sling which is frayed or damaged.
• ALWAYS t the sling according to the instructions in the user manual.
• ALWAYS check the safe working load of the lift is suitable for the weight of the
patient.
• ALWAYS carry out lifting according to the instructions in the user manual.
• NEVER disconnect or bypass a control or safety feature because it seems easier to
operate the lift.
• NEVER force an operating or safety control. All controls are easy to use and do not
require excessive force to operate. If a control is not working easily there will be a
reason. Forcing will only strain or damage the lift and may compromise safety.
• DO NOT lift a patient with the castor brakes on.
• DO NOT attempt to manoeuvre the lift by pushing on the mast, boom or patient.
• ALWAYS manoeuvre the lift with the handle provided.
• ALWAYS lower the patient to the lowest comfortable position before transfers.
• DO NOT push a loaded lift at speeds which exceed a slow walking pace
(3 Kilometres/hour 0.8 metres/second).
• DO NOT push the lift over uneven or rough ground. particularly if loaded.
• DO NOT attempt to push or pull a loaded lift over a oor obstruction which the
castors are unable to ride over easily.
• DO NOT bump the lift down steps, loaded or unloaded.
• DO NOT attempt to negotiate a loaded lift on a slope which exceeds 1:12
(approximately 5 degrees). Sunrise Medical recommend a second helper is present
when moving a patient on a slope.

Oxford Range of Mobile Hoists
11
OXFORD MOBILE HOIST CONTROLS
Detachable Battery Pack
Emergency
Stop Button
Emergency
Raise/Lower
Hand
Control
Battery
Indicator
Actuator
Motor

Oxford Range of Mobile Hoists
12
Stowaway Assembly.
Remove all the parts from the carton and place on the oor, taking care to protect the
nish from damage.
SAFETY NOTE: The Stowaway is heavy and will need to be lifted with care. You may
need assistance to lift the Stowaway from the carton.
Fig 1. Place the folded Stowaway at on the oor, resting on the rear castors and the
folded boom. Engage the brakes on the rear castors.

Oxford Range of Mobile Hoists
13
Assembly and commissioning instructions
Fig 2. Stand facing the front castors and swing the leg retaining latches clear of the square
handle on the mast. Move the legs sideways and downwards to place the front castors on
the oor.
Fig 3. Swing the mast and boom upright and allow the mast to drop into the mast box.
SAFETY NOTE: Avoid trapping ngers. Keep ngers away from the end of the mast
when inserting into the socket. Engage the mast lock.

Oxford Range of Mobile Hoists
14
Assembly and commissioning instructions
Fig 4. Remove the quick release pin at the top of the actuator, this will release both the
boom and the actuator. Hydraulic version - The hydraulic unit is completely detached
when the Stowaway is folded. Remove the quick release pin to release the boom and use
the pin to reconnect the top of the hydraulic unit to the boom. Connect the lower mounting
of the hydraulic unit to the mast with the second quick release pin stored through the mast
bracket.
Fig 5. Lift the boom and spreader bar and swing the actuator over to engage with the
mounting bracket on the underside of the boom. Secure the actuator to the boom mounting
bracket with the quick release pin.
SAFETY NOTE: Make sure the quick release pin is coorectly located and locked.

Oxford Range of Mobile Hoists
15
Assembly and commissioning instructions
Fig 6. Remove leg adjusting handle from the storage clips on the mast and t to the leg
adjusting lever through the gate on the mast.
Fit the battery pack to the mounting point on the mast and connect the power/charging
plug to the battery pack.
Important
The handcontrol plug is indexed and can only be tted one way. Do not force, but make
sure the plug of the handcontrol is rmly pushed into the socket.
Plug the actuator jack plug into the (left socket) actuator socket located at the base of the
Controller.
Check the following:
* The legs of the lift open and close satisfactorily.
* The red emergency stop button, located on the top of the power pack, is in the
OFF (out) position.
* Push the up and down buttons on the handcontrol and conrm the boom rises and lowers.
CONTROLLER CLOSE-UP
Leg Adjusting
Handle
Leg Adjusting
Handle
Handcontrol
Emergency
Stop
Emergency
Raise/Lower
Retaining
Clips

Oxford Range of Mobile Hoists
16
REAR VIEW

Oxford Range of Mobile Hoists
17
Safety Precautions (cont.)
• DO NOT park a loaded lift on ANY sloping surface.
• DO NOT use electric lifts in a shower.
• DO NOT charge an electric lift in a bathroom or shower room.
• DO NOT lift a patient unless you are trained and competent to do so.
• YOUR lift is for patient lifting. DO NOT use it, or allow it to be used, for any other
purpose.
Operating Instructions for the Oxford Mobile Hoists
1. Leg adjustment. The legs on the Mobile Hoists are adjustable for width. The legs can
be opened to enable access around armchairs or wheelchairs. For transferring and
negotiating narrow doorways and passages the lift legs should be in the closed
position. To achieve the adjustment, the leg adjuster handle, located at the rear of the
mast, is moved in towards the mast and then sideways from RIGHT (fully closed) to
LEFT (fully open). The adjustment can be carried out with the patient in the lift, but
loaded or unloaded the adjustment should be made when the lift is moving.
2. Castors and Braking. The lift has two braked castors which can be applied for
parking. When lifting, the castors should be left free and unbraked. The lift will
then be able to move to the centre of gravity of the lift. If the brakes are applied it
is the patient that will swing to the centre of gravity and this may prove disconcerting
and uncomfortable.
3. Straight line steering (where supplied). One of the rear castors is tted with a
straight line steering device. To engage the device simply swing the ‘U’ shaped
bar over the end of the leg. There is no need to t the bar over the castor as it will
automatically engage as you move off.
4. Raising and lowering the boom (electric models). The movement of the boom is
achieved by a powerful electric actuator which is controlled by a simple handcontrol
unit. The handcontrol has two buttons with directional arrows UP and DOWN. The
actuator stops automatically at the limit of travel in both directions. The handcontrol
plugs into a socket at the base of the Controller. There is a magnetic backing to the
handcontrol which allows it to be “parked” on the mast or boom when not in use.
5. Emergency Stop (Electric only). The red Emergency Stop Button is located on the
Controller and is activated by pressing in. This will cut all power to the lift and
can only be reset by twisting the button anticlockwise and releasing.

Oxford Range of Mobile Hoists
18
6. Emergency Raise/Lower Function: The operation of this facility depends on the
specication of the actuator tted to the hoist. Some hoists have the emergency
descent device incorporated into the actuator. These actuators have a red moulded
block at the base of the actuator ram that can be pulled up to activate the device. This
will bring the boom down slowly. The device is purely mechanical and will operate if
the hoist is without electrical power. THIS SHOULD ONLY BE USED IN
EMERGENCY SITUATIONS.
All Oxford Mobile Hoists are tted with raise/lower buttons on the Controller. These
are located underneath the emergency stop button and can be operated by means of
inserting a ball point pen tip. This can be used to lower/raise the patient should the
handcontrol fail. Caution should be excercised when using this control as there is no
automatic cut-out of the actuator when the bottom stop is reached.
7. Batteries. The batteries are protected from deep discharge by a LOW VOLTAGE
ALARM. This will sound when the batteries need recharging and the handcontrol is
being operated. It will not sound independently of the handcontrol being operated.
DO NOT IGNORE THIS WARNING ALARM. Complete the lifting operation and
place the lift on charge (see charging instructions).
8. Raising and lowering the boom (hydraulic models). The raising and lowering of the
boom is achieved by a powerful hydraulic ram which is operated by two simple
controls. The release valve, which is identied by a black knurled knob, and the pump
handle which is a long lever on the side of the hydraulic unit.
To raise the boom, ensure the release valve is closed. The valve is closed by gently
turning the knurled knob fully clockwise. When closed, pump the long handle with
smooth even strokes for maximum effect. The handle strokes from an upright position
through an arc of 90 degrees. Leave the handle in the upright position when not in use.
DO NOT force the handle beyond the upper or lower stops. The hydraulic unit can be
rotated to allow the handle to be used from either side of the lift.
To lower the boom, turn the release valve anticlockwise. The release valve is progressive,
the more it is opened the faster the descent. The valve is restricted so even when fully
open the descent is controlled. This facility allows for a “hands free” descent.
If the release valve is opened a fraction (a quarter turn) a very slow speed of descent
will allow the carer to work “hands free” while assisting or comforting the patient.
REMEMBER to close the release valve before commencing lifting operations. The
release valve only requires gentle pressure to open or close.
DO NOT apply excessive force to the release valve, either to close or to open. It is not
necessary and will only damage the valve.
9. Slings. The selected sling is attached to the spreader bar hooks, each sling is supplied
with instructions and they are reproduced in this manual. The instructions should be
followed carefully.
Use only SUNRISE MEDICAL LTD slings of the Quickt, Quickt Deluxe,
Longseat, Full Back and Access range.

Oxford Range of Mobile Hoists
19
Charging Instructions For Oxford Mobile Hoists
The batteries are located in the power pack and are charged through two contacts on
the base. When the power pack needs charging it is removed from the lift and tted to a
charging unit. Sunrise Medical Ltd recommend an additional power pack is purchased, so
that one pack can be on charge at all times.
1. Remove the power pack from the lift. The pack is retained by a simple latch at the top
of the pack. Lift the latch and the power pack will be released.
2. Fit the power pack to the charging unit. The location and latching of the power pack to
the charger is the same system as used on the lift.
3. Plug the charger mains plug into a suitable mains outlet and switch the mains supply
ON.
4. Charging is automatic and will fully charge the batteries over a period of eight to
twelve hours. Note: Even if the charger is left plugged in for extended periods it will
not allow the batteries to “overcharge”.
5. To return the lift to service, switch OFF the mains supply and remove the power pack
from the charger. Fit the power pack to the lift and make sure the latch holding the
pack in place is fully engaged.
The charging of Oxford electric lifts is simple and straightforward, but it is important to
follow the charging instructions closely. Please pay particular attention to the following
points, they will help you avoid problems with discharged batteries.
• KEEP the batteries fully charged. Place the power pack on charge whenever it is not
in use. If it is more convenient to do so, place on charge every night. The charger will
not allow the batteries to “overcharge”.
• NEVER run the batteries completely at. As soon as the audible warning sounds,
complete the lifting operation in hand and place on charge.
• NEVER store the power pack for long periods without regular charging throughout the
storage period.
• ALWAYS make sure the mains power to the charger is switched off before connecting
or disconnecting the power pack.
• NEVER leave the power pack plugged in to the charger with the mains power off.
• ALWAYS check Battery Charge Indicator (LCD) screen.
• Batteries NOT to be opened by unauthorised personnel. (Contact your distributor for
warranty and repairs).
• DO NOT touch battery/charger terminals.
• DO NOT leave charger switched on with battery disconnected.

Oxford Range of Mobile Hoists
20
Maintenance Schedule For The Oxford Mobile Hoists
All Oxford products are designed for Minimum maintenance, however some safety checks
and procedures are required. A schedule of DAILY tasks are detailed below.
Daily checks and a biannual service, inspection and test will ensure a lift is kept in
optimum safe working condition. A list of spare parts is available upon request. The
LOAD TEST and CERTIFICATION should only be carried out by qualied personnel
or an authorised service dealer.
Daily Check List
Sunrise Medical Ltd strongly recommend the following checks are carried out on a daily
basis and before using the lift.
• MAKE sure the lift moves freely on it’s castors.
• MAKE sure the spreader bar is free to rotate and swing. Check the spreader bar is
rmly attached to the boom.
• EXAMINE the sling hooks on the spreader bar and side suspenders for excessive
wear. If in doubt - do not use.
• MAKE sure the legs open and close correctly.
• OPERATE the handcontrol or the hydraulic unit to conrm the boom raises and
lowers satisfactorily.
• CONFIRM the lift is not giving a low battery alarm when the handcontrol is operated
(electric lifts only). If the alarm sounds DO NOT use and place on charge immediately.
• ON electric powered lifts check the operation of the emergency stop button.
• ON hydraulically operated lifts check for hydraulic uid leakage. Any leakage should
be reported to a service engineer immediately and the lift should not be used until it
has been checked out.
• ON lifts with detachable masts make sure the mast is fully engaged and the locking
knob is fully tightened.
• EXAMINE slings for fraying or other damage. DO NOT use any sling with fraying or
damage to the suspension straps or tears in the body of the sling.
This manual suits for next models
4
Table of contents
Other Sunrise Medical Lifting System manuals