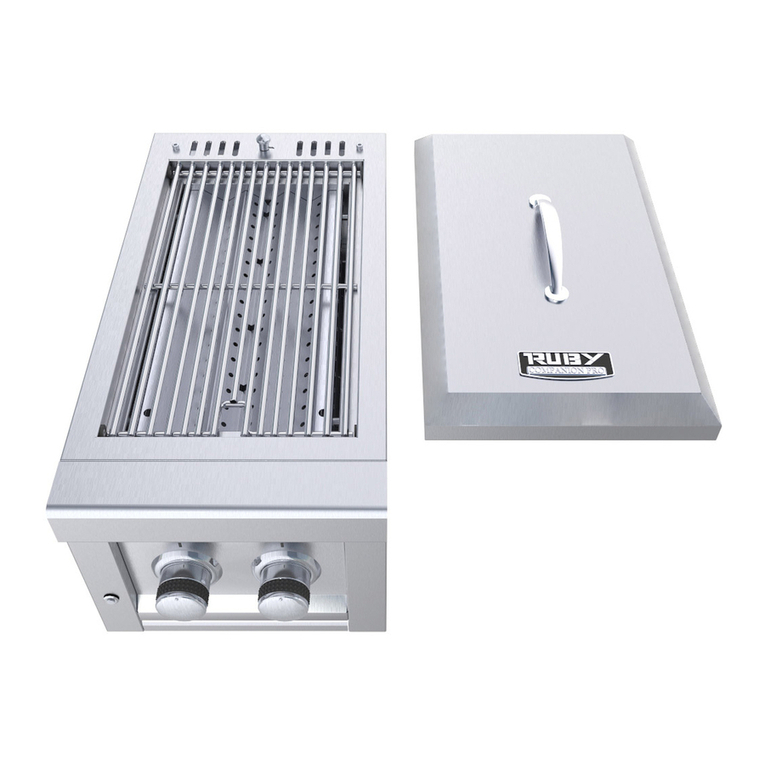
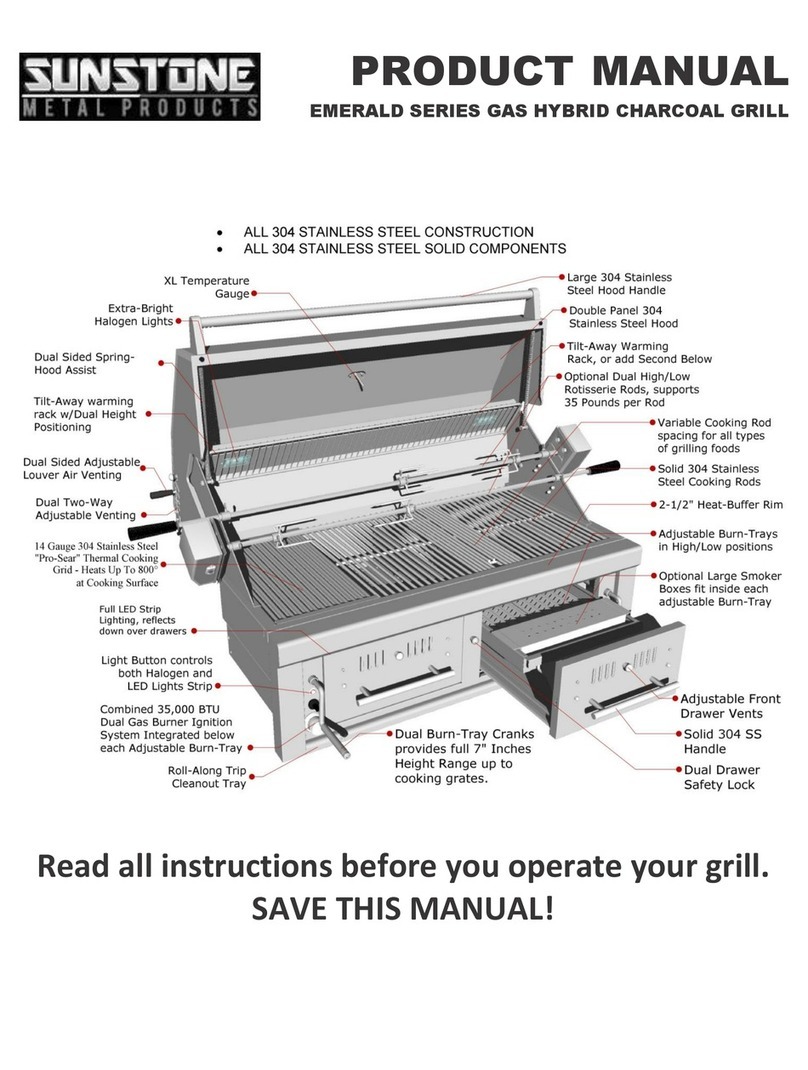
SUNSTONE ruby series User manual

Read all instructions before you operate your grill.
Save these instructions!
Conforms to
ANSI STD Z21.58b-2012
Certified to CSA STD 1.6b-2012
Outdoor Cooking Gas Appliance
To installer or person assembling grill: Leave this manual with grill for future reference.
To consumer: Keep this manual for future reference.
www.sunstonemetalproducts.com
3174816
USE & CARE GUIDE
RUBY SERIES GRILL
BY SUNSTONE®

Welcome & Congratulations
Congratulations on your purchase of a new Ruby grill! We are very proud of our product and we are
completely committed to providing you with the best service possible. Your satisfaction is our #1 priority.
Please read this manual carefully to understand all the instructions about how to install, operate and
maintain for optimum performance and longevity. We know you’ll enjoy your new grill and thank you for
choosing our product. We hope you consider us for future purchases.
How to Obtain Service
Before you call
Is there Gas supplied to the Grill?
Have you recently refilled the LP Tank?
Please make sure you have the following information:
MODEL NUMBER | DATE OF PURCHASE| INVOICE NUMBER.
For warranty service, contact SUNSTONE Customer Service Department at (888)-934-9449 or email
Must keep copy of your sales slip for proof of purchase.
NAME_________________________________ DATE OF PURCHASE _______________________
ADDRESS_______________________________________________________________________________
MODEL NO_____________________________INVOICE NO_______________________________________
COMPANY THAT YOU PURCHASED FROM ________________________________________________
SUNSTONE METAL PRODUCTS LLC.
16004 Central Commerce Dr, Pflugerville Texas 78660.
Business Hours.
Mon. to Thur. 9:00AM to 4:30PM
Closed Fri/Sat/Sun
Tel: 512-487-5116
Toll Free: 888-934-9449 (Technical Support Line)
Fax: 512-487-7016

INDEX DIRECTORY
SPECIFICATIONS
Ruby 3B 30” Specifications ----
---------------
1-2
Ruby 4B 36” Specifications ----
-------------------
3-4
Ruby 4BIR 36” Specifications --
5-6
Ruby 5BIR 42” Specifications -
7-8
LOCATING THE GRILL
Grill Cut-Out Dimensions---------
------------------
9
Installing in Open Area -----------
----------------
10
Installing in Windy Area ----------
-----------------
11
Installing in Enclosed Area-------
----------------
12
INSTALLING COMPONENTS
Light Transformer Plug------------
---------------
13
Rotisserie Rod Assembly -------
14-15
GAS INSTALLATION
Propane Tank Types ---------------
------------
16-17
LP Gas Line Connection ----------
-----------------
18
NG Gas Line Connection ---------
-------------
19
Propane Tank Safety --------------
-------------
20
Propane Tank Connection
21-22
SAFETY CHECKS
Service Access -------------------
23
Check Parts -----------------------
24
Leak Test ---------------------------
25-26
Attention & Warnings -----------
27
Grill Safety -------------------------
28
Grill Start-Up
Lighting the Grill ------------------
29
Appendix
Warranty ---------------------------
30
ATTENTION: Indicates a potentially hazardous
situation which, if not avoided, may result in minor or
moderate personal injury, or property damage.
WARNING: Indicates an imminently hazardous
situation which, if not avoided, will result in death or
serious injury.
VOLTAGE: Indicates a potentially hazardous
situation which, if not avoided, may result in minor or
moderate electrical shock.
EXPLOSION: Indicates an imminently hazardous
situation which, if not avoided, will result in possible
explosion and cause death or serious injury.
BODILY INJURY: Indicates a potentially hazardous
situation which, if not avoided, may result in minor or
moderate personal injury, or property damage.
HOT SURFACE: Indicates an imminently hazardous
hot surface which, if not avoided, will result in serious
burn or injury.
LIVE CIRCUIT: Indicates a potentially hazard from
Live electrical current that if extreme caution is not
used, may result in minor or moderate personal injury,
or property damage.

START-UP
CHECKLIST
Caution: Never operate the grill unattended.
FIRST TIME STARTUP CHECKLIST
The burner is free of any debris or obstruction.
Installation of the proper gas type and regulator settings.
The proper gas connection is complete.
Minimum clearances are maintained.
All packaging has been removed.
All parts and components are properly in installed.
An installer-supplied manual gas shut-off valve is fully
accessible.
LP hose is clean and inspected for cuts, wear, abrasion,
or leaks. Replace if necessary with a suitable UL, ETL or CSA
Listed part with internally threaded connector.

Page 1
SPECIFICATIONS –Ruby 30” 3 Burner - Pro Sear Product Overview
Model Series
RUBY3B-NG 30”
RUBY3B-LP 30”
***All 304 Stainless Steel***
Product Overview
Cooking Grid Size---
27-1/2" X 19-1/2”
Burger Count--------
28 burgers
Warming Rack-------
151.25 Sq. Inch
Main Cooking Space
536.25 Sq. Inch
Total Cooking Space
687.5 Sq. Inch
Grilling Surface BTU’s & Heat
Grill Surface BTU’s---
45,000 Btu’s
Pro Searing Grid ---
Max -700°F- Open
Max - 800°F- Closed
Single Burner Heat--
-
Up-to 350°F -400°F
Product Specifications
Product Net Weight 130
Hood Closed
Overall Width-----------
---------
30"
Overall Height----------
---------
23"
Overall Depth-----------
---------
25-3/4"
Control Panel Height
10-5/8"
Hood Open Size
Counter to Top---------
---------
25-1/2"
Overall Depth-----------
---------
28-3/4"
Hood Overhang---------
--------
3”
Cut out Size
Width----------------
28”
Depth----------------
21-1/2”
Height---------------- 9-3/4”
9-3/4”
Components
34”
Rotisserie Assembly
Optional
Pro Searing Grid
Included
IR Sear Burner
Optional
Smoker Box
Optional
BBQ Grill Cover
Optional
3174816

Page 2
SPECIFICATIONS –Parts Diagram/Ruby3B 30”
RUBY3B-LP / RUBY3B-NG Parts List
No.
Description
Q
ty
.
Part No.
1
Thermostat
1
R-TMETER
2
Hood Handle
1
Hood-R3B-H
3
Hood
Thermometer
1
Hood-R3B
4
Hood Bolt
2
R-HAB
5
Light Assembly
2
R-LIGHT
6
Warming Rack
1
R-WR-3B
7
Pro Searing Grate
1
R-GSEAR3B
8
Grate
1
R-GR3B
9
Grate
1
R-GR3B
10
Warming grid
2
R-FL-3B
11
Heat Shield
2
R-HS-3B
12
Gas Transfer
1
R-GSC-3B
13
Rot. Mount
1
R-RMOUNT
14
Manifold Clip
1
R-MFCLIP
RUBY3B-LP / RUBY3B-NG Parts List
No.
Description
Q
t
y
.
Part No.
15
Panel Bolt
2
R-PANBOLT
16
Light Switch
1
R-LIGHT-SW
17
Control Panel
1
R-PANEL-3B
18
Knob Ring
3
P-KNOB-R
19
LED Light
1
R-LED-3B
20
Drip Pan
1
R-DTRAY-3B
21
“I” Burner
3
P-GBURNER
22
Knob
3
P-KNOB-L
23
Valve –LP/NG
3
R-VALVE
24
Manifold Pipe
1
R-GMP-3B
25
Transformer Plug
1
P-LPB
26
Regulator - NG
1
NGH18
27
Regulator - LP
1
LP-REG

Page 3
SPECIFICATIONS –Ruby 36” 4 Burner - Pro Sear Product Overview
Model Series
RUBY3B-NG 30”
RUBY3B-LP 30”
***All 304 Stainless Steel***
Product Overview
Cooking Grid Size---
33-1/2" X 19-1/2”
Burger Count--------
32 burgers
Warming Rack-------
184.25 Sq. Inch
Main Cooking Space
653.25 Sq. Inch
Total Cooking Space
837.5 Sq. Inch
Grilling Surface BTU’s & Heat
Grill Surface BTU’s---
45,000 Btu’s
Pro Searing Grid ---
Max -700°F- Open
Max - 800°F- Closed
Single Burner Heat--
-
Up-to 350°F -400°F
Product Specifications
Product Net Weight 140
Hood Closed
Overall Width-----------
---------
36"
Overall Height----------
---------
23"
Overall Depth-----------
---------
25-3/4"
Control Panel Height
10-5/8"
Hood Open Size
Counter to Top---------
---------
25-1/2"
Overall Depth-----------
---------
28-3/4"
Hood Overhang---------
--------
3”
Cut out Size
Width----------------
34”
Depth----------------
21-1/2”
Height---------------- 9-3/4”
9-3/4”
Components
34”
Rotisserie Assembly
Optional
Pro Searing Grid
Included
IR Sear Burner
Optional
Smoker Box
Optional
BBQ Grill Cover
Optional
3174816

Page 4
SPECIFICATIONS –Parts Diagram/Ruby4B 36”
ISLAND SETUP –Cut-Out Dimension
RUBY4B-LP / RUBY4B-NG Parts List
No.
Description
Q
ty
.
Part No.
1
Thermostat
1
R-TMETER
2
Hood Handle
1
Hood-R4B-H
3
Hood
Thermometer
1
Hood-R4B
4
Hood Bolt
2
R-HAB
5
Light Assembly
2
R-LIGHT
6
Warming Rack
1
R-WR-4B
7
Pro Searing Grate
1
R-GSEAR
8
Grate
1
R-GR4B
9
Grate
1
R-GR4B
10
Warming grid
3
R-FL-4B
11
Heat Shield
3
R-HS-4B
12
Gas Transfer
1
R-GSC-4B
13
Rot. Mount
1
R-RMOUNT
14
Manifold Clip
1
R-MFCLIP
RUBY4B-LP / RUBY4B-NG Parts List
No.
Description
Q
t
y
.
Part No.
15
Panel Bolt
2
R-PANBOLT
16
Light Switch
1
R-LIGHT-SW
17
Control Panel
1
R-PANEL-4B
18
Knob Ring
4
P-KNOB-R
19
LED Light
1
R-LED-4B
20
Drip Pan
1
R-DTRAY-4B
21
“I” Burner
4
P-GBURNER
22
Knob
4
P-KNOB-L
23
Valve –LP/NG
4
R-VALVE
24
Manifold Pipe
1
R-GMP-4B
25
Transformer Plug
1
P-LPB
26
Regulator - NG
1
NGH18
27
Regulator - LP
1
LP-REG

Page 5
SPECIFICATIONS –Ruby 36” 4 Burner IR - Pro Sear Product Overview
Model Series
RUBY4BIR-NG 36”
RUBY4BIR-LP 36”
***All 304 Stainless Steel***
Product Overview
Cooking Grid Size---
33-1/2" X 19-1/2”
Burger Count--------
32 burgers
Warming Rack-------
184.25 Sq. Inch
Main Cooking Space
653.25 Sq. Inch
Total Cooking Space
837.5 Sq. Inch
Grilling Surface BTU’s & Heat
Grill Surface BTU’s---
60,000 Btu’s
Rot. Burner BTU’s ---
---
15,000 Btu’s
Pro Searing Grid ---
Max -700°F- Open
Max - 800°F- Closed
Single Burner Heat--
-
Up-to 350°F -400°F
IR Burner Heat ------
Up-to 1200°F
Product Specifications
Product Net Weight 147
Hood Closed
Overall Width-----------
---------
36"
Overall Height----------
---------
23"
Overall Depth-----------
---------
25-3/4"
Control Panel Height
10-5/8"
Hood Open Size
Counter to Top---------
---------
25-1/2"
Overall Depth-----------
---------
28-3/4"
Hood Overhang---------
--------
3”
Cut out Size
Width----------------
34”
Depth----------------
21-1/2”
Height---------------- 9-3/4”
9-3/4”
Components
34”
Rotisserie Assembly
Included
Pro Searing Grid
Included
IR Sear Burner
Optional
Smoker Box
Optional
BBQ Grill Cover
Optional
3174816

Page 6
SPECIFICATIONS –Parts Diagram/Ruby4BIR 36”
RUBY4BIR-LP / RUBY4BIR-NG Parts
List
No.
Description
Q
ty
.
Part No.
1
Thermostat
1
R-TMETER
2
Hood Handle
1
Hood-R4B-H
3
Hood
Thermometer
1
Hood-R4B
4
Hood Bolt
2
R-HAB
5
Light Assembly
2
R-LIGHT
6
Warming Rack
1
R-WR-4B
7
Pro Searing Grate
1
R-GSEAR4B
8
Left Grate
1
R-GR4BL
9
Right Grate
1
R-GR4BR
10
Warming grid
3
R-FL-4B
11
Heat Shield
3
R-HS-4B
12
Gas Transfer
1
R-GSC-4B
13
Rot. Mount
1
R-RMOUNT
14
Manifold Clip
1
R-MFCLIP
15
Panel Bolt
2
R-PANBOLT
RUBY4BIR-LP / RUBY4BIR-NG Parts
List
No.
Description
Q
t
y
.
Part No.
16
Light Switch
1
R-LIGHT-SW
17
Control Panel
1
R-PANEL-4B
18
Knob Ring
5
P-KNOB-R
19
LED Light
1
R-LED-4B
20
Drip Pan
1
R-DTRAY-4B
21
“I” Burner
4
P-GBURN
22
Infra-Red Burner
1
R-IRBURN-4BIR
23
Large Knob
4
P-KNOB-L
24
Small Knob
1
P-KNOB-S
25
Ignition Valve
4
R-VALVE LP/NG
26
IR-Ignition Valve
1
R-IRVALVE
27
Manifold Pipe
1
R-GMP-4BIR
28
Transformer Plug
1
P-LPB
29
Regulator - NG
1
NGH18
30
Regulator - LP
1
LP-REG

Page 7
SPECIFICATIONS –Ruby 42” 5 Burner IR - Pro Sear Product Overview
Model Series
RUBY5BIR-NG 42”
RUBY5BIR-LP 42”
***All 304 Stainless Steel***
Product Overview
Cooking Grid Size---
39-1/2" X 19-1/2”
Burger Count--------
36 burgers
Warming Rack-------
217.25 Sq. Inch
Main Cooking Space
770.25 Sq. Inch
Total Cooking Space
987.5 Sq. Inch
Grilling Surface BTU’s & Heat
Grill Surface BTU’s---
75,000 Btu’s
Rot. Burner BTU’s ---
---
15,000 Btu’s
Pro Searing Grid ---
Max -700°F- Open
Max - 800°F- Closed
Single Burner Heat--
-
Up-to 350°F -400°F
IR Burner Heat ------
Up-to 1200°F
Product Specifications
Product Net Weight 167
Hood Closed
Overall Width-----------
---------
42"
Overall Height----------
---------
23"
Overall Depth-----------
---------
25-3/4"
Control Panel Height
10-5/8"
Hood Open Size
Counter to Top---------
---------
25-1/2"
Overall Depth-----------
---------
28-3/4"
Hood Overhang---------
--------
3”
Cut out Size
Width----------------
40”
Depth----------------
21-1/2”
Height---------------- 9-3/4”
9-3/4”
Components
34”
Rotisserie Assembly
Included
Pro Searing Grid
Included
IR Sear Burner
Optional
Smoker Box
Optional
BBQ Grill Cover
Optional
3174816

Page 8
SPECIFICATIONS –Parts Diagram/Ruby5BIR 42”
RUBY5BIR-LP / RUBY5BIR-NG Parts
List
No.
Description
Q
ty
.
Part No.
1
Thermostat
1
R-TMETER
2
Hood Handle
1
Hood-R5B-H
3
Hood
Thermometer
1
Hood-R5B
4
Hood Bolt
2
R-HAB
5
Light Assembly
2
R-LIGHT
6
Warming Rack
1
R-WR-5B
7
Pro Searing Grate
1
R-GSEAR5B
8
Left Grate
1
R-GR5BL
9
Right Grate
1
R-GR5BR
10
Warming grid
4
R-FL-5B
11
Heat Shield
4
R-HS-5B
12
Gas Transfer
1
R-GSC-5B
13
Rot. Mount
1
R-RMOUNT
14
Manifold Clip
1
R-MFCLIP
15
Panel Bolt
2
R-PANBOLT
RUBY5BIR-LP / RUBY5BIR-NG Parts
List
No.
Description
Q
t
y
.
Part No.
16
Light Switch
1
R-LIGHT-SW
17
Control Panel
1
R-PANEL-5B
18
Knob Ring
6
P-KNOB-R
19
LED Light
1
R-LED-5B
20
Drip Pan
1
R-DTRAY-5B
21
“I” Burner
5
P-GBURN
22
Infra-Red Burner
1
R-IRBURN-5BIR
23
Large Knob
5
P-KNOB-L
24
Small Knob
1
P-KNOB-S
25
Manifold Pipe
1
R-GMP-5B
26
Ignition Valve
5
R-VALVE LP/NG
27
IR-Ignition Valve
1
R-IRVALVE
28
Transformer Plug
1
P-LPB
29
Regulator - NG
1
NGH18
30
Regulator - LP
1
LP-REG

Page 9
LOCATING GRILL –Grill Cut-Out Dimensions
Ruby Series Grill Island Cut-Out Dimensions
ITEM NO.
WIDTH
DEPTH
HEIGHT
RUBY3B –LP/NG
28” Inch
21-3/4”Inch
9-3/4”Inch
RUBY4B –LP/NG
34” Inch
21-3/4”Inch
9-3/4”Inch
RUBY4BIR –LP/NG
34” Inch
21-3/4”Inch
9-3/4”Inch
RUBY5BIR –LP/NG
40” Inch
21-3/4”Inch
9-3/4”Inch
WARNING: Never build shelf or enclose interior space under the BBQ Cut-Out. The Ruby Grill is
Self-Rimming and is supported by the top counter surface on the Back and Sides, the front of grill is
designed to Free-Hang. The bottom of Grill needs to be open to allow for proper ventilation.
Grill Cut-Out
Your grill is SELF-RIMMING, meaning the lip of grill rests on top of the counter edge around the cut-out
with the front of grill which is Free-Hanging from counter top. Because of this, there is No Need for any
Trim-Kit like with many other grill in the market.
1. Maintain 24” Clearance from any Combustible Materials in ANY direction of Grill.
2. If any combustible materials within 24” distance, must have Heat Barrier like Grill Jacket, or other
Non-Combustible type like Bricks, Hardy Board, Metal.
3. Orient the grill so the Prevailing winds are not blowing into the rear or side of grill.

Page 10
LOCATING GRILL –Installing into Open Area
Windy Conditions
Your grill is specially designed to draw fresh air in through the front, and in direct to the bottom burners.
When grilling the hot gases are then released through the back of grill through a venting system. Using
your grill in windy conditions may disrupt the front-to-back air flow.
4. For breezy days, be careful not to leave the front hood down for more than 15 minutes, when the
burners are on. (Never leave grill unattended when in operation)
5. If you suspect the grill is overheating, using an oven mitt, open the front hood. Then adjust the
burner control knob to off position.
6. Orient the grill so the Prevailing winds are not blowing into the rear or side of grill.

Page 11
LOCATING GRILL–Installing into Windy Open Area
ATTENTION: Take special precaution when installing grill in open Breezy area, check the direction
of Prevailing Wind Direction, if back of grill is facing any oncoming wind or breeze, be sure to protect
the back of grill, and erect a partition wall, or only use grill with hood open on breezy days.
Windy Area
Positioning your grill in your backyard is more often thought of how it is pleasing to the eye, but more
important than this is how that it functions correctly. Unlike an indoor appliance, your grill has to combat
many outside weather influences in an all manner of weather related instances, most severely is Wind.
7. Maintain proper Prevailing wind, grill direction –with the front of grill facing in to the wind, and
the back of grill in the direct wind is blowing.
8. If direction of wind is unclear, or difficult to combat even with preventative measures, then always
grill with the hood open, and when hood is closed –always be within close proximity to grill and
monitor it that it does not overheat.
9. If wind or breeze is in the direction of back of grill, you must erect partition wall of 14” height so
that the top of grill hood is covered by several inches. If this is not done, you must grill with hood
open and or when hood is closed stand in close area to grill and monitor if the grill overheats.

Page 12
LOCATING GRILL –Installing into Enclosed Area
Minimum Requirements
FRONT VIEW See Diagram (Page 11) to Right
From Counter to Overhead Structure
8’ ft. Min. Clearance
From Counter to Outdoor Vent Hood
36" Min. Clearance
From Floor to Counter Top
38" Min. Clearance
From Grill to Vent Hood Width
4”-6" Min. Clearance
From Appliance to Appliance
12" Min. Clearance
From Appliance to Combustible Material
24" Min. Clearance

Page 13
INSTALLNG COMPONENTS- Transformer Installation
1. Locate the transformer
Remove the transformer from the plastic bag located
in the interior of grill. Make sure the Transformer is
complete, and double check the grill light plug cord is
properly secured to transformer, and all wires are
firmly fixed into plastic clip plug.
2. Mount Transformer
Using metal screws and attach the transformer to the
back inner wall of your islands cabinet wall,
somewhere near the already installed GFCI electrical
outlet. When you plug the transformer in, double
check then GFCI breaker switch, that the outlet has
power.
4. Make Connections
Locate the Light Switch on Left side BACK of grill. The
connection clips together, to form a secure
connection. Double check that all wires are tightly
pushed into plug sockets, so all wires make proper
connections.
LIVE CIRCUIT: IMPORTANT: All outdoor electeri

Page 14
INSTALLNG COMPONENTS- Rotisserie Rod Assembly
Rotisserie assembly can be purchased
individually either by individual item, or in a
complete set, for your size of grill. The rotisserie
assembly can also be used with or without an
infra-red back burner.
Name
Qty.
Part No.
3 Burner Rotisserie set
1
P--RK-3B
4 Burner Rotisserie set
1
P--RK-4B
5 Burner Rotisserie set
1
P--RK-5B
Electrical Grounding Instructions:
The rotisserie motor is equipped with a three-prong grounding plug for your protection against electric
shock. This plug must be inserted directly into a properly grounded three-prong receptacle. Do not cut
or remove the grounding prong from this plug.
The rotisserie motor must be electrically grounded in accordance with local codes or, in the absence of
local codes, in accordance with the National Electrical Code, ANSI/NFPA 70-1990 or Canadian Electrical
Code, CSA C22.1.
Do not use an extension cord to supply power to your grill. Such use may result in fire, electrical shock
or other personal injury. Do not install a fuse in the neutral or ground circuit. A fuse in the neutral or
ground circuit may result in an electrical shock hazard. Do not ground this appliance to a gas supply pipe
or hot water pipe.

Page 15
INSTALLNG COMPONENTS –Rotisserie Installation
WARNING: Never stand with your head directly over the Grill when preparing to light the Rotisserie
burner, to prevent possible bodily injury. Never operate Rotisserie Burner with main (other) burner(s)
“ON”. Warming Rack must be removed when Rotisserie Burner is ON.
Rotisserie is mostly used to cook large pieces of meat and poultry to assure slow, even cooking. The
constant turning provides a self-basting action, making food cooked on a rotisserie exceptionally moist
and juicy. Rotisserie cooking generally requires 1 ½to 4½hrs to cook depending on the size and type of
meat being cooked. You can have rotisserie cooking with indirect heat with infrared rotisserie burner.
Preferred by professional chefs over other methods, the intense heat is ideal for searing in the natural
juices and nutrients found in quality meats. For successful rotisserie, the meat should be centered and
balanced as evenly as possible on the spit rod to avoid overworking the rotisserie motor. Attach Motor
Bracket Assembly to the side of the barbecue frame (can be mounted on either left or the right side of
the frame) using two screws and two nuts.
1. Insert Rotisserie Motor onto Motor Bracket Assembly.
2. Slide Prong Forks with the prongs facing away from the handle onto the Spit Rod. So that any
food item will be in the center between the two four prong forks.
3. Assemble Key Washer, Counter-balance and handle to Spit Rod. Slide Shaft Collar with long end
towards handle.
4. Insert motor extension cord three prong plug into an adjacent grounded GFCI receptacle outlet.
5. Before placing food item on forks when the rotisserie is being operated exclusively, it is strongly
recommended that a pan be placed on the grilling grids, beneath the food to catch the meat
drippings. This will prevent excessive build up of drippings on the grids and facilitate cleaning.
When food item is placed on rotisserie, be sure that all Bolts are tightened securely.
NOTE: Close hood carefully and align Motor Bracket and Shaft Mounting Bracket so that Rotisserie Rod
is in between the hood openings.

Page 16
GAS INSTALLATION –Propane Tank Types
Types of Propane Tanks: Propane tanks are mainly used alongside stoves, water heaters, grills,
generators, and welding equipment. These bottles or metal cylinders contain propane, a type of alkaline
gas that has been compressed and transformed into liquid form. Transporting, storing, and using
propane safely can only be possible if it is held inside tanks or containers. Since propane has various
applications, many types of tanks are being used as propane containers. Below are some common
examples.
Large Capacity Tanks: Propane is delivered to your home as a very cold liquid and is pumped into a
specially designed storage tank (Fig.A). The liquid changes to gas before it leaves the tank. Propane
tanks are typically painted white or silver to reflect heat and prevent the pressure inside the tank from
getting too high.
If you have an underground tank, only the cover (Fig.B)
will be visible above ground.
The cover on top of the tank protects several
components from weather and physical damage.
The tank shut-off valve, which you can close to
stop the flow of propane to your home in case of
a leak or other emergency.
The regulator, which controls the pressure of the
propane gas coming out of the tank.
The safety relief valve, which will pop open
automatically if the pressure inside the tank gets
too high. The valve will close again when the
pressure returns to normal.
The tank gauge, which shows the percentage of
propane in the tank.
Propane flows from your tank to your home through pipes, most of which run underground. You may
also have a secondary pressure regulator on an outside wall of your home to further adjust gas
pressure. A shut-off valve in each pipe can be closed to stop gas flow to an individual appliance. An
appliance connector is the final segment in the gas piping system. This specially designed flexible tube
typically two or three feet long-carries gas from a pipe to the back of an appliance.
Medium Capacity Tanks
Any L.P. gas supply cylinder used with this grill must be approximately 12 inches diameter and 18 inches
high. The maximum fuel capacity is 80% and is approximately 20 pounds of propane. The L.P. cylinder
must have a shut-off valve terminating in a Type 1 L.P. A Type 1 compatible cylinder with a Type 1
cylinder valve has a back-check valve which does not permit gas flow, until a positive seal has been
obtained.
LP Tank Filling
Use only licensed and experienced dealers.
LP dealer must purged tank before filling.
Dealer should NEVER fill LP tank more than 80% of LP tank volume. Volume of propane in tank
will vary by temperature.
A frosty regulator indicates gas overfill. Immediately close LP tank valve and call local LP gas
dealer for assistance.
Do not release liquid propane (LP) gas into the atmosphere. This is a hazardous practice.
To remove gas from LP tank, contact an LP dealer or call a local fire department for assistance.
Check the telephone directory under “Gas companies”for nearest certified LP dealers.
.
Fig. A
Fig. B
Table of contents
Other SUNSTONE Grill manuals

SUNSTONE
SUNSTONE 304 series User manual

SUNSTONE
SUNSTONE SUNCHSZ30 User manual

SUNSTONE
SUNSTONE SUNCHDZ28 User manual

SUNSTONE
SUNSTONE SUN3B-LP User manual
SUNSTONE
SUNSTONE SUN4B User manual

SUNSTONE
SUNSTONE SUNPLT40 User manual

SUNSTONE
SUNSTONE OUTDOOR CHARCOAL GRILL User manual
SUNSTONE
SUNSTONE Ruby Companion Pro User manual
Popular Grill manuals by other brands

Dyna-Glo
Dyna-Glo DGSS675CB-D owner's manual

Capital
Capital Performance Series PSQ30RC Product brochure

Capital
Capital Professional Series PRO36RBI Specifications

NOVO
NOVO ALTA-32 user manual

Frigidaire
Frigidaire Panini Grill/Griddle use & care

KitchenAid
KitchenAid 720-0745D Installation Instructions and Use & Care Guide