manuals.online logo
Brands
  1. Home
  2. •
  3. Brands
  4. •
  5. Supera
  6. •
  7. Medical Equipment
  8. •
  9. Supera M1000 User manual

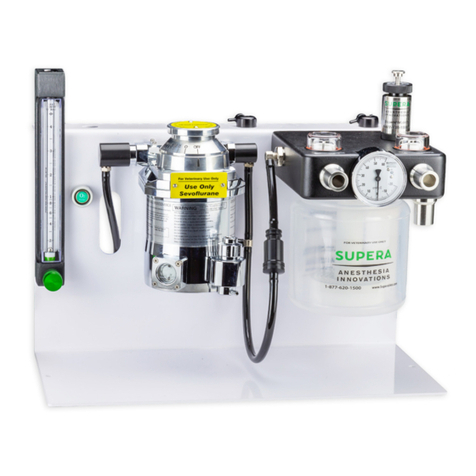
Supera M1000 User manual

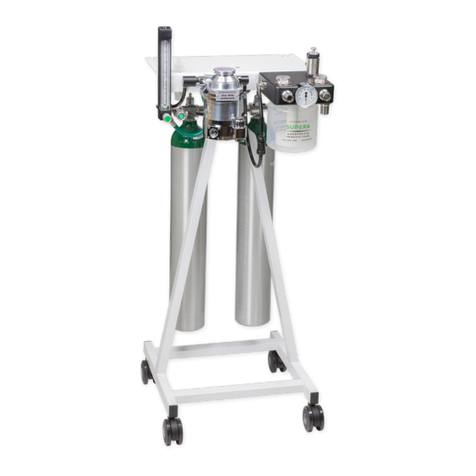
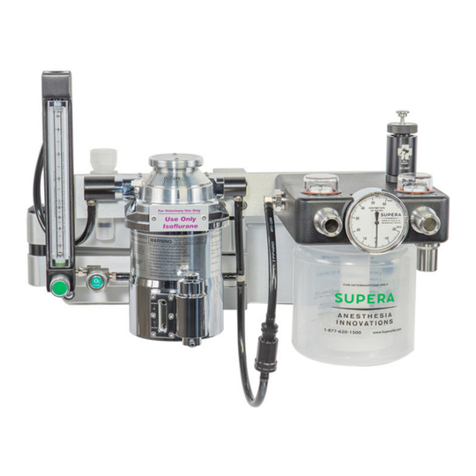
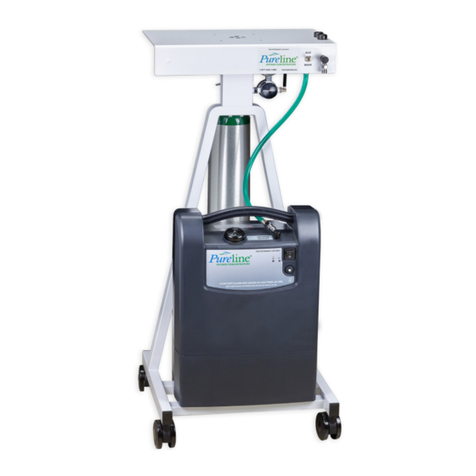
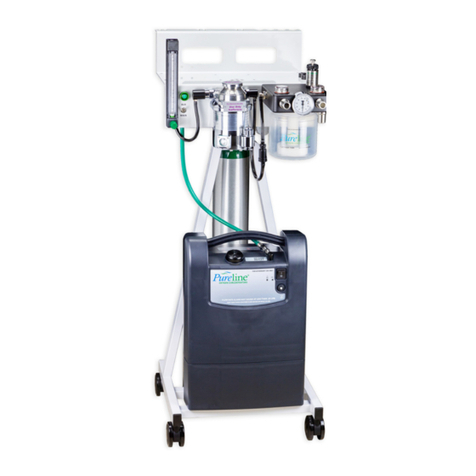
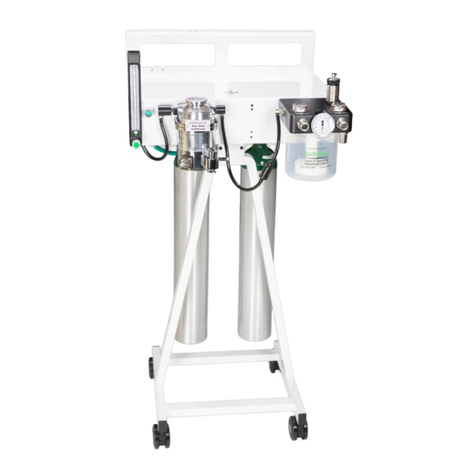
(All shown with optional equipment)
Operators Manual
Non-Rebreathing Anesthesia Machine
Model M1000
Supera, LLC Copyright 2022
For Veterinary Use Only
Examination and Preparation for Use
Thank you for ordering an Supera Anesthesia Innovations anesthesia machine!
We are delighted to have you as a Supera Anesthesia Innovations customer and want
you to be completely satised with your purchase. Please inspect the contents of your
order to see if everything is as you expected. Should anything not be exactly right, or if
anything was damaged in shipping, please contact your sales representative right away
for help.
Our goal is to make your new anesthesia machine as easy to use and care for as pos-
sible.
This device is meant to be operated under the normal supervision and control of a
veterinarian trained in its use. However, you need to know more about this device than
just how to operate it.
Please read this manual in its entirety before using the anesthesia machine.
If you have any comments or questions, we welcome the opportunity to address them.
Please contact us directly at 877-620-1500.
Thank you!
Brian Lawson
President,
Supera Anesthesia Innovations
100% Made In USA
TABLE OF CONTENTS
Machine Assembly Pages
Assembling the stand
Attaching the E–tanks (optional)
Attaching the O2 supply
Circuit
Waste Gas Evacuation
Technical Information
Warranty / Return Information
Machine & Service notes
Machine Assembly
3. Assemble the top portion with the frame by installing the two 1/4-20 X 1
3/4” long screws and washers provided.
4. Tighten both screws with the provided 3/16” allen wrench tightly.
* NOTE: THIS REQUIRES TWO
PEOPLE TO
SAFELY ASSEMBLE *
1. Carefully unpack the top assembly
and frame from the box
2. Align the top to the frame as
shown.
1st Step
Hand tighten 1/4-20 cap
screws (4 each)
2nd Step
Using 3/16” hex wrench
provided, tighten 1/4-20 cap
screws (4 each)
Optional E-Tank Manifold Installation
3rd Step
Attache green oxygen line to
ow meter. Lightley tighten
with wrench.
NOTE: The ttings have an
o-ring to seal the joint
* DO NOT OVER TIGHTEN *
Finished assembly
Sample of a non-rebreathing anesthesia machine
includes a storage basket and I.V. Pole standard.
Optional Features & Accessories
Shown with optional
universal control arm
for use with Bain circuits
P/N MA2013
With safety pop o󰀨 valve
I.V. Pole (included)
Optional Features & Accessories
The Non–rebreathing system connects to the common gas outlet of the
anesthesia machine.
1. Disconnect the common gas outlet from the rebreathing head. (quick disconnect t-
tings)
2. Plug the 15mm male connector from the non–rebreathing system into the common
gas outlet of the anesthesia machine.
3. Connect the blue exhaust port on the bag of the non–rebreathing system to the
19mm blue evacuation tubing connected to the waste gas interface device or to any
other waste gas evacuation device (outside air, F–air canister, etc.)
Circuit
CIR518 - Non-Rebreathing Modied Jackson-Rees
Waste Gas Interface Device Features
A. 19mm Inlet – blue tubing
B. 22mm Outlet – Clear/white tubing
C. 3 liter reservoir bag
D. Room air inlet tube
NOTE: this tube is not to be connected to any other ttings and should remain open to
room air at all times.
Waste Gas Evacuation
EVC630 WGI (optional equipment)
The Waste gas interface device is a non–adjustable valve that balances the negative
pressure from the suction device to the positive pressure of the
anesthesia machine. EVC629 for vacuum pump systems also available.
A B
C
D
Waste Gas Evacuation
F-AIR Charcoal Canister Kit (optional equipment)
P/N EVC555
The F-AIR canister will remove the waste gas from the anesthesia machine for
approximately 8-12 hours. After that time, the canister is replaced.
F–Air Canister Bracket - Optional
Install in the lower part of “A” frame using the screw and washer provided.
Warranty / Return Policy
Supera Anesthesia Innovations warrants that each product or part shall be free from
defects in workmanship and materials, under normal use and with appropriate mainte-
nance, for 10 (ten) years from the date of purchase. For plastic, rubber and disposable
parts or items, Supera Anesthesia Innovations warrants only that each such part and
item shall be free from defects in workmanship and materials at the time of delivery.
This warranty shall be void for any product that has been altered, defaced or removed
from the original Supera Anesthesia Innovations product.
Supera Anesthesia Innovations shall not be liable for any damage, injury or loss arising
out of the use of the product, whether as a result of a defect in the product or other-
wise, if, prior to such damage, injury or loss, the product was (1) damaged,misused,
or misapplied; (2) repaired, altered or modied by persons other than Supera Anes-
thesia Innovations; (3) not installed in strict compliance with the applicable codes and
ordinances; (4) not installed by Supera Anesthesia Innovations or an authorized Supera
Anesthesia Innovations dealer.
UNDER NO CIRCUMSTANCES SHALL SUPERA ANESTHESIA INNOVATIONS BE LI-
ABLE FOR INCIDENTAL OR CONSEQUENTIAL DAMAGES AS THOSE TERMS ARE
DEFINED IN THE UNIFORM COMMERCIAL CODE.
All items returned for service or repair are the responsibility of the customer. Proper
packing methods should be used in returning items to Supera Anesthesia Innovations.
SHIPPING POLICY
1. Do Not Sign The Bill Of Lading Until You Have Inspected The Box Or Crate
2. Examine the box AS it is delivered and BEFORE the truck/driver leaves.
3. If there is any evidence of damage when it arrives, note it in detail with the phrase “possible
concealed damage” on the bill of lading and immediately call the o󰀩ce for instructions before the truck/
driver leaves if at all possible.
4. If there is obvious damage such as a hole in the box, a crushed box, etc., refuse the shipment. The
product will then go back to the freight company’s terminal where they are entirely responsible.
5. Open and inspect your product as soon as possible. DO NOT WAIT.
6. If you nd damage, take as many photographs of everything as soon as you can and email them to
[email protected]
7. Note: unless the following procedures are followed correctly and we are notied within ten (10)
days, SUPERA LLC cannot accept any responsibility for the problems that may ensue.
DO NOT RETURN ANY DAMAGED GOODS TO SUPERA LLC WITHOUT PRIOR
AUTHORIZATION OF SUPERA LLC AND THE CARRIER.
KEEP ALL PACKAGING!
DO NOT RETURN ANY DAMAGED ITEMS UNTIL SHIPPING INSTRUCTIONS ARE RECEIVED.
ALL CLAIMS MUST BE FILED WITHIN TEN (10) DAYS OF RECEIPT OF GOODS.
IF YOU HAVE ANY QUESTIONS CONTACT SUPERA DIRECTLY AT 503-723-5068.
DOCUMENTATION
Date purchased:
Purchased from:
Machine serial number:
Vaporizer serial number:
Machine service information
Service Date:
Service information:
Service Date:
Service information:
Service Date:
Service information:
(503) 723-5068 or (877) 620-1500 toll-free
E-Mail: info@superavet.com
1220 NW Noble Drive, Estacada OR 97023
www.SuperaVet.com
MADE IN
oREGON, uSA
since 1993

Other Supera Medical Equipment manuals

Supera M2000 User manual

Supera

Supera M2000 User manual

Supera M4000 User manual

Supera

Supera M4000 User manual

Supera M2300 User manual

Supera

Supera M2300 User manual

Supera Pureline OC8000 User manual

Supera

Supera Pureline OC8000 User manual

Supera M1200 User manual

Supera

Supera M1200 User manual

Supera Pureline OC6000 User manual

Supera

Supera Pureline OC6000 User manual

Supera Pureline OC4000 User manual

Supera

Supera Pureline OC4000 User manual

Supera Pureline M6000 User manual

Supera

Supera Pureline M6000 User manual

Popular Medical Equipment manuals by other brands

Welch Allyn 1500 Directions for use

Welch Allyn

Welch Allyn 1500 Directions for use

Thompson Uncompromised Exposure Femur Elevator user manual

Thompson

Thompson Uncompromised Exposure Femur Elevator user manual

Thomashilfen ThevoVital user manual

Thomashilfen

Thomashilfen ThevoVital user manual

BiancaMed SleepMinder instruction manual

BiancaMed

BiancaMed SleepMinder instruction manual

Bestcare BESTLIFT PL400 manual

Bestcare

Bestcare BESTLIFT PL400 manual

MELAG MELAtherm 10 user manual

MELAG

MELAG MELAtherm 10 user manual

Enovate Medical ENCORE LITE quick start guide

Enovate Medical

Enovate Medical ENCORE LITE quick start guide

OAKWORKS Clodagh Leo user manual

OAKWORKS

OAKWORKS Clodagh Leo user manual

telli health BM1000 user manual

telli health

telli health BM1000 user manual

Bioness BITS Clinicians Guide

Bioness

Bioness BITS Clinicians Guide

ResMed LifeChoice Activox Quick setup guide

ResMed

ResMed LifeChoice Activox Quick setup guide

Orliman OP1172-FUND INSTRUCTIONS FOR USE AND PRESERVATION

Orliman

Orliman OP1172-FUND INSTRUCTIONS FOR USE AND PRESERVATION

promotal 118 Series user guide

promotal

promotal 118 Series user guide

medi Manumed RFX Instructions for use

medi

medi Manumed RFX Instructions for use

PHILIPS Respironics TrueBlue user guide

PHILIPS Respironics

PHILIPS Respironics TrueBlue user guide

Gima OXY-200 Instructions to user

Gima

Gima OXY-200 Instructions to user

myon m320 user manual

myon

myon m320 user manual

Kimberly-Clark MIC-KEY Low-Profile Jejunal Feeding Tube Directions for use

Kimberly-Clark

Kimberly-Clark MIC-KEY Low-Profile Jejunal Feeding Tube Directions for use

manuals.online logo
manuals.online logoBrands
  • About & Mission
  • Contact us
  • Privacy Policy
  • Terms and Conditions

Copyright 2025 Manuals.Online. All Rights Reserved.