manuals.online logo
Brands
  1. Home
  2. •
  3. Brands
  4. •
  5. Supera
  6. •
  7. Medical Equipment
  8. •
  9. Supera M2000 User manual

Supera M2000 User manual

Supera, LLC Copyright 2021
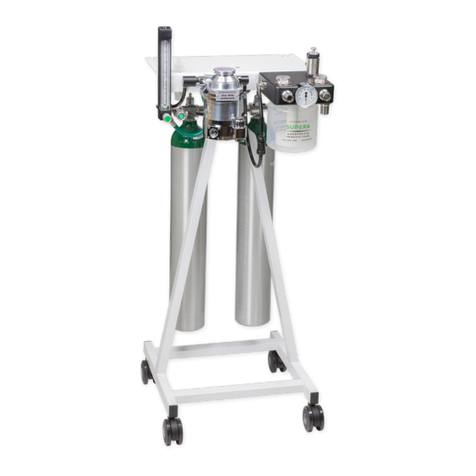
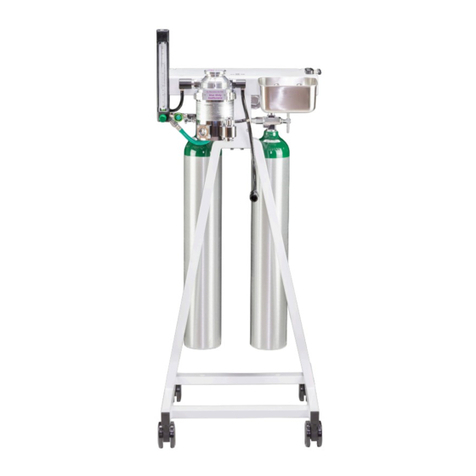
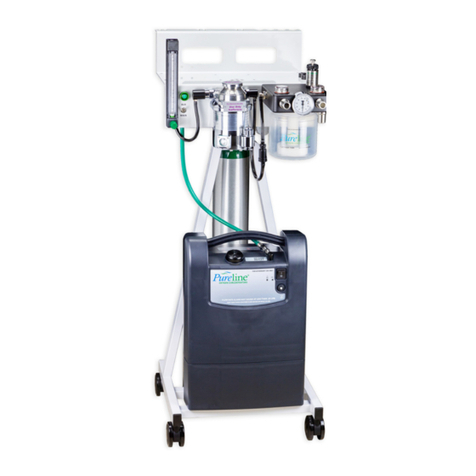
*shown with optional
vaporizer & E-Tank Manifold
For Veterinary Use Only
Operators Manual - M2000
Examination and Preparation for Use
Thank you for ordering a Supera Anesthesia Innovations anesthesia ma-
chine!
We are delighted to have you as a Supera Anesthesia Innovations customer
and want you to be completely satised with your purchase. Please inspect
the contents of your order to see if everything is as you expected. Should
anything not be exactly right, or if anything was damaged in shipping, please
contact your sales representative right away for help.
Our goal is to make your new anesthesia machine as easy to use and care
for as possible.
This device is meant to be operated under the normal supervision and
control of a veterinarian trained in its use. However, you need to know more
about this device than just how to operate it.
Please read this manual in its entirety before using the anesthesia
machine.
If you have any comments or questions, we welcome the opportunity to ad-
dress them. Please contact us directly at 877–620–1500.
Thank you!
Brian Lawson
President,
Supera Anesthesia Innovations
Proudly Designed and Made In Oregon,USA
MADE IN
oREGON, uSA
since 1993
TABLE OF CONTENTS
Machine Assembly
Attaching the top assembly to frame
Connecting oxygen supply hose
Features & Optional Accessories
Safety Pop O󰀨 Valve
I.V. Pole mounting
Universal Control Arm for Bain circuits
Waste gas evacuation
Rebreathing circuits
Non-rebreathing circuits
Technical Information
Maintenance
Warranty /Return
Machine & Service notes
Machine Assembly
3. Assemble the top portion with the frame by installing the two 1/4-20 X 1
3/4” long screws and washers provided.
4. Tighten both screws with the provided 3/16” allen wrench tightly.
* NOTE: THIS REQUIRES TWO
PEOPLE TO SAFELY ASSEMBLE *
1. Carefully unpack the top
assembly and frame from the
box
2. Align the top to the frame
as shown.
1st Step
Hand tighten 1/4-20 cap
screws (4 each)
2nd Step
Using 3/16” hex wrench
provided, tighten 1/4-20 cap
screws (4 each)
Optional E-Tank Manifold Installation
3rd Step
Attach green oxygen line to ow meter. Lightly tighten with wrench.
NOTE: The ttings have an O-ring to seal the joint
* DO NOT OVER TIGHTEN *
Finished assembly
Anesthesia Machine Operation
&
Optional Accessories
Safety Pop O󰀨 Valve
Manual Ventilation
Screw-down pop-o󰀨 valve open with push-button
valve depressed.
In this position the breathing circuit is closed but
will leak at pressures of 20-25 cm H2O. This al-
lows enough pressure to manually ventilate the
patient without risking excessive pressure (which
can cause pulmonary damage and death).
User Error! (pop o󰀨 valve left closed)
Screw-down pop-o󰀨 valve closed with push-
button valve open
In this position the breathing circuit is partially
closed but will leak at 0.5 cm H2O. This will not
cause injury to the patient, however depress-
ing the push-button valve to ventilate the patient
would allow excessive pressure and could injure
the patient.
This setting is designed to prevent patient deaths
associated with leaving the pop-o󰀨 valve closed
but it is not recommended for normal operation.
Normal Operation
Screw-down pop-o󰀨 valve open with push-button
valve up
In this position the breathing circuit is fully open.
The manometer should read "0" with slight
uctuations during respiration. Squeezing the
rebreathing bag should not create pressure in the
breathing circuit.
Machine Leak Test
1. Close pop o󰀨 valve (turn knob clockwise)
2. Depress plunger valve in the center and hold
3. Plug the end of the rebreathing hose
4. Add pressure to the system until the manometer reads 30cmH20
Hold the pressure for ten seconds. If it doesn’t drop faster than 1 cm H2O
per second, the machine is sealed enough for use.
If it does drop faster, check your rebreathing bags and hoses for leaks.
Glass cleaner works well for this. Make sure the canister and clear valve
domes are tight
Optional Features & Accessories
Shown with optional
universal control arm
for use with Bain circuits
P/N MA2013
With safety pop o󰀨 valve
I.V. Pole (included)
Optional Features & Accessories
Optional F-Air evacuation kit
P/N EVC555
(Shown on M6000)
Bag & circuit organizer
(Shown on M6000)
Optional waste gas interface valve
P/N EVC630 for use with fan based
evacuation systems like our EVC3000
Optional waste gas interface valve
P/N EVC629 for use with vacuum pump
based evacuation systems like our
EVC3100
Waste Gas Evacuation
Heavy Duty Rebreathing Bags
Part Number
ACC520 500cc Rebreathing Bag
ACC521 1L Rebreathing Bag
ACC522 2L Rebreathing Bag
ACC523 3L Rebreathing Bag
ACC524 4L Rebreathing Bag
ACC525 5L Rebreathing Bag
The Non–rebreathing system connects to the common gas outlet of the
anesthesia machine.
1. Disconnect the common gas outlet from the rebreathing head.
(quick disconnect ttings)
2. Plug the 15mm male connector from the non–rebreathing system into the
common gas outlet of the anesthesia machine.
3. Connect the blue exhaust port on the bag of the non–rebreathing system
to the 19mm blue evacuation tubing connected to the waste gas interface
device or to any other waste gas evacuation device (outside air, F–air canis-
ter, etc.)
Circuits
P/N CIR518 - Non-Rebreathing Modied Jackson-Rees
Common
Gas Outlet
Unilimb design removes clutter and disorder from the anesthesia eld.
Patients exhaled breath acts as a thermal wrap to maintain the temperature
and humidity of inspired gases. The swivel connector at the patient end
eliminates kinking of the tubing.
This circuit attaches to the “Inhalation” and “Exhalation” ports on the
rebreathing head (CO2 Absorber)
P/N CIR529 Adult (blue inner tube)
Recommended for Patients weighing above 20kg
P/N CIR529P Pediatric (Pink or Green inner tube)
Recommended for Patients weighing under 20kg
Circuits
P/N CIR529 & CIR529P Rebreathing Unilimb circuits
MAINTENANCE
Anesthesia Machine
The Supera Anesthesia Innovations anesthesia machine should be serviced
by a certied technician. Only certied service companies will have the fac-
tory specications and access to original replacement parts.
Annual Preventative Maintenance Service
Service will include:
Pre–service low and high pressure test. Inspection and replacement of hos-
es, gaskets and seals as needed. Measure pressure relief valve resistance.
Inspect unidirectional valves. Inspection of evacuation system. Inspection of
oxygen system. Verication of vaporizer concentration output. Final low and
high pressure test.
Contact Supera for a list of certied service companies.
Daily Inspection - Leak Test
Before each use check for pressure leaks in the machine. Also make certain
the waste gas evacuation system is working properly.

Other Supera Medical Equipment manuals

Supera Pureline OC8000 User manual

Supera

Supera Pureline OC8000 User manual

Supera Pureline M6000 User manual

Supera

Supera Pureline M6000 User manual

Supera M1200 User manual

Supera

Supera M1200 User manual

Supera Pureline OC4000 User manual

Supera

Supera Pureline OC4000 User manual

Supera M2300 User manual

Supera

Supera M2300 User manual

Supera M1000 User manual

Supera

Supera M1000 User manual

Supera M4000 User manual

Supera

Supera M4000 User manual

Supera Pureline OC6000 User manual

Supera

Supera Pureline OC6000 User manual

Popular Medical Equipment manuals by other brands

Envitec OxiQuant B Instructions for use

Envitec

Envitec OxiQuant B Instructions for use

Otto Bock 3R78 Operator's Quick Reference Guide

Otto Bock

Otto Bock 3R78 Operator's Quick Reference Guide

24/7 EEG SUBQ user manual

24/7 EEG

24/7 EEG SUBQ user manual

3M Bair Hugger 675 Service manual

3M

3M Bair Hugger 675 Service manual

Otto Bock Invader 480S26 10000 K Instructions for use

Otto Bock

Otto Bock Invader 480S26 10000 K Instructions for use

Sirona Heliodent plus operating instructions

Sirona

Sirona Heliodent plus operating instructions

VITACON C5 Assembly instructions

VITACON

VITACON C5 Assembly instructions

rehamedi Ottfried Instructions for use

rehamedi

rehamedi Ottfried Instructions for use

Insyte Autoguard BC Instructions for use

Insyte

Insyte Autoguard BC Instructions for use

MIR Spirobank II user manual

MIR

MIR Spirobank II user manual

ECS Warmair 135 Operation manual

ECS

ECS Warmair 135 Operation manual

GHM DeltaOhm HD402 Series operating manual

GHM

GHM DeltaOhm HD402 Series operating manual

Gima Rescue LIFE user manual

Gima

Gima Rescue LIFE user manual

Sizewise Bari Rehab Platform 3 Series user manual

Sizewise

Sizewise Bari Rehab Platform 3 Series user manual

Stryker Power-PRO XT 6500 Operation and maintenance manual

Stryker

Stryker Power-PRO XT 6500 Operation and maintenance manual

Vapotherm FELIX-1 Instructions for use

Vapotherm

Vapotherm FELIX-1 Instructions for use

gbo DUODYNATOR 1049 user manual

gbo

gbo DUODYNATOR 1049 user manual

NeoLight SKYLIFE Quick reference guide

NeoLight

NeoLight SKYLIFE Quick reference guide

manuals.online logo
manuals.online logoBrands
  • About & Mission
  • Contact us
  • Privacy Policy
  • Terms and Conditions

Copyright 2025 Manuals.Online. All Rights Reserved.