Superior Electric SLO-SYN SS2000-DP4 User manual

SLO-SYN®SS2000-DP4
TRANSLATOR/DRIVE
INSTALLATION
AND
OPERATION
INSTRUCTIONS

SS2000-DP4 - Page 2
!"#$"!!%$"#&'()"#!*
!"#$%&'%( )*$+,%&+( %$-$%.$-( ,/$( %&0/,( ,'( 123$( $40&4$$%&40( %$5&4$1$4,-( '4( 2**( &,-( #%'6"+,-7( ( !"+/
%$5&4$1$4,-( 128( 255$+,( &45'%12,&'4( 0&.$4( &4( &4-,%"+,&'4-9( :/$%$5'%$9( +*!& ,"-.& /(!& $"*/%+'/$,"*
/()/&)%!&0)'1!2&3$/(&/(!&0%,2+'/4
%!',%2&,5&%!6$*$,"
;$.&-&'4 <2,$ <$-+%&#,&'4
= >?@?@A B4&,&2*(;$*$2-$
C A?DA?EE F#62,$(+'%#'%2,$(&67

SS2000-DP4 - Page 3
TABLE OF CONTENTS
Description Page
THINGS TO KNOW BEFORE USING THIS EQUIPMENT...................................................................... 4
WARRANTY INFORMATION .................................................................................................................. 4
SECTION 1: INTRODUCTION................................................................................................................. 4
1.1 Using This Manual......................................................................................................... 4
1.2 Product Features........................................................................................................... 4
SECTION 2: EXPRESS START UP PROCEDURE ................................................................................ 5
SECTION 3: INSTALLATION GUIDELINES........................................................................................... 6
3.1 General Wiring Guidelines ............................................................................................ 6
3.2 Mounting ......................................................................................................................7
3.3 Connector Locations and Pin Assignments...................................................................8
SECTION 4: SPECIFICATIONS ............................................................................................................. 12
4.1 Mechanical Specifications............................................................................................ 12
4.2 Electrical Specifications ............................................................................................... 12
4.3 Environmental Specifications....................................................................................... 12
4.4 Motor Compatibility....................................................................................................... 12
4.5 Current Settings ........................................................................................................... 14
4.6 Automatic Current Reduction....................................................................................... 14
4.7 Step Resolution............................................................................................................ 14
4.8 Signal Specifications.................................................................................................... 15
4.9 Indicator Lights............................................................................................................. 17
SECTION 5: TORQUE VERSUS SPEED CHARACTERISTICS............................................................ 17
5.1 Motor Performance....................................................................................................... 17
5.2 Typical Torque Vs. Speed Curves................................................................................ 17
F Drive Torque Vs. Speed Curves ...............................................................................17
M Drive Torque Vs. Speed Curves...............................................................................23
SECTION 6: TROUBLESHOOTING ...................................................................................................... 25
APPENDIX A: TROUBLESHOOTING ELECTRICAL INTERFERENCE PROBLEMS………………….26

SS2000-DP4 - Page 4
THINGS TO KNOW BEFORE USING THIS EQUIPMENT
Only qualified personnel should install or perform servicing procedures on this equipment.
Before performing any work on the unit, allow at least five minutes for the capacitors to discharge fully.
Voltage is present on unprotected pins when unit is operational.
Motors powered by this drive may develop extremely high torque. Be sure to disconnect power to this
drive before doing any mechanical work.
WARRANTY INFORMATION
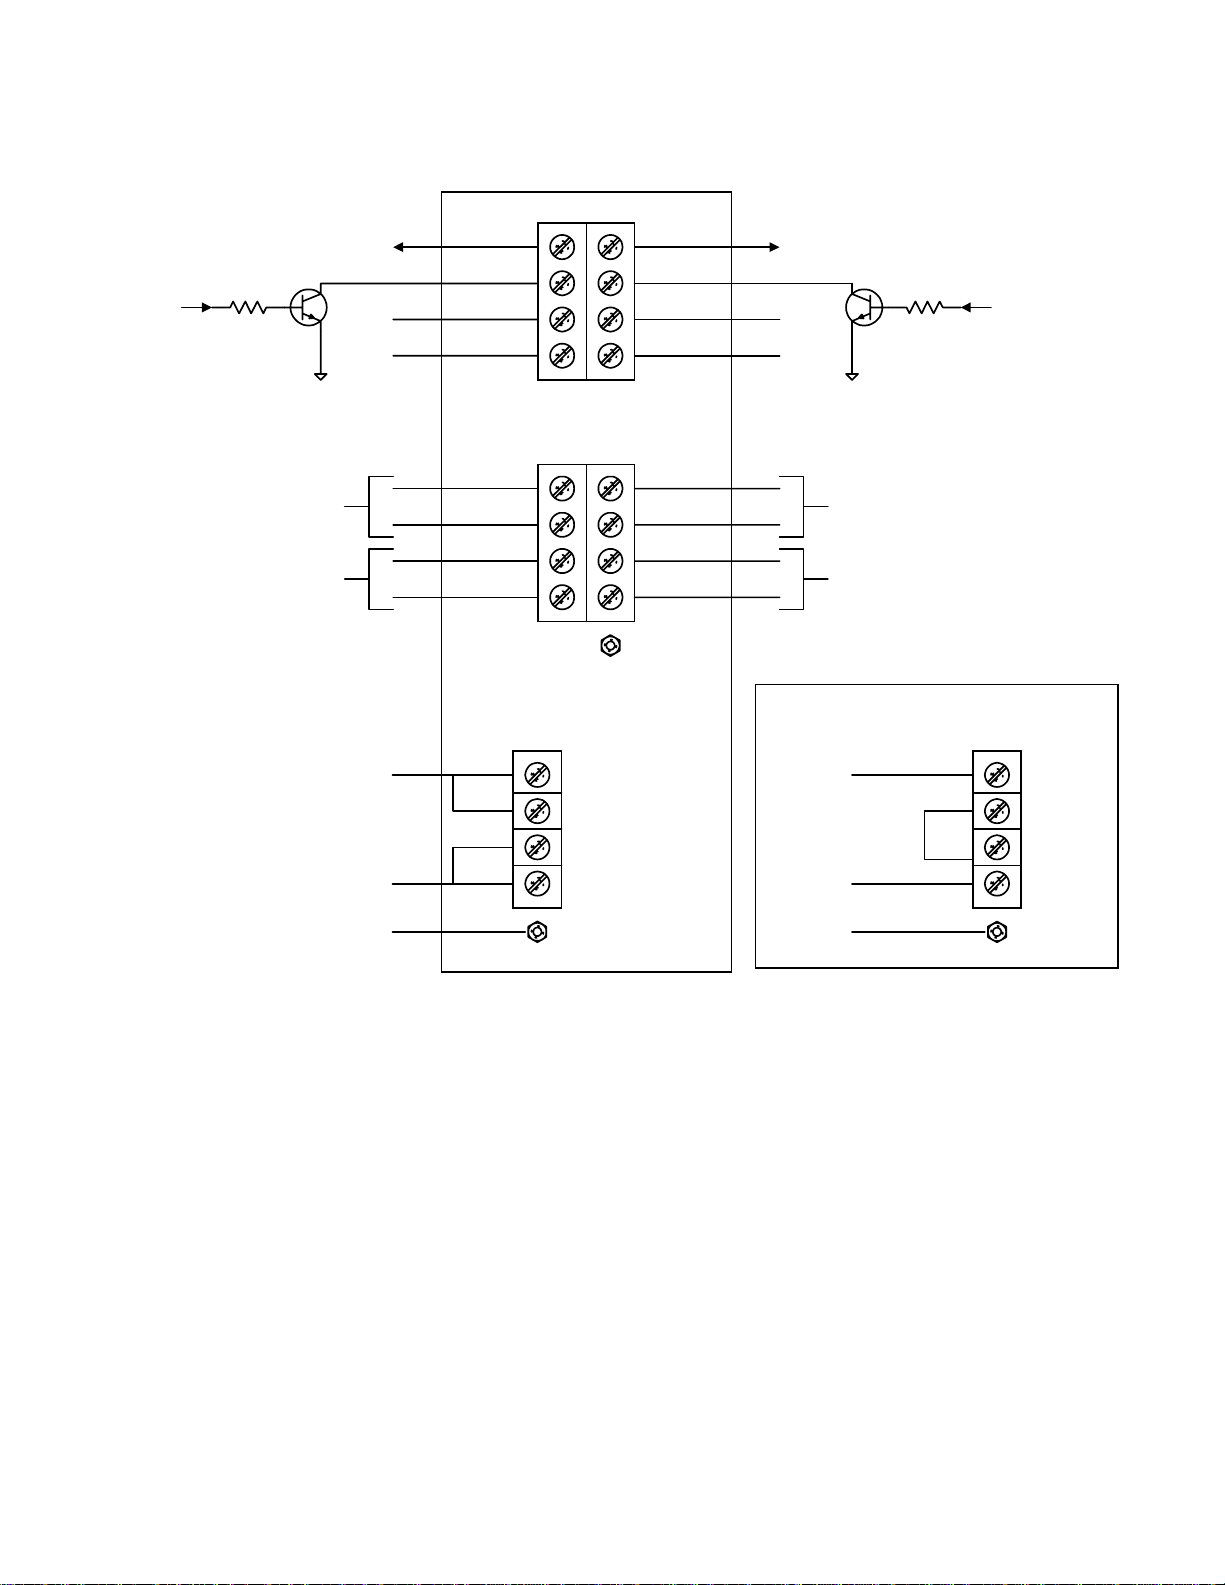
Reconfiguration of the circuit in any fashion not shown in this manual will void the Warranty.
Failure to follow the installation guidelines as described in Section 3 will void the Warranty.
SECTION 1: INTRODUCTION
1.1 USING THIS MANUAL
It is important that you understand how this SLO-SYN SS2000-DP4 Translator/Drive is installed and
operated before you attempt to use it. We strongly recommend that you read this manual completely
before proceeding with the installation of this unit.
This manual is an installation and operating guide to the SLO-SYN SS2000-DP4 Translator/Drive.
Section 1 gives an overview of the Drive and its features. Section 2 describes the steps necessary to
place the drive into operation. General wiring guidelines as well as the physical mounting of the unit and
connections to the drive portion are covered in Section 3.
Complete specifications, listed in Section 4, provide easily referenced information concerning electrical,
mechanical and environmental specifications. The procedure for setting the motor current level is also
covered in this section.
Torque versus speed characteristics with all appropriate SLO-SYN Stepper Motors are given in Section 5.
Section 6, Troubleshooting, gives procedures to follow if the Translator/Drive fails to operate properly.
Appendix A provides procedures for troubleshooting electrical interference problems.
1.2 PRODUCT FEATURES
The SLO-SYN SS2000-DP4 Dual Packaged drive system includes two independent stepper motor drives
and their motor power supply in a single packaged unit. Each drive is a bipolar, adjustable speed,
two-phase PWM circuit which uses hybrid power devices. It can be set to operate a step motor in
microstep mode at up to 20,000 microsteps per revolution. The maximum running speed is 3,000 rpm. To
reduce the chances of electrical noise problems, the control signals are optically isolated from the drive
circuit. Features include:
•Switch selectable current levels of 0.5 through 3.5 amperes
•Choice of either Pulse/Direction or CW / CCW input capability
•Full short circuit protection (phase-to-phase and phase-to-ground)
•Undervoltage and transient overvoltage protection
•Overtemperature Protection
•Efficient thermal design
•Optically isolated inputs
•Windings Off capability
•Automatic Current Reduction (In –MM models)
•Switch selectable step resolution
•Compact size
•Sturdy cabinet with integral mounting flanges

SS2000-DP4 - Page 5
SECTION 2: EXPRESS START UP PROCEDURE
The following instructions define the minimum steps necessary to make your Drive operational.
CAUTION:
Always disconnect the power to the unit before connecting or disconnecting the
motor leads. FAILURE TO DO THIS WILL RESULT IN A SHOCK HAZARD AND MAY
DAMAGE THE DRIVE.
Always operate the unit with the Motor and the Drive enclosure GROUNDED. Be sure to twist
together the wires for each motor phase as well as those for the dc input. Six twists per foot (0.3
m) is a good guideline.
1. Check to see that the motor used is compatible with the drive. Refer to Section 4.4 for a list of
compatible motors.
2. Set the correct current level for the motor being used per the instructions in Section 4.5.
3. Select the appropriate step resolution and set the switches as described in Section 4.7.
4. Wire the motor and I/O per the "Motor Connections" description in Section 3.3.
Connect the power source to the AC input terminal strip. Be sure to follow the instructions for connecting
the jumpers for 115 VAC or 230 VAC as described in Section 3.3, under Power Input.
NOTES: If the motor operates erratically, refer to Section 5, "Torque Versus Speed Characteristics".
Clockwise and counterclockwise directions are properly oriented when viewing the motor from
the end opposite the mounting flange.

SS2000-DP4 - Page 6
SECTION 3: INSTALLATION GUIDELINES
3.1 GENERAL WIRING GUIDELINES
SLO-SYN 2000 drives use modern solid-state electronics to provide the features needed for advanced
motion control applications. In some cases, these applications produce electromagnetic interference
(EMI, or electrical "noise") that may cause inappropriate operation of the digital logic used in the drive, or
in any other computer-type equipment in the user's system.
In general, any equipment that causes arcs or sparks or that switches voltage or current at high
frequencies can cause interference. In addition, ac utility lines are often "polluted" with electrical noise
from sources outside a user's control (such as equipment in the factory next door). Some of the more
common causes of electrical interference are:
•power from the utility ac line
•relays, contactors and solenoids
•light dimmers
•arc welders
•motors and motor starters
•induction heaters
•radio controls or transmitters
•switch-mode power supplies
•computer-based equipment
•high frequency lighting equipment
•dc servo and stepper motors and drives
The following wiring practices should be used to reduce noise interference.
Solid grounding of the system is essential. Be sure that there is a solid connection to the ac system
earth ground. Bond the drive case to the system enclosure. Use a single-point grounding system for all
related components of a system (a "hub and spokes" arrangement). Keep the ground connection short
and direct.
Keep signal and power wiring well separated. If possible, use separate conduit or ducts for each. If
the wires must cross, they should do so at right angles to minimize coupling.
Note: Power wiring includes ac wiring, motor wiring, etc. and signal wiring includes inputs and outputs
(I/O), serial communications (RS232 lines), etc.
Use shielded, twisted-pair cables for Indexer I/O lines. BE SURE TO GROUND SHIELDS ONLY AT
ONE END, THE INDEXER/DRIVE END FOR OUTPUTS AND THE SWITCH OR SENSOR END FOR
INPUTS.
Suppress all relays to prevent noise generation. Typical suppressors are capacitors or MOV’s. (See
manufacturer’s literature for complete information). Whenever possible, use solid-state relays instead of
mechanical contact types to minimize noise generation.
If you are experiencing problems with drive operation which might be related to EMI, refer to Section 6.0
for Troubleshooting pointers.

SS2000-DP4 - Page 7
3.2 MOUNTING
The SLO-SYN Drive is mounted by fastening its mounting brackets to a flat surface as shown in Figure
3.1.
Figure 3.1, Mounting Diagram
NOTE: The unit should be mounted upright so that air flow will not be obstructed. Case
temperature should not exceed +70° C (+158° F). Forced air cooling may be required to maintain
temperature within the stated limits.
When selecting a mounting location, it is important to leave at least two inches (51mm) of space around
the top, bottom and sides of the unit to allow proper airflow for cooling.
It is also important to keep the drive away from obvious electrical noise sources. If possible, locate the
drive unit in a metal enclosure to shield it and its wiring from electrical noise sources. If this cannot be
done, keep the drive at least three feet from any noise sources.
0.22
[5.56]
0.38
[9.53]
3.50
[88.90]
9.70
[246.38]
3.50
[88.90]
1.35
[34.29]
5.28 [134.05]
5.96 [151.32]
9.21
[233.95]
6.00 [152.40]
6.88 [174.63]

SS2000-DP4 - Page 8
3.3 CONNECTOR LOCATIONS AND PIN ASSIGNMENTS
Figure 3.2 shows the connector locations for the SS2000DP4 drive.
Figure 3.2, Connector Locations and Typical Wiring
OPTO
PU / CW
DIR / CCW
AWO
AB
1
2
3
4
MOTOR
SHIELD
AB
Control
Signal
Drive 1
Control
Logic
Common
Typical
External
Control
Circuit
Control Logic
Supply Drive 1 Control Logic
Supply Drive 2
Typical
External
Control
Circuit
Control
Signal
Drive 2
Motor 1
Phase A
Motor 1
Phase B
Motor 2
Phase A
Motor 2
Phase B
H
T2
T1
N
GND
115 VAC
Configuration
Hot
Neutral
Earth
Ground
H
T2
T1
N
GND
230 VAC
Configuration
Hot
Neutral
Earth
Ground
Control
Logic
Common

SS2000-DP4 - Page 9
MOTOR CONNECTIONS
All motor connections are made via a double row 4-pin connector and ground stud. Pin assignments for
this connector are:
Figure 3.3, Motor Connector
Motor Connection:
Axis A Axis B Motor
Pin Assignment Pin Assignment Leads Terminals
1 M1 (Phase A) 1 M1 (Phase A) Red #1
2 M3 (Phase A) 2 M3 (Phase A) White/Red #3
3 M4 (Phase B) 3 M4 (Phase B) Black #4
4 M5 (Phase B) 4 M5 (Phase B) White/Blk #5
GND Stud Shield GND Stud Shield Shield -
NOTE: Motor phase A is M1 and M3 and motor phase B is M4 and M5. The motor frame must be
grounded.
Cabling from the drive to the motor should be done with a shielded, twisted pair cable. As a guideline, the
wires for each motor phase should be twisted about six times per foot. Terminate the cable shield to the
"MOTOR SHIELD" terminal on the DP4 unit case. The recommended maximum cable length is 75 feet.
Superior Electric offers the following motor cable configurations. These cables have unterminated leads
on both ends.
Length Part Number
10 ft (3 m) 216022-031
25 ft (7.6 m) 216022-032
50 ft (15.2 m) 216022-033
75 ft (22.8 m) 216022-034
MOTOR
SHIELD
AB
1
2
3
4
1
2
3
4

SS2000-DP4 - Page 10
Figure 3.4a shows typical wiring configurations to the motor output terminal block. Figure 3.4b provides
motor wiring configurations for 4, 6, and 8 lead motors.
Figure 3.4a, Motor Wiring Configurations
MOTOR
SHIELD
AB
Motor 2
Phase A
Motor 2
Phase B
Motor 1
Phase A
Motor 1
Phase B
1
2
3
4
1
2
3
4
D
F
B
H
5
4
1
3
WHITE/
BLACK
BLACK
WHITE/
RED
RED
GREEN
MOTOR TERMINAL "M" NUMBERS
MOTOR
CONNECTOR PIN MOTOR
CONNECTOR PIN
4-LEAD MOTORS
D
F
B
H
5
4
1
3
GREEN
WHITE/
RED
RED
6-LEAD MOTORS
WHITE N.C.*
E
2
G
* N.C. BLACK
WHITE/
GREEN
PHASE A PHASE B
D
F
B
H
5
4
1
3
WHITE/
BLACK
WHITE/
RED
RED
8-LEAD MOTORS, SERIES CONNECTIONS
G
BLACK
A
WHITE
ORANGE
E
GREEN
CWHITE/
GREEN
*
6
2
7
8
*
DRIVE PIN 1
DRIVE PIN 2
DRIVE PIN 1
DRIVE PIN 2
DRIVE PIN 1
DRIVE PIN 2
DRIVE PIN 4
DRIVE PIN 3
DRIVE PIN 4
DRIVE PIN 3
DRIVE PIN 4
DRIVE PIN 3
D
F
B
H
5
4
1
3
WHITE/
RED
RED
8-LEAD MOTORS, PARALLEL CONNECTIONS
WHITE/
BLACK
G
BLACK
A
WHITE
ORANGEE
C
6
2
7
8
GREEN
WHITE/
GREEN
* These leads are NOT connected to drive or ground. These leads
must be insulated and isolated or damage to the drive may occur.
DRIVE PIN 4
DRIVE PIN 3
DRIVE PIN 1
DRIVE PIN 2
6

SS2000-DP4 - Page 11
POWER INPUT
The ac input power is connected to a 4-screw terminal strip. The terminals are labeled as follows:
Lead Color,
North American
Terminal Standard
"H" for Line or "Hot" Black
"N" for Common or Neutral White
" " for Ground Green
Figure 3.5, AC Input Power Connections
H
T2
T1
N
GND
115 VAC
Configuration
Hot
Neutral
Earth
Ground
H
T2
T1
N
GND
230 VAC
Configuration
Hot
Neutral
Earth
Ground
Supplied
Jumpers
Supplied
Jumper

SS2000-DP4 - Page 12
SECTION 4: SPECIFICATIONS
4.1 MECHANICAL SPECIFICATIONS
Size (Inches).................................................................... 9.7 H x 6.875 W x 5.96 D
(mm)......................................................................... 246.38 H x 174.63 W x 151.38 D
Weight 15 pounds (6.8 kg)
4.2 ELECTRICAL SPECIFICATIONS
AC Input Range ................................................................... 115 VAC / 230 VAC ±10 %
AC Current........................................................................... 2.5 Amps @115 VAC / 1.25 @230 VAC
Drive Power Dissipation
(Worst Case)............................................................70 watts
4.3 ENVIRONMENTAL SPECIFICATIONS
Temperature:
Operating................................................................. +32° F to +122° F (0° C to +50° C)
free air ambient,
Storage .................................................................... -40° F to +167° F (-40° C to +75° C)
Humidity............................................................................... 95% max. noncondensing
Altitude................................................................................. 10,000 feet (3048 m) max.
4.4 MOTOR COMPATIBILITY
Motor Types......................................................................... Superior Electric M and KM Series
Frame Sizes......................................................................... M061 (NEMA 23D) through M092 (NEMA 34)
................................................................................. KML060 (NEMA 23D mounting)
................................................................................. through KML092 (NEMA 34 mounting)
Number of Connections ...................................................... 4, 6, 8
Minimum Inductance............................................................ 0.5 millihenry
Maximum Resistance .......................................................... = 0.25 x 32/I Setting
NOTE: Maximum resistance is total of motor plus cable. I Setting = drives current setting in
amperes (see Section 4.5)
CAUTION: Do not use larger frame size motor than those listed, or the drive may be damaged. If a
larger frame size motor must be used, consult the factory for recommendations.

SS2000-DP4 - Page 13
MOTORS FOR USE WITH THE SS2000DP4 DUAL PACKAGED DRIVE SYSTEM
Power Supply Current
Motor Winding Connection Current
Setting*
(Amperes) Standstill
(Amps. DC) Maximum
(Amps. DC)
M061 08 Series 2.5 1.0 2.0
M061 08 Parallel 3.5 1.0 2.0
M062 09 Series 3.0 1.0 2.5
M062 09 Parallel 3.5 1.0 3.5
M063** 09 Series 3.0 1.5 2.0
M063** 09 Parallel 3.5 1.0 3.5
M091 09 Series 3.0 1.0 1.5
M091 09 Parallel 3.5 1.0 3.0
M092 09 Series 3.0 1.5 2.0
M092 09 Parallel 3.5 1.0 3.0
KML061F05 - - 2.5 1.2 1.5
KML061F11 - - 3.5 1.0 3.0
KML062F07 - - 3.0 1.0 2.5
KML062F13 - - 3.5 1.0 4.0
KML063F07 - - 3.0 1.5 2.0
KML063F13 - - 3.5 1.0 4.0
KML091F07 - - 3.0 1.0 2.0
KML091F13 - - 3.5 1.0 4.0
KML092F07 - - 3.0 1.5 2.5
KML092F13 - - 3.5 1.0 4.0
KML093F07 - - 3.5 1.8 2.5
* See Section 4.5 for instructions on setting drive current.
** M063 motors are discontinued and should not be incorporated into new designs. They can be
provided to support existing systems.
Power supply currents shown are measured at the output of the rectifier bridge in Figure 3.4a.
Figures 3.4a and 3.4b in Section 3.3 provide motor connection information for the motors listed above.
M061, M062 and M063 motors listed include LS, LE, CS, FC and FD versions. M091 and M092 motors
include FC and FD versions with 6 or 8 leads. All KML motors listed have 4 leads. Motors with windings
other than those listed can be used as long as the current ratings listed on the motors are not exceeded.

SS2000-DP4 - Page 14
4.5 CURRENT SETTINGS
The proper current setting for each motor is shown on the individual torque vs. speed curves. Use this
current level to obtain the torque shown. The current setting dip switch for each drive is located on the top
of the unit. (See figure below) Be sure to set each according to the motor table in section 4.4 Dip switch
positions 1 through 7 are used to select the current level. Select the desired operating current by setting
the appropriate switch to 1 (ON). The OFF setting is labeled "0". Only one switch should be ON. If two or
more switches are ON, the one which selects the highest current level will be the active switch. The
switch settings are as follows:
4.5.1 CURRENT SETTINGS for F Drive
Current
Position (amperes)
None 0.5
10.75
21.0
31.5
42.0
52.5
63.0
73.5
4.5.2 CURRENT SETTINGS for M Drive
Current
Position (amperes)
None 1.0
11.5
22.0
32.5
43.0
53.5
4.6 AUTOMATIC CURRENT REDUCTION on M Drives only
When switch #6 is in the OFF position, the current at standstill goes to 50% of the selected level. This
occurs between 1 and 2 seconds after the last pulse is received. When switch #6 is in the ON position,
the current at standstill remains at full value.
4.7 STEP RESOLUTION
4.7.1 STEP RESOLUTION – F Drive
The number of pulses per revolution is selected using position 8 of the switch described in Section 4.5.1.
The following chart shows the correct switch setting for each available step resolution.
Switch Position 8 Step Resolution Pulses Per Revolution
0 (off) Full-Step 200
1 (on) Half-Step 400
4.7.2 STEP RESOLUTION – M Drive
The number of pulses per revolution is selected using positions 7 and- 8 of the switch described in
Section 4.5.2. The following chart shows the correct switch setting for each available step resolution.
Switch Position
78 Step Resolution Pulses PerRevolution
0 (OFF) 0 (OFF) 1/2 400
1 (ON) 0 (OFF) 1/10 2,000
0 (OFF 1 (ON) 1/25 5,000
1 (ON) 1 (ON) 1/100 20,000
DRIVE B DRIVE A INPUT TYPE
SELECT SWITCH (S1)

SS2000-DP4 - Page 15
4.8 SIGNAL SPECIFICATIONS
4.8.1 Terminal Assignments
All connections are made via the 4-pin terminal strip.
Pin Assignment
1OPTO
2 PULSE/CW
3 DIR/CCW
4AWO
4.8.2 Signal Descriptions
OPTO Opto-Isolator Supply
User supplied power for the opto-isolators. (See Section 4.8.3 for level requirements)
PULSE / CW Direction, Pulse Input
In Pulse/Direction mode a low to high transition on this terminal advances the motor one step. The step
size is determined by the Step Resolution switch setting. In CW/CCW mode a pulse on this input will
cause the motor to move one step clockwise.
DIR / CCW Direction, Pulse Input
When this signal is high, in Pulse/Direction mode , motor rotation will be clockwise. Rotation will be coun-
terclockwise when this signal is low. In the CW/CCW mode a pulse on this input will cause the motor to
move one step counter-clockwise.
Note: Clockwise and counterclockwise directions are properly oriented when viewing the motor from the
end opposite the mounting flange.
AWO All Windings Off Input
When this signal is low, AC and DC current to the motor will be zero. Caution: There will be no holding
torque when the AWO signal is low.
NOTE: If you are using the drive with an SS2000I or SS2000I-V control, the READY input and the
OPTO input on the control must be jumpered together.
4.8.3 Level Requirements
OPTO Voltage..................................................................... 4.5 to 6.0 volts dc
Current..................................................................... 16 mA per signal used
Other Signals
Voltage.....................................................................Low 0.8 Vdc 0.0 Vdc
High OPTO - 1 volt
Current.....................................................................Low 16 mA
High 0.2 mA
4.8.4 Timing Requirements
PULSE F Drive M Drive
Max. Frequency 20 kHz 500 kHz
Max. Rise And Fall Times 1 microsecond 1 microsecond
Min. Pulse Width 25 microseconds 1 microsecond
Other Signals:.......Response Time 25 microseconds 50 microseconds

SS2000-DP4 - Page 16
74849& 0:;<=&>?@&2AB=CDAE?&F&'3&G&''3&,HDAE?
!G&,+/(!D('4(,/$(,'#('5(,/$("4&,(2**'G-(,/$(-$*$+,&'4('5($&,/$%(2(#"*-$(246(6&%$+,&'4(-&042*(&4,'(,/$(6%&.$-('%
2(HI(?(HHI(&4#",7((B5(2(#"*-$(246(6&%$+,&'4(-&042*(&-(,'(J$("-$69(,/$(-G&,+/(-/'"*6(J$(#*2+$6(&4,'(,/$(KF(?
<B;(#'-&,&'47((=(6&20%21('5(,/&-(,8#$('5(+'4,%'*(-&042*(&-(-/'G4(J$*'G(G/$%$(,/$(-&042*-(2%$(-$$4(2,(,/$
#&4-('5(,/$(6%&.$7((B5(,/$(6&%$+,&'4(-&042*(&-(/&0/(,/$(1','%(G&**(%',2,$(+*'+3G&-$(2-(-$$4(5%'1(,/$($46('5(,/$
1','%( 2G28( 5%'1( ,/$( 1'"4,&40( 5*240$7( ( B5( ,/$( 6&%$+,&'4( *&4$( &-( *'G( ,/$( 6%&.$( G&**( %',2,$( &4( ,/$( +'"4,$%L
+*'+3G&-$(6&%$+,&'4(2-(-$$4(5%'1(,/$($46(2G28(5%'1(,/$(1','%(5*240$7
B5(2(HI(?(HHI(-&042*(&-(J$&40(5$6(&4,'(,/$(6%&.$9(DI=&A?H:D<&J:<D&K=&IALI&@:BA?L&HEM=B&:H(,'($4-"%$
#%'#$%('#$%2,&'47(=(6&20%21('5(,/&-(,8#$('5(+'4,%'*(-&042*(&-(-/'G4(J$*'G(G/$%$(,/$(-&042*-(2%$(-$$4( 2,
,/$(#&4-('5(,/$(6%&.$7((M'%(,/$(1','%(,'(%',2,$(&4(,/$(+*'+3G&-$(6&%$+,&'49(#"*-$-(2(#*2+$6('4(,/$(HI(&4#",
246(,/$(HHI(&4#",(&-(/$*6(/&0/7((B5(+'"4,$%L+*'+3G&-$(%',2,&'4(&-(6$-&%$69(#"*-$-(2%$(2##*&$6(,'(,/$(HHI
&4#",(246(,/$(HI(&4#",(&-(/$*6(/&0/7((N>O4&A?H:D&PB=Q:=?CR&PEB&DI=&'3&F&''3&JE@=&EP&EH=B>DAE?&A<
STTU(VW&>;;&EDI=B&DAJA?L&B=Q:AB=J=?D<&>B=&DI=&<>J=&><&A?&<=CDAE?&748474
H*'+3G&-$(;',2,&'4
H'"4,$%L+*'+3G&-$(;',2,&'4
Pulse
Direction CW CCW
CW
CCW
CW
CCW

SS2000-DP4 - Page 17
74X&&$"2$')/,%&-$#(/*
NKOI);P(Q)<9(;$6
B46&+2,$-(,/2,(=H(#'G$%(/2-(J$$4(2##*&$6(,'(,/$(6%&.$-7
RM=FQ:R(Q)<S-9(;$6
Q&0/,-(,'(&46&+2,$('.$%(+"%%$4,(+'46&,&'47(:/&-(+'46&,&'4(&-(+2"-$6(J8(1','%(G&%&40($%%'%-('%(2(0%'"46(52"*,7
;$+'.$%8(5%'1('.$%(+"%%$4,(+'46&,&'4(%$T"&%$-(%$1'.&40(246(,/$4(%$2##*8&40(,/$(#'G$%7((:/$-$(Q)<S-(2%$
*'+2,$6('4(,/$(&46&.&6"2*(6%&.$(J'2%6-(246(2%$(.&-&J*$(,/%'"0/(,/$(,'#('5(,/$("4&,7
NOU);(:)VKP(Q)<9(;$6
!/'G-(,/2,(,/$(&4,$%42*(/$2,-&43(,$1#$%2,"%$(&-(≥(WX(°H7
:/&-( &-( 2( *2,+/$6( 5"4+,&'49( ,/$%$5'%$( ,'( %$-$,( ,/$( 6%&.$( #'G$%( 1"-,( J$( +8+*$6( 246( &4,$%42*( /$2,-&43
,$1#$%2,"%$(1"-,(J$(Y(WX(°H7
*!'/$,"&9Y&/,%Z+!&6!%*+*&*0!!2&'()%)'/!%$*/$'*
94S&&N,/,%&0!%5,%N)"'!
=**(-,$##$%(1','%-($Z/&J&,(&4-,2J&*&,8(2,(,/$&%(42,"%2*(5%$T"$4+8(246(/2%1'4&+-('5(,/2,(5%$T"$4+87((:8#&+2**89
,/&-(&4-,2J&*&,8(G&**('++"%(2,(-#$$6-(J$,G$$4(XE(246(DEEE(5"**(-,$#-(#$%(-$+'46(2469(6$#$46&40('4(,/$(68L
421&+(1','%(*'26(#2%21$,$%-9(+24(+2"-$($Z+$--&.$(.$*'+&,8(1'6"*2,&'4('%(&1#%'#$%(#'-&,&'4&407(:/&-(,8#$
'5(&4-,2J&*&,8(&-(%$#%$-$4,$6(J8(,/$('#$4(2%$2(2,(,/$(*'G($46('5($2+/(:'%T"$(.-7(!#$$6(+"%.$7
:/$%$( 2%$( 2*-'( ',/$%( &4-,2J&*&,&$-( G/&+/( 128( +2"-$( 2( *'--( '5( ,'%T"$( 2,( -,$##&40( %2,$-( '",-&6$( ,/$( %240$( '5
42,"%2*( %$-'424+$( 5%$T"$4+&$-7( O4$( -"+/( &4-,2J&*&,8( &-( J%'26*8( 6$5&4$6( 2-( 1&6L%240$( &4-,2J&*&,87( F-"2**89( ,/$
621#&40('5(,/$(-8-,$1(246(2++$*$%2,&'4?6$+$*$%2,&'4(,/%'"0/(,/$(%$-'424+$(2%$2-(2&6(&4(%$6"+&40(&4-,2J&*&,8(,'
2( *$.$*( ,/2,(#%'.&6$-( -1'',/( -/25,( .$*'+&,8( 246( 2++"%2,$( #'-&,&'4&407( ( B5( &4-,2J&*&,8( 6'$-( +2"-$( "42++$#,2J*$
#$%5'%124+$( "46$%( 2+,"2*( '#$%2,&40( +'46&,&'4-9( ,/$( 5'**'G&40( ,$+/4&T"$-( +24( J$( "-$6( ,'( %$6"+$( .$*'+&,8
1'6"*2,&'47
D[ =.'&6(+'4-,24,(-#$$6('#$%2,&'4(2,(,/$(1','%S-("4-,2J*$(5%$T"$4+&$-7(!$*$+,(2(J2-$(-#$$6(,/2,(&-(2J'.$(,/$
1','%S-(%$-'424,(5%$T"$4+&$-(246(26\"-,(2++$*$%2,&'4(246(6$+$*$%2,&'4(,'(1'.$(,/$(1','%(,/%'"0/("4-,2J*$
%$0&'4-(T"&+3*87
>[ :/$(1','%(G&46&40(+"%%$4,(+24(J$(%$6"+$6(2-(6$-+%&J$6(&4(!$+,&'4(]7X7(Q'G$%&40(,/$(+"%%$4,(G&**(%$6"+$
,'%T"$(#%'#'%,&'42**87(:/$(%$6"+$6($4$%08(6$*&.$%$6(,'(,/$(1','%(+24(6$+%$2-$(.$*'+&,8(1'6"*2,&'47
^[ F-&40(24',/$%(-,$#(%$-'*",&'4(128(#%'.&6$(-1'',/$%('#$%2,&'4(246(%$6"+$(,/$($55$+,-('5(1&6(%240$(&4-,2J&*L
&,87(_',$(,/2,(1&+%'-,$##&40(+/240$-(,/$(-/25,(-#$$6(5'%(2(0&.$4(#"*-$(&4#",(%2,$7

SS2000-DP4 - Page 18
94[&/.0$')-&/,%Z+!&6!%*+*&*0!!2&'+%6!*
_O:)`(:/$(,$-,(+'46&,&'4-("-$6(G/$4('J,2&4&40(,/$(,'%T"$(.$%-"-(-#$$6(62,2(2%$(*&-,$6(&4(,/$(*'G$%(*$5,L
/246(+'%4$%('5($2+/(+"%.$7
5&2%$6!&&/,%Z+!&6<4&*0!!2&'+%6!*

SS2000-DP4 - Page 19
5&2%$6!&/,%Z+!&6<4&*0!!2&'+%6!*&\CE?D4]

SS2000-DP4 - Page 20
a(VEb^(1','%-(2%$(6&-+'4,&4"$6(246(-/'"*6(4',(J$(&4+'%#'%2,$6(&4,'(4$G(6$-&04-7((:/$8(+24(J$(#%'.&6$6
,'(-"##'%,($Z&-,&40(-8-,$1-7
5&2%$6!&/,%Z+!&6<4&*0!!2&'+%6!*&\CE?D4]
Table of contents
Other Superior Electric DC Drive manuals
Popular DC Drive manuals by other brands

INVT
INVT CHV Series Operation manual

Franklin Electric
Franklin Electric SubDrive Connect Plus SDCP-SUB0723 quick start guide

Danfoss
Danfoss VLT HVAC Basic Drive FC 101 quick guide

ZIEHL-ABEGG
ZIEHL-ABEGG FXDM25 operating instructions

Smartrise
Smartrise KEB Series Startup manual

Invertek Drives
Invertek Drives Optidrive HVAC Application note