SUPERMICR R
ContaCt InformatIon
MNL-1122-QRG
• Manuals:http://www.supermicro.com/support/manuals
• Drivers&Utilities:ftp://ftp.supermicro.com
• Safety:http://www.supermicro.com/about/policies/safety_information.cfm
© 2013 Supermicro Computer Inc. All rights reserved. Reproduction of this document whether in part or in whole is strictly prohibited without Supermicro's written
consent. All Trademarks are property of their respective entities. All information provided is deemed accurate at the time of printing; however, it is not guaranteed.
PaCkage Contents
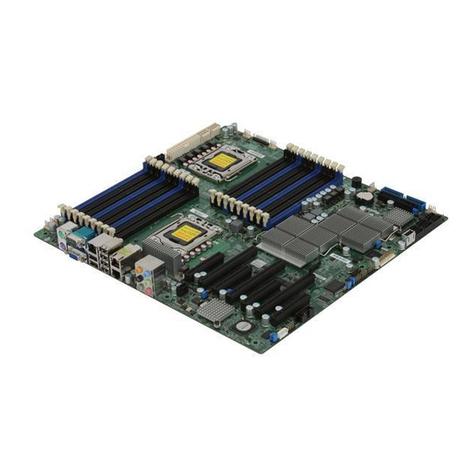
X8Dtg-Qf
QuICk referenCe guIDe
• One(1)SupermicroMotherboard
• Six(6)SATACables
• One(1)I/OShield
1. Keyboard (Purple)
2. PS/2 Mouse (Green)
3. COM Port 1 (Turquoise)
4. VGA (Blue)
5. USB 0
6. USB1
7. IPMI_Dedicated LAN
8. USB 2
9. USB 3
10.USB 4
LED Indicators
Connectors
DIMM Memory Installation
Jumpers, Connectors and LED Indicators
Back Panel I/O Connectors
Memory Support
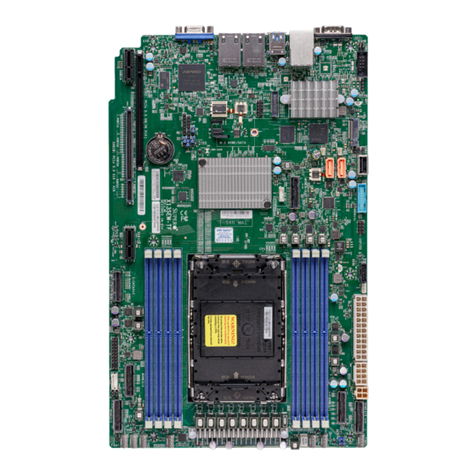
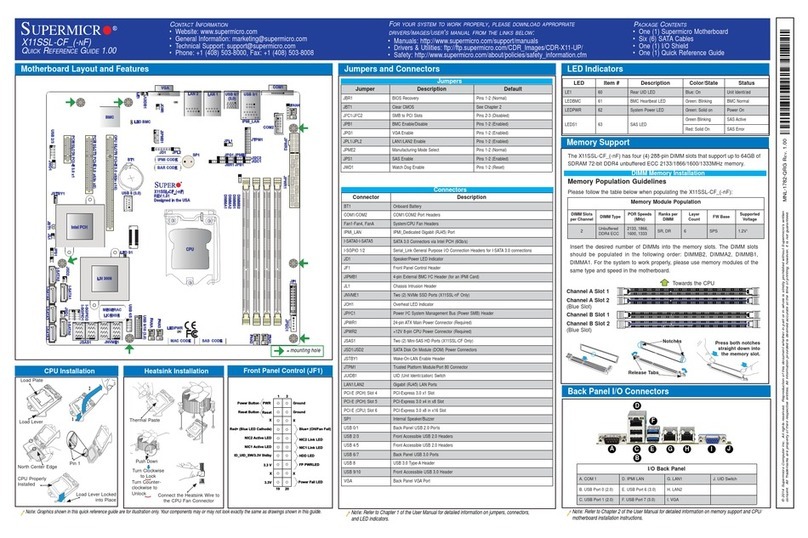
Motherboard Layout and Features
Jumpers
Note: Graphics shown in this quick reference guide are for illustration only. Your components may or may not look exactly the same as drawings shown in this guide. Note: Refer to Chapter 1 of the User Manual for detailed information on jumpers, connectors,
and LED indicators.
Note: Refer to Chapter 2 of the User Manual for detailed information on memory support and CPU/
motherboard installation instructions.
= mounting hole
I-SATA0
I-SATA1
I-SATA2
I-SATA3
I-SATA4
I-SATA5
JWOL
Battery
JPI2C
J18
T-SGPIO1
T-SGPIO2
JP6
1
JP3
1
JI2C1
JI2C2
JL2
JPL2
JWD
JPG1
JPAC
JPL1
JPW3
JBT1
JSMB1
J138
D33
DP1
CD1
JAUDIO1
SP1
FAN2 FAN1
FAN5
FAN4 FAN3
JPUSB2
JPUSB1
CPU2
CPU1
FAN6
ICH 10R
Intel
JTPM1
TPM
Jumper Description Default Setting
JBT1 CMOS Clear Pins 1-2 (Reset)
JI2C1/JI2C2 SMB to PCI/PCI-E Slots Open (Disabled)
JL2 Audio Mode Select Open (HD Mode)
JPAC Audio Enable Pins 1-2 (Enable)
JPG1 VGA Enable Pins 1-2 (Enabled)
JPL1/JPL2 LAN1/2 Enable Pins 1-2 (Normal)
JPUSB1/2 Back/FP USB Wake-up Enable Pins 1-2 (Enabled)
JWD Watch Dog Pins 1-2 (Reset)
Connector Description
(HD) Audio/CD-In/FP Audio 7.1 Channel High Denition Audio (JAUDIO1)/CD-In
(CD-1)/Front Panel Audio
COM1/COM2 COM1/COM2 Serial Connections
FAN#1~10 System/CPU Fan Headers (Fans 7~8: CPU Fans)
I-SATA0 ~ 5 (Intel South Bridge) SATA Ports 0~5
JD1 PWR LED (Pins 1~3)/Speaker (Pins 4~7)
JF1 Front Panel Connector
JL1 Chassis Intrusion
JOH1 Overheat LED Indicator
JPW1,JPW2/JPW3 12V 24-pin Main PWR, 8-pin PWR Connectors
JSMB1 System Management Bus I2C Header
JTPM1 TPM (Trusted Platform Module) Header
JWOL Wake-On_LAN
KB/Mouse PS2 Keyboard/Mouse
LAN1/2, IPMI_LAN Gigabit Ethernet Ports 1~2, IPMI LAN
SP1 Internal Speaker/Buzzer Header
T-SGPIO-0/1 Serial General Purpose IO Headers
USB 0/1, 2/3/4/5 Backplane USB Ports 0/1, 2/3/4/5
USB 6, 7, 8/9 Front Panel USB 6, 7, 8/9
VGA Video Port
LED Description
DP1 Onboard Standby PWR warning LED Indicator
D33 BMC LED Indicator
PowerButton
OH/Fan Fail/PWR
Fail/UID LED
1
ResetButton
2
HDD LED
PowerLED
Reset
PWR
3.3V
FP UID Switch/3.3V SB
3.3V
Ground
Ground
1920
Blue_LED_Cathode
(UID)/5V SB
Key
Ground
Key
NIC2 (Activity) LED
PWR Fail LED
NIC2 (Link) LED
NIC1(Link) LED NIC1 (Activity) LED
No Connection
The X8DTG-QF supports up to 192 GB of Registered ECC or up to 48 GB of Unbuf-
fered ECC/Non-ECC DDR3 1333/1066/800 MHz Memory in 12 DIMMs. (*Refer to
our memory recommendation list posted on our website at www.supermicro.com.)
Note: For Unbuffered ECC/Non-ECC memory, maximum of 4 GB per
DIMM is supported.
Note: Notch
should align
with the
receptive point
on the slot
Notch
Release
Tab
Release
Tab
DIMM DDR3
Notch
Memory Population for Optimal Performance
-For a motherboard with One CPU (CPU1) installed
O Branch 0 Branch 1 Branch 2
3 DIMMs P1 DIMM1A P1 DIMM2A P1 DIMM3A
6 DIMMs P1 DIMM1A P1 DIMM1B P1 DIMM2A P1 DIMM2B P1 DIMM3A P1 DIMM3B
Memory Population for Optimal Performance
-For a motherboard with One CPU (CPU2) installed
Branch 0 Branch 1 Branch 2
3 DIMMs P2 DIMM1A P2 DIMM2A P2 DIMM3A
6 DIMMs P2 DIMM1A P2 DIMM1B P2 DIMM2A P2 DIMM2B P2 DIMM3A P2 DIMM3B
Memory Population for Optimal Performance
-For a motherboard with Two CPUs installed
CPU1 CPU2
Branch 0 Branch 1 Branch 3 Branch 0 Branch 1 Branch 3
6 DIMMs 1A 2A 3A 1A 2A 3A
12
DIMMs
1A 1B 2A 2B 3A 3B 1A 1B 2A 2B 3A 3B
Insert the desired number of DIMMs into the memory slots, starting with P1-DIMM 1A.
