SURFANS V10 User manual

User's manual
2 | P a g e
Preface
Thanks for choosing our company’s stereo voice recorder.
In order to familiarize you with the operation of the machine as soon
as possible, we have provided a detailed user manual from which you
can get an introduction about the product, instructions, knowledge of
system settings and safety precautions. Before you use this product,
please be sure to read all the information provided carefully, which will
help you using the product better.
When writing this manual, we are very careful and rigorous, and we
believe that the information provided in this manual is correct and
reliable. If there are any omissions, please forgive us and welcome
any advise to correct it.
Shall you have any problems during the usage of the product, please
great supporting.

User's manual
3 | P a g e
Content
1) Before use
1. Preface………………………...............2
2. Features.....................................4
3. Accessories………………..…...........4
4. Product Safety Information.......5
5. Product icons and Function.......5
2) Quick Operation
1. Power on / off………………....…….7
2. Recording..................................7
3. Reset………………........…....……….7
4. Music File / recorded file
Selection…….................................7
5. A-B Repeat…………………............8
6. T-MARK Bookmark…….............8
7. Pervious, rewind / next,
fast forward………………………........8
8. Volume adjustment……………...8
9. Back …………………….…….....…....8
3) File management and playback
1. Delete Files………………………......9
2. Play Settings……...….…..............9
3. Bookmark.…….........................10
4. Repeat Setting.……...................10
4) System Settings
1. File Manager…………………........11
2. Recording Settings……………....11
3. System Settings……………….……13
4. Edit File…………………………….…..15
5. Recording Specification….....…16
5) Connecting to Computer and
Charge
1. Connect with Computer……......16
2. Battery and Charging……..…......16
6) Specifications
Technical specifications……......…..17

User's manual
4 | P a g e
Before use
Latest-generation high-quality PCM linear recording;
High-precision zinc alloy gold shell manufacturing process, 2.5D acrylic
mirror;
High-resolution 0.96-inch TFT display with song title display function;
Professional DSP IC audio decoding + ADC dual decoding, restoring real
scene effectively;
MP3, APE, WAV, FLAC Lossless playback function;
One-button recording function, recorded file cutting, splitting, inserting,
and link-editing function;
Time recording function, linear recording function, external microphones
supported;
Optional recording formats as MP3/WAV, high quality PCM recording
(1536Kbps);
VOR voice control function; adjustable recording sensitivity, you can
delete the recorded files on the recorder;
Monitor recording function, remained recording time display, remaining
capacity display function;
A-B repeat function, T-mark function;
One-button to return to playlist function, find files more conveniently;
Multitask operating system, resource managing functions;
Intelligent power detection, automatically saving recorded files before the
battery runs out.
Accessories
1 x Digital Voice Recorder
1 x USB Cable
1 x Headphone
1 x User Manual

User's manual
5 | P a g e
Product Safety Information
WARNING: Failure to follow these safety instructions may result in injury
and danger!
Do not drop or hit the voice recorder violently, which may cause serious
damage or malfunction;
Do not open or disassemble the voice recorder. There are no
maintenance parts inside;
Do not use this recorder in humid and hot environment, do not place the
product in water or any liquids, do not expose the product to sunlight and
do not put the product in fire, or battery will explode and catch fire.
If you don’t use the recorder for a long time, please charge and discharge
the product every 2 months.
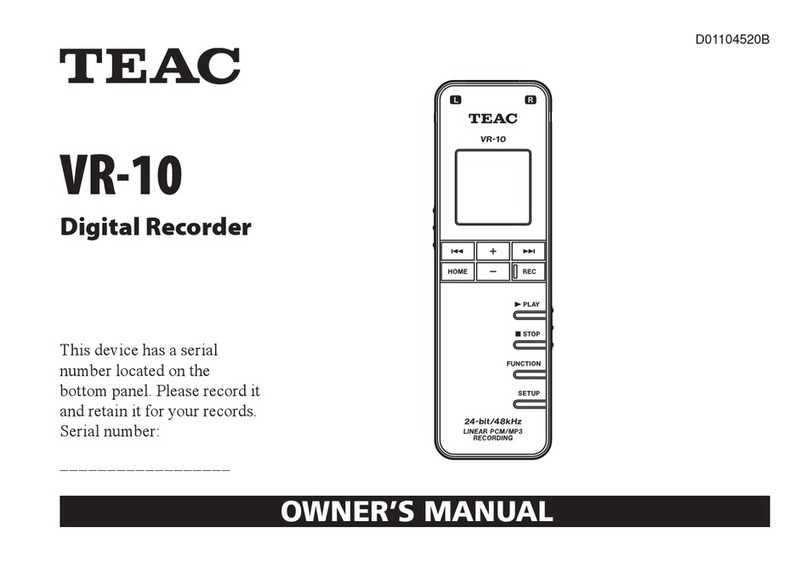
Product Icons and Functions
Indicator Light
Displaying Screen

User's manual
6 | P a g e
Earphone Port Speaker
Microphone
Volume +
Power
Play / Pause
Volume -
USB Port
Microphone
Previous / Rewind
Menu / Confirm
Next / Fast Forward
Recording /Saving
Back

User's manual
7 | P a g e
Quick Operation
1. Power on / off
Push up the power button to “ON” to turn it on, and push it down to “OFF” to
turn it off.
Please Note: If you turn on the voice recorder and don’t operate anything for
3 minutes, the recorder will turn off automatically; and you can long press
“ ” play/pause button for 3 seconds to return to the power on condition.
2. Recording
After turn on the recorder, push up the “Record / Save” button to “RECORD”
to start recording. The display will indicate the recording status. Push down
to “STOP” to stop recording and save the recorded file; press “ ” during
recording to pause / resume recording.
1) The product’s recorded files are named REC001.WAV; REC002.WAV….
2) The product supports one-button recording function. Even the recorder in
powered-off condition, you can directly push the "Record / Save" button
up to the "RECORD" position, the recorder will automatically turn on and
enter the recording state.
Please Note: If you want to use the one-button recording function under the
state of automatic shutdown, you must first turn the power switch to "OFF"
position before starting.
3. Reset
If you operate this product with no respond, please press and hold the " "
button for 5-8 seconds to reset the system and restart. If it still fails to start,
please check the battery condition.
4. Music file / recorded file selection
In pause or stop condition, short press the “M” button to fast switch between
the music file and the recorded file, and press the “ ” button to play the
music or recorded file.
In the pause or stop condition, press and hold the "M" button to enter the
menu interface:

User's manual
8 | P a g e
File Manager -> short press “M” button
Here you will find all music files and “RECORD” folders, short press the " "
or " " button to select file and press the "M" button to confirm the selection
and then press the " " button to play.
5. A-B Repeat
In playing condition, press and hold "M" button to set the repeat starting
point A, then press and hold "M" button to set ending point B, and it will start
repeating; press and hold the "M" button again to cancel the repeat mode.
6. T-mark
In recording condition, short press the “M” button to bookmark. You will see
a flag icon on the screen, short press “M” button add a mark in this recorded
file. A recorded file can only have a maximum of 10pcs recording marks.
After saving and playing this recorded file, press “ ” or “ ” to switch the
mark point.
7. Previous, Rewind / Next, Fast Forward
In playing condition, short press “ ” / “ ” to switch to the previous / next
song, and long press to fast forward / rewind.
8. Volume Adjustment
In playing or pause condition, short press “+” button for volume up, and short
press “-” button for volume down.
9. Back
In playing or pause condition, short press the "Back" button to return to the
playlist of the current playing list; in the menu option condition, short press
the "Back" button to return to the previous menu interface or exit the option
function.

User's manual
9 | P a g e
File Management and Playback
1. Delete Files
Single Delete:
In pause condition -> long press M button to enter menu interface:
Here please short press “ ” button to select single delete -> short press
“M” button to enter -> short press " " or " " button, choose “yes” to
single delete and choose “no” to cancel the deletion.
Delete All:
In pause condition -> long press M button to enter menu interface:
Here please short press “ ” button to select delete all function -> short
press “M” button to enter -> short press " " or " " button, choose “yes” to
delete all and choose “no” to cancel the deletion.
Please Note:
Once you choose “yes”, you can’t cancel it, please backup important files
before you delete. And please note that the more files you delete, the longer
it takes to finish it.
2. Play Settings
In playing condition -> short press M button -> play setting
There are 4 options: “play mode”, “sound settings”, “bookmarks”, “repeat
settings”.
Play mode: Short press “ ” or “ ” button to select the play mode, short
press M button to enter: “Play in order”, “Repeat 1”, “Repeat All”, “Shuffle”,
“View Playing” available;
Sound settings: Short press “ ” or “ ” button to select sound setting,
short press M button to enter: “equalizer” and “variable speed playback”.
(1) Equalizer: Short press “ ” or “ ” button to select equalizer, short press
“M” button to enter, there are Rock, Funk, Hip Hop, Jazz, Classical,

User's manual
10 | P a g e
electronic music sound effects, press “ ” or “ ” button to select, short
press “M” button to confirm.
(2) Variable speed playback: You can adjust the speed of the playing song:
short press “ ” button for fast playback, the higher the level, the faster the
speed; short press “ ” button for slow playback, the higher the level, the
slower the speed.
Please Note:
Lossless music files do not support variable speed playback function; Once
equalizer set, when you play music at variable speed, the product will
automatically turn off the equalizer function.
3. Bookmark
In playing condition -> short press M button -> Bookmarks
There are 3 options: "Add Bookmark", "Go to Bookmark" and "Delete
Bookmark".
(1) Add Bookmark: Short press “M” button to select add bookmarks.
Bookmarks are saved by time HH: MM: SS. Short press “ ” or “ ” button
to select bookmarks and short press “M” button to confirm to add. one audio
file can maximally add up to 10 bookmarks.
(2) Go to Bookmark: Short press “M” button to go to bookmark, short press
“ ” or “ ” button to select the bookmark you want to go to, and press “M”
button to confirm, the audio file currently playing will go directly to the
bookmarked area and resume playing.
(3) Delete Bookmark: Short press "M" button to delete the bookmark, press
" " or " " button to select the bookmark you want to delete, press "M" to
confirm the deletion, at this time, the saved bookmark will be cleared.
4. Repeat Settings
In playing condition -> short press M button -> Repeat setting
After pressing the " " or " " button to select the repeat setting, there are
three options: "Repeat Mode", "Repeat Times", and "Repeat Interval".

User's manual
11 | P a g e
(1)Repeat Mode: Short press " " or " " button to select "Repeat
Mode" and short press "M" button to enter, at this time the screen will
display flashing A, repeat mode starts, and then short press " " to set
repeat starting point A, then on the display B flashes, press “ ” button
again to set the end point B, short press “ ” again to cancel A-B repeat
and exit repeat mode.
(2)Repeat Times: Short press “M” button to enter, short press “ ” or
“ ” button to adjust 1-10 repeat times, short press “M” to confirm
selection.
(3)Repeat Interval: Short press “M” button to enter, short press “ ” or
“ ” button to adjust 1-10 seconds interval value, press “M” to confirm
selection.
System Settings
In pause condition -> long press “M” button to enter the menu interface:
Options as file manager, record setting, system setting, single delete, delete
all and edit file.
1. File Manager
In pause condition -> long press “M” button to enter the menu interface:
Short press “M” button to choose and enter file manager, here you can see
all music lists and all recorded files in “RECORD”.
Short press “ ” or “ ” button to select the file you want to play -> short
press “M” button to confirm -> short press " " button to start playing.
2. Recording Settings
In pause condition -> long press “M” button to enter the menu interface:
Short press “ ” or “ ” button and short press M button to enter options:
folder selection, recording format, recording bit rate, recording source,
segment recording, noise reduction setting, voice control mode, monitor
switch, auto recording, and recording light switch.
(1)Folder Selection:

User's manual
12 | P a g e
Short press “ ” or “ ” button to select a folder among A, B, C, D. Short
press “M” button to confirm, the recorded file will be saved to the folder you
choose. (Each folder can maximally record up to 200 files)
(2)Recording Format:
Short press “ ” or “ ” button to select MP3 or WAV, short press “M”
button to confirm selection of the recording format.
(3)Recording Bit Rate:
Short press “M” button to enter, short press “ ” or “ ” button to select
recording bit rate;
Available MP3 format: 32Kbps, 128Kbps;
Available WAV format: 512Kbps, 1024Kbps, 1536Kbps;
The higher the bit rate, the better the recording quality and the larger the
memory space will be occupied.
Please Note:
For better recording quality, it is recommended to use WAV format and the
maximum bit rate.
(4)Recording Source:
Short press “ ” or “ ” button to select microphone or line-in recording.
Microphone recording: built-in microphone recording;
Line-in recording: external sound source recording. Use audio cable to
connect the voice recorder with an external audio source, and then push the
recording switch “ON” position to start Line-in recording.
(5)Segment Recording:
Short press “ ” or “ ” button to select: close; 30 mins, 60 mins, 90 mins
and 120 mins.
(6)Noise Reduction Setting:
Short press “ ” or “ ” button to select: noise reduction open/close:
Please Note: In noise reduction mode, it is mono recording; turning off noise
reduction is stereo recording.
(7)Voice control mode:

User's manual
13 | P a g e
Short press “ ” or “ ” button to enter options: off / on / voice sensitivity.
After turn on the voice control mode, you will find VOR displaying in the
screen.
Sensitivity 1-4 available, the higher the value, the higher recording
sensitivity.
Please Note:
In noise condition, please set sensitivity low;
In quiet condition, please set sensitivity high.
(8)Monitor switch:
Short press “ ” or “ ” button to select recording monitoring on or off.
(9)Timer recording:
Short press “ ” or “ ” button to select four options: timer recording (on /
off), timer recording cycle, starting time, ending time.
(10) Recording light switch:
Short press “ ” or “ ” button to select: on, off; turn off the recording
indicator for longer recording time.
3. System Settings
In pause condition -> long press “M” button to enter the menu interface:
Short press " " or " " button to select "System Settings" and press "M"
button to enter: backlight time, brightness, time and date, language,
password settings, disk space, product information, formatting device,
factory setting.
(1)Backlight Time:
Short press "M" button to enter the settings: 10 seconds / 20 seconds / 30
seconds / 60 seconds and always on function.
In order to save power, please do not set the backlight to always on mode.
(2)Brightness:
Press "M" button to enter to set 0-11 level brightness.

User's manual
14 | P a g e
The higher the level, the greater the brightness and more power
consumption.
(3)Time and Date:
After pressing the “M” button for a short time, you can manually adjust the
time and date. After entering the time setting interface, press the volume “+”
or “-” button to switch between hours and minutes, press the “ ” or “ ”
button to switch the value, and press “M” button to confirm the selection.
After entering the date setting mode, press the volume “+” or “-” button to
switch the year, month, and day, press the “ ” or “ ” button to switch the
value, and press the “M” button to confirm the setting.
(4)Language:
Short press "M" button to choose language.
(5)Password Settings:
After short pressing “M” button to enter: password switch and reset
password.
Password switch: ON or OFF.
After you turn on password function, you are requested to tap the
combination before entering the device.
Reset password:
If you need to reset the password, you need to enter the password you’ve
set first (the default password is 0000);
How to set password?
Short press “Volume +” or “Volume -” button set the value, and short press
“ " Or " " button to switch between the value.
After setting, short press “M” button to confirm the new password.
If you forget the password, you can enter 8888 to unlock it.
(6)Disk Space:
Enter the disk space to view the total disk space and available disk space of
the device.

User's manual
15 | P a g e
(7)Player Information:
After entering player information settings, player information and software
version can be viewed.
(8)Formatting Device:
After short pressing "M" button to enter, you will see "All data will be deleted,
whether to continue", then short press " " or " " button to select "Yes" or
"No" to format the product.
Note: After formatting, all file information in the memory will be empty and
can’t be restored. Please remember to backup!
(9)Factory Setting:
Short press “M” button enter the screen, you will see prompt asking whether
to restore to the factory settings, press “ ” or “ ” button to select “Yes” or
“No”.
4. Edit File
Short press “ ” or “ ” button to select “Edit File” and short press “M”
button to enter: cut file, divide file, insert in file, seamless recording.
(1)Cut File:
Short press “M” button to confirm cutting. The recorder will save the previous
recorded file at a certain point in time and automatically delete the later
recorded file.
(2)Divide File:
Short press “M” button to confirm splitting. The device divides single
recorded file into two files to save.
(3)Insert in file:
Short press “M” button to confirm the insertion, the device will insert another
segment of the recorded file in the selected recorded file; short press "Back"
button to save the insertion.
(4)Seamless Recording:
Short press "M" button to confirm the insertion. This device connects the end
of a certain recorded file and the beginning of a new recorded file to merge
into a single recorded file.

User's manual
16 | P a g e
Note: Files that have been edited do not support second editing!
5. Recording Specification
WAV Format
8GB/16GB
1536Kbps
1024Kbps
512Kbps
Duration (M)
720/1440
1080/2160
2160/4320
MP3 Format
8GB/16GB
128Kbps
32Kbps
Duration (M)
8730/17460
34560/69180
Please Note: The above recording duration is the maximum recording
duration of the storage capacity of the device, not the continuous recording
time of the battery.
Connecting to computer and charge
1. Connect with Computer
You can use the included cable to connect this voice recorder with computer.
This device will be recognized as "removable disk" device. After successful
connection, you can manage and operate the files in the device.
2. Battery and Charging
This device has built-in lithium polymer battery. If you use an adapter for
charging. Please choose maximum output of 5V, 500MA adapter for
charging, you can also charge the device via a USB cable. The battery is
fully charged in about 2 hours.

User's manual
17 | P a g e
Specification
Product Name
HD Lossless Voice Recorder
Storage Capacity
Built-in 8G/16G flash memory
(FLASH)
LCD
Size: 0.96 inches
Resolution: 80 * 160 TFT display
Battery
Built-in lithium battery: 3.7V 240mAh
Microphone
Built-in microphone: 2pcs
condenser microphones
Signal to noise ratio (SNR)
≥85dB
Support Compression Rate
WAV supports up to 24bit 48KHz,
APE / FLAC supports up to 16bit
48KHz
Recording Quality
1536Kbps/1024kbps/512kbps/
128kbps / 32kbps
Recording Format
WAV/MP3
Recording Sample Rate
8KHZ~48KHZ
File System
FAT32
Operating Temperature
-5°C~40°C
Connection Method
Standard MICRO USB interface

User's manual
18 | P a g e
For any operational problem, please refer to our Youtube video instruction:
https://bit.ly/332B1m1, you can also contact us: help@surfans.net
Transmission Interface
USB 2.0
System Support
Windows XP/VISTA/Windows 8
Dimension
100mm * 25.6mm * 11.6mm
Continuous Working Duration
(under room temperature)
Lithium battery lasts about 11 hours
(Backlight setting 30 seconds, WAV
1536Kbps)
Continuous Playback Duration
About lasts 13 hours for fully
charged (backlight setting 30
seconds volume 20 headphones
playback)
Supporting Language
English; German; French; Italian;
Japanese; Portuguese; Spanish;
Korean; Simplified Chinese;
Traditional Chinese; Arabic; Russian
Net Weight
45g (including battery)
Table of contents

