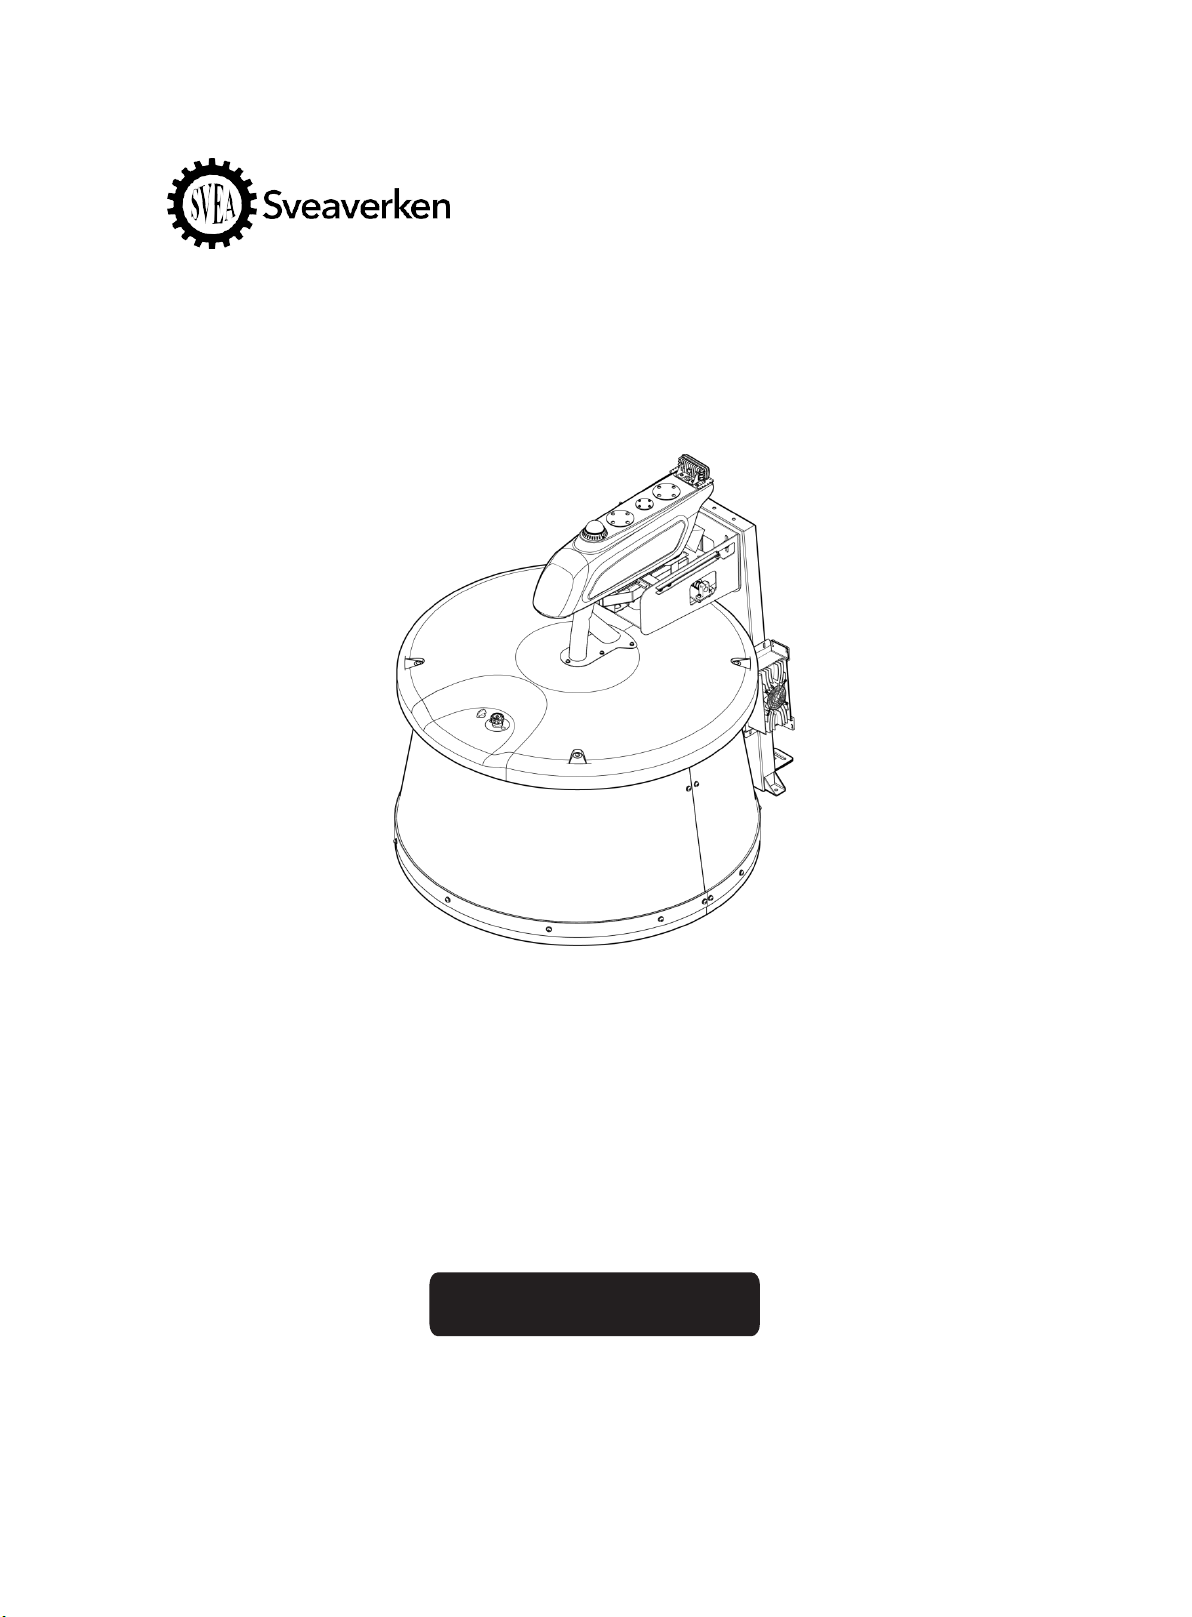
RoboPusher Nimbo User Manual
Without the written permission of Sveaverken, no organization or individual shall transcribe or copy the
whole or any part of this manual, or disseminate it in any form.
Contents
1.About the Manual ................................................................................... 1
2.Product Introduction ............................................................................... 1
2.1. Application ................................................................................................ 1
2.2. Overview ................................................................................................... 1
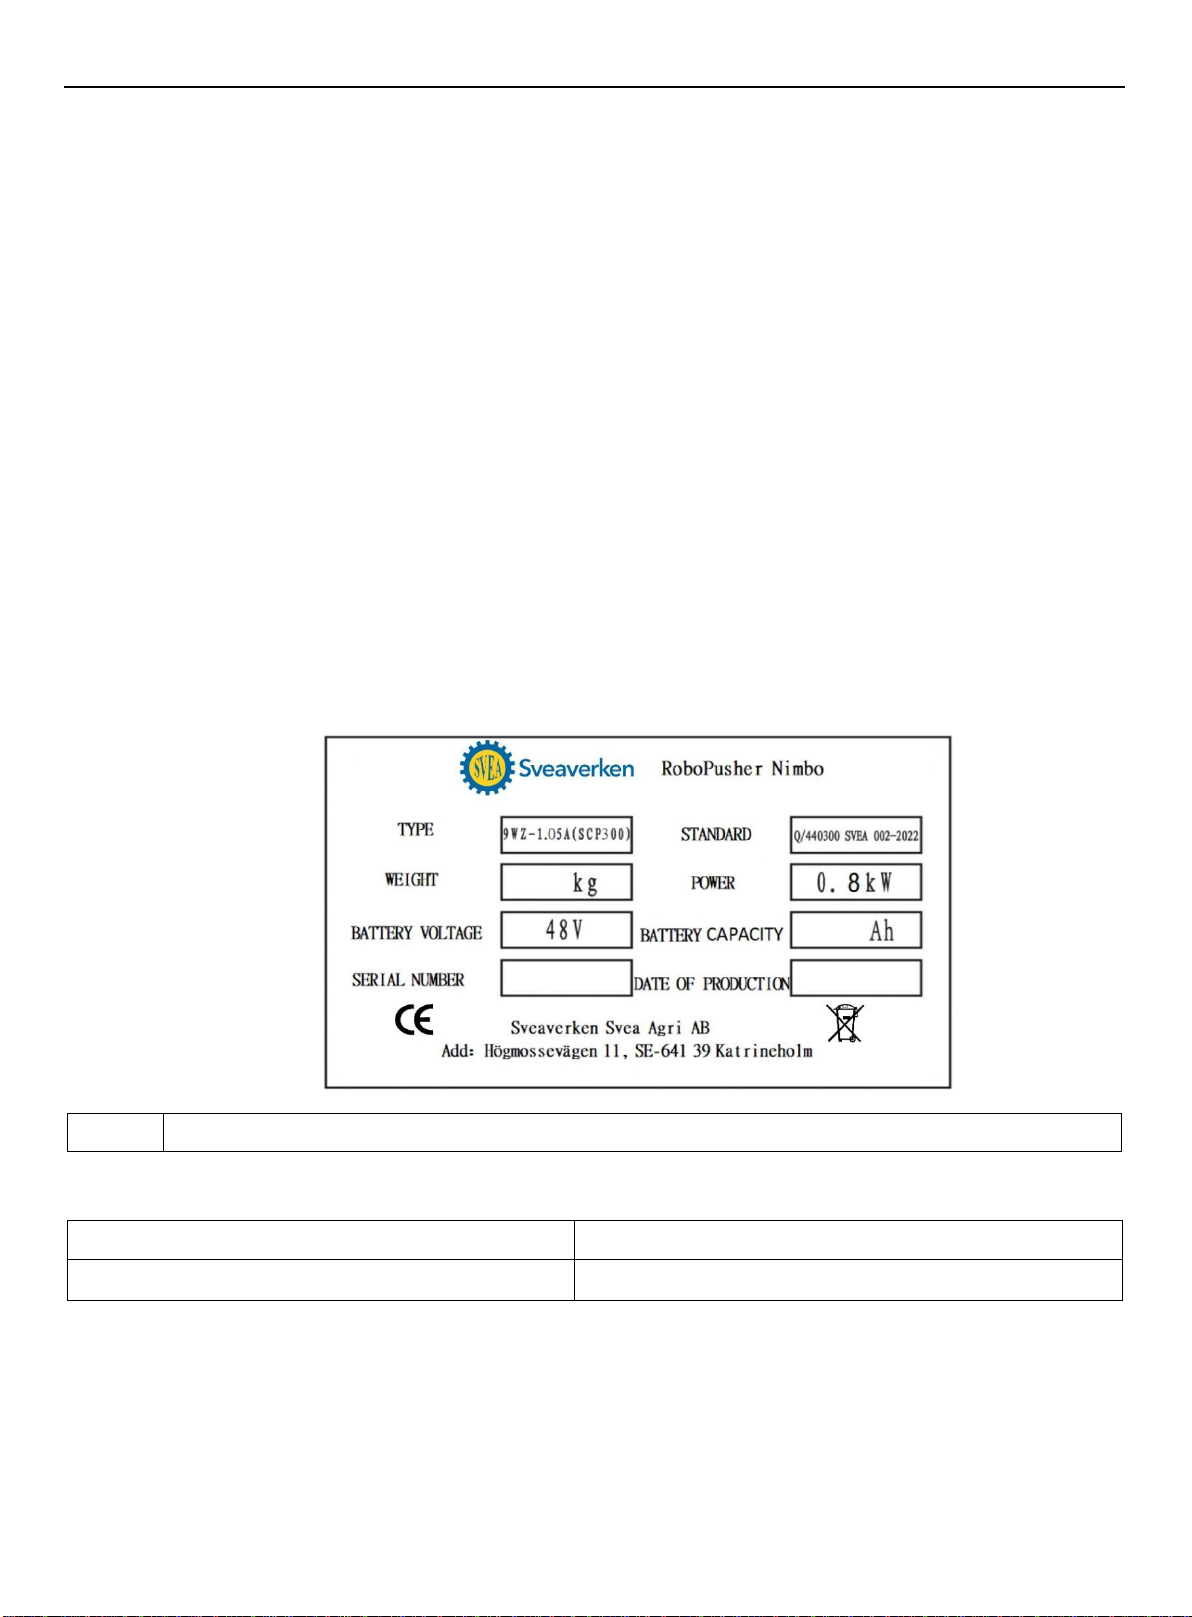
2.3. Nameplate .................................................................................................. 1
2.4. Standard Compliance ........................................................................................ 1
3.Safety Instructions ................................................................................ 1
3.1. Electrical Safety .......................................................................................... 1
3.2. Operation Safety ........................................................................................... 2
3.3. Maintenance Safety ......................................................................................... 2
4.Specifications ..................................................................................... 3
5.Robot Information .................................................................................. 4
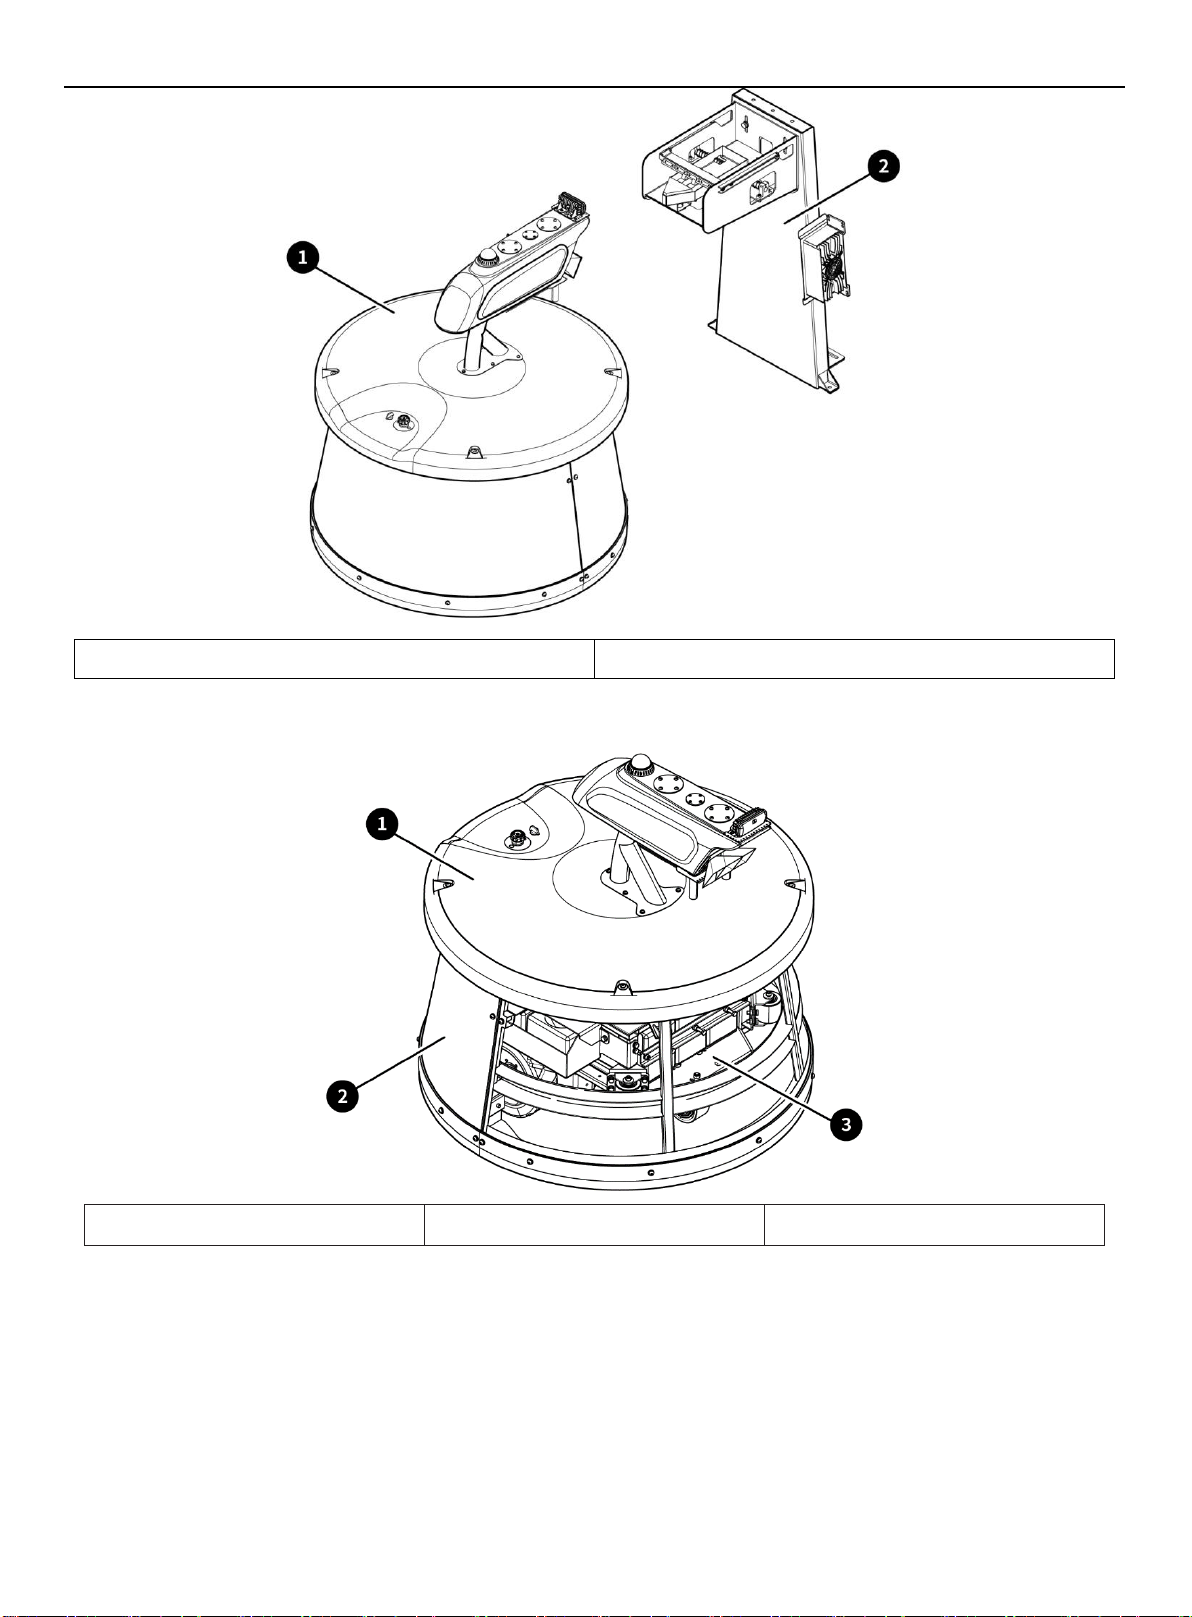
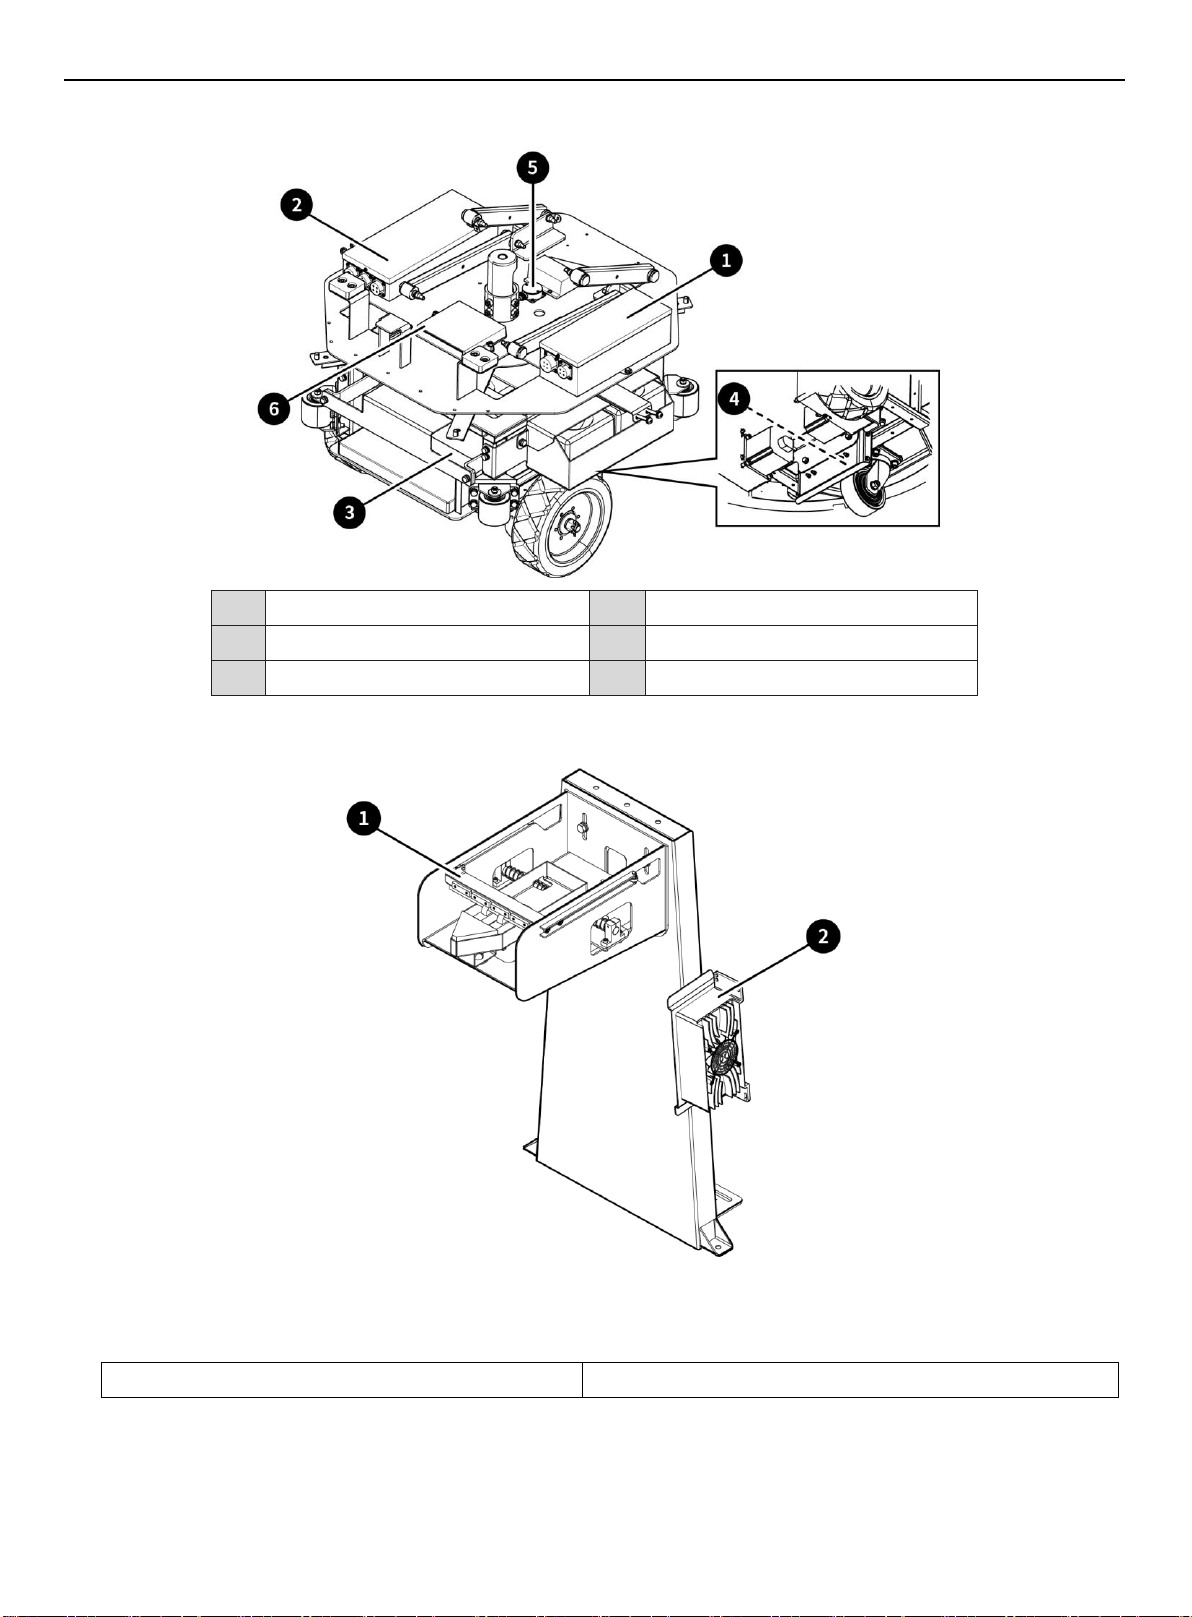
6.Composition ........................................................................................ 4
6.1 Assembly .................................................................................................... 4
6.2 Feed Pushing Robot .......................................................................................... 5
6.3 Charging Pile ............................................................................................... 7
7.Software Operation ................................................................................. 8
7.1 Connecting to Robot ......................................................................................... 8
7.2 Logging In .................................................................................................. 9
7.3 Modules ..................................................................................................... 9
8.Installation and Commissioning .................................................................... 19
8.1 Deployment of Travel Routes ................................................................................ 19
8.2 Installation of Charging Pile .............................................................................. 19
8.3 Commissioning .............................................................................................. 19
8.4 Loading and Unloading ...................................................................................... 20
9.Maintenance ....................................................................................... 20
10. Transportation and Storage ...................................................................... 20
11. Troubleshooting ................................................................................. 21
12. Waste Disposal .................................................................................. 21
13. After-sales Service ............................................................................. 22
14. Manufacturer .................................................................................... 22