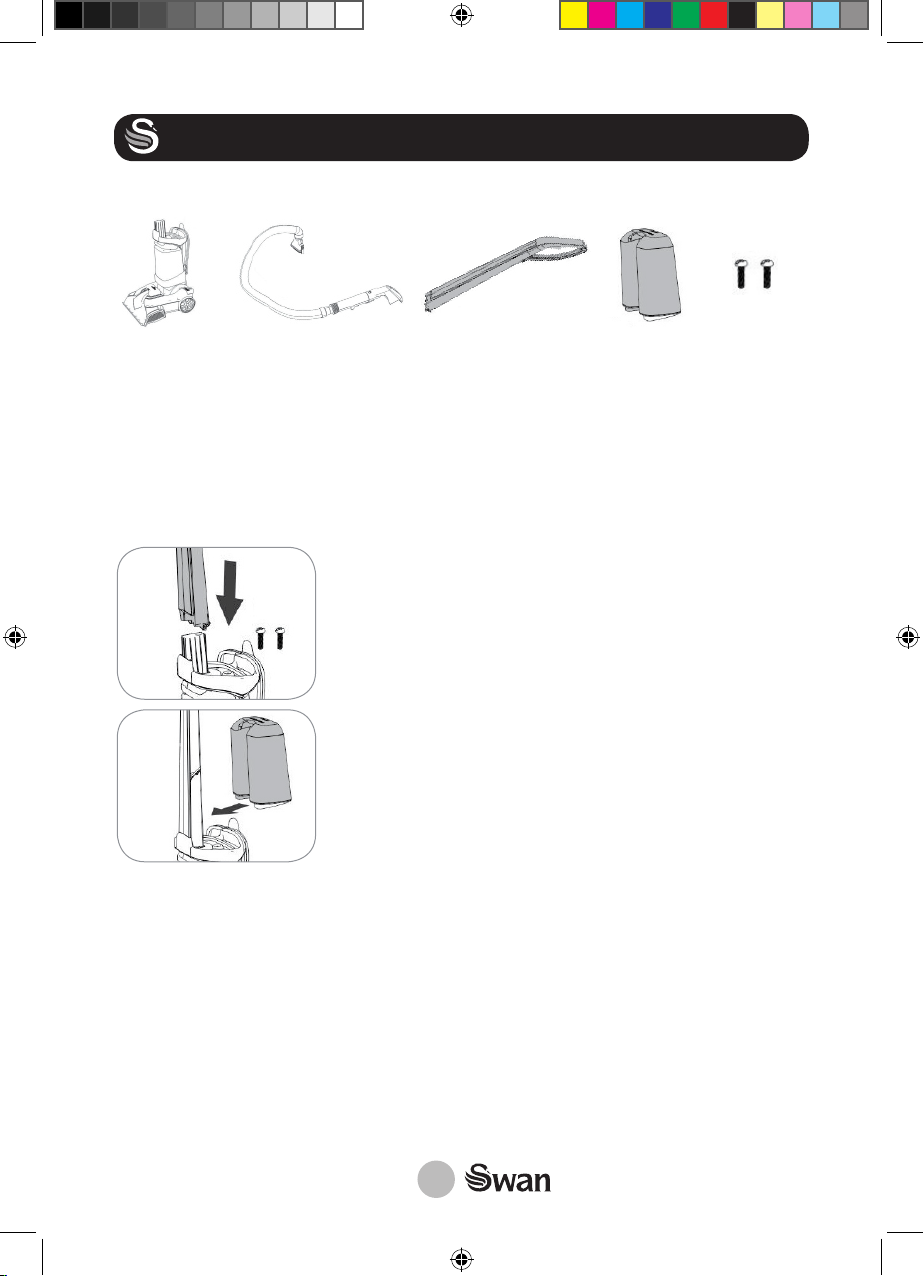
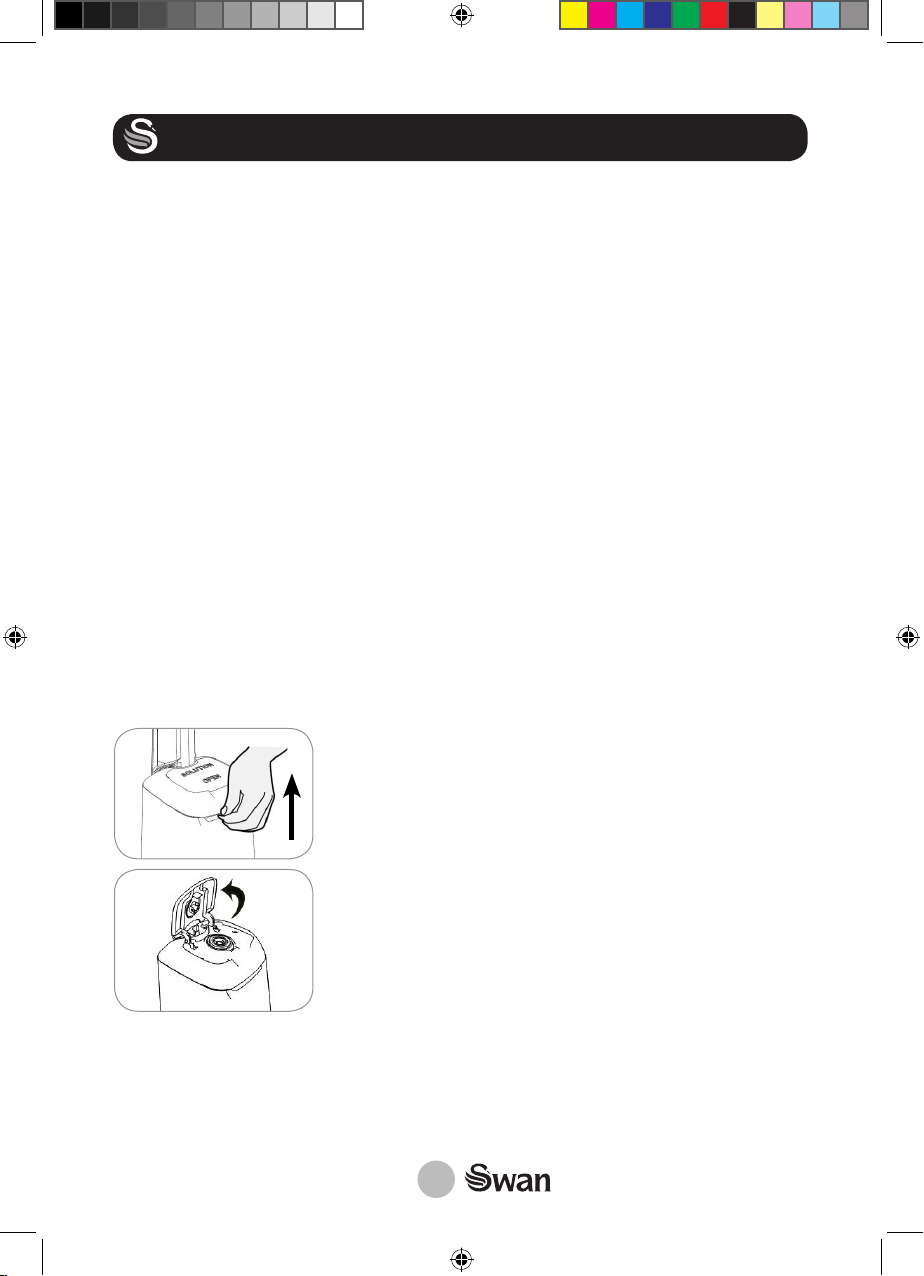
Swann Dirtmaster Pro SC17320N User manual

2 Litre
Smart Clean
Carpet Washer
Pet & Extend
Model: SC17320N
Help line
0333 220 6050
v1.0
SC17320N_IMindd.indd 1 27/02/2019 08:35

2
The device is designed to be used for removing light levels of
dirt on carpets and upholstered furniture and for freshening
up carpets and upholstered furniture. It is not a substitute for
a conventional vacuum cleaner. Before using the device, the
carpet or upholstered furniture which is to be treated must be
thoroughly cleaned with a vacuum cleaner. The device is also
suitable for use on tiles, stone floors and PVC.
On no account should the device be used to suck up the following:
• Glowing ash, cigarette ends, matches, etc.
• Inflammable or explosive substances
• Very fine dust (e.g. concrete dust), toner or sand
• Pointed, hard objects such as pieces of broken glass
The device is designed for personal use only and is not intended
for commercial applications.
The device should only be used as described in these instructions.
Any other use is deemed to be improper.
The warranty does not cover faults caused by incorrect handling,
damage, lime scale build-up or repair attempts. This also applies
to the normal wear and tear of the individual components.
• This device may be used by children aged 8 and over and by
people with reduced physical, sensory or mental abilities or a
lack of experience and/or knowledge if they are supervised
or have received instruction on how to use the device safely
and have understood the dangers resulting from failure to
comply with the relevant safety precautions.
IMPORTANT INFORMATION - RETAIN FOR FUTURE USE
SC17320N_IMindd.indd 2 27/02/2019 08:35

3
IMPORTANT INFORMATION - RETAIN FOR FUTURE USE
• Children must not play with the device.
• Cleaning and user maintenance may not be carried out by
children.
• Children younger than 8 years of age and animals must be
kept away from the device and the connecting cable!
• Improper use can lead to injuries and electric shock.
• The device must always be disconnected from the mains
power when it is left unattended and before assembly,
dismantling, before you pour water into the water tanks or
empty them, and before cleaning.
• If the device, the connecting cable or the mains plug of the
device is damaged, it must be replaced by the manufacturer
or customer service department or a similarly qualified
person (e.g. specialist workshop) in order to avoid any
hazards.
• Make sure that the connected mains cable does not present
a trip hazard.
• Use the device only in closed rooms.
• Only connect the device to a properly installed plug socket.
The plug socket must also be readily accessible after
connection so that the connection to the mains can quickly
be isolated. The mains voltage must match the technical
data of the device. Only use suitable extension cables whose
technical data is the same as that of the device.
• Never immerse the device, mains cable or mains plug in
water or other liquids and ensure that they cannot fall into
water or become wet.
• Should the device fall into water, switch off the power supply
immediately. Do not attempt to pull the device out of the
SC17320N_IMindd.indd 3 27/02/2019 08:35

4
water while it is still connected to the mains power!
• Never touch the device, mains cable or mains plug with wet
hands when these components are connected to the mains
power.
• In the interest of your own safety, you should therefore
inspect the device for damage each time before you use it.
Only use it if the device, mains cable and mains plug have no
signs of damage.
• Always pull the mains plug and never the mains cable.
• Store the device only in dry indoor rooms.
• Do not operate the device in a very damp environment.
• Make sure that the device does not roll over the mains cable
(danger of the cable breaking).
• Do not use the device in rooms containing easily ignitable
dust or poisonous and explosive fumes.
• Switch off the device and pull the mains plug out of the
plug socket if an error occurs during operation or before a
thunderstorm.
• Do not operate the device in the vicinity of combustible
material.
• Do not insert anything into the openings of the device and
make sure that these do not become clogged so that the
circulation of air is not impeded.
• Use the device only when it is completely assembled and the
mains cable is completely unwound. The fresh water and
dirty water containers must be inserted.
• Make sure that the device does not tip over. The water from
the water containers could spill out.
• Do not use any sharp or pointed objects to remove foreign
bodies from the device. These could damage the device.
IMPORTANT INFORMATION - RETAIN FOR FUTURE USE
SC17320N_IMindd.indd 4 27/02/2019 08:35

5
IMPORTANT INFORMATION - RETAIN FOR FUTURE USE
• After use, place the device down on a cloth as residual water
may escape from the nozzles after it has been switched off.
• Maintain a sufficient distance from heat sources and naked
flames in order not to damage the device.
• Do not drop the device or subject it to heavy impacts.
• Use only original spare parts from the manufacturer.
• Only ever pour the cleaning agent supplied with the device
or standard carpet cleaning products for carpet cleaners
into the fresh water container.
• Never fill the water containers beyond the maximum fill level.
• Always test the cleaning at a small spot first to check the
colourfastness.
DOMESTIC INDOOR USE ONLY
SPECIFICATION OVERVIEW
Clean tank capacity: 2.1 litres
Dirty water tank capacity: 1.6 litres
Motor power: 700 Watts
Voltage: 220-240V AC 50/60Hz
Cord length: 7 metres
Upholstery hose length: 2.8 metres
Vacuum power: 11KPA
Max air flow: 16.5 litres per second
SC17320N_IMindd.indd 5 27/02/2019 08:35

6
PRODUCT OVERVIEW
1
2
3
4
8
7
6
5
17
16
15
14
13
9
10
11
12
1. Handle
2. Fresh water container
3. Handle of the dirt container
4. Mains cable
5. Carpet brush (under the main unit
6. Carpet suction nozzle
7. Closure cap of the hose connection
8. Dirty water container
9. Closure cap of the fresh water con-
tainer
10. Upper hook for winding up the cable
11. Lower hook for winding up the cable
12. On / Off switch
13. Pedal for tipping the handle
14. Container support
15. Release lever for the fresh water
container
16. Cable mount
17. Button for dispensing water or cleaning
solution
SC17320N_IMindd.indd 6 27/02/2019 08:35

7
BEFORE FIRST USE
Included with product:
Main unit 2.8m Upholstery
nozzle with hose
1 x handle 1 x water tank 2 x screws
(mounted
on main
unit)
Unpack the product and remove all packaging. Check that the above components
are all included. Now to fit the handle to the main unit. You’re going to need a cross-
head screwdriver.
Insert the handle (1) into the opening of the container sup-
port (14) and align it so that the curved end of the handle
(1) points towards the back of the device. Fix the handle
(1) in place using the two screws.
Insert the fresh water container (2) into the container
sup- port (14). When you do this, make sure that the
locking lugs on the fresh water container (1) fit in the
recesses in the container support (14). Press the fresh
water container (2) against the handle (1) until you hear it
engage.
The dirty water container (8) is already inserted in the main unit.
SC17320N_IMindd.indd 7 27/02/2019 08:35

8
HOW TO USE
Preparing the Carpet
1. Vacuum the carpet or upholstered furniture which is to be cleaned thoroughly
with a vacuum cleaner. If possible, use a brush attachment to do this.
2. If possible, remove all furniture from the carpet. In the case of large items of
furniture which cannot be moved to one side, place plastic film below or around
the feet and only remove it once the carpet has completely dried after it has
been cleaned. The feet could be damaged by the moisture from the carpet.
3. Check the colourfastness of the carpet or upholstered furniture. Soak a piece of
white fabric with the cleaning solution supplied (see the “Preparing the Device /
Filling the Fresh Water Container” section) and rub it carefully on an inconspicu-
ous spot on the carpet. If the white fabric does not become discoloured, the
carpet or upholstered furniture can be cleaned with the device. In the case of
carpets or upholstered furniture with several colours, test the fastness of each
colour.
Preparing the Device / Filling the Fresh Water Container
CAUTION: Only ever pour the cleaning agent supplied with the device or standard
carpet cleaning products for carpet cleaners into the fresh water container. Do not
use any cleaning products that produce a lot of foam as excessive foaming impedes
the functioning of the device.
1. Press the release lever of the fresh water container (15)
upwards. The fresh water container (2) is released from
the locking mechanism.
2. Remove the fresh water container (2) from the device.
3. Flip open the seal cap of the fresh water container (9) and
pour in carpet cleaning agent. Note the dosing instructions
for the cleaning agent when you do this. Typically 50ml
of solution to 500ml of water. It is important to put the
water in first, then add the solution. Then give the tank a
shake to mix it.
4. Fill the fresh water container (2) up to the Max mark with
warm water (max. 40°C). Close the seal cap again.
5. Insert the fresh water container (2) into the container sup-
port (14) (see the “Before Initial Use” chapter).
SC17320N_IMindd.indd 8 27/02/2019 08:35

9
CLEANING
ATTENTION
• Never leave the device switched on when it is unsupervised.
• Switch off the device before a water container is removed.
• Make sure that the device does not tip over. The water from the water containers
could spill out. To park the device, move the handle to the vertical position in which it
engages.
• Do not wet the carpet or the upholstered furniture excessively.
• If the device switches off during use, the built-in overheating protection has been
activated. In this case, let the device cool down for approx. 60 minutes and then
switch it on again using the On/Off switch.
Cleaning the Carpet
1. Decide where cleaning should start and where it should stop so that you do not
step on the carpet which has already been cleaned. We recommend that right-
handed people should start at the right-hand edge of the carpet, and left-handed
people should start at the left-hand edge of the carpet. Cleaning solution may still
escape from the device even after it has been switched off. Therefore have a
towel or cloth ready on which the device can be placed down after use.
2. Fully unwind the mains cable from the hook for winding up the cable (10, 11), insert
it into the cable holder (16) and connect it to an easily accessible plug socket whose
main voltage matches the technical data of the device.
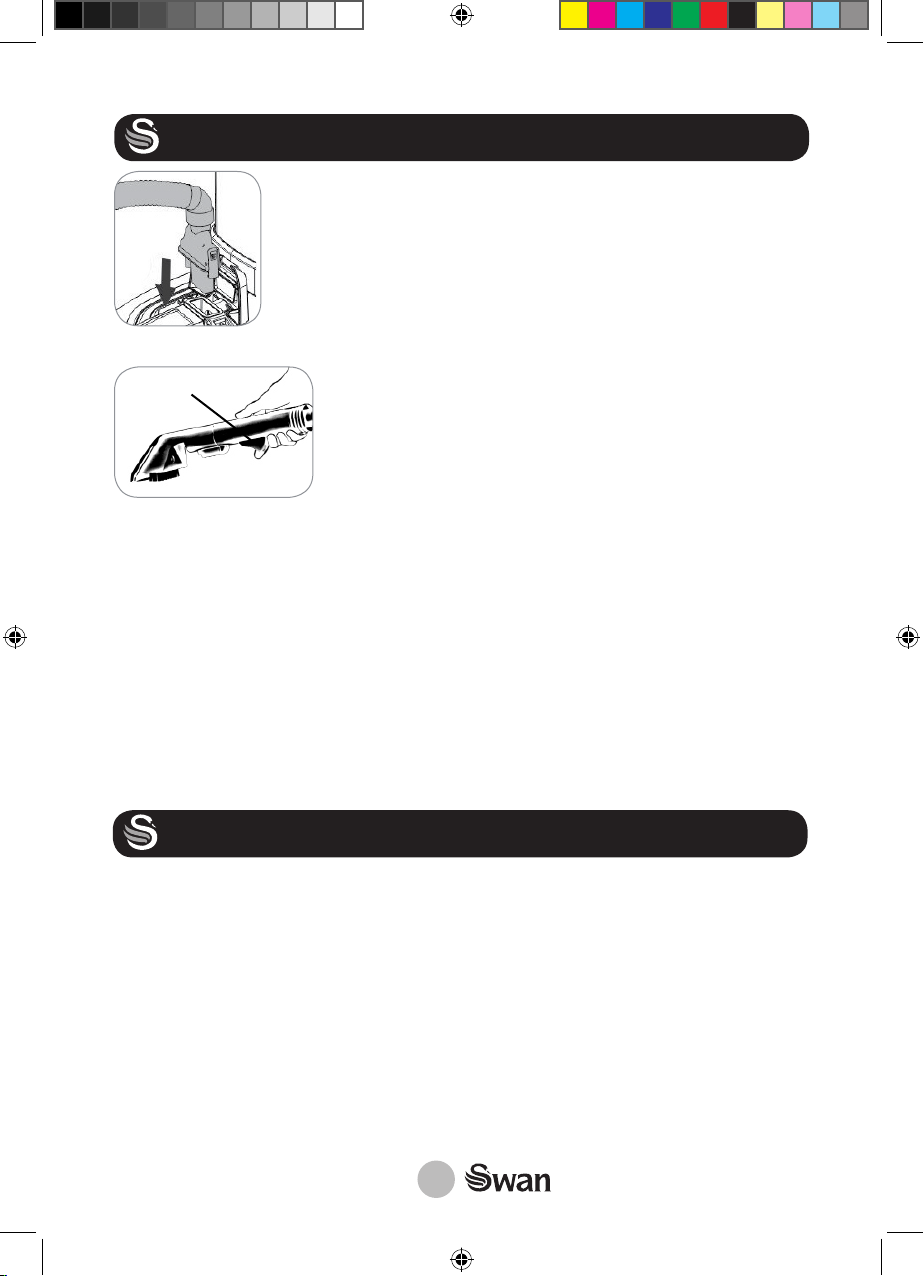
3. Step on the pedal for tipping the handle (13) and tilt the handle (3) towards you.
4. Step on the On/Off switch (12) to switch on the device.
5. Roll the device to a corner of the carpet.
6. Slide the device forwards along the edge of the carpet and hold down the button for
discharging the cleaning solution (17). This applies the solution to the carpet and
brushes it in. Walk to the side of the device as you do this. Do not tread on the wet
carpet! Once you have reached the other end of the carpet, let go of the button.
7. Pull the device backwards along the same strip. The dirty water will be sucked up.
8. Start the next strip slightly overlapping the strip of carpet that has just been
cleaned. Work up to the other edge of the carpet with even movements forwards
and back- wards. If you find more stubborn patches of dirt, go over a strip several
times if necessary.
9. Move slowly to give the machine a chance to do its work. About half the speed of
a vacuum cleaner
10. When the dirty water container (8) is filled to the Max marking, it must be emptied
(see the “After Use” chapter, “Cleaning the Water Containers” section).
11. When the dirty water container (8) is to be emptied, the fresh water container (2)
is to be topped up or the cleaning is to be finished, place the device on the towel or
cloth provided. Switch off the device by stepping on the On / Off switch (12), and
move the handle (1) to a vertical position.
12. Remove the mains plug from the plug socket.
SC17320N_IMindd.indd 9 27/02/2019 08:35

10
CLEANING
A
1. Use the upholstery nozzle for cleaning upholstered furniture.
To do this, first flip up the closure cap of the hose connection
(7), place the end of the hose onto the connection and press this
down firmly until you feel it engage.
2 Step on the On/Off switch (12) to switch on the device.
3. Pull the upholstery nozzle along the edge of the
upholstered furniture and hold down the button for
dispensing the cleaning solution on the handle of the
upholstery nozzle (A) (see picture). Let go of the button (A)
at the other end of the strip.
4. Pull the upholstery nozzle over the same strip. The dirty water will be sucked up.
5. Continue in the same way as with carpet cleaning (see the “Use” chapter,
“Cleaning the Carpet” section).
After Use
• Empty both water containers after each use.
• Allow the freshly cleaned surfaces to dry completely.
• If possible, do not tread on the carpet while it is still damp. If it has to be
trodden on, put down white or colourfast towels and tread on them.
• If cleaning solution has got onto wooden floors or furniture, wipe it away.
• Vacuum the dry carpet or upholstered furniture with a vacuum cleaner. If
possible, use a brush attachment to do this.
CLEANING THE DEVICE
Remove the mains plug from the plug socket before cleaning the device.
• Do not use any chemical cleaning agents to clean the device. These may dam-
age it.
• Before the device can be stored away, the water containers must be emptied
and rinsed out.
SC17320N_IMindd.indd 10 27/02/2019 08:35

11
CLEANING THE DEVICE
Cleaning the water containers
B
C
D
1. Make sure the plug has been pulled out
2. Empty the dirty water container (8). To do this, press
down the handle of the dirty water container (3) and
pull it (8) forwards out of the main unit (see picture).
3. Pull the silicone cap of the dirty water container (B)
upwards.
4. Pour away the dirty water and rinse out the dirty wa-
ter container (8) thoroughly with warm water.
5. Remove the fresh water container (2) from the con-
tainer support (14) (see the “Pre- paring the Device /
Filling the Fresh Water Container” section) and pour
away the rest of the cleaning solution. Rinse out the
fresh water container (2) thoroughly with warm water.
6. Allow all parts to dry completely before assembling them.
7. Insert the fresh water container (2) back into the device (see the “Before Initial
Use” chapter).
8. Press the silicone cap firmly onto the dirt container (8) and insert the dirty
water container (8) into the main unit. When you do this, make sure that the
recess on the dirty water container (8) fits in the frame of the main unit. Press
the dirty water container (8) against the frame of the main unit until you hear it
engage.
B
C
D
Cleaning the carpet suction nozzle
1. After cleaning a carpet, clean the carpet suction
nozzle (6). To do this, flip up the closure cap of the
hose connection (7). Grip hold of the upper end of the
carpet suction nozzle (6), pull it up and remove (see
picture).
2. Rinse out the carpet suction nozzle (6) thoroughly
with warm water.
3. Allow the carpet suction nozzle (6) to dry completely
and insert it back into the main unit. To do this, place
the locking lugs of the carpet suction nozzle (6) into
the recess- es on the main unit and press down the
carpet suction nozzle (6). It must engage audibly.
1. For cleaning the carpet brush (5) place the device on the floor so that the bot-
tom of the device is accessible. Attention! Make sure you empty the water
containers prior to cleaning.
2. Press together the locking device (C, D) and pull out the carpet brush (5) (see
picture).
SC17320N_IMindd.indd 11 27/02/2019 08:35

12
CLEANING THE DEVICE
3. Rinse out the carpet brush (6) thoroughly under warm, running water.
4. Allow the carpet brush (5) to dry completely and
insert it back into the main unit. Make sure it is in the
correct position (see picture). Press together the
locking device and press it into the recess on the bot-
tom of the main unit. It must engage audibly.
E
F
Cleaning the Upholstery Nozzle
E
F
1. Clean the upholstery nozzle. To do this, press the
button on the base of the upholstery nozzle (E) and
detach the it from the hose (see picture).
2. If necessary, remove the brush insert from the uphol-
stery nozzle. To do this, press down the button on the
bottom of the upholstery nozzle (F) and pull out the
brush insert
3. Rinse out the upholstery nozzle and brush insert
thoroughly with warm water.
4. Allow all parts to dry completely before assembling
them.
TROUBLESHOOTING
Problem Cause/Solution
The device does not work. • Is the plug inserted in the socket correctly?
• Is the socket defective? Try another plug
socket.
• Check the fuse of the mains connection.
• Has the overheating protection been acti-
vated? Let the device cool down for approx. 60
minutes and then switch it on again using the
On/Off switch.
The stain is not removed. • The stain is too stubborn or too old. Treat
the stain specifically with a carpet cleaning
product.
SC17320N_IMindd.indd 12 27/02/2019 08:35

13
SPARES
Please refer to the diagram below and quote appropriate part number when order-
ing from our web site:
www.swan-brand.co.uk
SC17320N-01
Handle
SC17320N-02
Screws
SC17320N-03
Clean water tank
SC17320N-04
Dirty water tank
SC17320N-05
Upholstery hose
SC17320N-06
Upholstery nozzle
SC17320N_IMindd.indd 13 27/02/2019 08:35

14
CLEANING SOLUTION
We recommend Swan Dirtmaster Carpet Detergent, which has be specially formu-
lated for use in our carpet washers. It can be purchased from Swan on line at:
www.swan-brand.co.uk
SC17320N_IMindd.indd 14 27/02/2019 08:35

15
DISPOSAL OF UNIT
Appliances bearing the symbol shown here may not be disposed of in domestic rubbish. You
are required to dispose of old electrical and electronic appliances like this separately.
Please visit www.recycle-more.co.uk or www.recyclenow.co.uk for access to information
about the recycling of electrical items. Please visit www.weeeireland.ie for access to information
about the recycling of electrical items purchased in Ireland. The WEEE directive, introduced in
August 2006, states that all electrical items must be recycled, rather than taken to landfill. Please arrange
to take this appliance to your local Civic Amenity site for recycling, once it has reached the end of its life.
The wires in the mains lead are coloured in accordance with the following code:
BLUE NEUTRAL
BROWN LIVE
As the colours of the wire in the mains lead of this appliance may not correspond with the colour markings
identifying the terminals on your plug, proceed as follows:
The wire which is coloured BLUE must be connected to the terminal which is marked with the letter N or
coloured black. The wire which is coloured BROWN must be connected to the terminal which is marked
with the letter L or coloured red.
THIS PRODUCT IS DOUBLE INSULATED. WARNING: DO NOT CONNECT ANY WIRE TO THE EARTH
TERMINAL
BS PLUG
WARRANTY
This product is guaranteed for 2 years from the date of original purchase. If any defect arises due to faulty
materials of workmanship the faulty products must be returned to the place of purchase. Refunds or
replacement is at the discretion of the store.
The following conditions apply:
• The product must be returned to the retailer with proof of purchase.
• The product must be installed and used in accordance with the instructions contained in this
instruction guide.
• It must be used only for domestic purposes.
• It does not cover wear and tear, damage, misuse or consumable parts.
• Swan Products Ltd has limited liability for incidental or consequential loss or damage.
• This guarantee is valid in the UK and Eire Only.
SC17320N_IMindd.indd 15 27/02/2019 08:35

www.swan-brand.co.uk
Copyright © Swan Products Ltd.
PO Box 3117, Stoke-on-Trent ST4 9GD
Est.1931
We love
what we do
s
2year
GUARANTEE
we’re proud
of our quality
Scan this QR code
to hear about
our story
Find us on Facebook
*
* on selected products
SC17320N_IMindd.indd 16 27/02/2019 08:35
This manual suits for next models
1
Table of contents
Other Swann Vacuum Cleaner manuals

Swann
Swann SU3017 User manual

Swann
Swann SC11052 User manual

Swann
Swann SU3021 User manual

Swann
Swann Eureka TURBO POWER SC15830N User manual

Swann
Swann SC4010N User manual

Swann
Swann SC1115 User manual

Swann
Swann Lynsey SC18410QOCN User manual

Swann
Swann eureka POWER TURBO SC15824N User manual

Swann
Swann Eureka SC15836N User manual

Swann
Swann SC1111 User manual