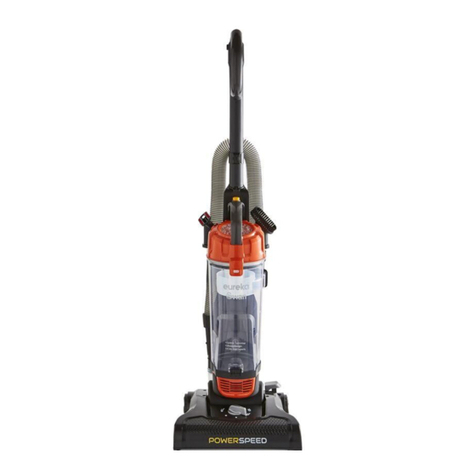
Swann Eureka TURBO POWER SC15830N User manual

Model: SC15830N
TURBO POWER PET
Model: SC15832N
TURBO POWER PET EXTEND
Model: SC15834N
Help line: 0333 220 6050
v1.0
TURBO POWER UPRIGHT VACUUM
SC15830_32_34_IM.indd 1 14/01/2019 11:16

2
When using an electrical appliance, basic precautions should always be followed, including the following:
READ ALL INSTRUCTIONS BEFORE USING THIS VACUUM CLEANER
Failure to follow the warnings and instructions may result in electric shock, fire and/or serious injury.
WARNING
IMPORTANT SAFEGUARDS
!Follow caution information wherever you see this symbol.
This vacuum cleaner is intended for household use only and NOT for
commercial or industrial use.
• Only use the vacuum cleaner indoors on dry surfaces and keep the
area you’re cleaning well lit.
• Keep fingers, hair and loose clothing away from moving parts and
openings whilst using the vacuum cleaner.
• Use only Eureka | Swan recommended tools and accessories with
this vacuum cleaner.
• Don’t use the vacuum cleaner if it has been dropped, damaged or
left outdoors.
• Don’t run over the power cord or use the vacuum cleaner if the
power cord or plug is damaged.
• Don’t handle the plug or use the vacuum cleaner with wet hands.
• Don’t pull or carry the vacuum cleaner by the power cord.
• Don’t use the power cord as a handle, pull the power cord around
corners, sharp edges or close a door over the power cord.
• Don’t unplug vacuum cleaner by pulling on the power cord.
• Turn off all controls on the vacuum cleaner before disconnecting or
connecting the power cord.
• Always make sure the filters are in place before use.
• Always switch off the vacuum cleaner before disconnecting or
connecting the hose and accessories.
• Keep all openings clear and free from debris as this may affect the
air flow/suction.
• Always replace the fuse in the plug with a British 13 amp fuse.
SC15830_32_34_IM.indd 2 14/01/2019 11:16

3
IMPORTANT SAFEGUARDS
• Always protect the power cable from heated surfaces and open
flames.
• This appliance can be used by children aged from 8 years and above
and persons with reduced physical, sensory or mental capabilities
or lack of experience and knowledge if they have been given
supervision or instruction concerning use of the vacuum cleaner in
a safe way and understand the hazards involved. Children shall not
play with the vacuum cleaner. Cleaning and user maintenance shall
not be made by children without supervision.
• Don’t vacuum up any flammable or combustible materials (lighter
fluid, petrol, kerosene etc.) or use the vacuum cleaner in an area
with explosive vapours or liquid.
• Don’t vacuum up hot coals, cigarette butts, matches or smoking
hot, burning items or use in an area where there may be harmful
fluids (chlorine, bleach, and ammonia drain cleaner).
• Don’t attempt to remove blockages with sharp objects as this may
cause damage to the vacuum cleaner.
• Don’t vacuum up hard or sharp objects such as glass, nails, screws
or coins etc.
• Don’t use the vacuum cleaner with incorrect voltage as this may
result in damage or injury to the user. The correct voltage is listed
on the rating label.
• Take extra care when positioning and using the vacuum cleaner on
the stairs.
• Use only CE marked 13 amp extension cords, non-approved
extension cords may overheat. Care should be taken to arrange
the extension cord as it can be a trip hazard.
• Store the vacuum cleaner in a cool, dry area. If filters have been
cleaned as per user guide instructions ensure they are thoroughly
dry before storing away.
Please keep instructions for future reference
SC15830_32_34_IM.indd 3 14/01/2019 11:16

4
Carefully unpack and inspect your new Eureka | Swan vacuum cleaner for shipping
damage.
Each unit is tested and thoroughly inspected before shipping. For instructions
regarding any shipping damage, call the Eureka | Swan Customer Service HELPLINE
at 0333 220 6050 immediately.
UNPACKING
! Make sure your vacuum cleaner is switched off and
unplugged when cleaning, removing or refitting parts.
SC15830_32_34_IM.indd 4 14/01/2019 11:16

5
PARTS
1. Handle
2. Dust tank release
3. Dust tank
4. Handle hose
5. Power on/off
6. Nozzle
7. Air outlet
8. Wheel
10. 3-in-1 crevice tool accessory
11. Power cord
12. Power cord wrap
13. Turbo Pet Tool accessory
1
The pet hair cleaning tool (13) is for use when vacuuming pet hair and/or ground-in
debris from carpeted or upholstery surfaces.
WARNING
Injury to pets. Do not use pet hair cleaning tool directly on animals.
2
34
5
6
7
8
9
10
11
12
13
SC15832N, SC15834N only
9. Connecting hose
SC15830_32_34_IM.indd 5 14/01/2019 11:16

6
GET TO KNOW YOUR VACUUM
1
2
Insert the handle hose end into the
conector hose and rotate clockwise to
join. Then insert the handle into the
other hose of the body.
Place the dust tank back onto
the machine and push until
it clicks into place.
Insert the 3-in-1 crevice tool accessory
into the on-board storage reservoir, as
shown.
2
1
WARNING:
Remove the dust tank before installing handle.
Insert the handle into the vacuum body, then rotate the
screw into body as shown.
3
DO NOT plug in your vacuum cleaner until you have completely assembled it per the
following instructions and are familiar with all instructions and operation procedures.
IMPORTANT: The handle must be
inserted first before replacing dust tank
SC15830_32_34_IM.indd 6 14/01/2019 11:16

7
OPERATION
Twist the quick release cord hook to
release the power cord.
Step on the brush cover and pull back on
handle, to engage for operation.
Operation
Plug in your machine and push ON/OFF
button to switch ON/OFF.
To maintain optimal performance, please
emtpy dust tank when debris reaches
MAX FILL line.
1
2
SC15830_32_34_IM.indd 7 14/01/2019 11:16

8
USING ACCESSORIES
The handle hose c an be used
immediately.
12
3-in-1 Crevice Tool
Accessory
Turbo Pet Tool
Operation
The 3-in-1 crevice tool with brush allows for vacuuming in
narrow and hard-to-reach places.
SC15832N, SC15834N models only
For vacuuming pet hair from surfaces
Remove hose handle and 3-in-1 crevice tool
from the machine
At the same time, you can insert the 3-in-1
crevice tool/turbo pet tool into the hose
handle to extend the distance.
SC15830_32_34_IM.indd 8 14/01/2019 11:16

9
MAINTENANCE
Press dust tank release
button to remove the dust
tank.
Hold dust tank over rubbish
bin and unclip the lock on the
bottom of the tank, allowing
the dust to empty.
Close the base of the dust
tank, align the tank base
back
onto the machine and push
until it clicks back into place .
Emptying and cleaning the dust tank
WARNING:
Turn off and unplug vacuum cleaner before performing
maintenance to the vacuum cleaner.
Inspect the lower tube and nozzle and remove
the dirt and debris.
WARNING
If the filter or hose is clogged, the motor may shut down in order to protect itself from
overheating. If this occurs, unplug the vacuum, clean the filter and inspect the hoses and
canister for clogging. Allow 3-4 hours for the unit to fully cool down before resuming use.
SC15830_32_34_IM.indd 9 14/01/2019 11:16

10
MAINTENANCE
-
Cleaning Exhaust Filter
LOCK
1
2 3
filter cover filter
Remove filter cover with filter. Wipe with
cloth over rubbish bin, removing dirt and
debris.
Wash with water every 3 months,
allow at least 24 hours to dry and
make sure it is dry thoroughly before
re-using
Locate and unlock filter cover as shown.
Push left to un-lock, right to lock
WARNING: Turn off and unplug vacuum cleaner before performing
maintenance to the vacuum cleaner.
DUST TANK
1. Remove the dust
tank.
2. Push the release
button, open the dust
tank and clean all
parts of the dust tank
3. Open the dust tank
filter lid located on top
of the tank
4. Remove the dust
tank foam filter.
SC15830_32_34_IM.indd 10 14/01/2019 11:16

11
MAINTENANCE
CLEANING BRUSH ROLL
Carefully remove any string, hair or debris located on the
brush roll.
You can use a tool such as a small knife or scissors to
remove and cut any hair or string.
-
Cleaning Exhaust Filter
WARNING: Turn off and unplug vacuum cleaner before performing
maintenance to the vacuum cleaner.
Do not turn the appliance on when the dust tank is removed. In order to keep the suction
force optimised, the dust tank and filters must be cleaned regularly.
CAUTION:
-
Cleaning Dust Cup Filter
5. Hand wash the
foam filter..
6. Allow filter to dry
before putting back
info vacuum cleaner
7. Twist filter assem-
bly anti-clockwise to
remove for cleaning
dirt and debris as
needed.
DO NOT operate without filter installed
DO NOT wash dust tank in the dish washer
DO NOT install filter if it is damp
SC15830_32_34_IM.indd 11 14/01/2019 11:16

12
MAINTENANCE
UNLOCK LOCK
1. To release the pet tool
plastic upper cap for internal
cleaning, roatate, unlock and
remove the plastic locking
ring as shown.
2. Pull up on the plastic upper
cap of the pet tool as shown.
3. Remove plastic upper cap
and clean, removing pet hair
and debris.
Pet Tool (SC15832N, SC15834N only)
• Do not clean the vacuum cleaner, components or accessories using petrol or any other
flammable liquid or solvents, etc.
• Clean only the outside of the vacuum cleaner.
• Use only a moist cloth and mild detergent for cleaning the vacuum cleaner, components
and accessories.
• After cleaning, wipe off the moisture on vacuum cleaner, components and accessories
with a dry cloth.
• Do Not place accessories, tools or components in a dishwasher.
You should check your cleaner’s brush roll and drive belt regularly for wear or damage.
You should also clean the brush and brush ends by removing string, hair and carpet fibres.
These can wrap around the brush and hamper its ability to effectively clean your carpet. Also
remove any debris that has accumulated under the brush cover.
1. Turn off vacuum and unplug from electrical outlet.
2. Place vacuum upside down with brush roll facing upwards.
3. Remove the six screws as shown with a small Phillips screwdriver (see images below).
4. Lift off brush cover.
5. Grasp floor brush at both ends and remove by lifting out.
6. Clean string, hair and other debris from floor brush, motor pulley, and drive belt.
7. Check floor brush for worn areas and replace if needed.
8. Check air passageway for obstructions. Remove debris from this area.
9. When finished cleaning, reposition floor brush and drive belt. Then replace the brush
cover and re-install the six screws.
10. Turn floor brush by hand several times in the direction of the motor pulley. If properly
installed, the drive belt will align itself on floor brush.
Bush Roll
SC15830_32_34_IM.indd 12 14/01/2019 11:16

13
MAINTENANCE
1
4
2
5
3
Remove
Six Screws
Replacing The Drive Belt
Make sure the vacuum is switched off and unplugged first
Check the drive belt carefully for wear, cuts and stressed areas. If the drive belt appears
worn, you will need to replace it. To remove the drive belt, read the instructions and follow the
drawings below:
1. Grasp the old drive belt and remove from motor shaft. Discard old drive belt.
2. Loop new drive belt over motor shaft and stretch other end over floor brush in the space
provided between the bristles.
3. Place ends of floor brush down into slots on sides as shown.
4. Turn floor brush by hand several times in the direction of the motor shaft.
5. If properly installed, drive belt will align itself on floor brush.
6. Replace brush cover and six screws.
SC15830_32_34_IM.indd 13 14/01/2019 11:16

14
MAINTENANCE
1 2
4
3
Replace Brush
Cover and
i Screws
TROUBLESHOOTING
Vacuum cleaner won’t run Remedies
1. Vacuum cleaner not plugged in
2. Blown fuse/tripped breaker
1. Check plug/socket
2. Check fuse/breaker
Vacuum won’t puck up dirt Remedies
1. Dust tank full
2. Filter is dirty
3. Hose not secure
4. Dust tank not in place
5. Vacuum path blocked
1. Empty dust tank
2. Check/remove debris or clean
3. Check hose is properly fitted
4. Make sure dust tank is fully inserted and
release handle is fully pushed in
5. Visually check air passageway, hose
inlet and hose for anything that might be
obstructing the vacuum path. Remove
blockage
SC15830_32_34_IM.indd 14 14/01/2019 11:16

15
Appliances bearing the symbol shown here may not be disposed of in domestic rubbish. You
are required to dispose of old electrical and electronic appliances like this separately.
Please visit www.recycle-more.co.uk or www.recyclenow.co.uk for access to information
about the recycling of electrical items. Please visit www.weeeireland.ie for access to information
about the recycling of electrical items purchased in Ireland. The WEEE directive, introduced in
August 2006, states that all electrical items must be recycled, rather than taken to landfill. Please arrange
to take this appliance to your local Civic Amenity site for recycling, once it has reached the end of its life.
DISPOSAL
TECHNICAL DATA
SC15830N
Performance
• Dust tank capacity: 2 Litres
• Energy class: A ++/D/E/E
• Motor power: 400 Watts
• Sound level: 80dBA
Accessories
• 1 x 3 in 1 brush
• 1 x 2m hose
Weight & Dimensions
• Net weight: 4.1kg
• Power cord length: 6.5 Metres
•
SC15834N
Performance
• Dust tank capacity: 2 Litres
• Energy class: A ++/D/E/E
• Motor power: 400 Watts
• Sound level: 80dBA
Accessories
• 1 x Pet tool
• 1 x 3 in 1 brush
• 1 x 3m hose
Weight & Dimensions
• Net weight: 4.1kg
• Power cord length: 9.3 Metres
SC15832N
Performance
• Dust tank capacity: 2 Litres
• Energy class: A ++/D/E/E
• Motor power: 400 Watts
• Sound level: 80dBA
Accessories
• 1 x Pet tool
• 1 x 3 in 1 brush
• 1 x 2m hose
Weight & Dimensions
• Net weight: 4.1kg
• Power cord length: 6.5 Metres
SC15830_32_34_IM.indd 15 14/01/2019 11:16

16
SPARES
www.eureka-swan.co.uk
1
2
3
4
1. SC15834N-01 3-in-1 tool
2. SC15834N-02 2 Metre Hose
3. SC15834N-03 Brush roll
4. SC15834N-04 Pet tool
5. SC15834N-05 Cover filter
6. SC15843N-06 Foam filter
-
Cleaning Exhaust Filter
LOCK
1
2 3
filter cover filter
Remove filter cover with filter. Wipe with
cloth over rubbish bin, removing dirt and
debris.
Wash with water every 3 months,
allow at least 24 hours to dry and
make sure it is dry thoroughly before
re-using
Locate and unlock filter cover as shown.
Push left to un-lock, right to lock
WARNING: Turn off and unplug vacuum cleaner before performing
maintenance to the vacuum cleaner.
DUST TANK
1. Remove the dust
tank.
2. Push the release
button, open the dust
tank and clean all
parts of the dust tank
3. Open the dust tank
filter lid located on top
of the tank
4. Remove the dust
tank foam filter.
CLEANING BRUSH ROLL
Carefully remove any string, hair or debris located on the
brush roll.
You can use a tool such as a small knife or scissors to
remove and cut any hair or string.
-
Cleaning Exhaust Filter
WARNING: Turn off and unplug vacuum cleaner before performing
maintenance to the vacuum cleaner.
Do not turn the appliance on when the dust tank is removed. In order to keep the suction
force optimised, the dust tank and filters must be cleaned regularly.
CAUTION:
-
Cleaning Dust Cup Filter
5. Hand wash the
foam filter..
6. Allow filter to dry
before putting back
info vacuum cleaner
7. Twist filter assem-
bly anti-clockwise to
remove for cleaning
dirt and debris as
needed.
DO NOT operate without filter installed
DO NOT wash dust tank in the dish washer
DO NOT install filter if it is damp
SC15830_32_34_IM.indd 16 14/01/2019 11:16

17
This product is guaranteed for 2 years from the date of original purchase. If any defect arises due to faulty
materials of workmanship the faulty products must be returned to the place of purchase. Refunds or
replacement is at the discretion of the store.
The following conditions apply:
• The product must be returned to the retailer with proof of purchase.
• The product must be installed and used in accordance with the instructions contained in this
instruction guide.
• It must be used only for domestic purposes.
• It does not cover wear and tear, damage, misuse or consumable parts.
• Swan Products Ltd has limited liability for incidental or consequential loss or damage.
• This guarantee is valid in the UK and Eire Only.
WARRANTY
SC15830_32_34_IM.indd 17 14/01/2019 11:16

18
NOTES
SC15830_32_34_IM.indd 18 14/01/2019 11:16

19
NOTES
SC15830_32_34_IM.indd 19 14/01/2019 11:16

www.eureka-swan.co.uk
Copyright © Swan Products Ltd.
PO Box 3117, Stoke-on-Trent ST4 9GD
Est.1931
We love
what we do
s
2year
GUARANTEE
we’re proud
of our quality
Scan this QR code
to hear about
our story
Find us on Facebook
*
* on selected products
SC15830_32_34_IM.indd 20 14/01/2019 11:16
This manual suits for next models
5
Table of contents
Other Swann Vacuum Cleaner manuals

Swann
Swann SC1111 User manual

Swann
Swann SC4010N User manual

Swann
Swann SC11041 User manual

Swann
Swann SU3021 User manual

Swann
Swann Dirt Master SC17310N User manual

Swann
Swann Lynsey SC18410QOCN User manual

Swann
Swann eureka POWER TURBO SC15824N User manual

Swann
Swann Dirtmaster Pro SC17320N User manual

Swann
Swann SU3022 User manual

Swann
Swann SC1115 User manual