Swienty
A/S
|Hørtoftvej
16,
Ragebøl
|DK-6400
Sønderborg
|Tel.
+45
7448
6969
|www.swienty.com | [email protected]Swienty
A/S
|Hørtoftvej
16,
Ragebøl
|DK-6400
Sønderborg
|Tel.
+45
7448
6969
|www.swienty.com | [email protected]Page 2
Contents
Read before use .................................................................................................. 3
Description .......................................................................................................... 4
Packing list DANA api MATIC 1000 ................................................................ 4
Operation............................................................................................................. 4
Key overview ................................................................................................ 5
The Display..................................................................................................... 5
Anti-drip operation.......................................................................................... 6
Speed regulation of the motor ......................................................................... 6
Pumping ......................................................................................................... 6
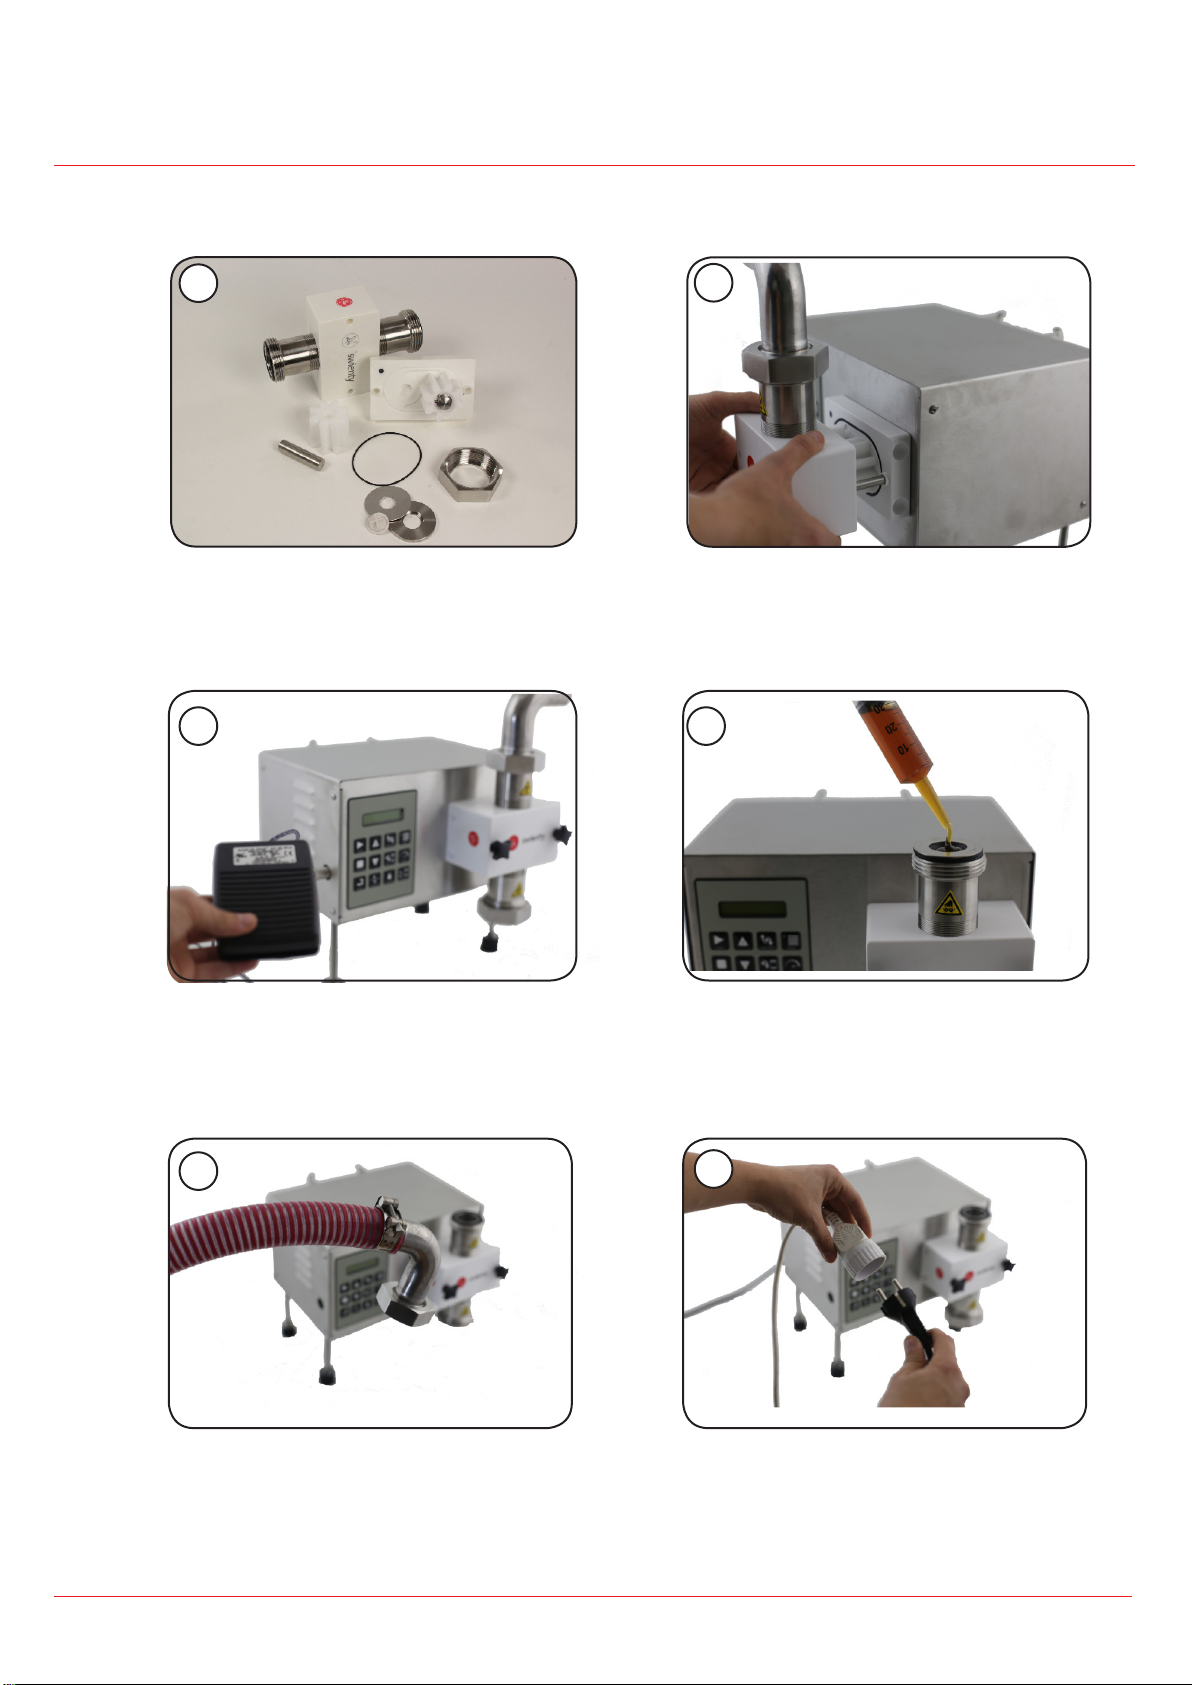
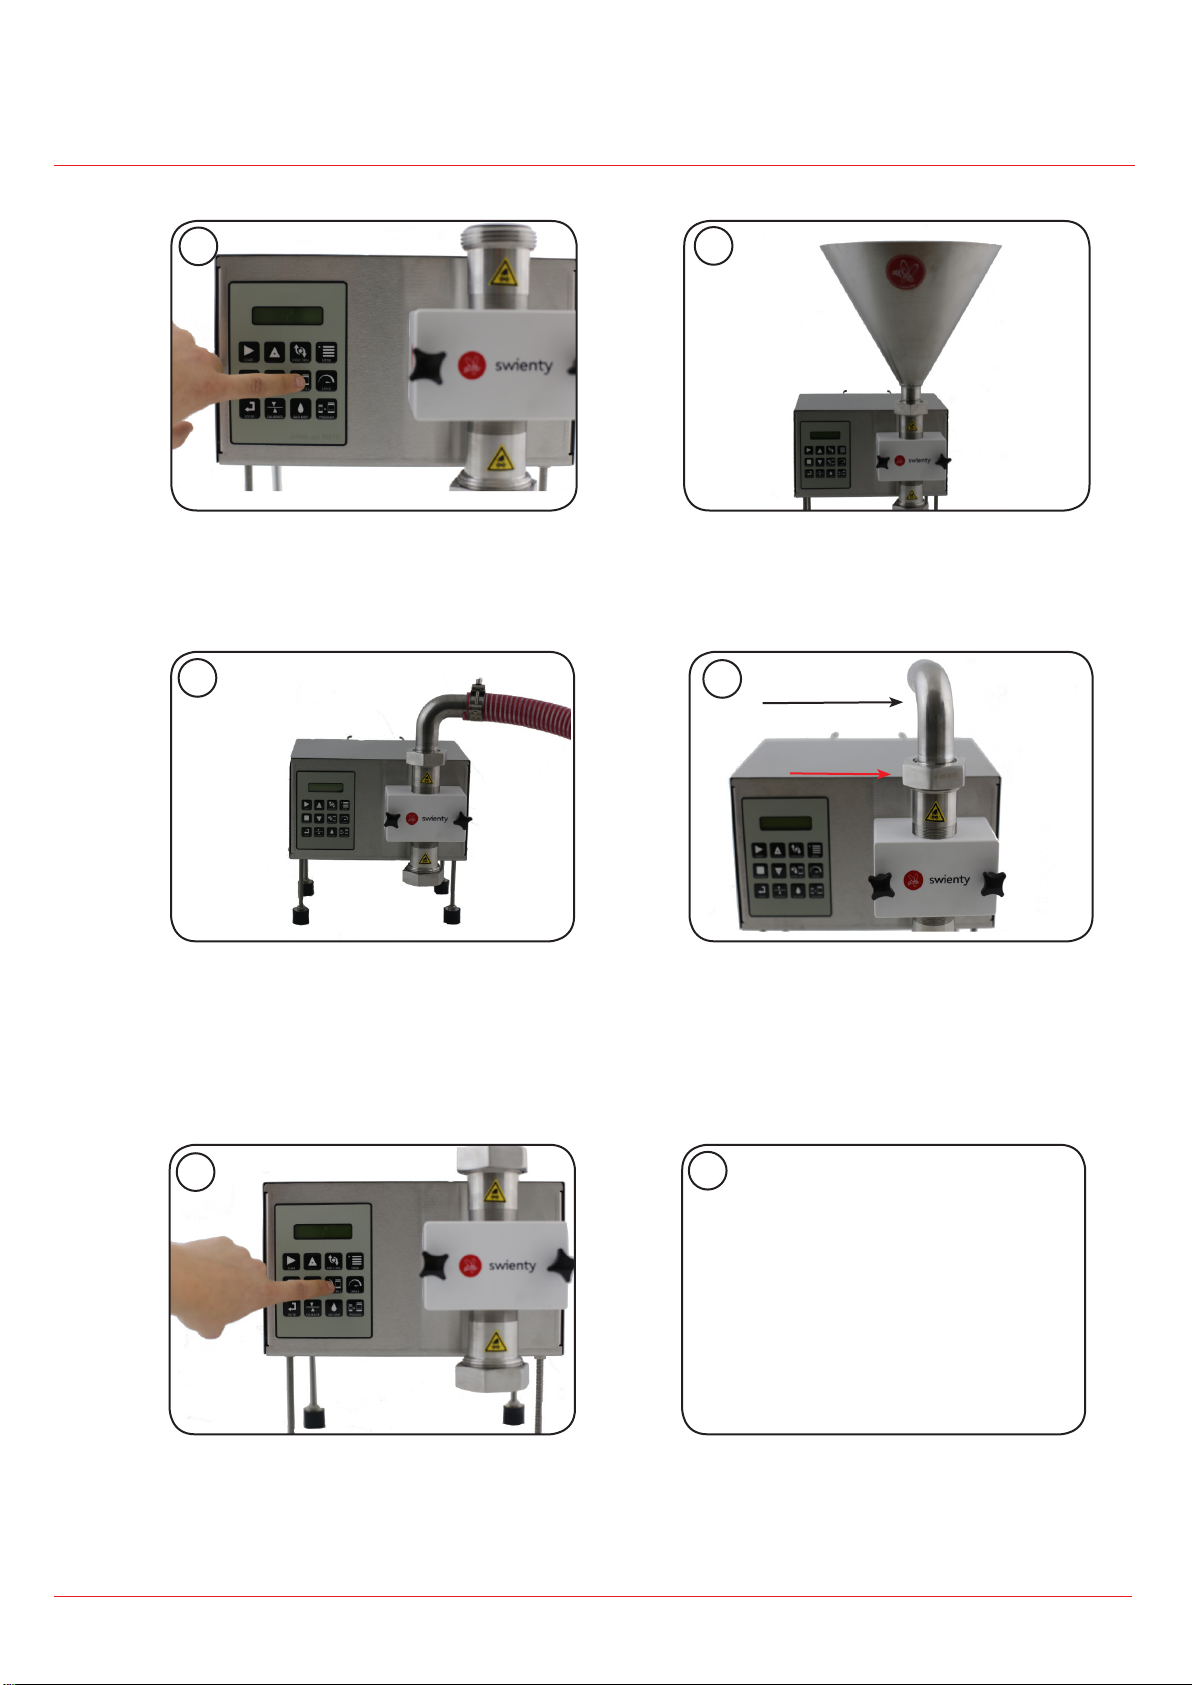
Preparing the machine ....................................................................................... 7
Preparation for dosing..................................................................................... 8
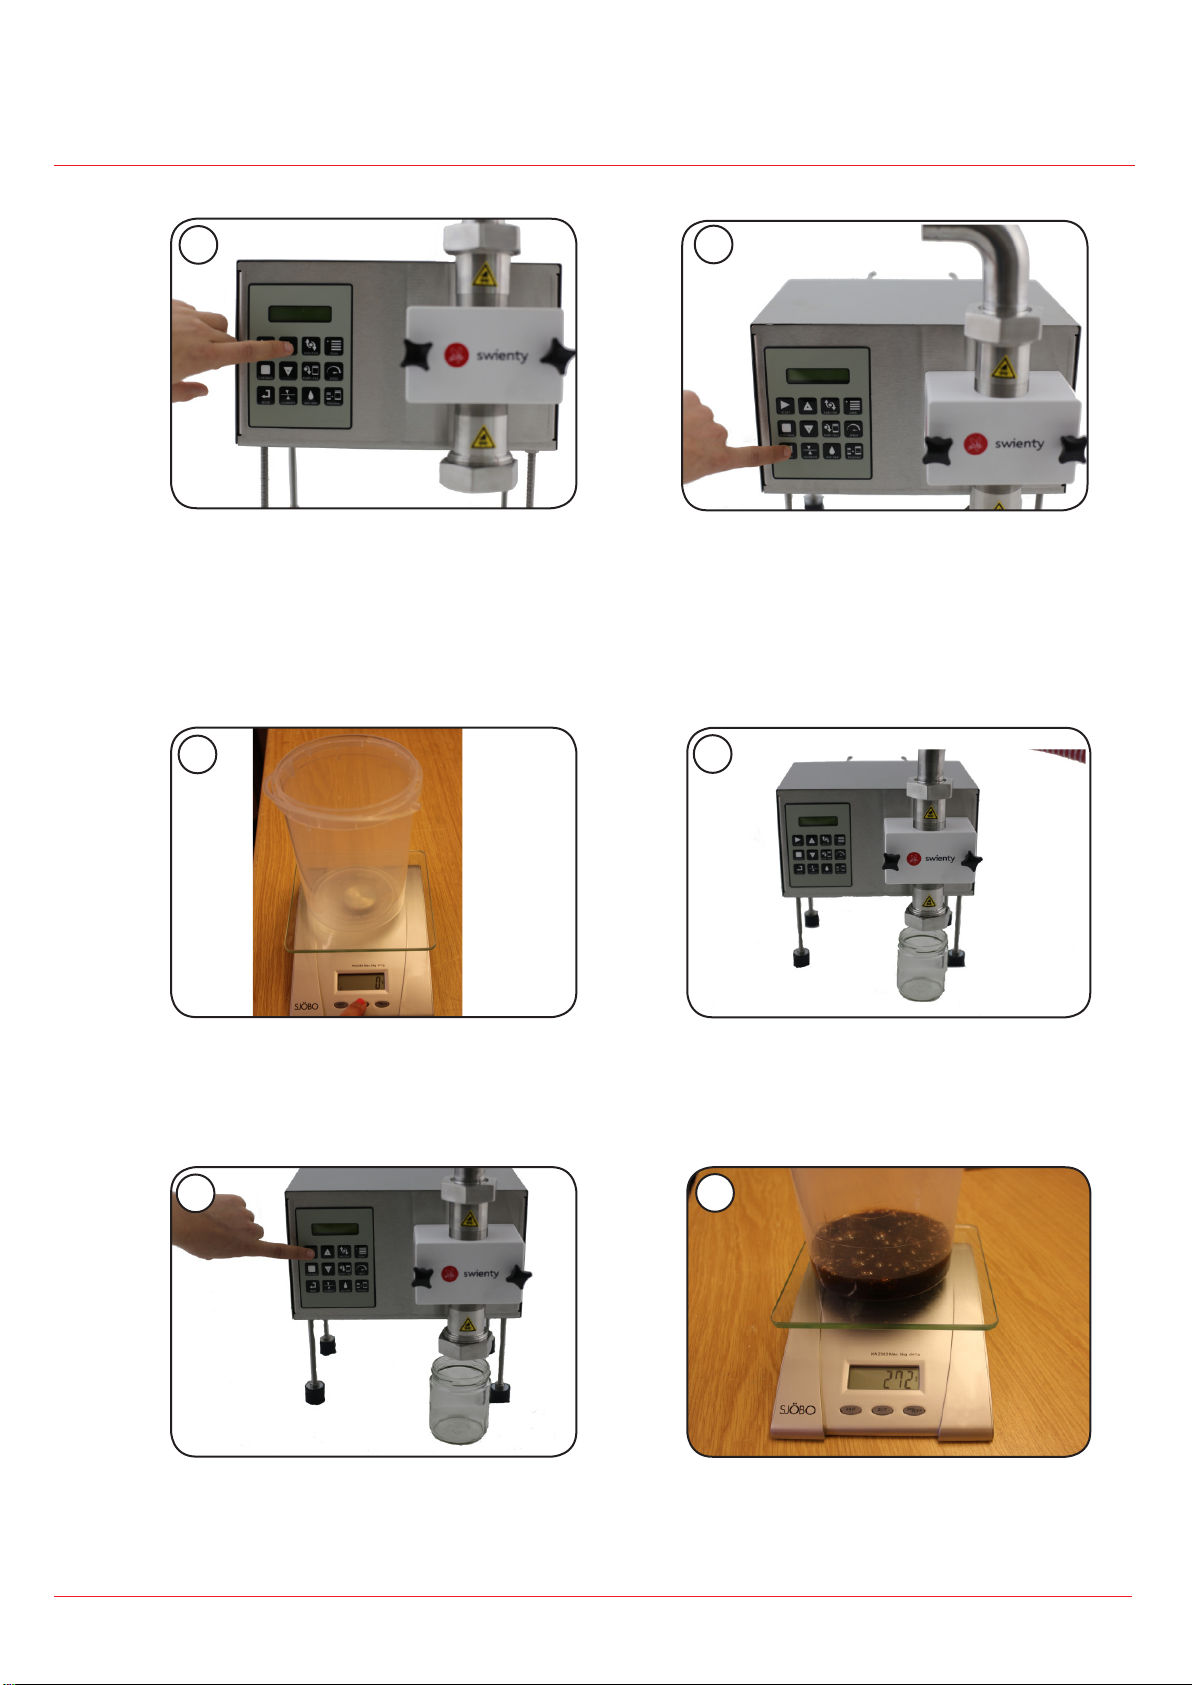
Calibration .................................................................................................... 10
Cleaning ............................................................................................................. 11
Possible konfigurations ................................................................................... 15
Antidrip mounting............................................................................................. 16
The Menu .......................................................................................................... 17
Parameter .................................................................................................... 17
LOG ............................................................................................................. 19
Language...................................................................................................... 19
RESET .......................................................................................................... 19
Functional Diagram ...................................................................................... 20
Programming default values .......................................................................... 21
Maintenance...................................................................................................... 22
How to install a new seal ............................................................................... 22
Plug socket connections................................................................................... 23
Fittings and extra parts .................................................................................... 24
Exploded view................................................................................................... 26
FAQ..................................................................................................................... 27
Conversion Table.......................................................................................... 28
Air in the honey ............................................................................................ 29
Quick Start ......................................................................................................... 30
Installation .................................................................................................... 30
Set the filling weight...................................................................................... 31
Calibration .................................................................................................... 31
Anti drip ....................................................................................................... 31
Speed regulation of the motor ....................................................................... 31
Pumping ....................................................................................................... 31