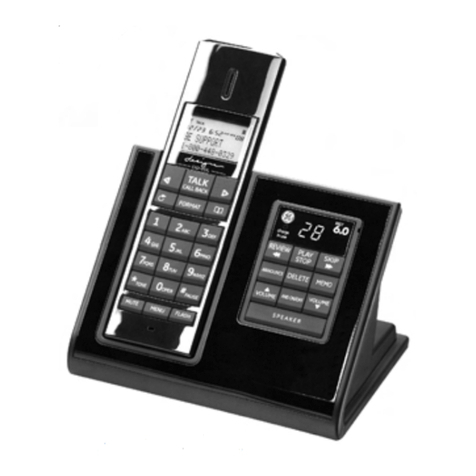
Swisscom Fixnet Comfort Handset User manual

Comfort Handset
User manual
!"§==Sinus XX=
123
ABCDEF
456
JKLMNO
GHI
789
TUVWXYZ
QRS
0
M
INTINT

2
Brief overview
Control key and display keys
The isplay is protecte by a plastic film.
Remove the plastic film.
!"§==Sinus XX=
123
ABC DEF
456
JKL MNOGHI
789
TUV WXYZQRS
0
MINT
Open directory
End call and
On/Off key
Ta l k key
Swisscom key
Callback on busy
Caller list/
message list
–En
call
–Cancel
function
– Back one
menu level
(press
briefly)
– Return to
i le status
(hol own)
– On/off in i le
status (hol
own)
Handsfree key
Switch from
han set to
han sfree talking
Keypad protection
on/off
Hol own
–Accept
call
–Dial
number
Ringer on/off
Hol own
Charging stat s
flat " 1/3
full 2/3
flashes: Caution
The isplay key
s
give you access
to the functions
shown in the
isplay.
Signal strength
Control key
Stat s LED
Display keys
Lights up uring a call;
flashes for:
– incoming calls
– new messages
– alarm calls, appoint-
ments, anniversaries
Microphone
U"
Annabelle
19.07.01 13:13
0@
MINT
The right display key lets
you perform functions,
some of which can also
be controlle with the
control key.
The control key is shown
as follows in the operating
instructions:
/ (left/right)
/ (p/down)
Press own on the si e
with the arrow fille in.
Control key
Display keys
MINT

3
Important menus
Display symbols
The following symbols appear above the isplay keys
epen ing on the situation:
Display
keys Meaning
@Menu key: Activates the main menu when the
phone is i le. During a call, it activates a menu
for the particular situation.
Selects an confirms the menu function.
En s an saves an entry.
Delete key (Backspace): Deletes characters
from right to left.
0Automatic re ial key: Opens a list of the last
five numbers ialle .
Displaye if answering machine or caller list is
active.
ROne menu level back, cancel.
<New Entry>
Anna
Barbara
Chris
:A
Display Number
Delete Entry
Copy Entry
Delete List
Send List
Available Memory
A
Add. Features
Calendar/Clock
Sound Settings
H/Set Settings 2.Ö
Base Settings
Voice Mail
Handset Volume
Ringer Settings
Advisory Tones

4
Safety precautions
Only se the power s pply nit s pplied as
in icate on the un ersi e of the evice.
Only insert approved rechargeable batteries
of the same type. Never use or inary (non-
rechargeable) batteries as they may pose a
health hazar or cause injury.
Make sure the rechargeable batteries are
inserte the right way roun (as in icate in the
battery compartment).
Use the batteries specifie in these operating
instructions (as in icate in the battery com-
partment).
The phone may affect me ical equipment so
always switch your phone off before entering
hospitals or octors’ practices.
The han set may cause an unpleasant hum-
ming noise in hearing ai s.
Do not operate the phone in places where
there is a risk of explosion (such as paint work-
shops).
The han set is not splash-proof.
Drivers must not use the phone while riving
(inclu ing the Walk an Talk function).
The phone must be switche off at all times in
an aircraft (inclu ing the Walk an Talk func-
tion). Make sure it cannot be switche on acci-
entally.
If you give your Comfort han set to someone
else you shoul also give them the operating
instructions.
Dispose of batteries an the phone carefully.
Do not pollute the environment.
Not all the functions escribe in these operating instruc-
tions are available in all countries.
!
7
8
5

5
Contents
Brief overview . . . . . . . . . . . . . . . . . . . . . . . . . . . . 2
Control key an isplay keys . . . . . . . . . . . . . . . . . . 2
Important menus. . . . . . . . . . . . . . . . . . . . . . . . . . . . 3
Display symbols . . . . . . . . . . . . . . . . . . . . . . . . . . . . 3
Safety preca tions . . . . . . . . . . . . . . . . . . . . . . . . 4
Preparing the handset . . . . . . . . . . . . . . . . . . . . . . 6
Delivery package . . . . . . . . . . . . . . . . . . . . . . . . . . . . 6
Inserting the batteries . . . . . . . . . . . . . . . . . . . . . . . . 6
Charging the batteries . . . . . . . . . . . . . . . . . . . . . . . . 6
Attaching the belt clip . . . . . . . . . . . . . . . . . . . . . . . . 7
Switching the han set on an off . . . . . . . . . . . . . . . 7
Setting the ate an time . . . . . . . . . . . . . . . . . . . . . 8
Activating/ eactivating the keypa lock . . . . . . . . . . 9
Changing the isplay language . . . . . . . . . . . . . . . . . 9
Registering the handset. . . . . . . . . . . . . . . . . . . . 10
Making calls . . . . . . . . . . . . . . . . . . . . . . . . . . . . . 11
Making an external call . . . . . . . . . . . . . . . . . . . . . . 11
Making internal calls . . . . . . . . . . . . . . . . . . . . . . . . 11
Answering a call . . . . . . . . . . . . . . . . . . . . . . . . . . . 12
Open caller list/message list . . . . . . . . . . . . . . . . . . 12
Han sfree talking . . . . . . . . . . . . . . . . . . . . . . . . . . 12
Forwar ing an external call, enquiry call . . . . . . . . . 13
A tomatic redial . . . . . . . . . . . . . . . . . . . . . . . . . . 13
Directory . . . . . . . . . . . . . . . . . . . . . . . . . . . . . . . . 15
Settings . . . . . . . . . . . . . . . . . . . . . . . . . . . . . . . . . 20
Setting the alarm clock . . . . . . . . . . . . . . . . . . . . . . 20
Activating the alarm clock . . . . . . . . . . . . . . . . . . . . 20
Deactivating the alarm clock . . . . . . . . . . . . . . . . . . 20
Turning off the alarm call. . . . . . . . . . . . . . . . . . . . . 21
Setting an appointment . . . . . . . . . . . . . . . . . . . . . . 21
Han set an lou speaker volume . . . . . . . . . . . . . . 22
Setting the ringer volume/melo y . . . . . . . . . . . . . . 23
Activating/ eactivating warning an signal tones . . 24
Auto talk feature on/off . . . . . . . . . . . . . . . . . . . . . . 24
Resetting to the factory efaults. . . . . . . . . . . . . . . 25
Room monitoring (babyphone). . . . . . . . . . . . . . 25
Setting the room monitor . . . . . . . . . . . . . . . . . . . . 26
Walk and Talk mode. . . . . . . . . . . . . . . . . . . . . . . 27
Appendix . . . . . . . . . . . . . . . . . . . . . . . . . . . . . . . . 28
Operating on base stations . . . . . . . . . . . . . . . . . . . 28
Looking after your phone . . . . . . . . . . . . . . . . . . . . 29
Range . . . . . . . . . . . . . . . . . . . . . . . . . . . . . . . . . . . 29
Guarantee . . . . . . . . . . . . . . . . . . . . . . . . . . . . . . . . 30
Repair/maintenance. . . . . . . . . . . . . . . . . . . . . . . . . 30
Approval conformity . . . . . . . . . . . . . . . . . . . . . . . . 31

6
Preparing the handset
Delivery package
Comfort han set, two batteries, charging unit, belt
clip, operating instructions.
Inserting the batteries
●Make sure you insert the batteries the right way
ro nd – see iagram on the left.
●Replace the cover an push gently pwards until it
clicks into place.
●To o p e n press the groove area on the cover an
sli e back.
Charging the batteries
Leave the han set for approx. five hours in
the charging unit to charge the batteries, as
they are not charge when they leave the
factory. The charging status icon flashes on
the han set to in icate that the batteries
are being charge :
See the appen ix for a list of recommen e batteries.
Before activating your Comfort han -
set, place it in the base station with
the display facing pwards. The
han set must be registere manually.
If registration is successful you will hear
a confirmation tone (rising sequence).
Battery flat
(battery symbol flashes) Batteries 2/3 charge
"Batteries 1/3 charge Batteries full
+
–+
–
'
Y
5 h

7
Attaching the belt clip
Push the belt clip onto the back of the han set until
the lugs at the si e click into place.
Switching the handset on and off
To switch the han set on an off,
hold down the en call key until
you hear a confirmation beep
(rising tone sequence).
●Once the initial charging process is complete you
can replace your han set in the charging unit after
each call. Charging is controlle electronically. This
ensures optimum charging an prolongs battery
life.
●The batteries heat up uring charging. This is nor-
mal an not angerous.
●Opening the battery compartment unnecessarily
may cause the wrong charging status to be is-
playe .
The han set is switche on as soon as you insert the
batteries an place the han set in the charging unit.

8
Setting the date and time
You nee to set the ate an time so that the time that
messages an calls are receive is shown correctly.
AOpen the menu.
Calendar/Clock Select an confirm.
Date/Time Select an confirm.
The current setting is shown.
Enter the date
Enter the ay/month/year.
In this case 20.05.2001.
e. g.9[[<[
Go own one line.
Enter the time
Enter hours an minutes.
In this case 19:05
e. g. D[<
Go own one line.
Select the display mode
Use the left si e of the control
key to select the 12-hour mo e
(am or pm) or the 24-hour mo e
( efault).
$,;0
Save the settings.

9
Activating deactivating the keypad lock
You can isable the han set keypa . If there is an in-
coming call, the key lock is automatically eactivate
an re-activate after the call has en e .
BTo activate/ eactivate, hol
down key
Accepting a call: Press the talk key !.
Changing the display language
AOpen the menu.
H/Set Settings Confirm the function.
Language The current language is marke
with a '.
Select the language you want
an confirm.
Displays for language settings:
Dialling an emergency number
You can ial the emergency numbers save in the
base station. Please refer to the operating instructions
for your base station.
Einstellungen Sprache De tsch
H/Set Settings Language English
Réglages comb. Langue Français
Impostazioni Lingua Italiano
Ajuste terminal I ioma Español
Programações Língua Port g ês
Instell. Han set Taal Nederlands
Instil hån sæt Sprog Dansk
Hån sett innst. Språk Norsk
Inställn. han enh Språk Svenska
Luurin asetuk. Kieli S omi
Nastav. pren.c. Jazyk Cesky
Ust. sluchawki Jezyk Polski
El Cihazi Ayari Dil seçimi Türkçe

10
Registering the handset
To make calls with your han set, you must "intro uce"
it to its base station (registering)
●if your han set has alrea y been registere at a
different base station (steps 1
, 2 an 3) or
●if you want to register the han set as a new han -
set at a Gigaset base station of an older Gigaset
range (steps 1 an 3).
Step 1: On the base station or on the base station
telephone:
Step 2: On the handset:
APress the isplay key.
H/Set Settings Select an confirm.
Register H/Set Select an confirm.
Select the base station.
Step 3: On the handset:
)
Enter the system PIN an con-
firm (factory setting 0000) – e.g.
is isplaye .
Ty p e On the base station or base telephone
Classic
S117/
To p S 3 17
Hol own the key on the un ersi e of
the base station.
Classic
E104/
To p E 3 0 4
Hol own the paging key on the base
station until you hear signal tones.
To p
E414ISDN
Select VHWWLQJV, V\VWHPVHWWLQJV an
UHJLVWHUKDQGVHW in the menu at the base
station telephone an confirm with 2..
To p
E514ISDN
Press the LED – it will flash uring regis-
tration.
Non-
Siemens
base
stations
To register at "GAP base stations", follow
the relevant operating instructions
(steps 2 an 3).
Regstr.Procedure Base 1
Table of contents
