manuals.online logo
Brands
  1. Home
  2. •
  3. Brands
  4. •
  5. BT
  6. •
  7. Handset
  8. •
  9. BT Freestyle 6 User manual

BT Freestyle 6 User manual

Freestyle 6 – 4th Edition – 3rd September – 3948
Offices worldwide
The telecommunications services described in this publication
are subject to availability and may be modified from time to time.
Services and equipment are provided subject to British
Telecommunications plc’s respective standard conditions of contract.
Nothing in this publication forms any part of any contract.
© British Telecommunications plc 2001.
Registered Office: 81 Newgate Street, London EC1A 7AJ.
Registered in England No. 1800000.
BT Freestyle 6. Issue 1 (9/01) 4.
Designed by The Art & Design Partnership Limited.
Printed in China by SunCorp Technologies.
Printed on paper which meets international environmental standards.
Freestyle 6 – 4th Edition – 3rd September – 3948
0168 !
Freestyle 6 – 4th Edition – 3rd September – 3948
Transferring calls
You can transfer calls between handsets that are
registered to the base unit.
To transfer a call
• During your call press the SE RE Y button
and then the handset number that you want to
transfer the call to.
• The called handset will ring.
• Press the TALK button on the ringing handset
to speak to the caller.
• If the call is not answered within 30 seconds
the original calling handset will ring.
• If after a further 30 seconds the call is not taken
the caller will be disconnected.
General information
leaning
Simply clean the handset with a damp cloth (not
wet) or an antistatic wipe. Never use household
sprays and cleansers as they can damage your
Freestyle 6 Additional Handset.
Product compliance
This product complies with R&TTE Directive
(1999/5/EC).
This phone is designed for UK use only. Using it
abroad may violate local radio laws.
5
Freestyle 6 – 4th Edition – 3rd September – 3948
6
Guarantee
Subject to the terms listed below the guarantee
will provide for the repair of, or at BT’s or its
agent’s discretion, the option to replace the
Freestyle 6 or any component thereof, (other
than batteries), which is identified as faulty or
below standard, or as a result of inferior
workmanship or materials. Products over 28 days
old from the date of purchase may be replaced
with a refurbished product.
The conditions of this guarantee are:
• The guarantee shall only apply to defects that
occur 12 months from the date of purchase,
provided that the equipment is sent to the repair
address within this period.
• This guarantee does not cover any faults or
defects caused by accidents, misuse, fair wear
and tear, neglect, tampering with the equipment,
or any attempt at adjustment or repair other
than through approved agents.
• This guarantee does not affect your statutory
rights.
For further information please refer to your
Freestyle 60 or Freestyle 65 User Guide.
Mains power supply unit
The Freestyle 6 must only be used with the
power supply unit supplied. Using any other power
supply unit will result in non-compliance with
EN60950:1992, and will invalidate the approval
given to this apparatus.
It is not permitted to interfere with the main BT
socket or wiring. If you have a problem, contact
BT on Freefone 0800 800 151 for residential or
Freefone 0800 800 154 for business lines.
If you experience any problems then please call
the Freestyle Helpline on 0845 769 7146.
Page button – Freestyle 60 and 65
The Freestyle 60 and 65 base units feature a
PAGE button. When pressed, the base unit and
all the handsets registered to that base unit will
ring and the light on the handset will flash.
The PAGE button feature does not enable
conversation between the base unit and handset.
The PAGE button cannot be used during a call.
R&TTE
This product is intended for use within the
UK for connection to the public telephone
network and compatible switchboards.
This equipment complies with the essential
requirements for the Radio Equipment and
Telecommunications Terminal Equipment
Directive 1999/5/EC.
Declaration of onformance
Hereby, Suncorp Technologies, declares
that this Freestyle 6 is in compliance with
the essential requirements and other
relevant provisions of Directive 1999/5/EC.
The Declaration of Conformance for the
Freestyle 6 is published on the web site
http://www.suncorptech.com/bt
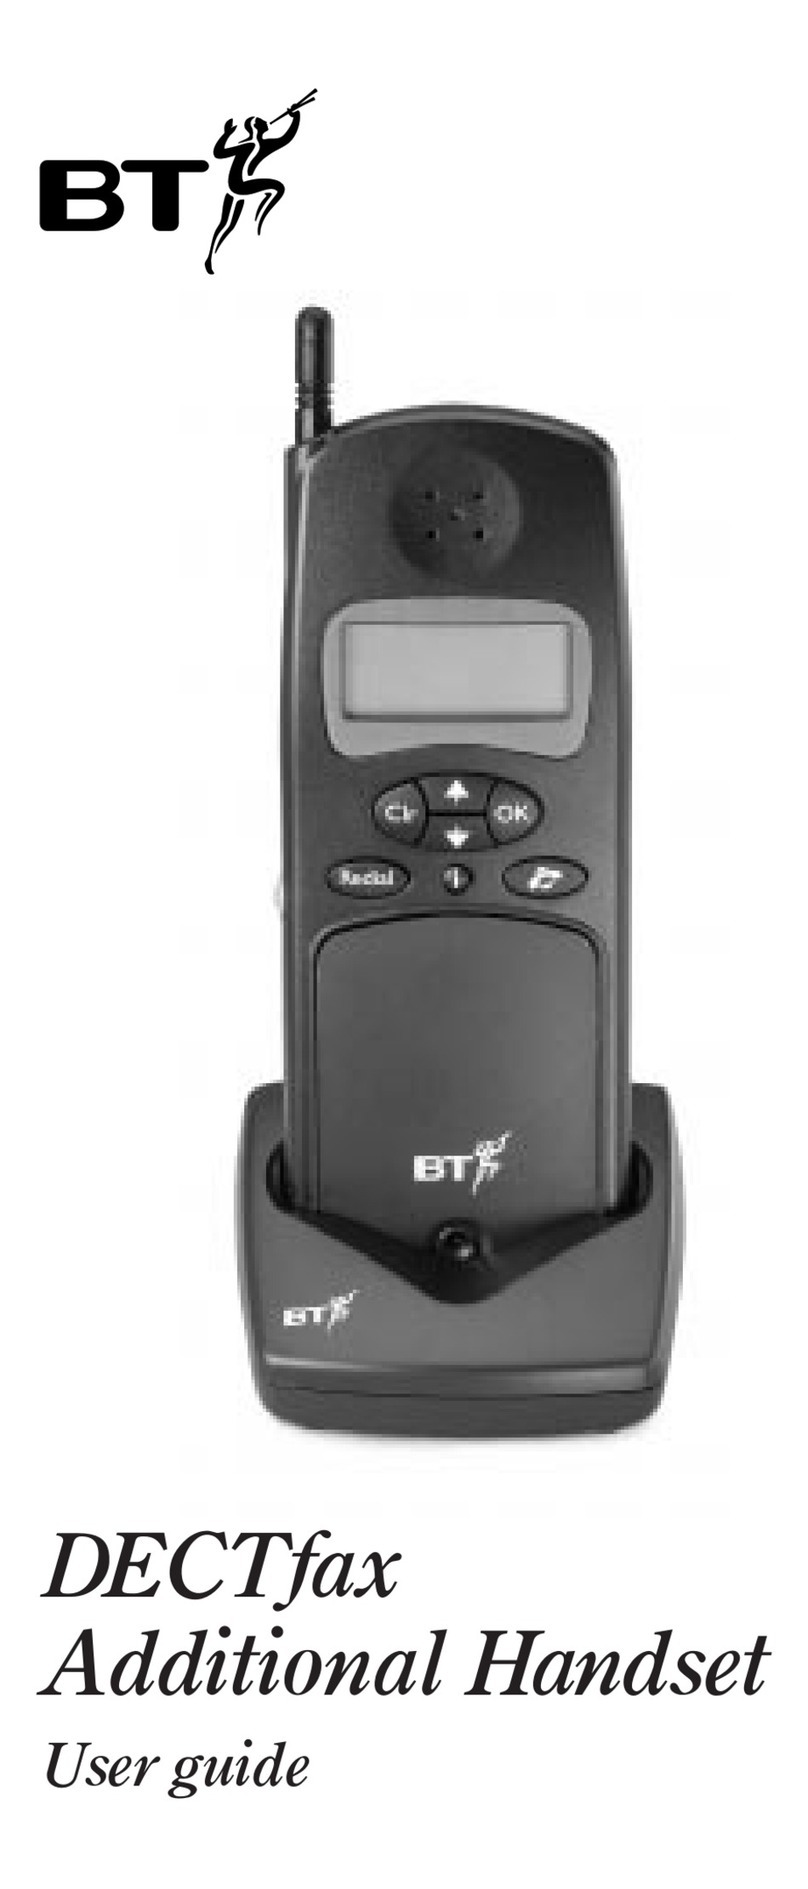
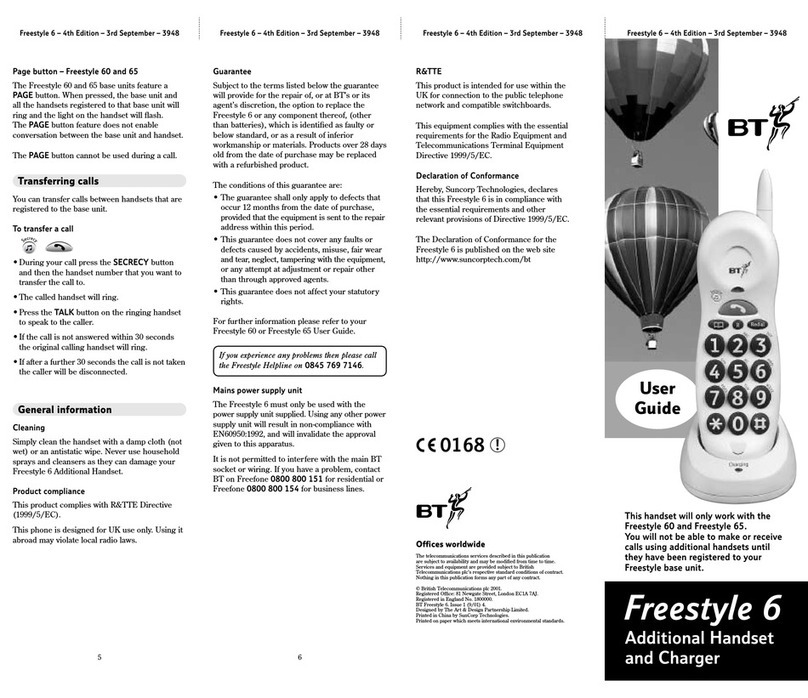
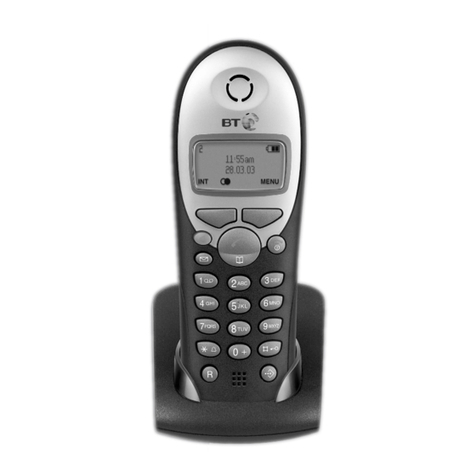
Freestyle 6
Additional Handset
and harger
User
Guide
This handset will only work with the
Freestyle 60 and Freestyle 65.
You will not be able to make or receive
calls using additional handsets until
they have been registered to your
Freestyle base unit.
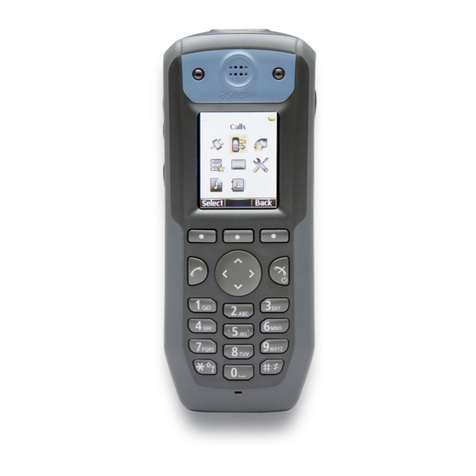
Light
Indicates when the
handset rings, is in
use or, if the
handset battery
needs recharging.
Secrecy/Music
on hold
Press to mute the
call so your caller
cannot hear you.
You and your caller
will hear music
while on hold.
Directory button
Allows you to store
and dial up to 10
numbers in the
memory.
Aerial
Can be extended
to obtain the best
signal and reception
available.
Talk button
Press to make or
receive a call.
ecall button
For use with a
switchboard/PBX
and BT Select
Services.
edial button
Redial the last
number called, or
press to enter a
pause in a stored
number.
Keypad
Setting up
Follow these steps to get your Freestyle 6
additional handset ready for use.
Like all cordless phones, your Freestyle 6
additional handset will need charging for 24
hours before use.
1 Plug the power cable into the charging unit
Plug the power cable into the socket located on
the bottom of the charging unit, then feed the
cable into the channel.
Freestyle 6 – 4th Edition – 3rd September – 3948
If you experience any problems then please call
the Freestyle Helpline on 0845 769 7146
1
2 Connect the power supply unit into a
convenient mains socket
3 Place the handset on the charging unit
Make sure the red HARGING light at the front
of the charging unit comes on.
4 Leave the handset to charge for 24 hours
When fully charged and in good condition, the
handset will provide up to 7 hours talktime or
72 hours standby.
If the handset battery is running low, the light
will flash every 10 -15 seconds.
If you are making a call and the handset
battery is running low you will hear a warning
tone every 10 -15 seconds.
egistering your handset
You must register your Freestyle 6 additional
handset before it can be used with your Freestyle
60 or 65 base unit. Make sure that each additional
handset is registered with a different number
(2, 3 or 4) to be used when transferring calls,
so it can be identified from other additional
handsets, see page 3.
To register an additional handset
• Please ensure that you have only the handset
you wish to register ready when following the
instructions below.
• Press and hold the base unit PAGE button for
5 seconds until both the POWER/IN USE light
on the base unit and the light on the handset
begin to flash.
•Release the PAGE button and press the
TALK button on the additional handset you
wish to register.
• Your additional handset is registered
automatically and you will hear a long
confirmation beep and the light will stop
flashing.
Freestyle 6 – 4th Edition – 3rd September – 3948
2
Once your Freestyle 6 additional handset has
been registered to your base unit it cannot be re-
registered to another base unit.
To set the handset number
Each additional handset must be assigned an
identity number (2, 3 or 4). Your Freestyle 60
or 65 handset is already registered as HANDSET
1. A Freestyle 6 additional handset is pre-set as
HANDSET 2. However, further additional
handsets can be numbered as they are added.
• Press the DIRE TORY button.
• Press the SE RE Y button.
• Enter the handset number between (2 and 4).
• Press the DIRE TORY button. You will hear
a beep confirming that the new number has
been stored.
Check that your Freestyle 6 handset is registered
correctly by pressing the TALK button and
listening for a dial tone. If you do not hear a
dial tone your Freestyle 6 handset is either out
of range of the base unit or it has not been
registered properly, or the base unit line cord is
not plugged in.
Make a note of the handset number by writing
it on the quickdial label on the additional
handset’s charger.
Freestyle 6 – 4th Edition – 3rd September – 3948
3
The handset range is up to 250 metres from the
base unit in ideal conditions. If you start to go
out of range while using the phone, you will
hear warning beeps. Move closer to the base
unit. If you do not move back into range your
call may be disconnected.
Your Freestyle 6 automatically scans the
available radio channels and selects the best
quality reception to use.
Your Freestyle 6 additional handset uses a
compact aerial which can be pulled out to
obtain the best signal and reception available.
Freestyle 6 – 4th Edition – 3rd September – 3948
To end a call
• Press the TALK button.
Or
• Replace the handset on the base unit.
Using your Freestyle 6
Additional Handset
Your Freestyle 6 can be used with the Freestyle 60
or Freestyle 65. Please refer to your main Freestyle
User Guide for a complete list of product features
and operating instructions.
To make an external call
Press the buttons in the order shown:
• Lift the handset off the base unit.
• Press the TALK button.
• The POWER/IN USE light on the base unit
begins to flash and the light on the handset
comes on.
• Listen for the dialling tone.
• Dial the number you want.
4
2-4

Other BT Handset manuals

BT CALLER DISPLAY 1000 User manual

BT

BT CALLER DISPLAY 1000 User manual

BT QUARTET 3000 User manual

BT

BT QUARTET 3000 User manual

BT DIVERSE 5400 User manual

BT

BT DIVERSE 5400 User manual

BT Diverse 5200 User manual

BT

BT Diverse 5200 User manual

BT FREESTYLE 2000 User manual

BT

BT FREESTYLE 2000 User manual

BT CALLER DISPLAY 1000 User manual

BT

BT CALLER DISPLAY 1000 User manual

BT Diverse 2000 User manual

BT

BT Diverse 2000 User manual

BT FREESTYLE 6 ADDITIONAL User manual

BT

BT FREESTYLE 6 ADDITIONAL User manual

BT CALLER DISPLAY 1000 User manual

BT

BT CALLER DISPLAY 1000 User manual

BT VERVE 3000 EXECUTIVE User manual

BT

BT VERVE 3000 EXECUTIVE User manual

BT DIVERSE 5300 User manual

BT

BT DIVERSE 5300 User manual

BT FREESTYLE 4500 User manual

BT

BT FREESTYLE 4500 User manual

BT DIVERSE 5400 ADDITIONAL User manual

BT

BT DIVERSE 5400 ADDITIONAL User manual

BT SYNERGY 3000 User manual

BT

BT SYNERGY 3000 User manual

BT SYNERGY User manual

BT

BT SYNERGY User manual

BT DECTfax User manual

BT

BT DECTfax User manual

BT DIVERSE 6100 User manual

BT

BT DIVERSE 6100 User manual

BT BT DIVERSE 5100 User manual

BT

BT BT DIVERSE 5100 User manual

BT 2000 Executive User manual

BT

BT 2000 Executive User manual

BT SYNERGY User manual

BT

BT SYNERGY User manual

BT Diverse 7460 User manual

BT

BT Diverse 7460 User manual

BT QUARTET 2000 User manual

BT

BT QUARTET 2000 User manual

BT agile User manual

BT

BT agile User manual

BT SYNERGY 2100 User manual

BT

BT SYNERGY 2100 User manual

Popular Handset manuals by other brands

Alcatel-Lucent Enterprise 8214 user manual

Alcatel-Lucent Enterprise

Alcatel-Lucent Enterprise 8214 user manual

SpectraLink 7522 user guide

SpectraLink

SpectraLink 7522 user guide

Gigaset CL390HX manual

Gigaset

Gigaset CL390HX manual

Panasonic KX-TPA60 manual

Panasonic

Panasonic KX-TPA60 manual

Panasonic KX-TG2559LBS Service manual

Panasonic

Panasonic KX-TG2559LBS Service manual

LG-Ericsson iPECS 1050i Key Features Guide

LG-Ericsson

LG-Ericsson iPECS 1050i Key Features Guide

Yamaichi Electronics USB-M05 user manual

Yamaichi Electronics

Yamaichi Electronics USB-M05 user manual

Alcatel EASY REFLEXES 4200 user guide

Alcatel

Alcatel EASY REFLEXES 4200 user guide

Panasonic KX-TGP550 T04 installation manual

Panasonic

Panasonic KX-TGP550 T04 installation manual

Nortel 4065R user guide

Nortel

Nortel 4065R user guide

Siemens Euroset 5005 installation instructions

Siemens

Siemens Euroset 5005 installation instructions

Plantronics CALISTO P210 MOC user guide

Plantronics

Plantronics CALISTO P210 MOC user guide

Indexa PENTATRON TF04M user manual

Indexa

Indexa PENTATRON TF04M user manual

Uniden DWX337 owner's manual

Uniden

Uniden DWX337 owner's manual

NEC G566 Features

NEC

NEC G566 Features

LG-Ericsson United Networks LIP-9020 Features guide

LG-Ericsson

LG-Ericsson United Networks LIP-9020 Features guide

Alcatel-Lucent 8118 user manual

Alcatel-Lucent

Alcatel-Lucent 8118 user manual

ASCOM d81 Messenger Quick reference guide

ASCOM

ASCOM d81 Messenger Quick reference guide

manuals.online logo
manuals.online logoBrands
  • About & Mission
  • Contact us
  • Privacy Policy
  • Terms and Conditions

Copyright 2025 Manuals.Online. All Rights Reserved.